
Check Best Thermostat Pricing in Amazon
** As an Amazon Associate, I earn from qualifying purchases.
Are you noticing your Honeywell thermostat acting slow or not responding at all? It might be time to change the batteries.
Knowing how to replace them quickly can save you from chilly mornings and high energy bills. In this guide, you’ll find simple, step-by-step instructions that anyone can follow. Keep reading to learn how to keep your thermostat running smoothly and your home comfortable all year round.
Identify Your Thermostat Model
Identifying your Honeywell thermostat model is the first step before changing its batteries. Each model has unique features and battery requirements. Knowing your model helps find the correct battery type and replacement process.
Take a moment to check your thermostat closely. This ensures a smooth battery change without guesswork or errors.
Locate Model Number
The model number is usually on the thermostat’s back or inside the battery compartment. Gently remove the thermostat from its wall plate to see the label. Look for a code starting with letters and numbers, like “TH” or “RTH”.
Write down this number. It helps in finding the right battery and instructions tailored to your device.
Check Battery Type
Honeywell thermostats use different battery types, including AA, AAA, or coin-cell batteries. The battery type is often written inside the battery compartment or in the user manual. Using the correct battery ensures the thermostat works properly.
Note the voltage and size of the batteries. This prevents damage and keeps your thermostat running smoothly.

Credit: willplumb.com
Gather Necessary Tools
Before changing the batteries in your Honeywell thermostat, gather all necessary tools. This step saves time and avoids interruptions. Having everything ready makes the process smooth and quick.
Select Correct Batteries
Choose the right batteries for your Honeywell thermostat. Most models use AA or AAA batteries. Check your thermostat’s manual or the battery compartment label. Using the wrong batteries can damage the device or cause it to stop working.
Buy fresh batteries for better performance. Avoid old or weak batteries to prevent frequent replacements.
Prepare Screwdriver If Needed
Some Honeywell thermostats have a cover secured by screws. Keep a small screwdriver handy. A Phillips head screwdriver usually works best. This tool helps you open the battery compartment safely.
Do not force the cover open without the right tool. This protects your thermostat from damage.
Power Off Your Thermostat
Powering off your Honeywell thermostat is the first step before changing its batteries. This step ensures the device does not run during the battery change. It protects the thermostat and keeps you safe. Follow simple actions to turn off your thermostat properly. This will make the battery replacement quick and smooth.
Switch Off Heating/cooling System
Locate the main control panel or breaker for your heating and cooling system. Turn off the system to stop all operations. This prevents any unexpected starts while you work on the thermostat. Shutting off the system reduces risks and protects the device from damage. Confirm the system is fully off before proceeding.
Ensure Safety Precautions
Use dry hands to avoid any electric shock. Avoid touching wires or metal parts inside the thermostat. Keep tools and small parts away from children and pets. Work in a well-lit space to see all parts clearly. Taking these safety steps helps keep you safe and your thermostat intact.
Remove Thermostat Cover
Removing the thermostat cover is the first step to change batteries in your Honeywell thermostat. This step gives you access to the battery compartment inside. It is simple but requires care to avoid damage. Follow the steps below to remove the cover safely.
Locate Release Tabs Or Screws
Look closely at the sides or bottom of the thermostat. You will find small release tabs or screws holding the cover. These tabs are usually plastic and snap in place. Screws may need a small screwdriver to remove. Knowing the type helps you handle the cover correctly.
Carefully Detach Cover
Press the release tabs gently or unscrew the screws slowly. Pull the cover straight off without forcing it. Use light pressure to avoid breaking clips or cracking plastic. Set the cover aside in a safe spot. Now you can see the battery compartment clearly.
Replace Old Batteries
Replacing old batteries in your Honeywell thermostat keeps it working well. Fresh batteries ensure the thermostat controls your home’s temperature accurately. This step is easy and saves you from cold or hot surprises. Follow simple actions to replace the batteries safely and correctly.
Remove Existing Batteries
Start by opening the thermostat’s battery compartment. Look for a small latch or cover you can slide or lift. Take out the old batteries carefully. Dispose of them properly. Avoid touching the battery terminals to prevent damage.
Insert New Batteries Correctly
Check the battery type your thermostat needs. Usually, it uses AA or AAA batteries. Place new batteries in the compartment, matching the plus (+) and minus (–) signs. Press them gently into place. Close the cover securely to protect the batteries and keep the thermostat working well.

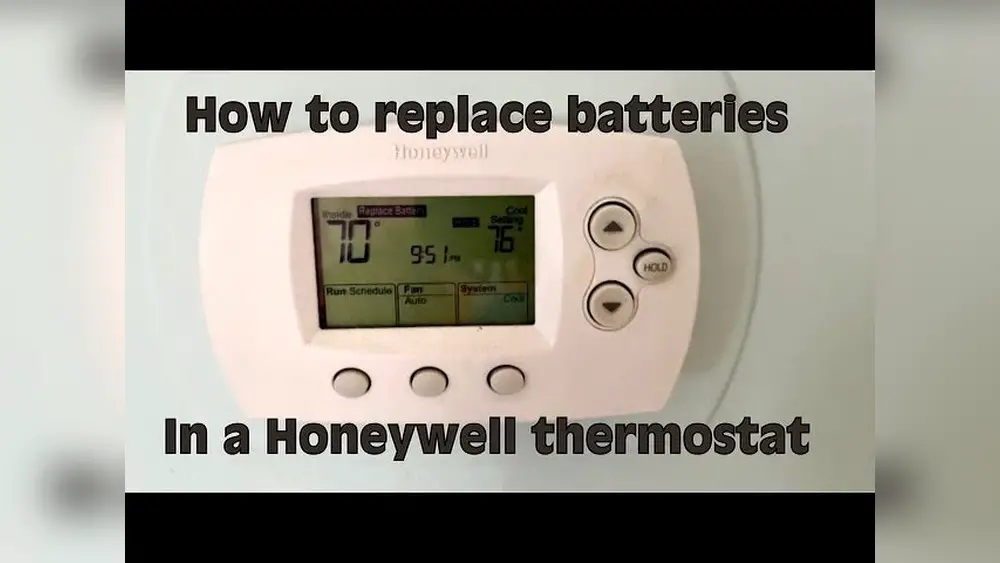
Credit: www.youtube.com
Check Best Thermostat Pricing in Amazon
** As an Amazon Associate, I earn from qualifying purchases.
Reattach Thermostat Cover
After changing the batteries in your Honeywell thermostat, reattaching the cover is the final step. This step protects the internal components and keeps your thermostat looking neat. Taking care to reattach the cover properly ensures the device works smoothly.
Align Cover Properly
Hold the thermostat cover close to the base. Check the edges and corners to match the base shape. Align the tabs or hooks on the cover with the slots on the thermostat. Do not force the cover. Gently adjust it until it fits perfectly.
Secure Cover In Place
Press the cover firmly against the base. You may hear a soft click as it snaps in. Make sure all sides are flush with the wall plate. Avoid leaving gaps that can let dust inside. Confirm the cover is secure by giving it a light tug.
Power On And Test
After changing the batteries in your Honeywell thermostat, the next step is to power it on and test its functions. This ensures the device works properly with the new batteries. Testing helps avoid any issues with your heating or cooling system.
Follow the steps below carefully to turn your system back on and verify the thermostat’s functions. This process confirms the thermostat reads the new power source and controls your home temperature correctly.
Turn Heating/cooling System Back On
First, locate the main power switch for your heating or cooling system. This switch is usually near your furnace or air handler. Flip the switch to the “on” position. This restores power to your system and allows the thermostat to communicate with it.
Next, check your circuit breaker box. Ensure the breaker for your HVAC system is on. If it was off, turn it back on. This step is crucial for the system to respond to the thermostat commands.
Verify Thermostat Functions
Now, check the thermostat screen. It should light up clearly and show the current temperature. Use the thermostat buttons to change the mode to heating or cooling. The system should start working accordingly.
Listen for sounds like the furnace igniting or the air conditioner starting. These sounds confirm the system is responding. Also, check if the thermostat temperature changes when you adjust the settings.
Finally, wait a few minutes. Make sure the room temperature changes after the system runs. This confirms your Honeywell thermostat functions well with the new batteries installed.
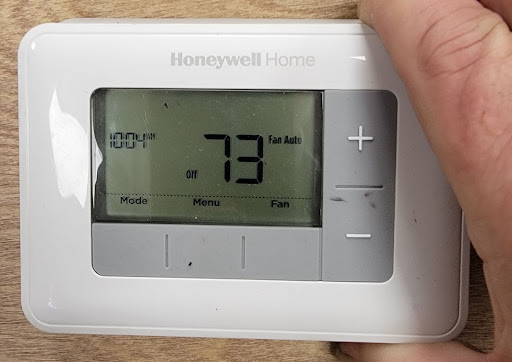
Credit: environmentmasters.com
Troubleshooting Tips
Changing the batteries in your Honeywell thermostat usually works smoothly. Still, sometimes problems pop up. Troubleshooting helps you fix these issues fast. It stops frustration and keeps your home comfortable.
This section covers simple tips to check and fix common battery problems. Follow each step carefully to ensure your thermostat works well after battery change.
Check Battery Orientation
Battery direction is important. Place batteries with correct poles facing the right way. Look inside the battery compartment for + and – signs. Insert batteries matching these signs exactly.
Wrong orientation stops the thermostat from turning on. It can cause error messages or no display. Double-check each battery before closing the cover.
Reset Thermostat If Needed
Sometimes, the thermostat needs a reset after new batteries go in. Press and hold the reset button or remove batteries for 30 seconds. This clears any small errors.
After reset, the thermostat restarts fresh. This often fixes display or connection problems. Follow your Honeywell model’s reset instructions carefully for best results.
Frequently Asked Questions
How Often Should I Change Honeywell Thermostat Batteries?
You should replace Honeywell thermostat batteries every 1 to 2 years. Check battery status regularly to avoid power issues. Low battery alerts prompt timely replacement, ensuring your thermostat functions properly.
What Type Of Batteries Does Honeywell Thermostat Use?
Most Honeywell thermostats use AA or AAA alkaline batteries. Always refer to your thermostat manual for the exact battery type to ensure compatibility and optimal performance.
How To Safely Remove Batteries From Honeywell Thermostat?
Turn off your thermostat before removing batteries. Open the battery compartment gently, remove old batteries, and dispose of them properly. Insert new batteries matching the correct polarity.
Can I Change Honeywell Thermostat Batteries Without Losing Settings?
Yes, many Honeywell thermostats retain settings during battery replacement. Replace batteries quickly to avoid losing saved schedules or preferences. If unsure, check your model’s manual for backup procedures.
Conclusion
Changing the batteries in your Honeywell thermostat is quick and simple. Keep extra batteries on hand to avoid sudden power loss. Regular checks help your thermostat work smoothly all year. A fresh battery means better temperature control and comfort. Follow the steps carefully for safety and ease.
Your home stays cozy without interruptions. Small tasks like this save time and prevent bigger issues later. Stay comfortable and save energy with a working thermostat.
Check Best Thermostat Pricing in Amazon
** As an Amazon Associate, I earn from qualifying purchases.