
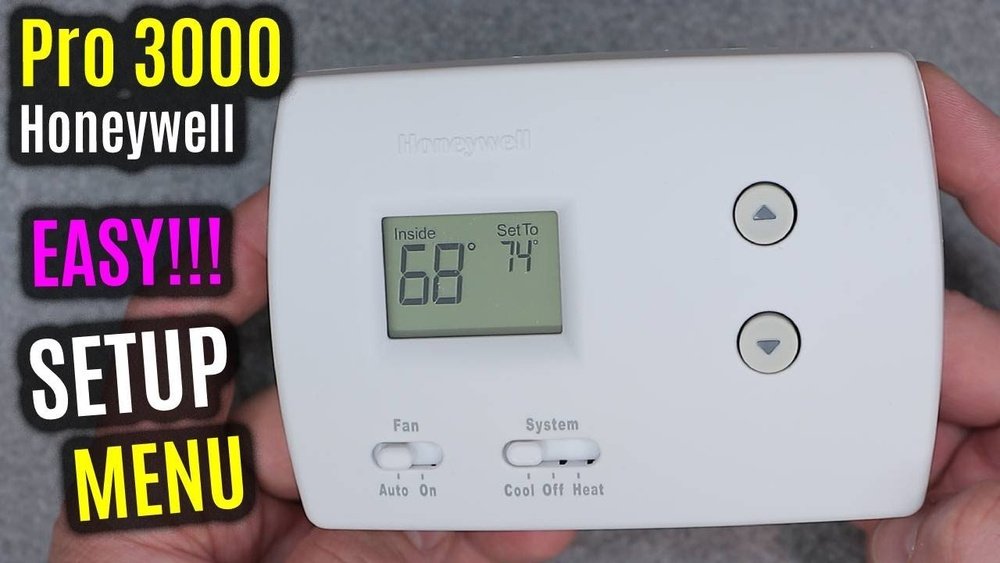
Check Best Thermostat Pricing in Amazon
** As an Amazon Associate, I earn from qualifying purchases.
Looking to upgrade your home comfort without the hassle? Installing a Honeywell non-programmable thermostat is simpler than you might think.
With just a few easy steps, you can take control of your heating and cooling, save energy, and enjoy a cozy environment all year round. This guide will walk you through the process, making sure you feel confident every step of the way.
Ready to get started and make your home smarter? Keep reading to find out how!
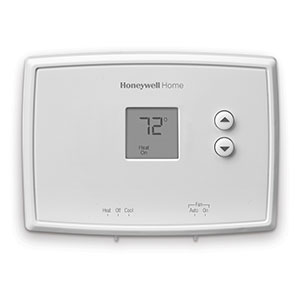
Credit: www.honeywellstore.com
Tools And Materials Needed
Before installing your Honeywell non-programmable thermostat, gather all necessary tools and materials. Having the right items ready saves time and avoids frustration. This section lists what you need for a smooth installation process.
Essential Tools
- Screwdriver (flathead and Phillips)
- Drill with drill bits
- Wire stripper or cutter
- Level tool
- Voltage tester
- Measuring tape
- Small flashlight or headlamp
- Electrical tape
These tools help you safely remove the old thermostat and install the new one. A voltage tester ensures no power is running through wires before handling them.
Thermostat Components
- Honeywell non-programmable thermostat unit
- Mounting screws and wall anchors
- Thermostat base plate
- Instruction manual
- Batteries (if required)
Check all components before starting. Confirm batteries are fresh to avoid power issues. Keep the instruction manual nearby for quick reference.
Preparing For Installation
Preparing for installation is the first step to a smooth thermostat setup. It ensures safety and prevents damage to your system. Take your time and follow each step carefully. This will make the process easier and faster.
Turn Off Power
Start by turning off the power to your heating and cooling system. Locate the circuit breaker that controls the thermostat. Switch it off to avoid electrical shock or damage. Double-check that the power is off by trying to change the temperature. The screen should be blank or unresponsive.
Remove Old Thermostat
Next, remove the old thermostat from the wall. Take off the thermostat cover by gently pulling it away. Use a screwdriver to unscrew the mounting plate. Carefully disconnect the wires and note their positions. Label each wire with tape for easy installation later. Keep the wires apart to prevent short circuits.
Wiring The New Thermostat
Wiring the new Honeywell non-programmable thermostat is a key step for proper function. It requires careful work and attention to detail. This part involves handling wires and connecting them to the right terminals. Doing this correctly ensures your heating system works smoothly.
Identify Wires
First, look at the wires coming from your wall. Most systems have a few color-coded wires. Common colors include red, white, green, and yellow. Each wire has a specific role in controlling the heating system. Use a label or tape to mark each wire as you identify it. This helps avoid confusion later.
Check the old thermostat’s wires too. They show which wire goes where. Take a photo or note the wire colors and their terminal letters. This step prevents mistakes during connection.
Connect Wires To Terminals
Next, attach the labeled wires to the new thermostat terminals. Match each wire color to its terminal letter. For example, red usually connects to the R terminal, white to W, green to G, and yellow to Y. Push the wire into the terminal slot firmly.
Ensure each wire is secure and not loose. Loose wires can cause the thermostat to fail. Tighten any screws if needed. After wiring, carefully push the thermostat base back into place on the wall.

Credit: www.youtube.com
Mounting The Thermostat
Mounting the Honeywell non-programmable thermostat is a simple step. It ensures the device stays fixed and works properly. Correct mounting improves temperature sensing and helps the thermostat last longer.
Follow clear steps to attach and secure the thermostat. This guide makes the process easy. A steady hand and basic tools are all you need.
Attach Backplate
Start by holding the backplate against the wall. Align it with the wires coming from your HVAC system. Use a level to make sure it is straight. Mark the spots for screws through the holes in the backplate. Drill small pilot holes if needed for easier screwing. Secure the backplate with screws provided in the kit. Check that it fits tight and does not move.
Secure Thermostat Unit
Next, connect the wires to the thermostat terminals. Match each wire to the right terminal as per the instructions. Push the wires in firmly to ensure good contact. After wiring, place the thermostat unit over the backplate. Press it gently until it clicks or fits snugly. Double-check that the unit is stable and does not wobble. This keeps the thermostat safe and working well.
Check Best Thermostat Pricing in Amazon
** As an Amazon Associate, I earn from qualifying purchases.
Testing The Installation
Testing the installation is a crucial step after wiring your Honeywell non programmable thermostat. This ensures the device works correctly and controls your heating and cooling system effectively. A proper test avoids future issues and saves time.
Restore Power
Turn the power back on at the circuit breaker or fuse box. This reactivates your heating and cooling system. Wait a few moments for the thermostat to power up fully. Watch for any error messages or lights on the display.
Check Thermostat Function
Set the thermostat to heating mode and increase the temperature. Listen for the furnace or heater to start running. Switch to cooling mode and lower the temperature. Confirm that the air conditioner or fan turns on.
Adjust the temperature up and down several times. Make sure the thermostat responds quickly. Check the display to see if the temperature settings change properly. If everything works smoothly, your installation is successful.
Troubleshooting Tips
Troubleshooting your Honeywell non-programmable thermostat can save time and avoid frustration. Small issues may stop your thermostat from working correctly. Knowing simple fixes helps you get the heat or cool air back fast.
This section guides you through common problems and shows when to call a professional. Follow these tips to keep your thermostat running smoothly.
Common Issues
Thermostat not turning on is a frequent problem. Check the batteries first. Replace them if they are dead. Loose wiring can cause the thermostat to stop working. Turn off power before checking wires.
Sometimes, the thermostat does not respond to changes. Clean the sensor gently. Dust can block the sensor from reading room temperature. Incorrect settings may also cause issues. Make sure the system is set to the right mode: heat or cool.
Another issue is the system turning on and off quickly. This is called short cycling. It wastes energy and wears out your system. Check for stuck switches or dirty filters. These can cause the problem.
When To Call A Professional
Some problems need expert help. Call a professional if you find damaged wires or burnt smells. Avoid handling electrical issues yourself. A certified technician can safely fix complex wiring problems.
If your system still does not work after basic checks, call a pro. Problems like faulty circuit boards or compressor issues require special tools. Professionals also test your system for hidden faults.

Credit: www.intralectric.nl
Frequently Asked Questions
How Do I Wire A Honeywell Non Programmable Thermostat?
Turn off power first. Connect wires to matching terminals. Follow the wiring diagram in the manual for accuracy. Secure connections tightly and avoid loose wires.
Can I Install This Thermostat Without Professional Help?
Yes, installation is simple for DIYers. Follow the instructions carefully. Use a screwdriver and wire stripper. Ensure power is off to avoid shock.
What Tools Are Needed For Installation?
You need a screwdriver, wire stripper, and a drill. A voltage tester is useful to confirm power is off. Keep the thermostat manual handy.
How To Reset Honeywell Non Programmable Thermostat?
Remove batteries or turn off power for a few minutes. Reinstall batteries or restore power. This resets settings to default and clears errors.
Conclusion
Installing a Honeywell non-programmable thermostat is simple and quick. Follow each step carefully to avoid mistakes. Double-check all wires before turning the power back on. Your home will stay comfortable with easy temperature control. No need for complicated settings or programming.
Enjoy better energy use and lower bills. This small task can make a big difference in your daily comfort. Keep the user manual handy for future reference. Stay warm or cool with confidence and ease.
Check Best Thermostat Pricing in Amazon
** As an Amazon Associate, I earn from qualifying purchases.