
Check Best Thermostat Pricing in Amazon
** As an Amazon Associate, I earn from qualifying purchases.
HVAC professionals and electricians typically install thermostats. They ensure proper connection and functionality.
Installing a thermostat is crucial for maintaining a comfortable home environment. HVAC professionals and electricians have the expertise to handle this task efficiently. A correctly installed thermostat can help reduce energy bills and improve heating and cooling system performance. Skilled technicians follow industry standards, ensuring accurate temperature regulation and seamless integration with your HVAC system.
DIY installations can be risky and may lead to improper functioning or damage. Professional installation guarantees that your thermostat operates effectively, providing comfort and energy efficiency. Always hire certified experts to ensure the best results and avoid potential issues.
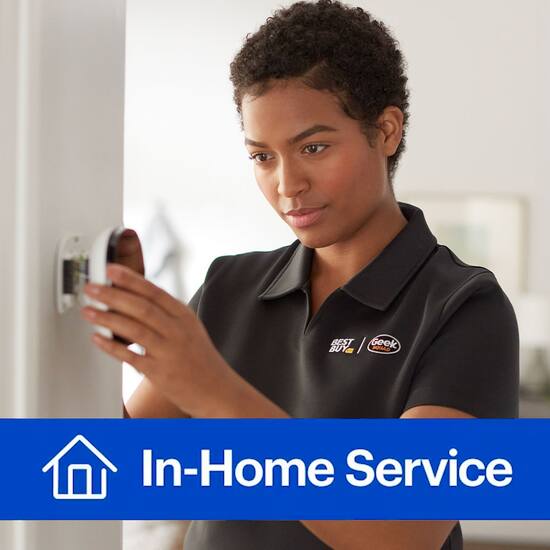
Credit: www.bestbuy.com
- Introduction To Thermostat Installation
- Types Of Thermostats
- Assessing Your Hvac Compatibility
- Tools And Materials Needed
- Pre-installation Steps
- Step-by-step Installation Process
- Troubleshooting Common Installation Issues
- Professional Installation Services
- Post-installation Tips
- Frequently Asked Questions
- Conclusion
Introduction To Thermostat Installation
Installing a thermostat is a crucial task. It ensures your home stays at the perfect temperature. Both comfort and energy savings depend on it. Let’s dive into the process of thermostat installation.
Importance Of Proper Installation
Proper installation is essential. A well-installed thermostat works efficiently. It keeps your home comfortable all year round. Incorrect installation can lead to issues. This can include inaccurate temperature readings. It can also cause higher energy bills. Always ensure the installation is done correctly.
Key Benefits of Proper Installation:
- Accurate temperature control
- Energy efficiency
- Longer lifespan of HVAC system
- Enhanced comfort
Diy Vs Professional Installation
DIY installation can be tempting. Many people enjoy the challenge. It can save money upfront. But it requires knowledge and skills. Mistakes can be costly and time-consuming to fix.
Professional installation offers peace of mind. Experts have the right tools and experience. They ensure the job is done correctly. This can prevent future problems. It can also save money in the long run.
Consider these factors when choosing between DIY and professional installation:
| DIY Installation | Professional Installation |
|---|---|
| Lower upfront cost | Higher upfront cost |
| Requires technical skills | No technical skills needed |
| Time-consuming | Quick and efficient |
| Risk of mistakes | Low risk of mistakes |
Ultimately, the choice depends on your comfort level and skills. Weigh the pros and cons carefully. Make an informed decision for a comfortable and efficient home.
Types Of Thermostats
Choosing the right thermostat can greatly impact your home’s comfort and energy efficiency. There are different types of thermostats, each with its own features and benefits. Below, we explore the three main types of thermostats: Manual Thermostats, Programmable Thermostats, and Smart Thermostats.
Manual Thermostats
Manual thermostats are the simplest type. You control the temperature by turning a dial or moving a lever. These thermostats are easy to use and inexpensive.
They are perfect for those who prefer a no-frills approach. However, they lack advanced features and do not save as much energy as other types.
Programmable Thermostats
Programmable thermostats allow you to set a schedule for your heating and cooling system. You can program different temperatures for different times of the day. This helps in saving energy when you are not at home.
For example, you can set it to lower the temperature at night and raise it in the morning. This type is more advanced than manual thermostats but still easy to use.
Smart Thermostats
Smart thermostats are the most advanced type. They connect to your Wi-Fi and can be controlled via a smartphone or voice assistant. These thermostats learn your habits and adjust the temperature automatically.
They offer features like energy reports, motion sensors, and integration with smart home devices. Though they are more expensive, they provide the best in energy savings and convenience.
| Thermostat Type | Features | Benefits |
|---|---|---|
| Manual Thermostats | Basic, Easy to Use | Low Cost |
| Programmable Thermostats | Set Schedules, Save Energy | Energy Efficient |
| Smart Thermostats | Wi-Fi, Remote Control, Learning Capabilities | High Energy Savings, Convenience |
Assessing Your Hvac Compatibility
Understanding your HVAC system’s compatibility with a new thermostat is crucial. This ensures optimal performance and efficiency. The following sections will guide you through the key steps of assessing your HVAC compatibility.
Identifying System Type
First, identify what type of HVAC system you have. Common types include:
- Central Air Systems
- Heat Pumps
- Furnaces
- Boilers
- Radiant Heating Systems
Each system has unique features. Knowing your system type helps you choose the right thermostat.
Checking Voltage Requirements
Next, check the voltage requirements of your HVAC system. Thermostats usually work with either:
| Voltage Type | Description |
|---|---|
| Low Voltage (24V) | Most common in modern homes. Compatible with many thermostats. |
| Line Voltage (120V or 240V) | Often found in older homes or specific heating systems. |
Ensure your thermostat matches your system’s voltage. This prevents potential damage and ensures safe operation.
Additional Considerations
Some HVAC systems have additional features or requirements:
- Multi-stage Heating/Cooling: Requires a compatible thermostat.
- Heat Pumps: May need specific thermostat settings.
- Smart Home Integration: Check if your system supports smart thermostats.
Identifying these specifics ensures you choose a thermostat that meets all your needs.
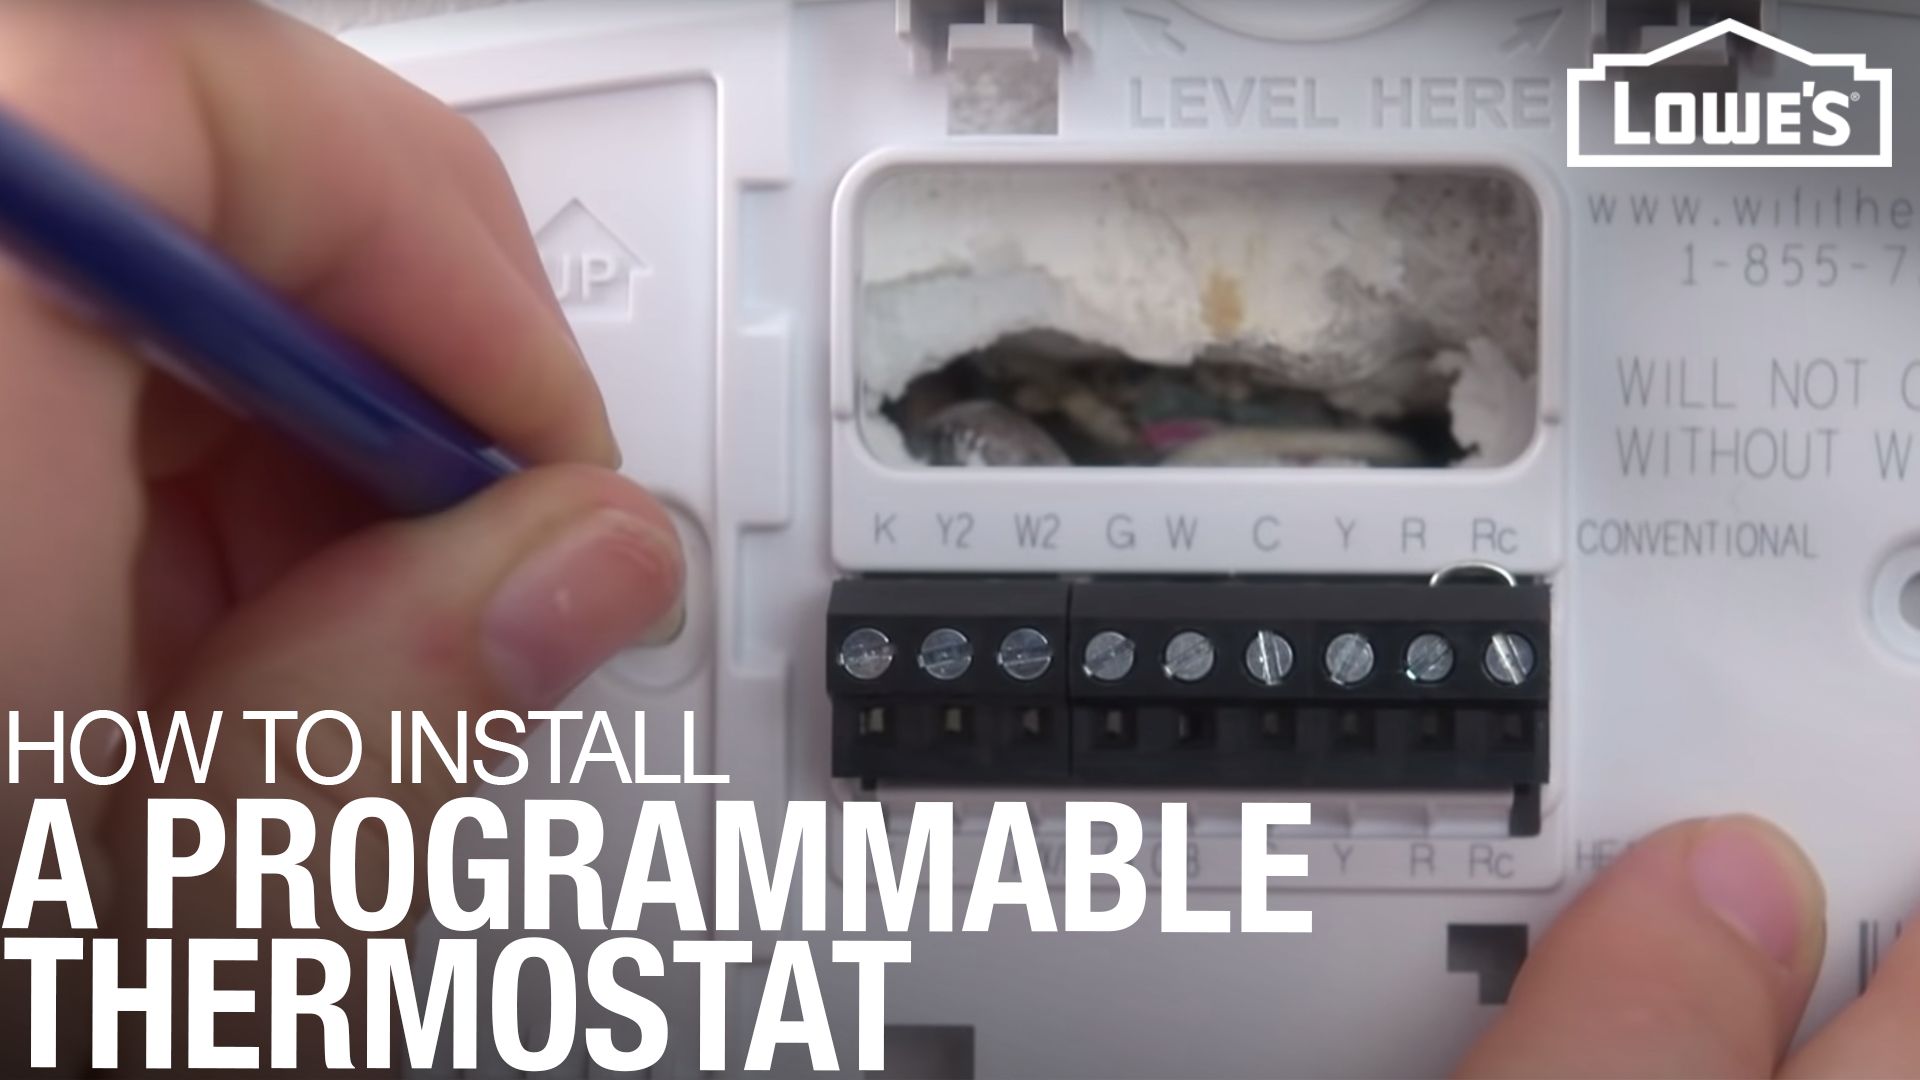
Credit: www.lowes.com
Tools And Materials Needed
Installing a thermostat requires specific tools and materials. This ensures the process is smooth and efficient. Below is a detailed guide on the tools and materials needed for a successful thermostat installation.
Basic Toolkit
For a thermostat installation, you need a basic toolkit. This includes:
- Screwdrivers – Both flat-head and Phillips.
- Wire strippers – For handling electrical wires.
- Drill – To mount the thermostat on the wall.
- Level – Ensures the thermostat is straight.
Additional Supplies
Besides the basic toolkit, you need some additional supplies. These include:
- Thermostat – Choose a programmable or smart thermostat.
- Mounting screws – To secure the thermostat.
- Electrical tape – For safety and insulation.
- Batteries – If your thermostat requires them.
- Wire labels – Helps identify wires during installation.
Having these tools and materials ready will make your thermostat installation simple and efficient. Always ensure you have the right supplies before you start.
Pre-installation Steps
Installing a new thermostat can improve energy efficiency and comfort in your home. Before you start, follow these pre-installation steps. These steps ensure a smooth installation process and help avoid common pitfalls.
Safety Precautions
Safety is the first priority when installing a thermostat. Always turn off the power to your HVAC system at the breaker box. This prevents electric shock and protects your system from damage.
Wear insulated gloves to protect your hands. Use a voltage tester to confirm that the power is off. Never skip this step, even if you believe the power is already off.
Thermostat Location
Choosing the right location for your thermostat is crucial. It ensures accurate temperature readings and efficient operation.
- Avoid placing the thermostat near windows, doors, or direct sunlight.
- Install it on an interior wall, away from air vents.
- Place it at a height of about 5 feet from the ground.
These locations help maintain a consistent temperature reading. This allows your HVAC system to work efficiently.
Removing The Old Thermostat
Before installing your new thermostat, you need to remove the old one. Follow these simple steps:
- Turn off the power to the HVAC system.
- Remove the cover of the old thermostat.
- Take a photo of the wiring for reference.
- Label each wire with masking tape and a pen.
- Disconnect the wires carefully.
- Unscrew the old thermostat from the wall.
These steps ensure you can easily connect the new thermostat without confusion.
Step-by-step Installation Process
Installing a thermostat might seem daunting, but it’s quite simple. Follow our step-by-step guide to ensure a smooth installation. Proper installation ensures your thermostat works efficiently. Let’s dive into the process.
Mounting The Thermostat
To start, choose a suitable location for your thermostat. It should be away from direct sunlight, drafts, or heat sources. This ensures accurate temperature readings.
Next, turn off the power to your heating and cooling system. This is crucial for safety.
Check Best Thermostat Pricing in Amazon
** As an Amazon Associate, I earn from qualifying purchases.
Remove the old thermostat if there is one. Take note of the wires and their labels. This will help you with the new installation.
Mount the new thermostat’s backplate on the wall. Use the provided screws and anchors. Ensure it’s level for accurate readings.
Wiring Connections
Refer to the wiring diagram provided with your new thermostat. This ensures you connect the right wires to the right terminals.
Connect each wire to its corresponding terminal. Use the labels you noted earlier. Secure the wires tightly to avoid any loose connections.
Once all wires are connected, attach the thermostat’s faceplate. Make sure it snaps into place securely.
Setting Up The Interface
With the thermostat mounted and wired, turn the power back on. Your thermostat should light up and be ready for setup.
Follow the on-screen prompts to configure your thermostat. This may include setting the date, time, and preferred temperature settings.
Most modern thermostats have smart features. You may need to connect it to your Wi-Fi network. This allows you to control it remotely.
Finally, test your thermostat. Ensure it controls your heating and cooling system as expected. Adjust settings if necessary.
Troubleshooting Common Installation Issues
Installing a thermostat can sometimes be challenging. Even experienced DIYers might face some issues. Here, we will discuss some common installation issues and how to troubleshoot them.
Incorrect Wiring
Incorrect wiring is a frequent issue with thermostat installation. Ensure you connect each wire to the correct terminal. Refer to the thermostat manual for wiring diagrams. Double-check the wire colors and terminal labels.
Common wiring issues include:
- Loose connections
- Reversed wires
- Disconnected wires
Steps to fix incorrect wiring:
- Turn off the power to the HVAC system.
- Check each wire’s connection.
- Ensure wires are securely attached to the correct terminals.
- Turn the power back on and test the thermostat.
Device Calibration
Device calibration ensures the thermostat reads the temperature accurately. If the temperature readings seem off, recalibrate your thermostat.
Steps to recalibrate:
- Locate the calibration settings in the thermostat menu.
- Compare the thermostat reading with a reliable thermometer.
- Adjust the thermostat settings to match the thermometer reading.
- Save the new settings and monitor the temperature readings.
Connectivity Problems
Connectivity problems are common with smart thermostats. These issues often involve Wi-Fi or Bluetooth connections.
To troubleshoot connectivity problems:
- Ensure the thermostat is within the Wi-Fi range.
- Check the Wi-Fi password and network settings.
- Restart the thermostat and the router.
- Update the thermostat firmware if needed.
If the thermostat still won’t connect, consider contacting customer support.
Professional Installation Services
Installing a thermostat may seem simple. Yet, it’s best to hire a professional. They ensure proper setup and avoid future issues. Let’s explore when to call a professional, choosing the right technician, and cost considerations.
When To Call A Professional
Call a professional if you aren’t confident with electrical tasks. Incorrect wiring can cause serious problems. A professional ensures safety and efficiency.
New thermostat models may need complex programming. Professionals handle these easily. If your home has unique HVAC systems, a professional can ensure compatibility.
Choosing The Right Technician
Check certifications when choosing a technician. Certified technicians have proven skills. Look for experience in HVAC systems.
Reading online reviews helps too. Happy customers mean good service. Ask for referrals from friends or family. They may know reliable technicians.
Cost Considerations
The cost of professional installation varies. Basic installations may cost less. Complex setups might be pricier.
Get multiple quotes before hiring. Compare prices and services. Some professionals offer warranty services. This can save money in the long run.
| Service | Approximate Cost |
|---|---|
| Basic Installation | $100 – $150 |
| Complex Installation | $200 – $300 |
| Programming Services | $50 – $100 |
Post-installation Tips
After installing your thermostat, it’s essential to follow some key steps to ensure it operates efficiently and lasts longer. Below are some post-installation tips that will help you get the most out of your new device.
Testing The Thermostat
Once installed, the first step is to test the thermostat to make sure it’s working correctly.
- Set the temperature to a level higher or lower than the current room temperature.
- Listen for the heating or cooling system to turn on.
- Wait a few minutes to see if the room temperature changes.
If the system doesn’t respond, double-check the wiring and settings. It’s also wise to consult the user manual for troubleshooting tips.
Energy-efficient Usage
Using your thermostat efficiently can save energy and reduce bills. Here are some energy-efficient usage tips:
- Set the thermostat to 68°F during the day in winter.
- Lower it to 60°F at night or when you’re away.
- In summer, set it to 78°F when you’re home.
- Raise it to 85°F when you’re away.
Consider using a programmable thermostat to automate these settings. This ensures that you maintain a comfortable home while saving energy.
Maintenance And Care
Regular maintenance and care of your thermostat can extend its life and improve its performance.
| Task | Frequency |
|---|---|
| Check and replace batteries | Every 6 months |
| Clean the thermostat | Once a month |
| Inspect the wiring | Annually |
Use a soft brush or cloth to clean the thermostat. Dust and dirt can affect its performance. Also, check the wiring for any signs of wear or damage. If you find any issues, consult a professional for repairs.

Credit: blog.energytrust.org
Frequently Asked Questions
Who Should I Call To Install A Thermostat?
Call a licensed HVAC technician to install a thermostat. They ensure proper installation and optimal performance.
Do Electricians Install Thermostats?
Yes, electricians install thermostats. They ensure proper wiring and functionality. Hiring a professional guarantees safe and efficient installation.
How Much Does It Cost To Have A Thermostat Installed?
The cost to install a thermostat typically ranges from $100 to $300. This includes labor and materials.
Who Do I Need To Install A Thermostat?
You need a licensed HVAC technician to install a thermostat. They ensure proper wiring and functionality.
Conclusion
Selecting the right professional to install your thermostat ensures optimal performance. Certified HVAC technicians are your best choice. They bring expertise and reliability. A well-installed thermostat can save energy and money. Don’t compromise on quality; invest in professional installation. Your comfort and efficiency depend on it.
Choose wisely for peace of mind.
Check Best Thermostat Pricing in Amazon
** As an Amazon Associate, I earn from qualifying purchases.