
Check Best Thermostat Pricing in Amazon
** As an Amazon Associate, I earn from qualifying purchases.
Reprogramming a Nest thermostat is straightforward. It helps you save energy and money.
A Nest thermostat makes controlling your home temperature easy and smart. Sometimes, you need to adjust its settings to better match your needs. Whether you want to change the schedule, update preferences, or troubleshoot issues, reprogramming is essential. This guide will walk you through the steps to reprogram your Nest thermostat.
You’ll learn how to access settings, make changes, and ensure your system runs efficiently. With these tips, your Nest thermostat will work just the way you want, providing comfort while saving energy. Let’s get started on making your home environment perfect for you.
Preparation
Reprogramming your Nest Thermostat can seem like a daunting task, but with a bit of preparation, it can be a straightforward process. Understanding the steps and having everything ready before you start will save you time and frustration. Let’s dive into the preparation process to ensure you’re set up for success.
Tools Needed
Before you begin, gather all the necessary tools. Having everything on hand will make the process smoother and quicker.
- Screwdriver: A small Phillips or flathead screwdriver will work for removing the thermostat from the wall.
- Wi-Fi Password: Ensure you have your Wi-Fi password handy, as you’ll need to reconnect the device after reprogramming.
- Smartphone or Tablet: The Nest app is essential for reprogramming, so make sure your device is charged and the app is installed.
- Pen and Paper: Jot down any current settings or configurations you might want to re-enter later.
Safety Precautions
Safety should be your top priority when working with any electrical device.
- Turn Off Power: Always turn off the power to your heating and cooling system at the circuit breaker before you start. This prevents any accidental shocks.
- Handle with Care: The Nest Thermostat is a delicate device. Handle it gently to avoid any damage.
- Check Wiring: If you’re not comfortable with handling wires, consider consulting a professional. Incorrect wiring can damage your system.
How do you feel about tackling this project on your own? By preparing correctly, you’re setting yourself up for a successful and stress-free experience. Ready to move on to the next steps? Let’s get started!
Credit: www.makeuseof.com
Power Off
Reprogramming a Nest Thermostat may require you to turn it off first. This step ensures safety and prevents any potential issues. Below, we’ll guide you through the process of powering off the system.
Shutting Down System
To begin, navigate to your thermostat’s home screen. Select the gear icon to access settings. Scroll down and choose “Power Off.” Confirm your choice to shut down the system. This will safely turn off your thermostat.
Disconnecting Thermostat
Next, gently remove the thermostat from its base. Pull it straight out to avoid damage. Once removed, check the wires connected to the base. Carefully disconnect these wires by loosening the screws. Make sure each wire is safely secured away from each other.
Removing Thermostat
Reprogramming a Nest Thermostat starts with removing the device from the wall. It’s the first step in the process. Handle it carefully to avoid damage. Follow these steps to ensure a smooth and safe removal.
Detaching From Wall
First, turn off the power to your HVAC system. This ensures safety while working with electrical components. Locate the small tab at the bottom of the Nest Thermostat. Gently press and pull the device away from the wall. It should come off easily. If it feels stuck, wiggle it slightly. This should loosen it.
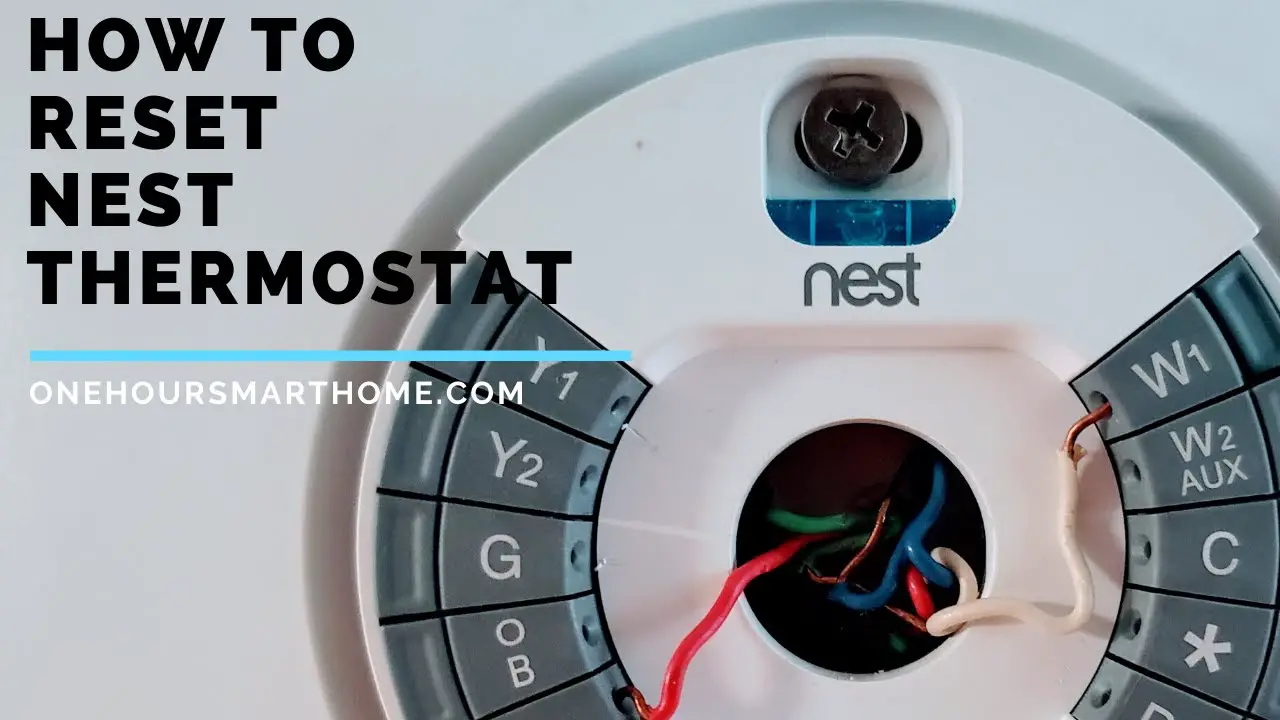
Handling Wires
Once the thermostat is off the wall, you will see several wires. Take a photo of the wiring setup. This will help you when reconnecting the wires later. Carefully detach each wire by pressing the small tabs on the connectors. Make sure the wires don’t touch each other. This could cause a short circuit. Label each wire with masking tape. This helps to remember their positions.
Credit: www.youtube.com
Factory Reset
Sometimes, you might need to reset your Nest Thermostat to its factory settings. This process wipes all your settings and returns the device to its original state. This is useful if you plan to sell or give away your thermostat. It can also help resolve persistent issues. Follow these steps to perform a factory reset.
Accessing Settings
First, go to your Nest Thermostat. Press the device to bring up the menu. Scroll through the options until you find “Settings.” Select it by pressing the device again. Now, you are in the settings menu where you can make changes.
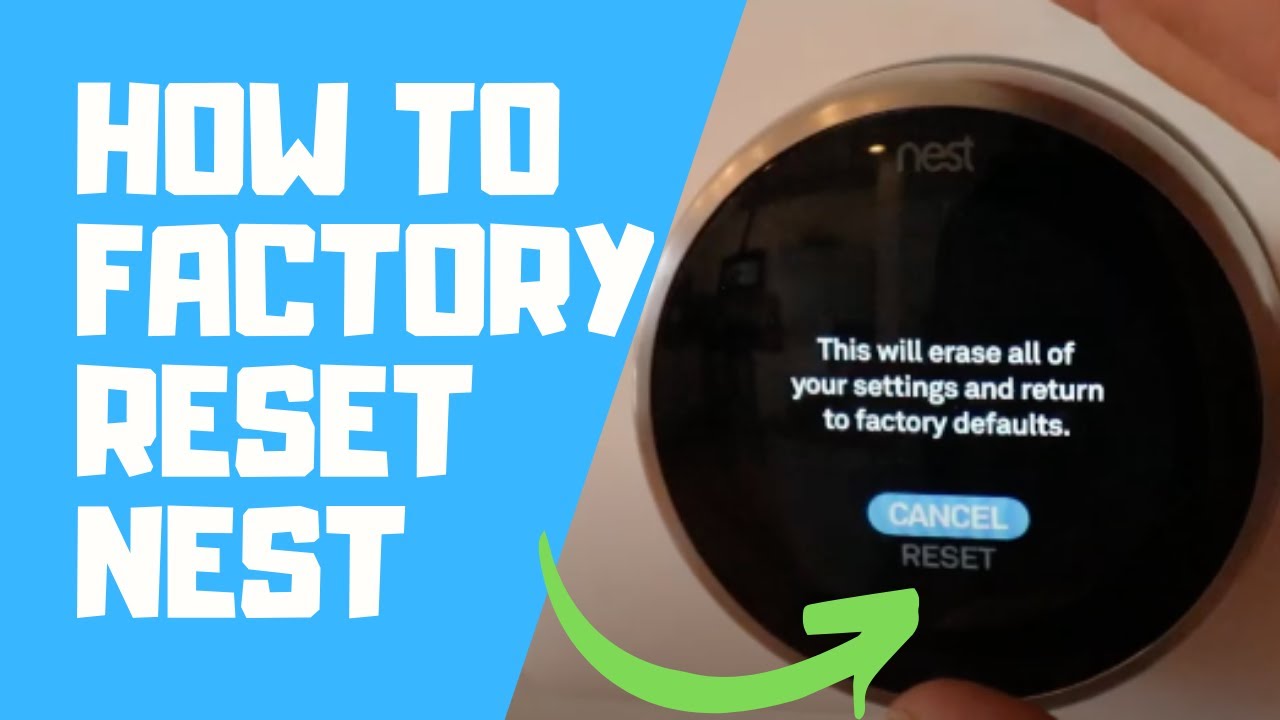
Executing Reset
In the settings menu, scroll down to “Reset.” Press the device to select this option. You will see different reset options. Choose “All Settings.” Confirm your choice by pressing the device again. The thermostat will start the reset process. This might take a few minutes. Once complete, your Nest Thermostat will be like new.
Installing Thermostat
Installing a Nest Thermostat is simple and straightforward. This section guides you through the process. Follow these easy steps to ensure everything is set up correctly.
Reconnecting Wires
First, turn off the power to your HVAC system. This prevents any electrical mishaps. Identify the wires connected to your old thermostat. Label each one with the supplied stickers. This helps you remember where each wire goes.
Next, remove the old thermostat from the wall. Carefully disconnect the wires. You should see a small hole where the wires come through. Pull these wires through the new Nest Thermostat base plate. Connect each labeled wire to the corresponding terminal.
Mounting On Wall
Now, align the Nest Thermostat base plate with the hole in the wall. Use a level to ensure it’s straight. Secure the base plate with screws. Some walls may need wall anchors for a firm hold. If so, use the ones provided in the box.
Once the base plate is secure, attach the Nest display. It should click into place easily. Turn the power back on. Your Nest Thermostat will light up, ready for setup.
Power On
Learn how to reprogram a Nest Thermostat with simple steps. Adjust settings to save energy and stay comfortable.
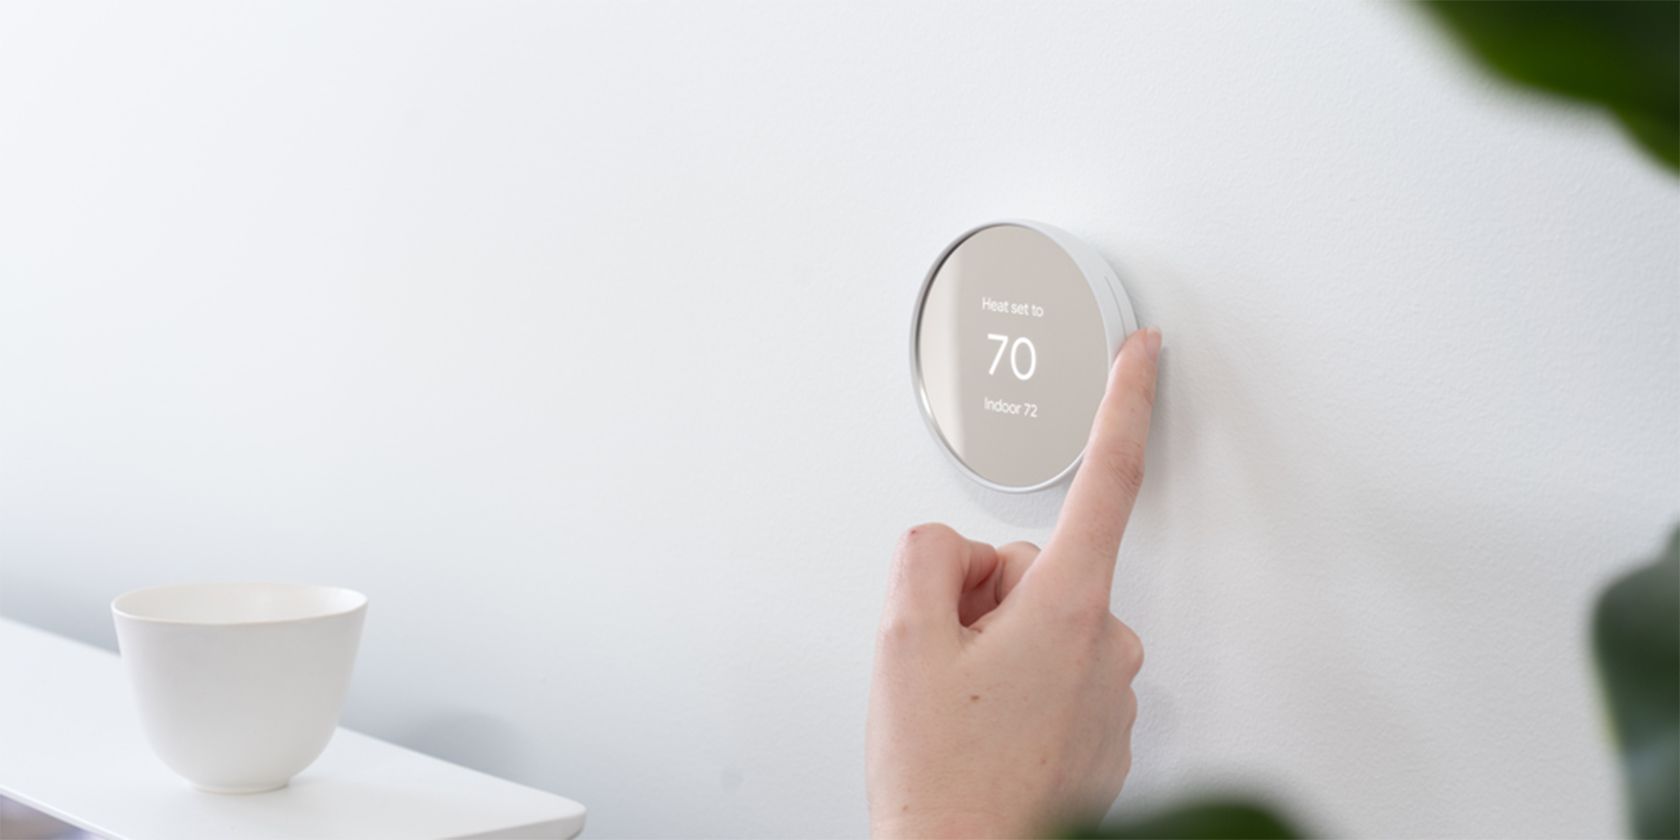
Powering on your Nest Thermostat is the first step to getting it up and running. This might sound like a simple task, but doing it correctly sets the foundation for a seamless experience. Let’s dive into the details to ensure you get it right the first time.Restoring Power
First, ensure your Nest Thermostat is properly connected to your HVAC system. Double-check that all wires are securely in place. Next, go to your circuit breaker and flip the switch for your thermostat’s power. Wait a few moments and then turn it back on. You should see the Nest logo appear on the thermostat screen. This indicates it’s receiving power and starting up.System Check
Once your Nest Thermostat powers on, it will run a quick system check. This ensures all components are functioning correctly. You might be prompted to select your language and set up Wi-Fi. Follow the on-screen instructions to complete these steps. If there are any issues, the thermostat will alert you with troubleshooting tips. Address these before moving forward to avoid future problems. Have you ever had an unexpected issue during setup? Share your experiences in the comments to help others who might face similar problems.Initial Setup
The initial setup of your Nest Thermostat is crucial for ensuring it operates efficiently and meets your comfort needs. From selecting the appropriate language to connecting it to your Wi-Fi network, each step is straightforward but essential. Let’s dive into these simple yet vital tasks.
Language Selection
When you first power up your Nest Thermostat, it will prompt you to select a language. This step is simple but important for clear navigation through the settings.
You’ll see a list of available languages. Use the dial to scroll and highlight your preferred language. Press the dial to confirm your selection.
Check Best Thermostat Pricing in Amazon
** As an Amazon Associate, I earn from qualifying purchases.
Choosing the right language ensures you understand all instructions and notifications. It might seem trivial, but it sets the foundation for a smooth user experience.
Connecting To Wi-fi
Connecting your Nest Thermostat to Wi-Fi unlocks its full potential. You can control it remotely, receive updates, and integrate it with other smart devices.
On the thermostat, navigate to the settings menu and select the Wi-Fi option. It will scan for available networks. Choose your network from the list.
Enter your Wi-Fi password using the dial. This step might feel like setting up any other device, but remember, a stable connection is key to seamless operation.
Don’t forget to test the connection. A successful connection is confirmed with a checkmark. If it fails, double-check your password and try again.
Take a moment to think about how much easier life becomes with remote access to your thermostat. Imagine adjusting the temperature while still in bed or before you get home. Isn’t that a comfort worth setting up?
Temperature Settings
Temperature settings are vital for keeping your home comfortable. By setting the right temperatures, you can save energy and money. You can adjust the settings to fit your daily routine. Let’s explore how to manage temperature settings on your Nest Thermostat.
Creating Schedules
Creating schedules helps to automate your thermostat. First, open the Nest app on your phone. Tap on the thermostat icon. Then, select “Schedule.”
Add a new time block by tapping on the screen. Set the desired temperature for that time. Repeat this for different times of the day. You can create a morning schedule with a higher temperature. Set a lower temperature for when you are away. Adjust it again for the evening.
This way, your home stays comfortable without manual changes. Scheduling saves energy by reducing heating or cooling when not needed.
Adjusting Preferences
Adjusting preferences allows for a more personalized experience. On the Nest app, tap the settings icon. Select “Home/Away Assist.”
Turn on “Use Phone Location.” This will adjust the temperature based on your location. If you are home, the thermostat will keep your home comfortable. If you leave, it will lower the energy use.
You can also adjust Eco Temperatures. These are the temperatures your Nest uses when you are away. Set these to a range that saves energy but is still comfortable for you.
By adjusting these preferences, you optimize your thermostat’s performance. Your home remains comfortable while you save energy and money.
Troubleshooting
Reprogramming a Nest Thermostat can sometimes be tricky. You may face some issues along the way. Troubleshooting common problems can save time. This section will help you fix those issues. It is important to understand the common problems and know how to contact support.
Common Issues
One common issue is the thermostat not connecting to Wi-Fi. Ensure your Wi-Fi password is correct. Restart your router and thermostat. Another problem is the thermostat not turning on. Check if the power is connected properly. Make sure the battery is charged.
Sometimes, the temperature settings may not change. Verify if the schedule is set correctly. Make sure the thermostat is not in “Eco” mode. It may also help to reset the thermostat. Lastly, software updates may fail. Check if your internet connection is stable. Ensure the thermostat has enough battery.
Contacting Support
If troubleshooting does not fix the problem, contact Nest Support. They can provide additional help. Visit the Nest Support website for more information. Use the chat feature for quick assistance. You can also call their customer service number.
Before contacting support, have your thermostat details ready. This includes the model number and any error messages. This information can help resolve your issue faster. Support staff are trained to handle all types of problems.

Credit: support.google.com
Frequently Asked Questions
How Do I Reset My Nest For A New Owner?
To reset your Nest for a new owner, go to Settings, select “Reset,” and choose “Factory Reset. ” Confirm the reset.
How Do You Reset A Nest Thermostat?
To reset a Nest thermostat, go to Settings > Reset > All Settings. Confirm the reset. The device will restart.
How Do I Recalibrate My Nest Thermostat?
To recalibrate your Nest thermostat, go to the settings menu. Select “Equipment,” then “Continue,” and follow the prompts to recalibrate.
How Do I Program My Nest Thermostat?
To program your Nest thermostat, use the Nest app or thermostat interface. Select “Schedule” and set preferred temperatures for different times.
Conclusion
Reprogramming a Nest Thermostat is simple and efficient. Follow the steps carefully. Make sure to check your settings regularly. This ensures optimal performance. Remember to update your thermostat software. This can improve its functionality. Don’t hesitate to explore its features.
They offer great benefits for your home. Enjoy the comfort and savings. Your smart home journey starts here. Make your living space more comfortable today.
Check Best Thermostat Pricing in Amazon
** As an Amazon Associate, I earn from qualifying purchases.