
Check Best Thermostat Pricing in Amazon
** As an Amazon Associate, I earn from qualifying purchases.
To charge a Nest Thermostat, connect it to a power source. Ensure proper installation for continuous charging.
Nest Thermostats are smart devices that help you manage your home’s climate. They are designed to be user-friendly and energy-efficient. But sometimes, users face issues with charging. Understanding how to charge your Nest Thermostat is crucial for its optimal performance.
This guide will walk you through the steps to ensure your device is always charged and ready to go. Knowing the right way to charge can prevent future problems and keep your home comfortable. Let’s explore the simple steps to keep your Nest Thermostat powered up.
Preparation
Charging your Nest Thermostat requires some preparation. Properly preparing ensures a smooth process. It also helps you avoid any issues. Here’s how to get ready.
Gather Tools
First, gather the necessary tools. You need a small screwdriver. You also need the USB charging cable that came with your thermostat. Ensure you have a power source or adapter. A power bank can work too. Having all these tools ready will save time.
Check Compatibility
Next, check if your Nest Thermostat is compatible with charging. Newer models usually are. Look at the manual or the device itself. It should have a USB port. If it doesn’t, check the battery type. Some models use replaceable batteries. Knowing this prevents any damage. It also helps you follow the right steps.
Credit: www.onehoursmarthome.com
Power Off
When it’s time to charge your Nest Thermostat, one crucial step is to power it off first. This helps prevent any damage to the device or your HVAC system. It also ensures you can safely remove and handle the thermostat. Let’s break down the process.
Turn Off Hvac System
First, turn off your HVAC system. This is important because the Nest Thermostat is wired directly to it. Go to your home’s breaker panel and locate the switches for your heating and cooling systems.
Flip the switches to the “off” position. This cuts the power supply and ensures no electricity is flowing to the thermostat. It might seem like a hassle, but it’s a necessary safety precaution.
Ensure Safety
Always double-check that the HVAC system is off. Test it by attempting to adjust the temperature on your thermostat. If nothing happens, you’re good to go.
Once you’re certain the system is off, carefully remove the Nest Thermostat from its base. Handle it gently to avoid damaging the delicate wiring. You might feel a bit nervous the first time, but it’s easier than you think.
Have you ever forgotten to turn off the HVAC system before handling the thermostat? It can lead to electrical issues or even damage your thermostat. Taking this extra step saves you from potential headaches down the road.
Do you have any tips for ensuring safety while working with home electronics? Share your thoughts in the comments below!
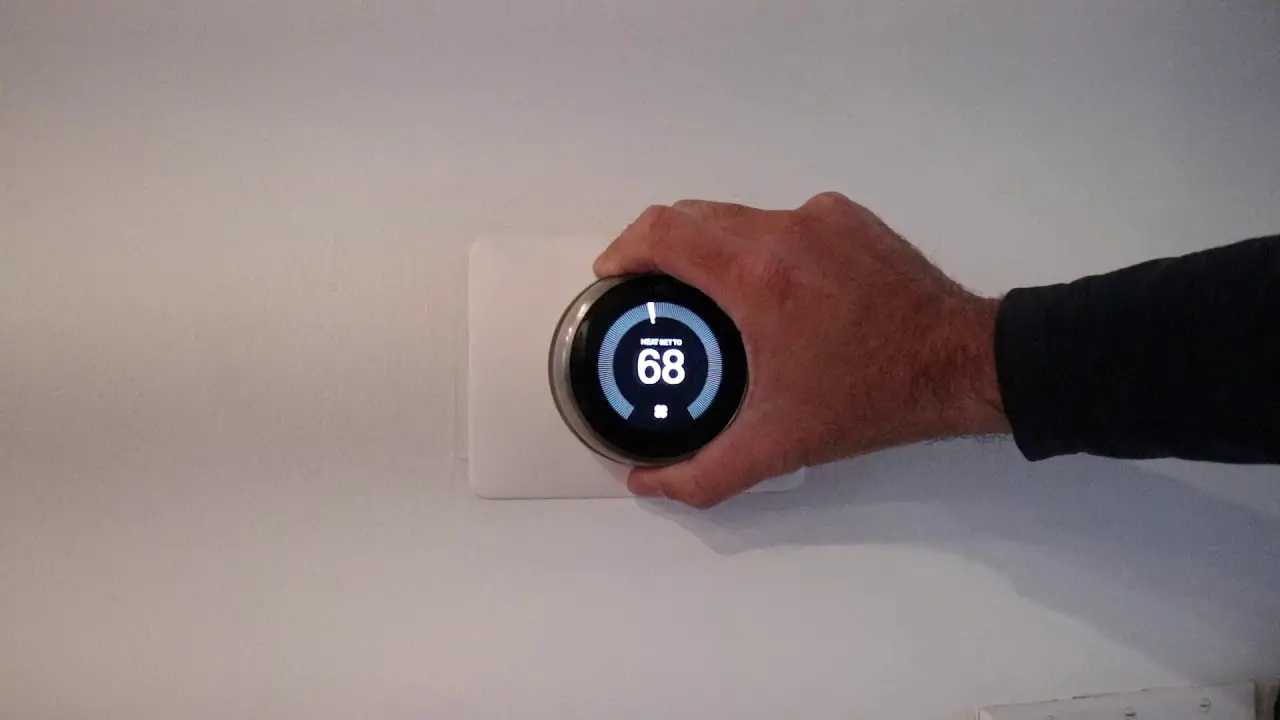
Remove Thermostat
To charge your Nest Thermostat, you need to remove it from the wall. This process is simple. Anyone can do it. Follow these steps to ensure you do it correctly.
Detach Display
First, locate the display on your Nest Thermostat. Gently pull the display towards you. Use both hands for a firm grip. The display should come off easily. If it doesn’t, check if it’s stuck.
Once detached, set the display aside. Make sure it doesn’t fall or get damaged. The display is delicate.
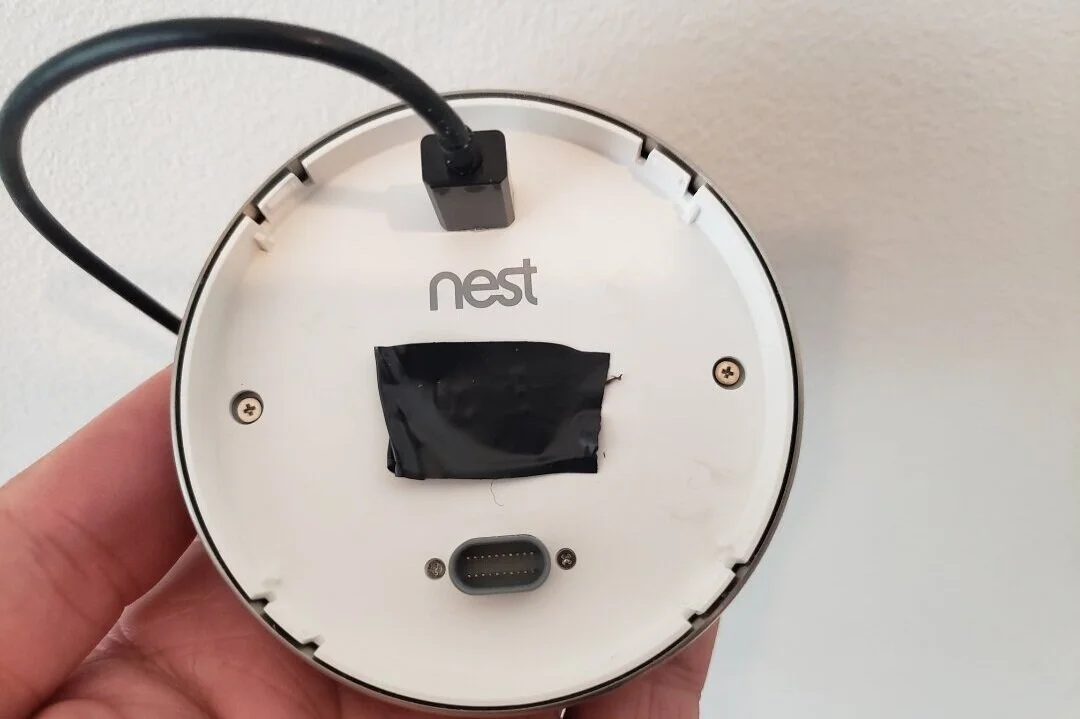
Disconnect Wires
Next, look at the base of the thermostat. You will see several wires connected. Take a photo of the wires for reference. This helps during reinstallation.
Carefully disconnect each wire. Do not force them out. Gently pull each wire to release it. Keep track of the wires to avoid confusion later.
Charge Device
Charging your Nest Thermostat is an essential skill for any homeowner looking to maintain an efficient and comfortable home environment. Whether your device has run out of battery or you simply want to ensure it’s always topped up, knowing how to charge your Nest Thermostat can save you from potential inconveniences. Let’s dive into the steps to keep your device charged and ready to manage your home’s temperature.
Use Usb Cable
First, you need a micro-USB cable, which is commonly used with many electronic devices. Locate the USB port on the back of your Nest Thermostat. Gently insert the micro-USB end into the port.
I remember the first time I needed to charge my Nest Thermostat, I was surprised at how easy it was. The USB port is easily accessible, and the whole process took less than a minute. It’s a straightforward task that anyone can handle.
Connect To Power Source
Once the USB cable is connected to your Nest Thermostat, you need to plug the other end into a power source. This can be a wall adapter, computer, or any USB power outlet. Ensure the power source is reliable to avoid any interruptions in charging.
It’s a good idea to use the wall adapter that came with your thermostat, if available. This ensures you’re using the correct voltage and prevents any potential issues. I once tried charging mine with an old phone adapter, and it took forever. Lesson learned!
Have you ever faced issues with your Nest Thermostat not holding a charge? Share your experiences and tips below. Keeping your device charged ensures it’s always ready to create the perfect home environment for you and your family.
Reinstall Thermostat
Reinstalling your Nest Thermostat is the final step in ensuring it charges correctly. You need to follow some simple steps to complete the process. This helps restore its functionality and ensures it runs efficiently.
Check Best Thermostat Pricing in Amazon
** As an Amazon Associate, I earn from qualifying purchases.
Reconnect Wires
First, reconnect the wires to the base. Make sure each wire goes into the correct terminal. Nest provides clear labels for each wire. Double-check your connections to avoid any errors. A secure connection is crucial for proper operation.
Attach Display
Once the wires are in place, attach the display. Align it with the base and push it gently. You should hear a click when it is secure. The display will light up, indicating it is properly connected. You can now proceed to set up your thermostat.

Credit: www.reddit.com
Power On
Charging a Nest Thermostat ensures it functions correctly. The thermostat needs enough power to control your HVAC system. If your thermostat isn’t powering on, it might need a charge.
Turn On Hvac System
First, ensure your HVAC system is turned on. The Nest Thermostat charges from the HVAC system. Without power, the thermostat won’t charge. Check your system’s main switch. Turn it on if it’s off. This step is crucial for charging.
Check Functionality
Once the HVAC system is on, check the thermostat’s display. The display should light up. If it does, your thermostat is charging. If the display stays dark, there may be a problem. Check the wiring connections. Loose wires can stop charging. Make sure all connections are tight.
Observe the Nest logo on the display. It should appear after a few moments. This confirms the thermostat is charging. If it doesn’t appear, the battery might be dead. Leave it connected for at least an hour. Check the display again after this period.
If your Nest Thermostat still doesn’t charge, consider contacting customer support. They can offer further assistance. Ensuring your thermostat is charged keeps your home comfortable.
Troubleshooting
Charging your Nest Thermostat should be a straightforward task, but sometimes, things don’t go as planned. In this section, we’ll cover common issues you might encounter and practical solutions to fix them. Let’s dive into some troubleshooting tips to get your thermostat back on track.
Common Issues
Sometimes, your Nest Thermostat might not charge properly. This can be due to various reasons:
- Faulty wiring
- Power issues with your HVAC system
- Software glitches
Have you ever found your thermostat stuck at a low battery warning despite being connected? This could be a sign of deeper issues. Don’t worry, many users face similar challenges.
Fixing Problems
First, ensure the wiring is correct. Incorrect connections can prevent proper charging. Double-check the wires against the installation manual.
If the wiring is fine, inspect your HVAC system. Sometimes, a power issue with the system can prevent the thermostat from charging. Ensure the system is turned on and functioning correctly.
Lastly, restart your Nest Thermostat. Go to the settings, select “Restart” and follow the prompts. This can resolve software-related glitches affecting charging.
These steps should help you troubleshoot effectively. Have you faced other issues? Share your experiences and solutions in the comments below!
Maintenance Tips
Maintaining your Nest Thermostat ensures it runs smoothly and lasts longer. Regular care, like charging, helps keep it performing at its best. Below are some essential maintenance tips to follow.
Regular Charging
Keep your Nest Thermostat charged to avoid interruptions. Regularly check the battery level. The device usually charges itself through the HVAC system. If it doesn’t, you may need to charge it manually. Use a USB cable to connect it to a power source. This keeps it ready to control your home’s climate.
Optimal Performance
Ensure your Nest Thermostat is fully charged for optimal performance. A low battery can cause it to malfunction. Regular charging helps the device work efficiently. Keep an eye on the battery indicator. If it drops too low, charge it immediately. This simple step helps maintain a comfortable home environment.

Credit: www.onehoursmarthome.com
Frequently Asked Questions
Does A Nest Thermostat Need Charging?
A Nest thermostat typically does not need charging. It draws power from your HVAC system’s wires. However, if the battery is low, it may require charging via USB temporarily.
What Happens When A Nest Thermostat Runs Out Of Battery?
The Nest thermostat stops functioning when the battery runs out. It disconnects from Wi-Fi and may lose settings. Recharge or replace the battery to restore functionality.
How Do You Change The Battery In A Nest Thermostat?
To change the battery in a Nest thermostat, pull the display off the base. Replace the old batteries with new AAA ones. Reattach the display to the base.
Does Nest Thermostat Need To Be Plugged In?
No, the Nest thermostat does not need to be plugged in. It uses your HVAC system’s wiring for power.
Conclusion
Charging your Nest Thermostat is straightforward. Follow the steps mentioned. Ensure proper connection and power source. Regularly check for updates and maintenance. These steps keep your device functioning smoothly. Always refer to the user manual for guidance. Now, your Nest Thermostat should be fully charged and ready.
Keep your home comfortable with this smart device. Happy charging!
Check Best Thermostat Pricing in Amazon
** As an Amazon Associate, I earn from qualifying purchases.