
Check Best Thermostat Pricing in Amazon
** As an Amazon Associate, I earn from qualifying purchases.
Cleaning your thermostat can improve its performance and extend its lifespan. A clean thermostat helps maintain accurate temperature readings.
Thermostats collect dust and dirt over time, which can interfere with their function. Regular cleaning ensures they work efficiently, saving energy and money. In this guide, you will learn simple steps to clean your thermostat. This process is quick and requires only basic tools.
Keeping your thermostat clean can prevent issues and keep your home comfortable. Let’s dive into the details and get your thermostat back in top shape.
Gather Your Supplies
Before you start cleaning your thermostat, it’s crucial to gather all necessary supplies. Having the right tools will make the job easier and more efficient. This section will guide you on what you need and how to ensure safety while cleaning.
Essential Cleaning Tools
To clean your thermostat, you need a few basic tools. First, get a soft cloth. Microfiber cloths work best. They won’t scratch the surface. Next, you need a small brush. A toothbrush will do. This will help you reach tight spots. Lastly, have a mild cleaning solution. You can make one with water and a few drops of dish soap.
Safety Precautions
Safety is important when cleaning your thermostat. First, turn off the power. This prevents any risk of electric shock. Next, wash your hands. Clean hands ensure you don’t transfer dirt. Also, avoid using harsh chemicals. They can damage the thermostat. Lastly, work in a well-lit area. Good lighting helps you see dust and dirt clearly.

Credit: www.reecenichols.com
Power Down The Thermostat
Before cleaning your thermostat, it’s crucial to power it down. This step ensures safety and prevents potential electrical issues. Failing to power down can lead to accidents or damage. Let’s explore how to do it safely.
Turning Off Power Source
First, locate the thermostat’s power source. It might be connected to a circuit breaker or a fuse box. Switch off the corresponding breaker or remove the fuse. This action cuts off the power supply to your thermostat.
Ensuring Safety
After turning off the power, double-check to ensure it’s off. Try adjusting the thermostat to see if it responds. If it doesn’t, you’re safe to proceed. This step guarantees there’s no electricity running through the device. Safety first!
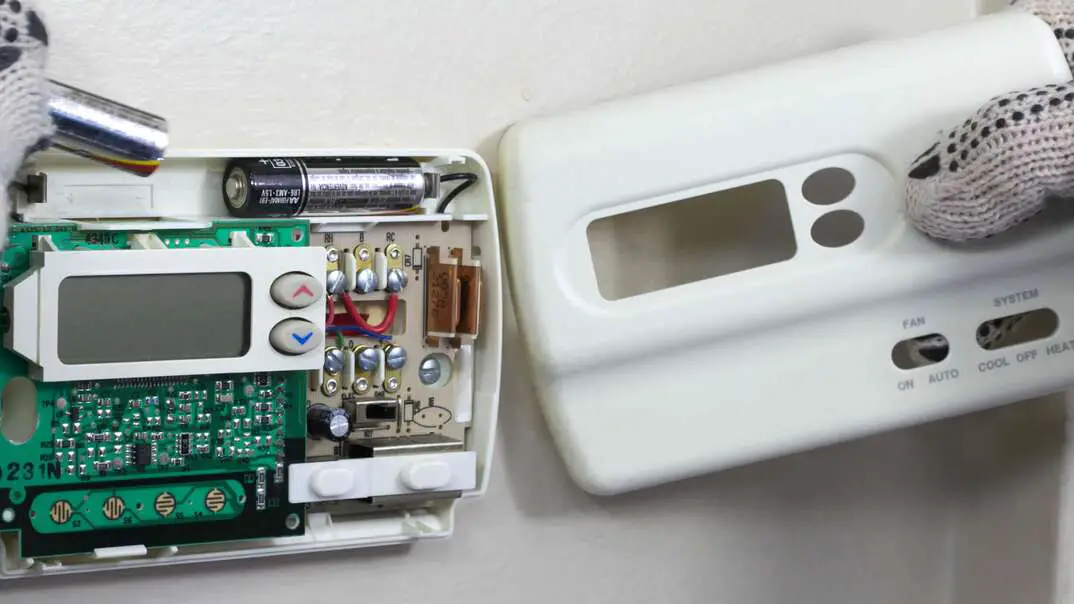
Access The Interior
To ensure your thermostat works well, you need to clean its interior. This process involves several steps, each crucial for maintaining a functional thermostat. Let’s explore how to access the interior of your thermostat.
Removing The Thermostat Cover
First, remove the thermostat cover. Most covers snap off easily. Use gentle pressure to avoid damaging the device. If you face resistance, check for screws. Some models have small screws securing the cover. Use a screwdriver to remove them carefully.
Identifying Key Components
Once the cover is off, identify the key components inside. Look for wires, screws, and the circuit board. The wires connect the thermostat to your heating and cooling system. The circuit board processes temperature readings. Take a moment to familiarize yourself with these parts. This helps in cleaning without disturbing essential connections.

Credit: www.youtube.com
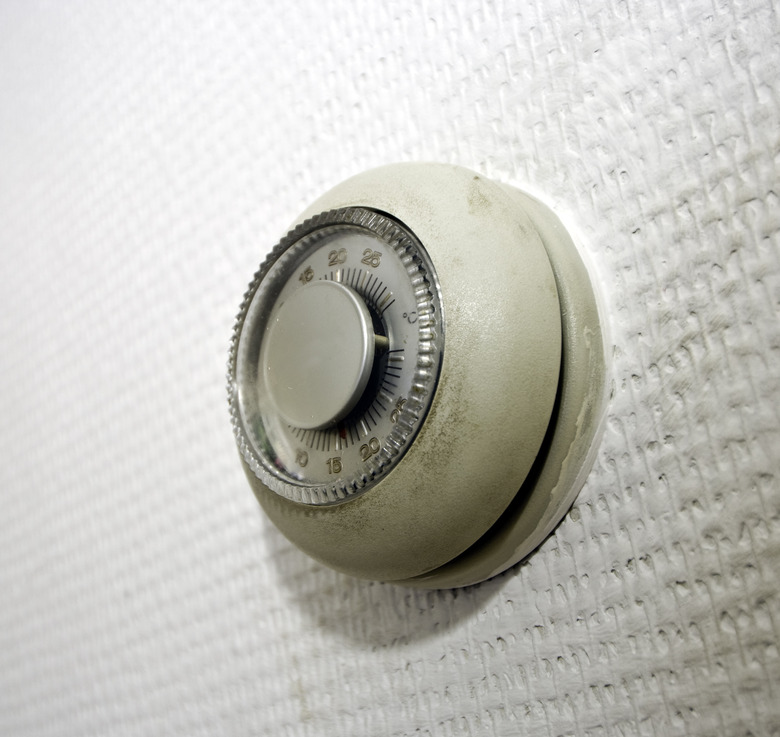
Clean The Exterior
Maintaining your thermostat’s exterior is essential for its longevity and efficiency. Dust and grime can accumulate over time. A clean thermostat not only looks better but also functions more effectively. Regular cleaning can prevent dust from interfering with the thermostat’s sensors.
Dusting The Outer Surface
Start by turning off the thermostat. Use a soft, dry cloth to wipe the surface. This will remove loose dust. Be gentle to avoid pressing any buttons accidentally. A microfiber cloth works best as it captures dust without scratching the surface.
Using Appropriate Cleaning Agents
If there’s grime or sticky residue, use a mild cleaning solution. Dampen a cloth with water mixed with a few drops of dish soap. Wipe the exterior gently. Do not spray the cleaner directly on the thermostat. This prevents liquid from seeping inside and causing damage.
For tougher stains, a small amount of rubbing alcohol on a cloth can help. Ensure the cloth is only slightly damp. Wipe the surface and dry it immediately with a clean cloth. Avoid using harsh chemicals as they can damage the thermostat’s finish.
Check Best Thermostat Pricing in Amazon
** As an Amazon Associate, I earn from qualifying purchases.
Clean The Interior
Keeping the interior of your thermostat clean is crucial. It ensures the device functions properly and maintains accurate temperature readings. Cleaning the interior involves careful handling of the device’s delicate parts.
Cleaning Electrical Contacts
First, turn off the power to the thermostat. This step prevents any risk of electric shock. Next, remove the thermostat cover. Locate the electrical contacts inside the unit. Use a soft, dry cloth to gently clean these contacts. Avoid using water or cleaning solutions. They can damage the contacts.
Removing Dust And Debris
Dust and debris can accumulate inside the thermostat. This buildup can affect its performance. Use a can of compressed air to blow out dust. Hold the can upright and aim it at the interior parts. Ensure all dust and debris are removed. If you see stubborn dirt, use a soft brush to gently sweep it away.
Regular cleaning of your thermostat’s interior helps maintain its efficiency. It also extends the device’s lifespan. Follow these steps to keep your thermostat in top condition.
Reassemble And Test
After cleaning your thermostat, it’s crucial to reassemble and test it. This ensures it works correctly. Follow these steps to complete the process.
Reattaching The Cover
First, align the cover with the thermostat body. Carefully snap it back into place. Ensure it fits snugly to prevent dust from entering. Tighten any screws if required. Make sure not to overtighten them. This can damage the unit. Check the cover for a secure fit.
Restoring Power And Testing Functionality
Once the cover is secure, restore power to the thermostat. Turn the power back on at the circuit breaker. Wait for the thermostat to power up. Check the display for proper functioning. Adjust the settings to test heating and cooling. Listen for the system to respond. Make sure the temperature readings are accurate. If something seems off, double-check your work. Ensure everything is correctly assembled.
Maintenance Tips
Maintaining a clean thermostat can help it function efficiently. Regular cleaning prevents dust buildup and ensures accurate temperature readings. Follow these maintenance tips to keep your thermostat in top shape.
Regular Cleaning Schedule
Dust the thermostat once a month. Use a soft, dry cloth to wipe the surface. Avoid using water or cleaning solutions. They can damage the device. Remove the cover gently. Use a small brush to clean inside.
Additional Care Instructions
Check the batteries. Replace them every six months. If the thermostat is near a kitchen or a bathroom, clean it more often. Grease and moisture can affect its performance. Ensure the area around the thermostat is clear. Avoid placing heat-producing devices nearby. Keep it away from direct sunlight.
Credit: www.hunker.com
Frequently Asked Questions
What Is The Best Way To Clean A Thermostat?
Clean a thermostat by first turning off the power. Use a soft brush or compressed air to remove dust. Wipe with a damp cloth. Avoid using harsh chemicals.
How Can You Check To See If Your Thermostat Is Bad?
Check if your thermostat is bad by testing for unresponsive buttons, inaccurate temperature readings, or frequent cycling.
How To Clean A Dirty Thermostat Sensor?
To clean a dirty thermostat sensor, gently wipe it with a soft cloth and mild soap solution. Rinse and dry thoroughly. Avoid using abrasive materials.
How To Clean A Thermostat In Honeywell?
Turn off the thermostat. Gently remove the cover. Use a soft brush or cloth to clean dust and debris. Reassemble and turn on.
Conclusion
Keeping your thermostat clean ensures it works efficiently. Regular cleaning prevents dust build-up. This can save energy and reduce bills. Use a soft cloth and gentle cleaner. Don’t forget to clean the surrounding area. This step is often overlooked. A clean thermostat means a comfortable home.
It’s a quick task with big benefits. Try to make it a routine. Your thermostat will thank you. So will your wallet. Happy cleaning!
Check Best Thermostat Pricing in Amazon
** As an Amazon Associate, I earn from qualifying purchases.