
Check Best Thermostat Pricing in Amazon
** As an Amazon Associate, I earn from qualifying purchases.
Thermostat wires are usually 18-gauge. This wire size balances safety and efficiency for most home systems.
But why is wire gauge important? Understanding the correct gauge for thermostat wires is crucial. It ensures your heating and cooling systems run smoothly. Too thin, and the wires may overheat. Too thick, and they become hard to work with.
The 18-gauge wire is the industry standard, providing the right balance for most applications. In this post, we’ll explore why this size is used. We’ll also look at different scenarios and exceptions. By the end, you’ll know which wire to choose for your thermostat. This knowledge helps in both installations and troubleshooting. Ready to learn more? Let’s dive in.

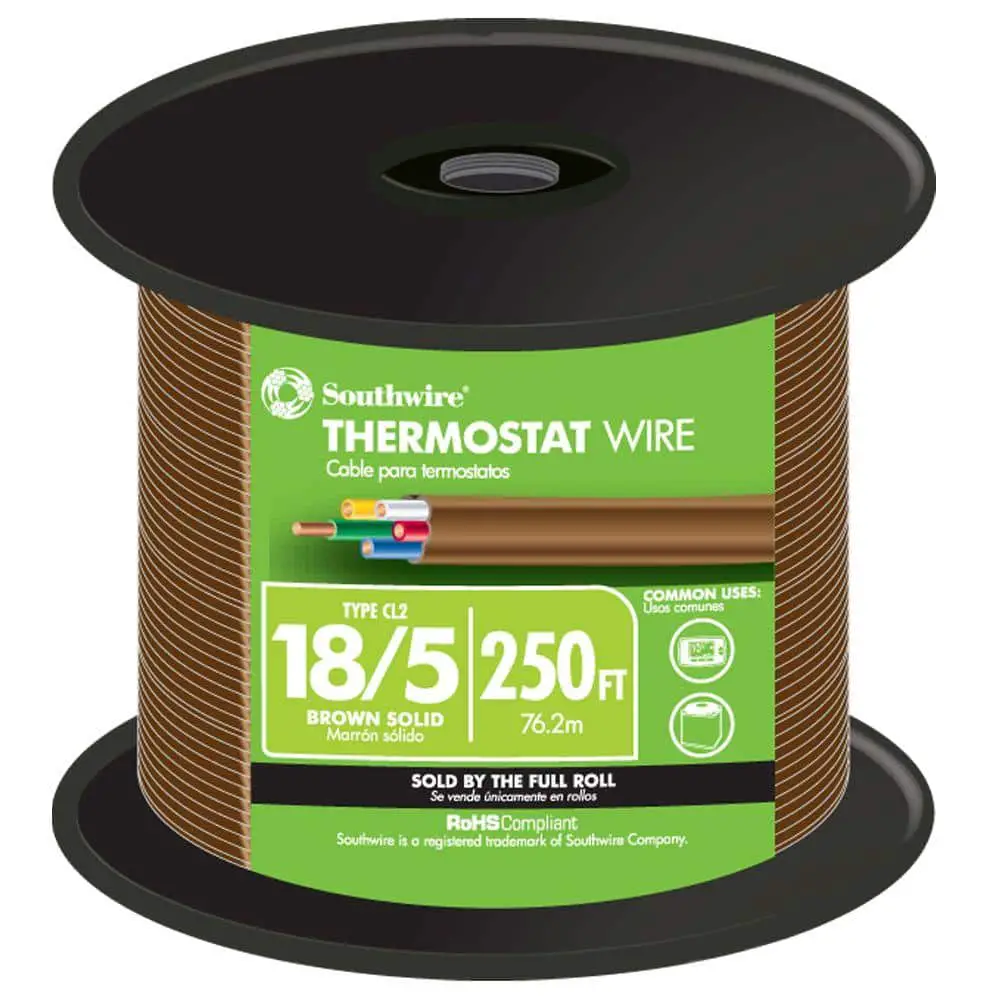
Credit: www.amazon.com
Introduction To Thermostat Wire
Thermostat wire is a crucial component in any heating, ventilation, and air conditioning (HVAC) system. It connects your thermostat to your HVAC unit, enabling you to control the temperature of your home. Understanding the gauge of thermostat wire can help you ensure that your system runs efficiently.
When I first installed a smart thermostat in my home, I was puzzled by the various wires. It took some research to understand their purpose and the importance of the wire gauge. This knowledge can make a significant difference in your HVAC system’s performance.
Purpose Of Thermostat Wire
The primary purpose of thermostat wire is to transmit signals from your thermostat to your HVAC system. These signals tell your system when to heat or cool your home, ensuring a comfortable environment.
Each wire in the thermostat cable has a specific function. For instance, the red wire typically connects to the power source, while the white wire may control the heating system. Knowing the function of each wire can help you troubleshoot any issues that arise.
Common Uses
Thermostat wire is commonly used in residential and commercial HVAC systems. It connects your thermostat to various components like furnaces, air conditioners, and heat pumps.
It’s also used in smart home systems. For instance, if you have a smart thermostat, the wire gauge must be compatible with the new device to ensure proper function. This compatibility can save you time and money on repairs.
Have you ever wondered why your HVAC system sometimes fails to respond? The answer might lie in the thermostat wire gauge. Ensuring you have the correct gauge can make all the difference in maintaining a comfortable home.

Credit: www.systoncable.com
Importance Of Wire Gauge
Choosing the right thermostat wire gauge is crucial for the efficiency and safety of your heating and cooling system. The gauge determines how much electrical current the wire can handle and how well it can maintain the system’s performance. Let’s dive into why wire gauge matters so much.
Impact On Performance
Wire gauge directly affects the performance of your thermostat. Thicker wires (lower gauge numbers) can carry more current without overheating. This ensures your thermostat gets the power it needs to function properly.
Have you ever noticed your thermostat acting erratically? It might be due to the wrong wire gauge. Using a wire that’s too thin can cause voltage drops. This makes your system work harder, leading to inconsistent temperatures and higher energy bills.
Imagine you are setting the temperature to 72 degrees, but it keeps fluctuating. That’s frustrating, right? Correct wire gauge can prevent this. Ensure you check the manufacturer’s recommendations for the best results.
Safety Considerations
Safety is another critical reason to choose the right wire gauge. Thinner wires can overheat if too much current passes through them. This can lead to electrical fires, posing a serious risk to your home and family.
Think about it: would you rather spend a little extra time choosing the right wire or risk a potential fire hazard? Always prioritize safety by ensuring your wire gauge matches your system’s requirements.
Moreover, proper wire gauge helps in preventing short circuits. It ensures the wire insulation stays intact, reducing the risk of dangerous electrical faults. This is why you should always follow the recommended guidelines for wire gauge.
Remember, the right wire gauge is not just a technical detail; it’s a crucial factor for both performance and safety. Always double-check before making your final choice.
Standard Thermostat Wire Gauges
Thermostat wires are essential for connecting your thermostat to your heating and cooling systems. Different gauges of wire serve distinct purposes. Choosing the right gauge ensures your system operates efficiently. Let’s explore the standard thermostat wire gauges.
18-gauge Wire
18-gauge wire is the most common choice for thermostat wiring. It strikes a balance between strength and flexibility. This gauge is suitable for most residential HVAC systems. It supports low voltage, making it safe for home use. The 18-gauge wire is also easy to handle and install.
20-gauge Wire
20-gauge wire is thinner compared to 18-gauge. It is less common but still used in some systems. This gauge is often found in smaller, simpler setups. It is more flexible but less durable. Ensure your system can operate with 20-gauge wire before using it.
Choosing The Right Wire Gauge
Thermostat wire typically uses 18-gauge wire. This thickness balances durability and flexibility. It ensures efficient signal transmission.
Check Best Thermostat Pricing in Amazon
** As an Amazon Associate, I earn from qualifying purchases.
Factors To Consider
When choosing the wire gauge for your thermostat, several factors come into play. First, check the manufacturer’s recommendations. They often provide guidelines specific to their systems. Second, consider the type of thermostat you’re using. Smart thermostats may require a different gauge than traditional models. Third, think about the wiring configuration in your home. Older homes might have different requirements than newer constructions.Wire Length And Resistance
The length of the wire and its resistance are critical. The longer the wire, the more resistance it will have. This can affect the efficiency of your thermostat. Imagine running a marathon. The longer the race, the more effort you need to maintain the same speed. Similarly, longer wires need to be thicker to handle the resistance and maintain efficiency. For instance, if your thermostat is far from the HVAC system, you might need an 18-gauge wire instead of a 20-gauge. This ensures that signals are transmitted effectively without loss of power. Have you ever noticed a delay in your thermostat’s response? It could be due to using the wrong wire gauge. By considering these factors, you can ensure that your thermostat functions efficiently and your home stays comfortable year-round. What other factors have you considered when choosing the right wire gauge for your thermostat?Installation Tips For Diyers
Choosing the right wire gauge is crucial for thermostat installation. Most thermostats use 18-gauge wire. This ensures proper function and safety.
Installing a thermostat wire can seem intimidating, especially if you’re diving into a DIY project for the first time. However, with the right tools and a clear step-by-step guide, you can tackle this task efficiently. Whether you’re upgrading an old thermostat or setting up a new one, following these installation tips will make your job easier and more enjoyable. ###Tools Needed
Before you start, gather all necessary tools. This will save you time and frustration. – Wire Strippers: Essential for removing the insulation from the wire ends. – Screwdrivers: Both flathead and Phillips to handle different screws. – Drill: Useful for making new holes if required. – Fish Tape: Helps in guiding the wire through walls. – Voltage Tester: Ensures the wires are not live before you touch them. Having these tools ready will streamline your installation process. ###Step-by-step Guide
#### 1. Turn Off the Power Before you start, shut off the power to your HVAC system. Use the voltage tester to confirm no current is flowing. #### 2. Remove the Old Thermostat Carefully detach the old thermostat from the wall. Take note of the existing wire connections. Labeling each wire with tape can be incredibly helpful. #### 3. Install the New Thermostat Base Mount the new thermostat base onto the wall. Use a level to ensure it’s perfectly straight. Secure it with screws. #### 4. Connect the Wires Using your wire strippers, remove about half an inch of insulation from the ends of each wire. Connect the wires to the corresponding terminals on the new thermostat. Tighten the screws to secure the connections. #### 5. Attach the Thermostat Faceplate Snap the thermostat faceplate onto the base. Make sure it clicks into place firmly. #### 6. Restore the Power Turn the power back on to your HVAC system. Test the new thermostat to ensure it’s working correctly. #### 7. Program Your Thermostat Follow the manufacturer’s instructions to set up the thermostat according to your needs. This might include setting the date, time, and preferred temperature settings. Installing a thermostat wire doesn’t have to be a daunting task. With the right tools and a clear plan, you can handle this DIY project confidently. What challenges have you faced in your home improvement projects, and how did you overcome them? Share your experiences in the comments below!Common Mistakes To Avoid
When dealing with thermostat wires, there are several common mistakes people often make. These mistakes can lead to inefficient heating or cooling, costly repairs, and even safety hazards. Being aware of these pitfalls can save you time, money, and frustration.
Incorrect Gauge Selection
One of the most frequent errors is choosing the wrong gauge wire. The gauge of a wire refers to its thickness; using the incorrect gauge can cause your thermostat to malfunction.
For instance, using a wire that is too thin can lead to overheating and potential fire hazards. On the other hand, a wire that is too thick might be difficult to maneuver and connect properly.
Always check your thermostat’s manual for the recommended wire gauge. This ensures compatibility and optimal performance.
Improper Connections
Another common mistake is making improper connections. Poor connections can disrupt the signal between the thermostat and your HVAC system.
Loose or corroded connections can lead to intermittent functionality. This can result in inconsistent temperatures and increased energy bills.
Make sure connections are tight and secure. If you’re unsure, consider hiring a professional to inspect your work.
Have you ever faced issues with your thermostat due to these mistakes? Share your experiences and tips in the comments below!
Maintaining Thermostat Wiring
Maintaining thermostat wiring is crucial for efficient home temperature control. Proper care ensures your system runs smoothly without unexpected breakdowns. Regular checks can prevent costly repairs and keep your home comfortable year-round.
Regular Inspections
Regular inspections can help you spot issues early. Check the thermostat wire for any signs of wear or damage. Look for frayed wires, loose connections, or discoloration. These can indicate problems that need fixing. Also, ensure the wire is securely connected to the thermostat and HVAC system.
Inspect the wire insulation too. Insulation damage can lead to short circuits or system failures. Use a flashlight to see clearly and check every part of the wire. Regular inspections help maintain your thermostat’s efficiency and longevity.
Troubleshooting Issues
Sometimes, thermostat wiring issues arise unexpectedly. If your thermostat is unresponsive, the wiring might be the culprit. Check if the wire is properly connected. Loose connections can cause the system to malfunction. Reconnect any loose wires firmly.
If the problem persists, use a multimeter to check the wire’s continuity. This tool helps identify breaks or faults in the wire. You can also check for voltage to ensure the wire is transmitting power correctly. If you find any issues, replacing the damaged wire might be necessary.
Following these steps can help maintain your thermostat wiring effectively. Regular care and timely troubleshooting keep your system running smoothly.
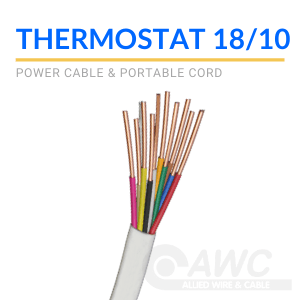
Credit: www.awcwire.com
Frequently Asked Questions
What Gauge Is Standard Thermostat Wire?
Standard thermostat wire is typically 18 gauge. This wire size is common for most residential HVAC systems.
Can I Use 22 Gauge Wire For A Thermostat?
Yes, you can use 22 gauge wire for a thermostat. Ensure it matches the manufacturer’s specifications.
Is My Wire 12 Or 14 Gauge?
Check the wire insulation. A 12-gauge wire is thicker than a 14-gauge wire. Use a wire gauge tool for accuracy.
What Gauge Wire Is Used In Hvac?
The common wire gauge used in HVAC systems is 14 or 12 AWG. It depends on the system’s amperage requirements.
Conclusion
Choosing the right gauge for thermostat wire is essential. It impacts performance and safety. Always consider your system’s needs. Use the correct wire gauge to ensure reliability. Consult a professional if unsure. Proper wiring leads to efficient heating and cooling.
Make informed choices for a comfortable home.
Check Best Thermostat Pricing in Amazon
** As an Amazon Associate, I earn from qualifying purchases.