
Check Best Thermostat Pricing in Amazon
** As an Amazon Associate, I earn from qualifying purchases.
To use an Emerson thermostat, first, power it on. Set the mode to heat or cool.
Adjust the temperature using the buttons. Emerson thermostats are popular for their reliability and ease of use. Whether you need to warm up during winter or cool down in summer, knowing how to operate your thermostat is essential. With simple controls, you can manage your home’s climate efficiently.
In this guide, we will walk you through the basic steps to get your Emerson thermostat working smoothly. Understanding these steps will help you maintain a comfortable environment in your home. Let’s dive into the details to make sure you get the most out of your Emerson thermostat.
Introduction To Emerson Thermostat
The Emerson Thermostat offers a modern solution for home temperature control. Its sleek design and advanced features make it a top choice for homeowners. Whether you want to save on energy bills or ensure comfort, this thermostat can help.
Features
The Emerson Thermostat includes a large, easy-to-read display. You can adjust settings with a simple touch. It also supports Wi-Fi connectivity, allowing remote control via a smartphone app. This feature ensures you can manage your home’s temperature from anywhere.
The device is compatible with most HVAC systems. It also has programmable schedules, which means you can set different temperatures for different times of the day. The thermostat sends alerts for maintenance issues. This helps in maintaining optimal performance.
Benefits
One key benefit of the Emerson Thermostat is energy efficiency. By programming schedules, you can reduce energy waste. This can lead to significant savings on utility bills. Remote control offers convenience. You can adjust the temperature without being home.
The user-friendly interface makes it easy to operate. Even if you are not tech-savvy, you can still use it effectively. The maintenance alerts help keep your HVAC system in good shape. This can prolong the lifespan of your system.
Overall, the Emerson Thermostat combines modern features with practical benefits. It provides a reliable way to manage home temperature, ensuring comfort and efficiency.

Credit: www.youtube.com
Getting Started
Starting with your new Emerson Thermostat can seem daunting. Don’t worry, this guide will help you. In this section, we’ll go through the basics. We’ll begin with the unboxing and then move on to the components overview.
Unboxing
First, open the box carefully. Inside, you will find several items. These include the thermostat, a wall plate, and screws. The box also contains a user manual. Keep the manual handy for later.
Components Overview
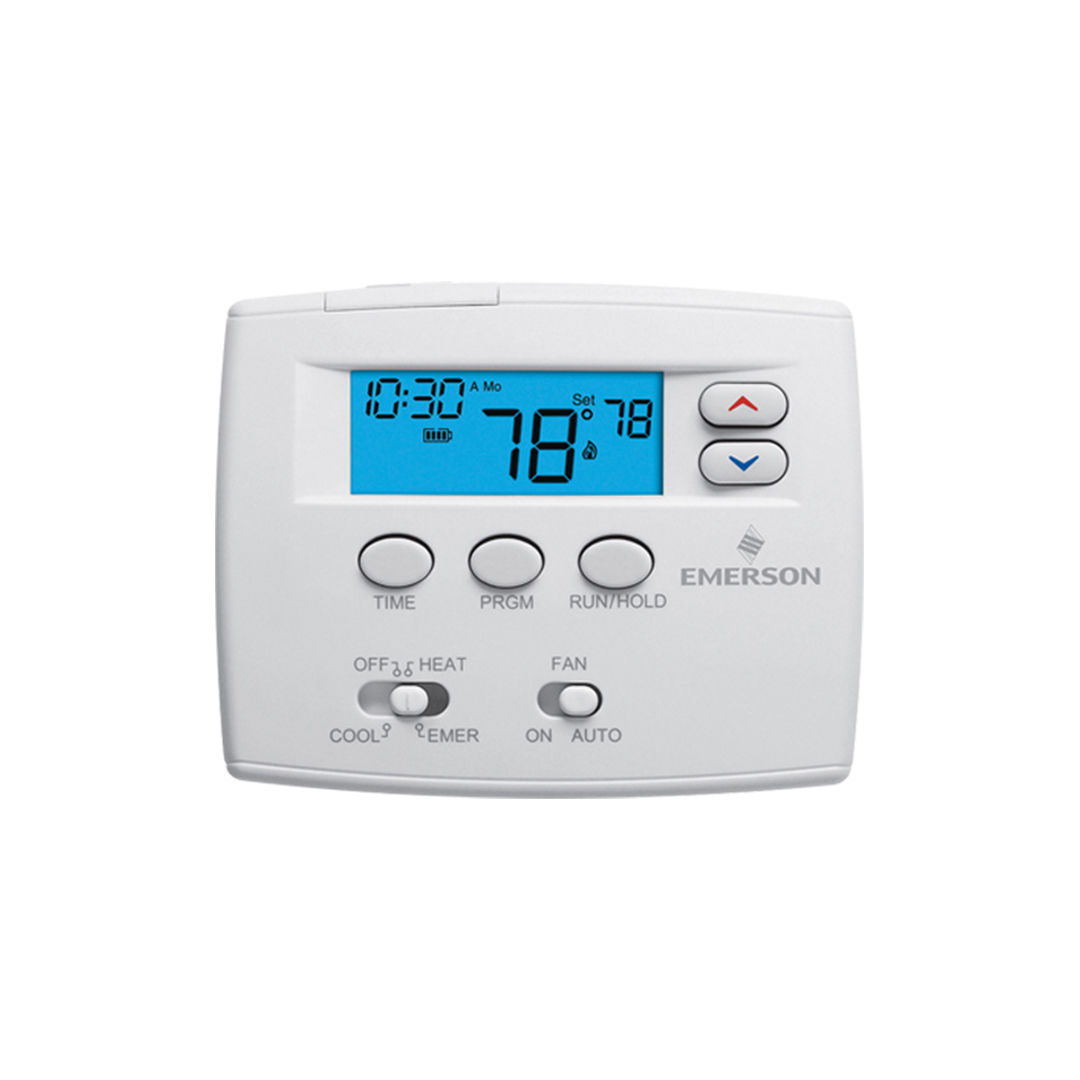
Let’s look at each part of the thermostat. The main unit has a display screen. This shows your home’s temperature. There are buttons below the screen. Use these to adjust settings. The back of the main unit connects to the wall plate.
The wall plate holds the thermostat in place. It also has wires that connect to your home’s HVAC system. The screws are for mounting the wall plate. Make sure you have a screwdriver ready. Follow these steps, and you’ll be on your way to a comfortable home.
Installation Process
The installation process of an Emerson thermostat is straightforward. Follow these steps to get your thermostat up and running. You don’t need to be a tech expert. Just have patience and the right tools.
Tools Needed
Before you begin, gather the necessary tools. You will need a screwdriver, wire stripper, and a drill. Ensure you have batteries for the thermostat if it requires them. A level can help with proper mounting.
Mounting The Thermostat
First, turn off the power to your HVAC system. Safety is essential. Remove the old thermostat, noting where each wire connects. Use labels if needed. Attach the mounting plate of the new thermostat to the wall. Use a level to ensure it is straight. Mark the screw holes with a pencil. Drill pilot holes if necessary.
Next, connect the wires to the terminals on the new thermostat. Match the labels to the correct terminals. Insert the screws and secure the thermostat to the wall. Install the batteries if required. Turn the power back on and test the thermostat. Follow the user manual for any setup instructions.
Credit: webapps.copeland.com
Wiring Instructions
Setting up your Emerson thermostat can seem daunting at first, but it’s quite manageable with the right guidance. One of the most crucial steps is wiring the thermostat correctly. Here’s a simple guide to help you through the wiring process. Follow these steps to ensure your thermostat is wired correctly and functions as expected.
Identifying Wires
First, you need to identify the wires coming from your wall. Typically, these wires are color-coded, which makes the process easier. Common wire colors and their functions are:
- Red (R): Power from the transformer
- White (W): Heating
- Yellow (Y): Cooling
- Green (G): Fan
- Blue or Black (C): Common wire (provides continuous power)
Use a flashlight to see the wires clearly and ensure you have identified each one correctly. Double-check the labeling on your old thermostat if you’re unsure about any wire.
Connecting Wires
Once you have identified the wires, it’s time to connect them to your new Emerson thermostat. Start by turning off the power to your HVAC system to avoid any electrical mishaps.
Next, refer to the wiring diagram provided with your Emerson thermostat. Typically, you’ll see terminals labeled with letters corresponding to the wire colors. Here’s a quick example:
| Wire Color | Terminal |
|---|---|
| Red (R) | R or RH |
| White (W) | W |
| Yellow (Y) | Y |
| Green (G) | G |
| Blue or Black (C) | C |
Connect each wire to its corresponding terminal. Make sure the connections are secure. Loose wires can cause your thermostat to malfunction.
After connecting the wires, tuck them back into the wall gently. Attach the thermostat to the wall plate and turn the power back on.
Did you know that correctly connecting the wires can improve the efficiency of your HVAC system? Share your thoughts or any challenges you faced in the comments below!
Setup And Configuration
Setting up and configuring your Emerson thermostat is simple. Follow the steps below to ensure proper installation and optimal performance. You’ll be up and running in no time. Let’s dive into the specifics of powering on and completing the initial setup.
Powering On
First, you need to power on your Emerson thermostat. Locate the power button. It is usually on the front or side. Press and hold the button for a few seconds. The display screen will light up. This indicates that your thermostat is now active.
Initial Setup
Once powered on, the initial setup begins. The thermostat will prompt you to select your preferred language. Use the up and down arrows to scroll through the options. Press the ‘Select’ button to confirm your choice.
Next, you will set the date and time. This is crucial for the thermostat’s scheduling features. Use the same arrows to adjust the numbers. Press ‘Select’ to move to the next field. Repeat this process until the date and time are correct.
After setting the date and time, choose your temperature scale. The options are Fahrenheit or Celsius. Select the one you are comfortable with. The thermostat will now ask for your home’s heating and cooling system type. This helps the thermostat optimize its performance.
Check Best Thermostat Pricing in Amazon
** As an Amazon Associate, I earn from qualifying purchases.
Lastly, you will connect the thermostat to your Wi-Fi network. This step ensures you can control the thermostat remotely. Follow the on-screen instructions to enter your Wi-Fi details. Once connected, the setup process is complete.
Congratulations! Your Emerson thermostat is now set up and ready to use.
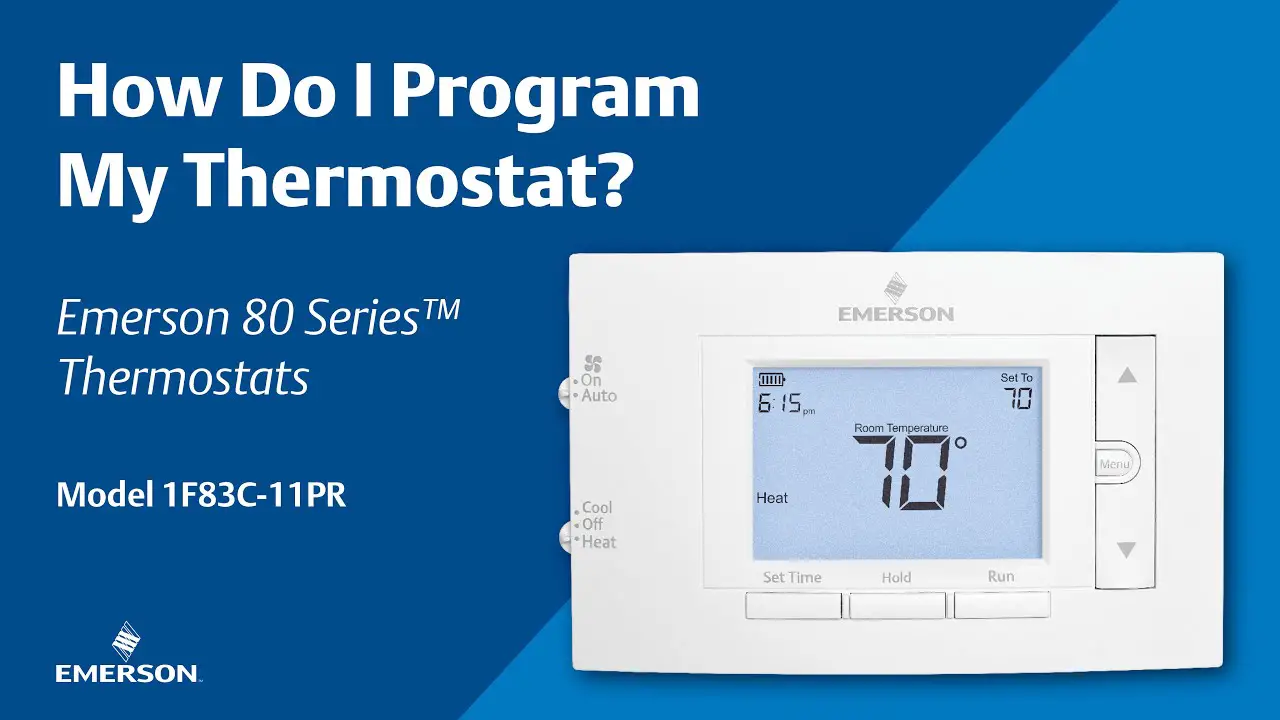
Programming The Thermostat
Setting up your Emerson thermostat can significantly enhance your comfort and energy efficiency. Programming the thermostat correctly is essential to reap these benefits. Let’s dive into the steps to make your thermostat work for you.
Setting Time And Date
First, ensure your thermostat displays the correct time and date. This step is crucial for accurate scheduling.
Here’s how you can do it:
- Press the “Menu” button on the thermostat.
- Select “Time” and adjust the hours and minutes using the arrow buttons.
- Next, select “Date” and set the month, day, and year.
- Confirm your settings by pressing “OK”.
Having the correct time and date ensures your schedules run as planned. It’s a small step with significant impact.
Creating Schedules
Programming your thermostat involves creating schedules that match your daily routine. This helps in saving energy and maintaining comfort.
Follow these steps to create schedules:
- Press the “Menu” button and select “Schedules”.
- Choose the days you want to set a schedule for. You can pick individual days or group them (e.g., weekdays).
- Set the time for each period (morning, day, evening, night) and adjust the temperature accordingly.
- Repeat for other periods and days as needed.
- Save your schedule by pressing “Done”.
Think about your daily routine. Do you wake up at 7 AM? Set the morning schedule to start just before that. Do you leave home at 9 AM? Adjust the day schedule accordingly.
Having a well-thought-out schedule can make a significant difference. You’ll notice your home is always at the perfect temperature when you need it to be.
Have you found any specific schedules that work best for you? Share your experience in the comments below!
Advanced Settings
Adjust the Emerson Thermostat’s advanced settings to control temperature and system modes. Easily customize your comfort preferences.
The advanced settings on an Emerson thermostat can significantly enhance your home comfort and energy efficiency. While the basic functions are straightforward, diving into these settings can optimize your heating and cooling system. Let’s explore how you can make the most of these features.Temperature Calibration
Temperature calibration ensures your thermostat reads the room temperature accurately. Over time, thermostats can become slightly off, leading to inefficient heating or cooling. To calibrate, go to the settings menu and find the calibration option. You might need a reliable thermometer to compare the temperatures. Adjust your thermostat settings until it matches the thermometer reading. This small tweak can make a big difference in maintaining your desired comfort level.Energy Saving Modes
Energy-saving modes are designed to reduce your energy consumption without compromising comfort. These settings are perfect for when you’re away from home or during sleeping hours. Activate the energy-saving mode through the settings menu. You can set specific temperatures for different times of the day. For instance, set a lower temperature during the winter nights or higher during summer afternoons when you’re not home. This way, you save energy and lower your utility bills. Have you ever tried tweaking these settings to see how much you can save? It’s like a little experiment with immediate benefits. Give it a go and notice the difference in your energy bill next month.Troubleshooting
Dealing with issues related to your Emerson thermostat can be frustrating, especially when you rely on it for maintaining a comfortable home environment. However, troubleshooting common problems can help you get it back on track. Here’s a guide to resolving typical issues you might face with your Emerson thermostat.
Common Issues
Several common issues can arise with your Emerson thermostat. Sometimes, the display may be blank or the thermostat might not respond to your inputs. You might notice the temperature reading is inaccurate or the HVAC system isn’t turning on or off as expected.
If your thermostat isn’t working, check the power supply first. Ensure your thermostat is securely attached to the wall plate and that the circuit breaker is on. Also, inspect the batteries and replace them if necessary.
Another common problem is connectivity issues with Wi-Fi enabled models. Make sure your network is functioning correctly and that the thermostat is within range of the router.
Resetting The Thermostat
Resetting your Emerson thermostat can resolve a variety of issues. If you find that simple troubleshooting steps don’t work, a reset might be necessary. It’s like giving your thermostat a fresh start.
To reset your Emerson thermostat, locate the reset button which is usually behind the faceplate. Press and hold the reset button for about five seconds. Release the button when the display goes blank and then reappears.
After resetting, you may need to reconfigure your settings. This includes setting the time, date, and preferred temperature ranges. Ensure you reconnect to your Wi-Fi network if you have a smart thermostat.
Have you ever had to reset your thermostat? What was your experience like? Share your tips and insights in the comments below to help others facing similar issues.
Maintenance Tips
Regular maintenance keeps your Emerson thermostat in good condition. It ensures efficient performance and extends the life of your device. Follow these simple tips to maintain your thermostat with ease.
Cleaning The Thermostat
Dust and dirt can build up on your thermostat over time. Clean the exterior using a soft, dry cloth. Avoid using water or cleaning sprays. Remove the cover gently to clean the inside. Use a small brush or vacuum cleaner with a soft brush attachment. Clean the sensors and other components carefully. This ensures accurate readings and efficient operation.
Battery Replacement
Many Emerson thermostats use batteries to function. Check the battery status regularly. Replace the batteries if the display is dim or blank. Use high-quality batteries for better performance. Follow the instructions in the user manual for battery replacement. Typically, you need to remove the thermostat from the wall mount. Replace the old batteries with new ones. Ensure the correct polarity. Reattach the thermostat to the wall mount. This simple task ensures uninterrupted operation.

Credit: thermostat.guide
Frequently Asked Questions
How Do I Operate My Emerson Thermostat?
To operate your Emerson thermostat, press the “Menu” button. Use the arrow keys to navigate options. Adjust temperature using the “+” and “-” buttons. Set schedules via the “Schedule” menu. Refer to the user manual for detailed instructions.
Should Emerson Thermostat Be On Auto Or On?
Set your Emerson thermostat to “auto” for better energy efficiency. It adjusts automatically, maintaining your desired temperature.
How Do I Change The Settings On My Emerson Thermostat?
Press the “Menu” button on your Emerson thermostat. Use the arrow keys to navigate and select “Settings. ” Adjust the desired settings.
How Do You Hold The Temperature On An Emerson Thermostat?
To hold the temperature on an Emerson thermostat, press the “Hold” button. Adjust the desired temperature using the up/down arrows.
Conclusion
Mastering your Emerson thermostat can make home temperature control easy. Follow the steps above to ensure your settings are correct. Regularly check and adjust for comfort. With these tips, you’ll keep your home cozy year-round. Remember, the key is consistency.
Keep experimenting until you find the perfect settings. Happy heating and cooling!
Check Best Thermostat Pricing in Amazon
** As an Amazon Associate, I earn from qualifying purchases.