
Check Best Thermostat Pricing in Amazon
** As an Amazon Associate, I earn from qualifying purchases.
Want to wire in a Nest thermostat? It can seem tricky, but it’s doable.
A Nest thermostat brings smart technology to your home, saving energy and money. Installing it yourself can be a rewarding project, and you don’t need to be an expert. With clear instructions and a bit of patience, you can get it done.
This guide will walk you through the steps, making the process simple and straightforward. We’ll explain the tools you need and the best practices to ensure a smooth installation. By the end, you’ll feel confident in wiring in your Nest thermostat. Let’s get started on this home improvement journey together.
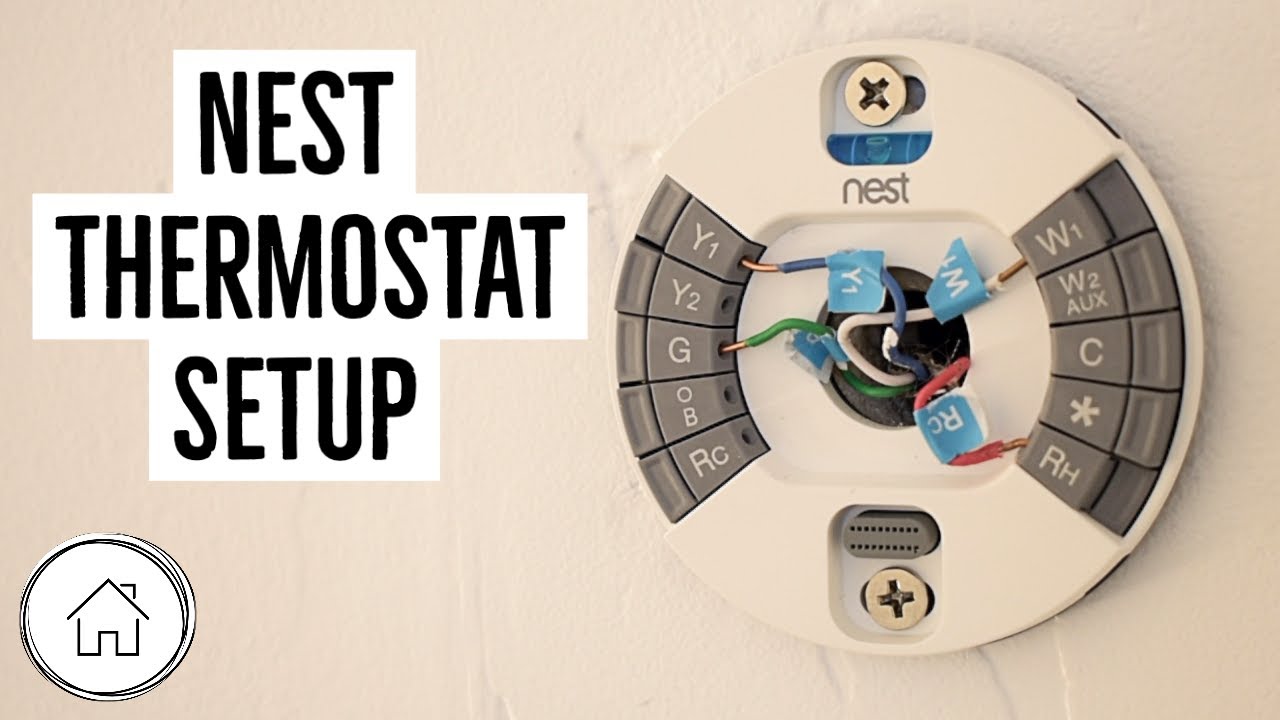
Credit: www.youtube.com
- Introduction To Nest Thermostat
- Tools And Materials Needed
- Preparing For Installation
- Removing The Old Thermostat
- Installing The Nest Thermostat Base
- Mounting The Nest Display
- Setting Up The Nest Thermostat
- Connecting To Wi-fi And App
- Testing And Troubleshooting
- Tips For Optimal Use
- Frequently Asked Questions
- Conclusion
Introduction To Nest Thermostat
Wiring in a Nest Thermostat might seem daunting, but it’s actually quite manageable. If you’re looking to upgrade to a smart thermostat, the Nest Thermostat offers a blend of convenience, energy savings, and modern design. This guide will walk you through the basics, ensuring you understand what makes this device a great addition to your home.
Benefits Of Smart Thermostats
Smart thermostats, like the Nest, bring a lot to the table. They help you save money by optimizing your heating and cooling schedule based on your habits. You can control them from your phone, whether you’re at home or away.
They also provide insights into your energy usage. This means you can make informed decisions to reduce your energy consumption. It’s not just about comfort—it’s about efficiency and savings.
Features Of The Nest Thermostat
The Nest Thermostat is packed with features designed to make your life easier. One of its standout features is the auto-schedule. It learns your routine and adjusts temperatures accordingly. No more fiddling with settings every day.
Another great feature is the remote control via the Nest app. Imagine adjusting your home’s temperature while you’re still at the office. It’s that easy.
Additionally, the Nest Thermostat integrates seamlessly with other smart devices. You can connect it to your Google Home or Amazon Alexa for voice control. It’s all about making your home smarter and your life simpler.
Have you ever thought about how much time you spend adjusting your thermostat? With Nest, you can set it and forget it. This smart device takes care of the rest.
Ready to take the plunge? Wiring in your Nest Thermostat is the first step towards a smarter, more efficient home. Let’s get started!
Credit: www.youtube.com
Tools And Materials Needed
Installing a Nest Thermostat can be a game-changer for your home’s energy efficiency. To ensure a smooth and safe installation, you need to have the right tools and materials on hand. Let’s dive into what you will need to get the job done efficiently.
Required Tools
Having the right tools makes the installation process straightforward and hassle-free. Here’s a list of essential tools you will need:
- Screwdriver: A standard Phillips-head screwdriver will suffice for most of the tasks.
- Drill: If your wall doesn’t have existing holes, a drill will be necessary.
- Wire Stripper: This is crucial for preparing the wires for connection.
- Level: To ensure your thermostat is mounted straight.
- Voltage Tester: For safety, always check that the power is off before you begin working.
Necessary Materials
In addition to tools, you’ll need some specific materials to complete your installation. Make sure you have the following:
- Nest Thermostat: The star of the show! Ensure you have the correct model for your system.
- Wall Plate: This often comes with the thermostat but double-check. It helps cover any unsightly holes or marks from your old thermostat.
- Mounting Screws: These are typically included with the Nest Thermostat package.
- Wire Labels: These will help you keep track of which wire goes where during the installation.
Ensuring you have all these tools and materials before you start can save you a lot of frustration. Have you ever started a project only to realize halfway that you’re missing something crucial? Avoid that scenario by prepping in advance.
Do you have any unique tips or tricks for making the installation process smoother? Share them in the comments below!
Preparing For Installation
Installing a Nest Thermostat can be a game-changer for your home’s energy efficiency. But before you dive in, you need to prepare properly. This ensures a smooth installation and keeps you safe. Let’s break down what you need to do before wiring in your new Nest Thermostat.
Safety Precautions
Safety should be your top priority when dealing with electrical installations. Always start by understanding the risks involved. An electrical shock can be dangerous, so taking safety precautions is non-negotiable.
First, wear rubber-soled shoes and avoid working in wet conditions. This reduces the risk of electrical shock. Also, use insulated tools to protect yourself further.
Keep a voltage tester handy. This will help you ensure that the power is off before you start working. No one wants an unpleasant surprise when dealing with wiring.
Turning Off Power
Before you touch any wires, you must turn off the power. Head to your breaker box and switch off the circuit that controls your HVAC system. This step is crucial for your safety.
Double-check that the power is off by trying to turn on the HVAC system. If it doesn’t power up, you’re good to go. Use a voltage tester to confirm there is no power running through the wires.
Remember, it’s better to be safe than sorry. Taking these precautions ensures you won’t accidentally shock yourself during the installation.
Have you ever faced a wiring project that didn’t go as planned? Share your experiences in the comments. Your tips could help someone else!

Credit: support-assets.nest.com
Removing The Old Thermostat
Carefully disconnect the wires from the old thermostat. Label them to ensure easy reconnection later.
Removing the old thermostat is the first crucial step in upgrading to your new Nest Thermostat. This part of the process may seem daunting, but it’s simpler than you might think. With a few straightforward steps, you’ll be ready to install your new, energy-efficient gadget in no time. ###Labeling Wires
Before you do anything, make sure to turn off the power to your HVAC system. Safety first! Once the power is off, carefully remove the cover of your old thermostat. Inside, you’ll see several wires connected to terminals. Each wire usually has a unique color and is connected to a labeled terminal (like Y, G, W, etc.). Use small labels or tape to mark each wire according to its terminal letter. This step is vital because it will help you remember where each wire goes when connecting your new Nest Thermostat. Trust me, you don’t want to mix these up! ###Disconnecting The Old Unit
Now that your wires are labeled, it’s time to disconnect the old thermostat. First, take a photo of the setup. This serves as a backup reference. Carefully unscrew each wire from its terminal. Make sure the wires don’t fall back into the wall. You can use a small piece of tape to secure them in place temporarily. After disconnecting the wires, remove the screws that hold the old thermostat’s base to the wall. Gently pull the old thermostat away from the wall, and you’re done! Removing the old thermostat may seem like a small step, but it sets the stage for a smooth installation process. Have you ever labeled wires before? How did it go? Share your experience in the comments!Installing The Nest Thermostat Base
Installing the Nest Thermostat Base is a crucial step in upgrading your home’s heating and cooling system. This part of the process sets the foundation for your smart thermostat to work efficiently. Let’s break it down into easy steps.
Attaching The Base To The Wall
First, turn off the power to your HVAC system. This ensures safety while working with wires. Next, remove your old thermostat. Use a screwdriver to detach it from the wall. Keep the screws; you may need them later.
Now, take the Nest Thermostat base. Position it on the wall where your old thermostat was. Use a level to make sure it is straight. Mark the screw holes with a pencil. Drill pilot holes if needed. Attach the base to the wall using the screws provided or the ones from your old thermostat.
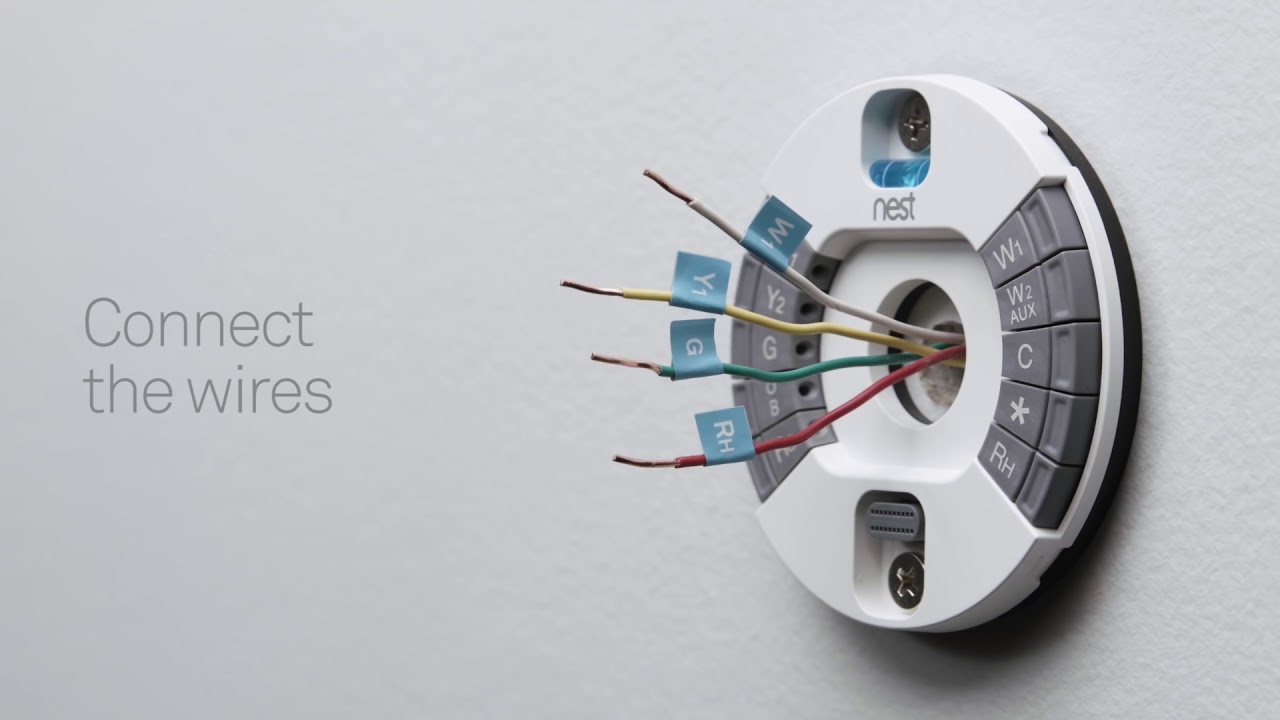
Connecting The Wires
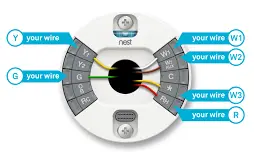
With the base secured, it’s time to connect the wires. Look at the wires coming from the wall. Match each wire to the corresponding terminal on the Nest base. The base has labels like Y, G, W, and R. These labels match your HVAC system’s wiring.
Insert each wire into its terminal. Press the small tab to secure the wire. Make sure each wire is firmly connected. Loose connections can cause problems later. Once all wires are connected, give each one a slight tug to ensure they are secure.
With the wires connected, you are ready to attach the display. Snap the Nest display onto the base. Turn the power back on to your HVAC system. Your Nest Thermostat should light up, ready for setup.
Mounting The Nest Display
Mounting the Nest Display is a crucial step in setting up your smart thermostat. A properly mounted display ensures optimal functionality and aesthetics. This section will guide you through aligning and securing the display for a seamless installation.
Aligning The Display
Before mounting, make sure the base is securely attached to the wall. The base should be level and firmly in place. Now, take the Nest display and align it with the base. You will notice that the display has connectors. These connectors need to match up with the base connectors.
Gently place the display near the base. Do not apply pressure yet. Ensure the connectors are aligned correctly. Check that the display fits snugly without any gaps. A proper alignment guarantees a smooth connection and efficient performance.
Securing The Display
Once aligned, press the display gently onto the base. You will hear a click sound. This click means the display is securely attached. Check the display to make sure it is firmly in place. It should not wobble or move.
Check Best Thermostat Pricing in Amazon
** As an Amazon Associate, I earn from qualifying purchases.
Ensure the display is flush with the wall. A secure fit not only looks good but also functions better. Now, your Nest display is mounted correctly. You are ready to proceed with the rest of the installation.
Setting Up The Nest Thermostat
Setting up the Nest Thermostat can seem daunting at first. But with a few simple steps, you’ll be on your way to a smarter home. In this section, we’ll guide you through powering on the device and configuring the initial settings.
Powering On The Device
First, ensure your Nest Thermostat is properly installed on the wall. Once it’s securely in place, connect the power supply. The device should light up, indicating it’s receiving power. If it doesn’t, double-check the wiring connections. Proper power is crucial for the thermostat to function.
Configuring Initial Settings
After powering on, the device will guide you through initial settings. Start by selecting your language. Next, connect to your Wi-Fi network. This step is important for remote control via the app. Follow the on-screen prompts to enter your network details. Ensure you use a secure and stable connection.
Then, the Nest Thermostat will ask for your location. This helps it optimize energy use based on local weather. Enter your zip code or city. Finally, set up your temperature preferences. The device will learn your habits over time. Adjust settings as needed for comfort.
With these steps, your Nest Thermostat is ready to start learning. Enjoy a more efficient and smart home environment.
Connecting To Wi-fi And App
Setting up your Nest Thermostat is easier than you might think, and one of the most important steps is connecting it to Wi-Fi and syncing it with the Nest App. This not only allows you to control your thermostat remotely but also helps you maximize its smart features. Let’s walk through how to get your Nest Thermostat connected to Wi-Fi and the Nest App.
Wi-fi Setup
First, ensure your Wi-Fi network is active and your Nest Thermostat is installed and powered on. Navigate to the settings menu on the thermostat by turning the ring and selecting the gear icon.
Next, select the ‘Network’ option. Your thermostat will scan for available Wi-Fi networks. Choose your network from the list and enter your password. If you’ve entered the correct password, your Nest Thermostat will connect to the Wi-Fi.
Having trouble connecting? Double-check your password and make sure your network is functioning properly. Sometimes, moving the router closer to the thermostat can help.
Syncing With The Nest App
Once your Nest Thermostat is connected to Wi-Fi, it’s time to sync it with the Nest App. Download the Nest App from the App Store or Google Play Store if you haven’t already.
Open the app and create a Nest account if you don’t have one. After logging in, tap the ‘Add’ button and select ‘Nest Thermostat’ from the list of devices.
The app will guide you through the syncing process. You will need to enter a pairing code displayed on your thermostat. Once entered, your thermostat will sync with the app.
Now, you can control your thermostat from your smartphone. Adjust the temperature, set schedules, and even receive alerts. Isn’t it convenient to know you can manage your home’s temperature from anywhere?
If you have any issues during this process, the Nest support website is a great resource. It’s also helpful to make sure your app and thermostat firmware are up to date.
Connecting your Nest Thermostat to Wi-Fi and the app not only makes your life easier but also helps you save energy. Have you found any surprising benefits of using your smart thermostat? Share your thoughts in the comments below!
Testing And Troubleshooting
Testing and troubleshooting your Nest Thermostat is crucial to ensure it works correctly. This process helps identify any issues and ensures that your system operates smoothly. Let’s explore how to run tests and fix common problems.
Running A System Test
To start, make sure your Nest Thermostat is connected properly. Navigate to the thermostat’s settings menu. Select the “System Test” option. Follow the on-screen instructions. The thermostat will test each component of your heating and cooling system. Pay close attention to any error messages. These will guide you in identifying and fixing problems.
Common Issues And Fixes
Sometimes, your Nest Thermostat may not work as expected. Here are some common issues and their fixes:
- Thermostat not turning on: Check the power connection. Ensure the wires are securely connected. Confirm the power supply is working.
- Heating or cooling not activating: Verify the wiring configuration. Make sure each wire is in the correct terminal. Check the compatibility of your HVAC system with the Nest Thermostat.
- Temperature readings are incorrect: Ensure the thermostat is not exposed to direct sunlight or drafts. These can affect the sensor readings. Relocate the thermostat if necessary.
Addressing these common issues can help ensure your Nest Thermostat functions properly. Regular testing and troubleshooting can prevent bigger problems down the line.
Tips For Optimal Use
Installing a Nest Thermostat is a great way to improve energy efficiency and comfort in your home. But to get the most out of it, you need to know a few tips for optimal use. These tips will help you save energy, keep your device in good shape, and enjoy a more comfortable living space.
Energy-saving Tips
Set a schedule for your thermostat. Program it to lower the temperature when you are away. Raise the temperature when you sleep. This simple adjustment can save a lot of energy.
Use the Eco mode feature. It adjusts the temperature to save energy while you are out. This is especially useful if you are away for long hours.
Take advantage of the learning feature. The Nest Thermostat learns your habits over time. It then adjusts the temperature based on your routines. This ensures optimal comfort and energy savings.
Check the energy history. The Nest app shows how much energy you use each day. Use this data to find ways to save more energy.
Regular Maintenance
Keep your thermostat clean. Dust and dirt can affect its performance. Wipe the screen gently with a soft cloth. Avoid using harsh chemicals.
Update the software regularly. Check for updates in the Nest app. Updates can improve performance and add new features.
Check the battery level. If the battery is low, replace it promptly. A low battery can affect the thermostat’s performance.
Inspect the wiring. Make sure all connections are secure. Loose wires can cause the thermostat to malfunction.
Test the system. Run a test to ensure everything is working correctly. This can help you catch issues early.
Frequently Asked Questions
What Color Wires Go Where On A Nest Thermostat?
Connect the red wire to the R terminal. Attach the yellow wire to Y, green to G, and white to W. The common wire (C) goes to C. Always refer to the Nest Thermostat installation guide for specific instructions.
How Many Wires Are Needed For A Nest Thermostat?
A Nest Thermostat typically requires 4 to 5 wires for installation. These include the R, Y, G, and W wires. Some systems may need the C wire.
What Color Wires Go Where On A Thermostat?
Red wire connects to the R terminal. White wire goes to W. Yellow wire attaches to Y. Green wire connects to G. Blue or black wire is for the C terminal.
How To Release Wires On Nest Thermostat?
To release wires on Nest Thermostat, press down on the small tabs located on the wire connectors. Pull the wires gently to remove.
Conclusion
Congratulations! You’ve successfully wired your Nest Thermostat. It’s ready to use. You’ve made your home smarter. Enjoy energy savings and a cozy environment. Remember to follow the maintenance tips. Check the thermostat regularly for updates. Keep the area around it clean.
If issues arise, refer to the user manual. Stay warm or cool, as needed. Happy Nesting!
Check Best Thermostat Pricing in Amazon
** As an Amazon Associate, I earn from qualifying purchases.