
Check Best Thermostat Pricing in Amazon
** As an Amazon Associate, I earn from qualifying purchases.
Are you struggling to turn on your Honeywell thermostat touch screen? It can be frustrating when you want to adjust your home’s temperature but the screen won’t respond.
Luckily, getting your thermostat up and running is easier than you think. You’ll discover simple steps to power on your Honeywell touch screen quickly and effortlessly. Keep reading—you’re just moments away from taking full control of your comfort.
Credit: scottsdaleair.com
Locate The Thermostat
Finding your Honeywell thermostat is the first step to turning on its touch screen. Thermostats usually sit in easy-to-access spots around your home. Knowing where to look saves time and frustration.
Most Honeywell thermostats are on walls in common areas. This helps control the temperature in main rooms. The thermostat should be at eye level for easy use.
Check Near Living Areas
Living rooms and family rooms often have the thermostat. These rooms need regular temperature control. Look on walls close to seating or entryways.
Look Around Hallways
Hallways are common places for thermostats. They connect different rooms and allow even heating or cooling. Scan walls near light switches or doors.
Avoid Kitchens And Bathrooms
Thermostats are rarely placed in kitchens or bathrooms. Heat and steam can affect their sensors. Focus on dry, central spots instead.
Spot The Display Screen
The Honeywell thermostat has a clear touch screen. It looks like a small tablet on the wall. The screen often shows the current temperature.

Credit: smudenergystore.com
Check Power Supply
Checking the power supply is the first step to turn on your Honeywell thermostat touch screen. Without proper power, the screen will stay blank. Power issues are a common reason why the thermostat does not turn on.
Start by making sure the thermostat has a steady power source. This helps the screen light up and respond to your touch. Let’s explore how to check the power supply in detail.
Verify Battery Status
Many Honeywell thermostats have backup batteries. These batteries keep the screen working during power outages. Open the thermostat’s battery compartment carefully.
Check if the batteries are in place and have enough charge. Replace old or dead batteries with new ones. Use batteries recommended by Honeywell for best results.
After replacing the batteries, press the screen to see if it turns on. A fresh battery often solves power issues quickly.
Inspect Wiring Connections
Wiring connects the thermostat to your home’s power system. Loose or damaged wires can stop the screen from powering up. Turn off the power at the breaker before checking wires.
Remove the thermostat cover gently to access the wires. Look for loose, disconnected, or burnt wires. Tighten any loose connections carefully.
If you see damaged wires, call a professional to fix them. Secure wiring ensures your thermostat gets the power it needs.
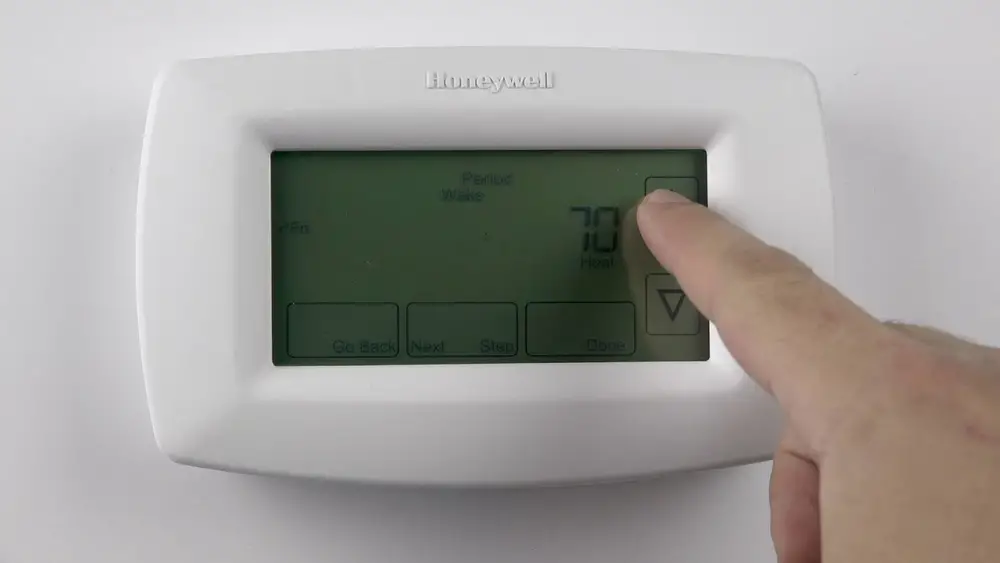
Wake The Touch Screen
Waking the touch screen on your Honeywell thermostat is the first step to controlling your home’s temperature. The screen often goes dark to save energy. You need to wake it up before making any changes. It only takes a simple action to bring the screen back to life. This section explains two easy ways to wake your Honeywell thermostat touch screen.
Tap The Screen
Gently tap the touch screen with your finger. This quick tap wakes the screen instantly. The display lights up and shows the current settings. Make sure you tap softly to avoid damaging the screen. This method is fast and works for most Honeywell models.
Press The Wake Button
Some Honeywell thermostats have a dedicated wake button. It is usually located on the side or front of the device. Press this button once to turn on the screen. The display will light up, ready for use. Using the wake button is helpful if the touch screen does not respond to tapping.
Set Up Initial Settings
Setting up your Honeywell thermostat touch screen is the first step to controlling your home’s temperature. The initial settings help the device work properly and fit your needs. Take your time to set the basics. It makes using the thermostat easier and more effective.
Start by choosing your language. This lets you understand all messages and options clearly. Next, set the date and time. This helps the thermostat follow your schedule accurately. Both steps are simple and important.
Select Language
When you turn on the thermostat for the first time, the screen asks you to pick a language. Use the touch screen to scroll through the list. Tap on the language you understand best. The thermostat will save your choice and show all instructions in that language. This step makes using the device easier.
Set Date And Time
After selecting the language, the thermostat asks for the current date and time. Use the arrows on the screen to adjust the numbers. Set the correct day, month, and year. Then, choose the right hour and minutes. Confirm your settings by tapping “OK” or “Save.” The thermostat uses this information to follow your heating and cooling schedule correctly.
Adjust Display Brightness
Adjusting the display brightness on your Honeywell thermostat touchscreen helps you see the screen clearly. It also saves battery life and reduces eye strain.
Check Best Thermostat Pricing in Amazon
** As an Amazon Associate, I earn from qualifying purchases.
You can make the screen brighter for daylight or dimmer for night use. The process is simple and quick to do.
Access The Main Menu
Start by tapping the screen to wake up the thermostat. Look for the gear icon or a menu button. Tap it to open the main settings menu.
Find Display Settings
Scroll through the menu until you see “Display” or “Screen.” Select this option to enter the display settings area.
Adjust Brightness Level
Look for a brightness slider or buttons to change brightness. Slide or tap to increase or decrease the brightness.
Stop adjusting when the screen looks comfortable to your eyes.
Save Your Settings
Confirm your choice by tapping “Save” or “Done.” The thermostat will now use your preferred brightness level.
Troubleshoot Common Issues
Troubleshooting common issues with your Honeywell thermostat touch screen helps save time and frustration. Many problems have simple fixes you can try yourself. This section guides you through easy steps to get your thermostat working again. Follow the instructions below to solve the most frequent issues.
Screen Not Responding
The touch screen may stop responding due to dirt or software glitches. Clean the screen gently with a soft, dry cloth. Avoid using water or chemicals on the display.
Try restarting the thermostat by pressing the reset button or removing the batteries for 30 seconds. Reinsert the batteries and check if the screen responds.
Check for firmware updates through the thermostat settings. Updating the software can fix bugs causing the screen to freeze.
Thermostat Won’t Turn On
First, confirm the thermostat has power. Check the circuit breaker and make sure it is not tripped.
Replace the batteries with fresh ones if your model uses them. Old batteries often cause power issues.
Inspect the wiring connections to ensure they are secure and undamaged. Loose wires can prevent the thermostat from turning on.
If the thermostat still won’t turn on, try resetting it by following the manual’s instructions. This often restores normal function.
Optimize Thermostat Usage
Optimizing your Honeywell thermostat helps save energy and keeps your home comfortable. Using the touch screen wisely makes daily temperature control easy. Small changes in settings can lower bills and improve comfort. Learn simple ways to get the best from your thermostat.
Enable Energy Saving Mode
Energy Saving Mode reduces power use without losing comfort. Turn it on through the touch screen settings menu. The thermostat adjusts heating and cooling to save energy. It limits extreme temperatures to use less electricity. This mode helps cut costs and supports the environment.
Schedule Temperature Changes
Scheduling temperature changes automates your heating and cooling. Set different temperatures for morning, afternoon, and night. The thermostat changes settings at the right time automatically. This avoids wasting energy when you are away or asleep. Use the touch screen to create and edit your schedule easily.

Credit: www.amazon.com
Frequently Asked Questions
How Do I Power On Honeywell Thermostat Touch Screen?
To power on, press the screen gently or tap the power button if available. Ensure the thermostat is connected to power. If it remains off, check your circuit breaker or wiring.
Why Won’t My Honeywell Thermostat Touch Screen Turn On?
Check if the thermostat is properly connected to power. Verify batteries if used. Reset the device by turning off power for 30 seconds, then turning it back on.
How To Activate Honeywell Thermostat After Installation?
After installation, connect the thermostat to your HVAC system. Power on by tapping the screen or pressing the button. Follow on-screen prompts to complete setup and activate the device.
Can I Turn On Honeywell Thermostat Remotely?
Yes, if your Honeywell thermostat supports Wi-Fi, use the Honeywell app. Sign in and control your thermostat remotely, including powering it on or off.
Conclusion
Turning on your Honeywell thermostat touch screen is quick and simple. Just follow the steps carefully, and the screen will light up. This lets you control your home’s temperature easily. Regular use helps save energy and keeps your space comfortable.
Remember to check the power source if the screen does not turn on. Enjoy a cozy home with your Honeywell thermostat working perfectly.
Check Best Thermostat Pricing in Amazon
** As an Amazon Associate, I earn from qualifying purchases.