
Check Best Thermostat Pricing in Amazon
** As an Amazon Associate, I earn from qualifying purchases.
To turn on a Honeywell thermostat, press the power button or switch. Ensure the device is connected to a power source.
Follow on-screen prompts if necessary. A Honeywell thermostat can help you maintain a comfortable home temperature with ease. Understanding how to turn it on is the first step. Whether you’re installing a new unit or troubleshooting an existing one, knowing how to activate your thermostat is crucial.
This guide will walk you through the process, ensuring your home stays cozy and your HVAC system runs efficiently. We’ll cover common models and provide simple instructions to get your thermostat up and running. Let’s dive into the steps and simplify the process for you.

Credit: www.reddit.com
Gather Necessary Tools
Gather the necessary tools like a small screwdriver before turning on your Honeywell thermostat. Having these tools ready makes the process smoother.
Turning on a Honeywell thermostat might seem like a straightforward task, but ensuring you have all the necessary tools can make the process smoother and more efficient. This step is crucial to avoid unnecessary interruptions and frustrations. Let’s delve into the essential preparations under the subheading “Gather Necessary Tools”. ###Materials Needed
Start by gathering the essential materials. Firstly, you will need the user manual for your specific Honeywell thermostat model. This will provide you with detailed instructions and troubleshooting tips. Secondly, get a set of screwdrivers. Typically, a Phillips head and a flat head screwdriver will suffice. These will help you open the thermostat cover and secure any loose screws. Finally, keep a pair of fresh batteries on hand. Many Honeywell thermostats are battery-operated, and having new batteries ensures your device powers up without a hitch. ###Preparing Workspace
Setting up a clean and organized workspace is vital. Begin by clearing the area around your thermostat. Remove any objects or clutter that might obstruct your access. Ensure you have good lighting. A well-lit area will help you see the small components and screws clearly. This reduces the risk of misplacing parts or making errors. Lay out all your tools and materials on a clean surface. This makes everything easily accessible and speeds up the process. Consider using a small tray to keep screws and small parts from getting lost. — Having the right tools and a prepared workspace can make turning on your Honeywell thermostat a breeze. Can you think of other tools or tips that might be helpful for this task? Share your thoughts and experiences in the comments!Locate Your Thermostat
Finding your Honeywell thermostat is the first step towards ensuring a comfortable living environment. Whether you’re new to the device or looking to upgrade your home system, locating the thermostat is crucial. Let’s dive into how you can easily find it and get started.
Finding The Thermostat
Your Honeywell thermostat is typically mounted on a wall in a central location of your home. Look for it in common areas such as the living room, hallway, or near the main entrance. If you recently moved in, check the walls around the HVAC system or ask the previous owner where it’s installed.
Don’t overlook less obvious places. Some homes have thermostats in bedrooms or upstairs hallways. Ensure you check all potential spots, so you don’t miss it.
Checking Compatibility
Before turning on your Honeywell thermostat, it’s important to ensure it’s compatible with your HVAC system. Honeywell thermostats usually work with a variety of systems, but double-checking won’t hurt. Refer to the user manual that came with your thermostat.
If you don’t have the manual, visit Honeywell’s website and search for your model. Compatibility information is typically available under the product’s specifications section.
Have you ever tried to turn on a device only to find out it wasn’t compatible? Avoid this frustration by confirming compatibility first. This small step can save you time and effort.
By locating your Honeywell thermostat and ensuring compatibility, you’re well on your way to creating a comfortable home environment. Ready to turn it on? Stay tuned for the next steps!
Power Supply Check
Before you can enjoy the comfort of a perfectly heated or cooled home, you need to ensure your Honeywell thermostat has the power it needs to function. Checking the power supply is essential for a smooth operation. This step-by-step guide will help you through the process.
Ensure Power Source
First, check if your thermostat is connected to a power source. Most Honeywell thermostats use a standard 24-volt power supply. Look for any visible wires connected to your thermostat.
If you see a wire connection, ensure it is secure. Sometimes, loose wires can cause power issues. If the wires are intact, you can move on to the next step.
Battery Check
Some Honeywell thermostats use batteries. If your model has a battery compartment, open it. Check for any signs of corrosion or leakage.
Replace old batteries with new ones. Ensure they are placed correctly, following the positive and negative markings. Fresh batteries can often solve power issues.
Turn On The Thermostat
To turn on a Honeywell thermostat, press the “System” button. Select the desired mode, such as “Heat” or “Cool”. Adjust the temperature using the up or down arrows.
Check Best Thermostat Pricing in Amazon
** As an Amazon Associate, I earn from qualifying purchases.
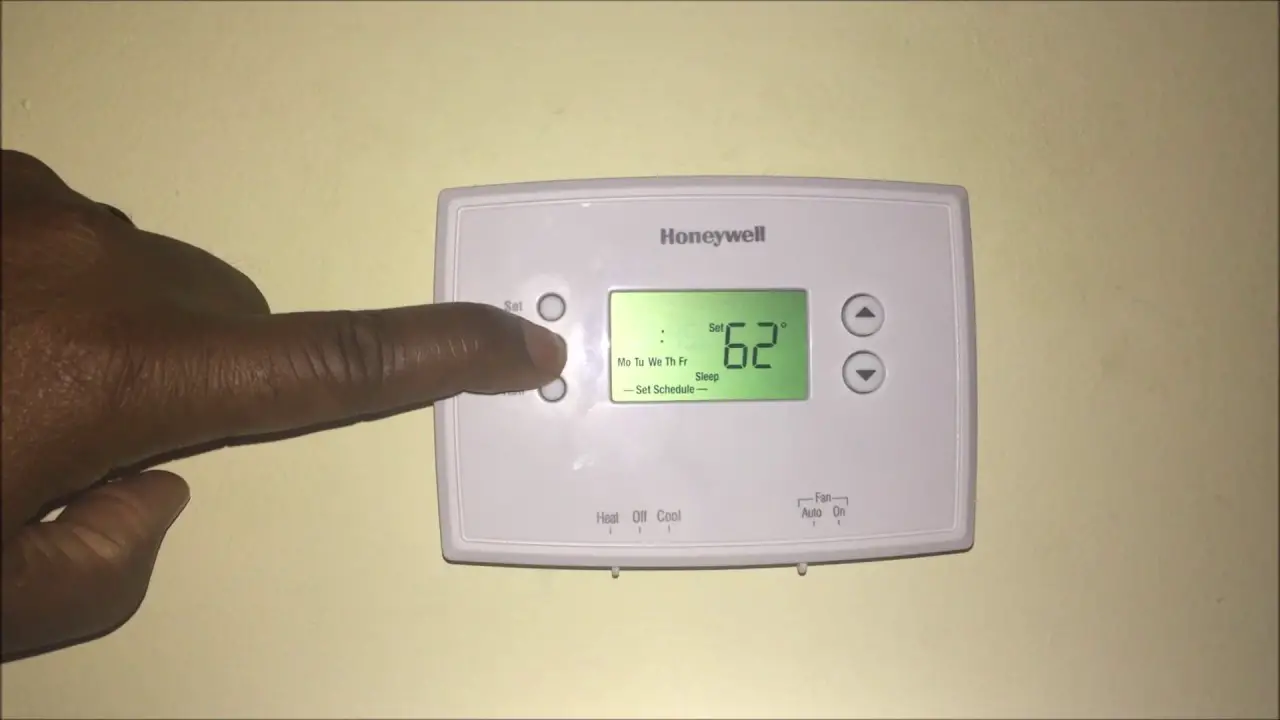
Power Button Location
The first step is to locate the power button on your Honeywell thermostat. Generally, the power button is situated on the front panel for easy access. If you’re unsure, refer to your thermostat’s manual for specific details. Some Honeywell models may have the power button on the side or hidden under a flap. Make sure to check these areas if you don’t see it immediately. Finding this button is crucial because it’s the primary way to turn the device on and off.Initial Power-up
Once you’ve located the power button, press it to turn on the thermostat. You should see the display light up, indicating that the unit has power. If nothing happens, double-check the power source. Ensure the thermostat is connected to a working outlet or has fresh batteries. This simple check can save you a lot of frustration. If the display still doesn’t turn on, there might be a deeper issue needing professional attention. When I first tried turning on my Honeywell thermostat, I missed the small power button on the side. It’s a good reminder to thoroughly inspect the unit. Have you ever encountered a hidden power button on your devices? By following these steps, you can easily turn on your Honeywell thermostat and ensure your home stays comfortable year-round. Whether it’s winter chills or summer heatwaves, being able to control your home’s temperature is vital.Setting Temperature
Setting the temperature on your Honeywell thermostat is a simple task. This feature ensures your home remains comfortable. Let’s dive into how you can adjust the settings and set your temperature preferences.
Adjusting Settings
First, locate the thermostat’s control panel. It usually has a digital display. Press the ‘Menu’ button to access the settings. Use the arrow buttons to navigate through the options. Select ‘System’ to set it to either ‘Heat’, ‘Cool’, or ‘Auto’. This choice depends on your needs. Confirm your selection by pressing ‘Enter’.
Temperature Preferences
After adjusting the system settings, set your desired temperature. Press the ‘Up’ or ‘Down’ arrows to increase or decrease the temperature. The display will show your chosen temperature. The thermostat will now maintain this temperature. If you have a programmable model, you can set different temperatures for different times. This option helps save energy and adds to comfort.
Connecting To Wi-fi
Turn on your Honeywell thermostat by pressing the “System” button. Select the desired mode, such as “Heat” or “Cool. ” Adjust the temperature using the up and down arrows.
To get the most out of your Honeywell thermostat, connect it to Wi-Fi. This allows you to control your thermostat from anywhere. Follow these simple steps to connect your Honeywell thermostat to Wi-Fi.Wi-fi Setup
First, make sure your thermostat is on. Press the menu button. Look for the Wi-Fi setup option. Select it. Your thermostat will start scanning for available networks. Choose your home network from the list. Enter your Wi-Fi password. Press “Connect.” Wait for the confirmation message. Your thermostat is now connected to Wi-Fi.Troubleshooting Connection
Sometimes, connection issues happen. Don’t worry. First, check your Wi-Fi signal. Make sure it’s strong. If the signal is weak, move your router closer. Restart your thermostat and router. If that doesn’t work, double-check your password. Make sure you entered it correctly. Still having trouble? Reset your thermostat to factory settings. Then try the Wi-Fi setup again. For persistent issues, contact Honeywell support. “` This content is clear, concise, and should be easy for non-native English speakers to follow.Program Schedule
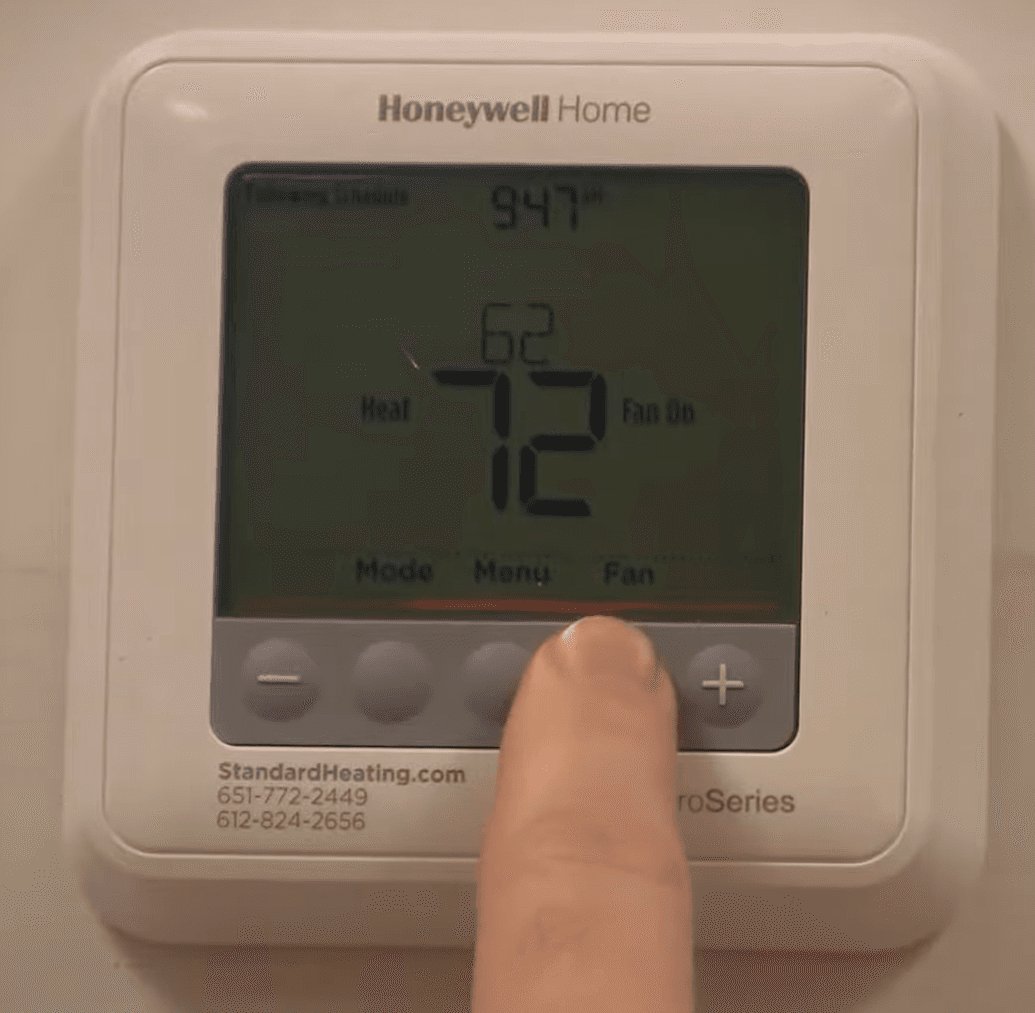
Programming your Honeywell thermostat can save energy and money. The program schedule allows you to set different temperatures for different times of the day. This feature ensures your home is always comfortable. Here’s how to set up and customize your program schedule.
Setting Timers
Start by accessing the main menu on your Honeywell thermostat. Navigate to the schedule option. Select the day you want to program. Choose the time you want the temperature to change. Set the desired temperature. Repeat these steps for each time period and day.
Customizing Schedule
Each day can have a unique schedule. Adjust the settings to fit your routine. You can set different temperatures for weekdays and weekends. Ensure the times align with your daily activities. This way, your home stays comfortable while optimizing energy use.
Credit: www.standardheating.com
Maintenance Tips
Turn on your Honeywell thermostat by pressing the “System” button. Select “Heat,” “Cool,” or “Off” to control the temperature. Adjust the desired temperature using the up and down arrows.
Maintaining your Honeywell thermostat ensures it functions efficiently and prolongs its lifespan. Regular maintenance can prevent unexpected issues and save you from the hassle of emergency repairs. Here are some simple yet effective maintenance tips to keep your thermostat in top shape.Regular Checks
Regular checks are essential to keep your thermostat running smoothly. Inspect your thermostat at least once a month to ensure it’s working correctly. Check for any visible dirt or dust on the thermostat. Dust can affect the thermostat’s sensors, leading to inaccurate temperature readings. Gently clean the surface with a soft cloth. If needed, use a mild detergent mixed with water to remove stubborn grime.Common Issues
Despite regular maintenance, you may encounter common issues with your Honeywell thermostat. Knowing these issues can help you troubleshoot and fix them quickly. A common problem is the thermostat not turning on. This can often be resolved by checking the batteries. Replace them if they are dead or weak. Another issue is the thermostat showing inaccurate temperatures. Ensure the thermostat is not exposed to direct sunlight or placed near heat sources, as this can affect its readings. If you experience connectivity issues with a smart thermostat, ensure your Wi-Fi connection is stable. Sometimes, a simple router restart can fix the problem. Have you ever faced any unexpected thermostat issues? What was the most surprising fix you discovered? Share your experiences and let’s learn from each other. Regular maintenance can seem tedious, but it’s worth the effort to ensure your home stays comfortable and your energy bills remain low. Happy maintaining!
Credit: www.reddit.com
Frequently Asked Questions
How Do I Turn My Honeywell Thermostat Back On?
Press the “System” button on your Honeywell thermostat. Select the desired mode (Heat, Cool, or Off). Adjust the temperature setting to your preference.
How To Switch On Honeywell Thermostat?
Press the power button on your Honeywell thermostat. Select the desired mode using the touchscreen or buttons. Adjust settings as needed.
Why Is My Honeywell Thermostat Not Turning On?
Check power supply, circuit breaker, and thermostat settings. Replace batteries if needed. Inspect wiring for damage or loose connections.
How Do I Turn My Thermostat On?
To turn on your thermostat, locate the power button or switch. Set the desired temperature using the control dial or buttons. Ensure the system mode is set to “Heat” or “Cool” as needed.
Conclusion
Turning on a Honeywell thermostat is simple. Follow these straightforward steps. Start by locating the power button. Press it gently to activate the display. Use the arrows to set your desired temperature. Check that settings are correct. Enjoy a comfortable home environment.
Regular maintenance ensures optimal performance. Keep your thermostat clean. Replace batteries as needed. This guarantees efficiency. A well-functioning thermostat saves energy. It also reduces costs. Remember, a comfortable home begins with a well-maintained thermostat. Follow these tips for a hassle-free experience.
Check Best Thermostat Pricing in Amazon
** As an Amazon Associate, I earn from qualifying purchases.