
Check Best Thermostat Pricing in Amazon
** As an Amazon Associate, I earn from qualifying purchases.
Are you noticing that your refrigerator isn’t cooling as it should, or perhaps it’s freezing your food instead? Before you start worrying about costly repairs or replacing your appliance altogether, there’s a crucial component you might want to check first: the thermostat.
Understanding how to test a thermostat in a refrigerator can save you time, money, and a lot of frustration. By empowering yourself with this simple knowledge, you can easily determine if your thermostat is the culprit behind your fridge woes.
In this guide, we’ll walk you through the straightforward steps to test your refrigerator’s thermostat, ensuring that you can keep your food fresh and your appliance running smoothly. Stay with us as we unravel this simple yet effective process that could be the key to restoring your refrigerator’s optimal performance.
Tools Needed
Testing a thermostat in a refrigerator requires specific tools. These tools help ensure accurate results and avoid damage. Having the right equipment makes the process easier and safer.
Multimeter
A multimeter is essential for testing electrical components. It measures voltage, current, and resistance. This tool helps check if the thermostat is functioning correctly.
Screwdriver
A screwdriver is needed to access the thermostat. Refrigerators often have screws securing the panel. Use the right size screwdriver to avoid stripping screws.
Needle Nose Pliers
Needle nose pliers help remove wires connected to the thermostat. They provide a firm grip, which is useful in tight spaces. Pliers ensure you handle wires safely.
Flashlight
A flashlight is useful for illuminating dark areas. Refrigerators can have poorly lit spaces. Proper lighting helps avoid mistakes during testing.
Safety Gloves
Safety gloves protect your hands from sharp edges. They also prevent electrical shocks. Wearing gloves ensures safe handling of parts.
Safety Precautions
Testing a refrigerator thermostat requires careful safety precautions. Always unplug the appliance before beginning any tests. Use insulated tools to prevent electric shock while handling components.
Testing a thermostat in a refrigerator requires caution. Safety is crucial. Before starting, gather your tools and clear your workspace. A secure environment minimizes risks. Protect yourself and your appliance by following these safety precautions.1. Unplug The Refrigerator
Ensure the refrigerator is unplugged before testing. This prevents electrical shocks. Safety comes first.2. Wear Protective Gear
Wear safety goggles and gloves. Protect your eyes and hands. These are vital areas to safeguard.3. Use Insulated Tools
Choose tools with insulated handles. They reduce the risk of electric shock. Safety tools are essential.4. Clear The Area
Remove any obstacles around the fridge. A clutter-free zone enhances safety. Keep the space open and clean.5. Be Cautious With Components
Handle all parts gently. Avoid forcing components into place. Damage can lead to more issues.6. Follow Manufacturer Guidelines
Refer to the refrigerator’s manual. Manufacturer guidelines offer important safety tips. Always adhere to these instructions.7. Double-check Connections
Ensure all connections are secure. Loose connections pose risks. Safety checks are key. Following these precautions ensures a safe testing process. Prioritize safety to protect yourself and your appliance.Locating The Thermostat
Start by finding the thermostat inside the refrigerator. Typically located near the back or side walls. Accessing it allows you to check its functionality.
Locating the thermostat in your refrigerator might seem like searching for a needle in a haystack, but it’s a straightforward task once you know where to look. The thermostat is a key component in maintaining the right temperature for your food and beverages. By finding it, you can troubleshoot any cooling issues effectively and ensure your fridge is working efficiently.Where Is The Thermostat Located?
The thermostat is usually found inside the refrigerator compartment. It’s often mounted on the back wall or on the side panel. Look for a small control knob or dial that adjusts temperature settings. Some models have the thermostat located in the freezer section. Check the ceiling or sidewall of the freezer for a similar control knob. If you have a manual, consult it for precise details on your model.Check The User Manual
The user manual can be an invaluable resource. It contains diagrams and information specific to your refrigerator model. If you’ve misplaced it, many manufacturers offer digital copies online. User manuals may also provide troubleshooting tips and maintenance advice. Having this information at your fingertips makes the process smoother.Look For Visual Cues
In many refrigerators, the thermostat is marked with a temperature control label. This label is often clear and easy to spot. It may be color-coded or have numbers indicating temperature levels. If your fridge has a digital display, the thermostat might be part of this interface. Look for buttons or a touchscreen that allows you to adjust settings.Why Is Locating The Thermostat Important?
Knowing where the thermostat is helps you adjust temperatures accurately. A misadjusted thermostat can lead to spoiled food or increased energy consumption. By locating it, you ensure your refrigerator operates at peak efficiency. Do you recall a time when your fridge wasn’t cooling properly? Understanding the thermostat’s location can be your first step in diagnosing and fixing the issue.Test Your Knowledge
Now that you’ve located the thermostat, why not test it to ensure it’s functioning correctly? Adjust the settings and observe any changes in temperature. This simple test can prevent potential problems down the line. By taking the time to locate your refrigerator’s thermostat, you equip yourself with the knowledge to maintain optimal cooling conditions. Have you found yours yet?
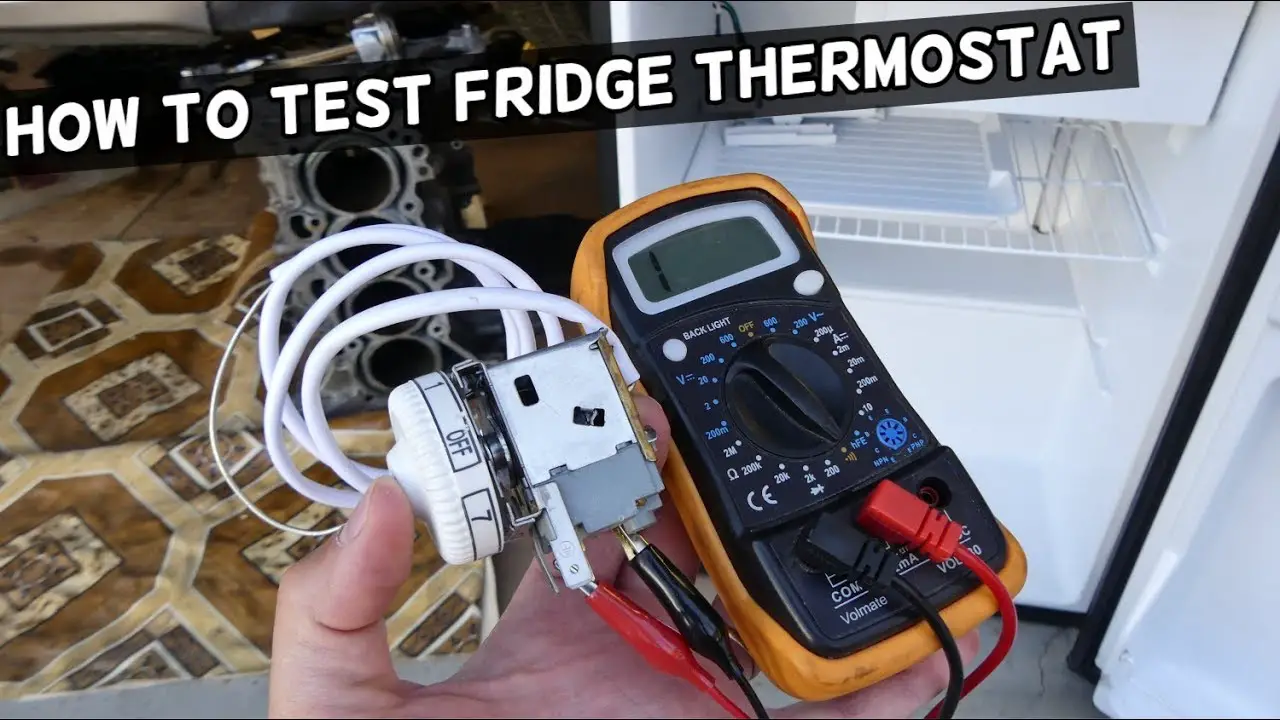
Credit: www.youtube.com
Testing With A Multimeter
Testing a refrigerator thermostat with a multimeter ensures proper function. First, unplug the refrigerator for safety. Next, set the multimeter to the resistance setting. Finally, place the probes on the thermostat terminals to check for continuity.
Testing the thermostat in your refrigerator with a multimeter can seem daunting at first, but it’s an essential step in ensuring your appliance runs smoothly. You don’t need to be an expert to do this; just a little guidance and a multimeter will get you through. Whether your fridge is not cooling properly or it’s running non-stop, learning how to test the thermostat can save you time and money on repairs.Setting The Multimeter
Before you start, make sure your multimeter is set correctly. Turn the dial to the ohm (Ω) setting, which measures resistance. Ensure the multimeter is powered on. It’s a good idea to test your multimeter first by touching the probes together. The display should read zero, indicating it’s ready to use.Checking Thermostat Continuity
First, unplug your refrigerator for safety. Locate the thermostat, usually found behind the temperature dial inside the fridge. Once you’ve accessed it, disconnect the wires attached to the thermostat. Hold the multimeter probes to the thermostat terminals. If your multimeter shows a reading of zero or close to zero, the thermostat has continuity and is working fine. If there’s no change in the reading, your thermostat might be faulty and need replacement. Have you ever hesitated to check your fridge’s thermostat because you weren’t sure how? Remember, even a small step like testing can help you understand your appliance better. Isn’t it empowering to solve these minor hiccups yourself? Taking this initiative not only boosts your DIY skills but also ensures your fridge is functioning optimally. So why wait? Grab that multimeter and take control of your fridge’s health today!Inspecting For Mechanical Issues
Testing a thermostat in a refrigerator involves checking its functionality and ensuring it maintains correct temperature settings. Start by setting the thermostat to a colder setting and listen for the compressor turning on. If the fridge doesn’t cool properly, the thermostat might need replacement.
Inspecting for mechanical issues in your refrigerator’s thermostat can prevent major problems. A malfunctioning thermostat affects the cooling efficiency. This leads to food spoilage. Regular checks ensure your appliance runs smoothly. Begin with a visual inspection. Then check for loose connections.Visual Inspection
Start by examining the thermostat closely. Look for signs of wear or damage. Check if the dial moves smoothly. A stuck dial indicates a possible issue. Inspect the thermostat’s housing. Cracks or missing parts need attention. Ensure the thermostat is securely attached. Loose parts can affect its function.Checking For Loose Connections
Loose connections can disrupt the thermostat’s operation. Inspect the wires connected to the thermostat. Look for any signs of fraying or damage. Ensure wires are securely attached. Loose wires can cause the thermostat to misread temperatures. Check the terminal screws. Make sure they are tight. A loose screw can lead to poor contact.Adjusting The Temperature Setting
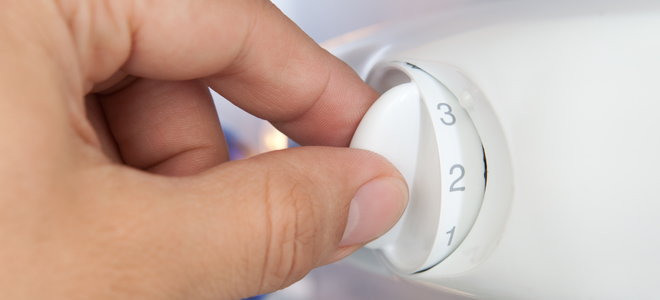
Adjusting the temperature setting is crucial in testing a refrigerator thermostat. First, set the dial to the desired temperature. Then, monitor the cooling efficiency by checking if the fridge maintains this setting consistently over time.
Adjusting the temperature setting of your refrigerator is crucial for efficiency. Ensuring the right temperature keeps food fresh and energy bills low. Sometimes, a thermostat may need recalibration. This section explains how to adjust the setting effectively.Understanding The Current Temperature Setting
First, check the current temperature inside the fridge. Use a reliable thermometer for accuracy. Place it in the center of the refrigerator. Wait for a few hours before reading the temperature. This provides an accurate measurement of the internal climate.Locate The Thermostat Control
Find the thermostat control inside the fridge. Usually near the top or side walls. It might be a dial or digital display. Refer to your refrigerator’s manual for specific details.Adjusting The Dial Or Digital Display
Turn the dial to your preferred setting. If digital, use the buttons to modify the temperature. Typically, 37°F (3°C) is ideal for the fridge section. This setting prevents spoilage and maintains food quality.Wait And Monitor
After adjustment, let the refrigerator stabilize. Wait at least 24 hours for changes to take effect. Recheck the temperature with your thermometer. Adjust again if necessary. This ensures the fridge is working efficiently.Reassembling And Testing
Reassembling and testing a refrigerator thermostat is crucial. It ensures the appliance functions efficiently. After removing and inspecting, the next step is putting everything back together. This process involves reattaching components and monitoring temperature changes. Follow these steps for a smooth reassembly.
Reattaching Components
Begin by carefully placing the thermostat back into its slot. Ensure it fits snugly. Connect the wires securely. Double-check each connection to avoid loose ends. Attach the cover and screws firmly. Use a screwdriver to tighten them properly. Make sure all components are in their correct positions. This prevents malfunction or damage.
Monitoring Temperature Changes
Once assembled, plug in the refrigerator. Allow it to run for several hours. Observe the internal temperature. Use a thermometer for accuracy. Check if the temperature remains constant. Fluctuations may indicate a problem. Adjust the thermostat if necessary. It should respond to changes in settings. Proper monitoring ensures the thermostat works effectively.
Check Best Thermostat Pricing in Amazon
** As an Amazon Associate, I earn from qualifying purchases.
Credit: www.doityourself.com
When To Seek Professional Help
Testing your refrigerator’s thermostat can resolve common cooling issues. Sometimes, problems persist despite troubleshooting efforts. This is when professional help becomes essential. Recognizing signs that indicate it is time to call an expert is crucial.
Signs You Need A Technician
Unusual noises can suggest deeper issues. If the refrigerator hums, it might be struggling. A constant loud buzz can indicate mechanical problems.
Temperature Fluctuations
Temperature swings hint at a faulty thermostat. Food spoiling too fast means the cooling is inconsistent.
High Energy Bills
Sudden spikes in energy usage might be the thermostat’s fault. The refrigerator works harder to maintain temperature, consuming more power.
Continuous Running
If the fridge never stops running, it could be a thermostat issue. A professional can assess and resolve this.
Water Leaks
Leaks can mean the refrigerator is overworking. This may relate to thermostat malfunctions. A technician can identify and fix the root cause.
Burning Smell
A burning smell is serious and needs expert attention. It could be an electrical issue tied to the thermostat.
When these signs appear, seeking professional help ensures safety and prevents damage. Technicians have the tools and knowledge to diagnose and repair effectively.

Credit: www.hnkparts.com
Frequently Asked Questions
How Do I Know If My Refrigerator Thermostat Is Bad?
Check for inconsistent cooling or frequent cycling in your fridge. Use a multimeter to test thermostat continuity. If readings are irregular, it may be faulty. Adjust settings to see if temperature stabilizes. Consult a professional if issues persist.
How To Tell If A Refrigerator Thermistor Is Bad?
Check for inconsistent fridge temperatures, unexpected freezing, or thawing. Test the thermistor with a multimeter for resistance changes. A faulty thermistor won’t show resistance variation with temperature changes, indicating it’s bad. Replace if needed for optimal refrigerator performance.
How To Tell If A Fridge Thermometer Is Working?
Place the thermometer in a glass of water inside the fridge. Check if it reads between 35-38°F. If it does, it’s working accurately.
How Do You Test A Thermostat With A Multimeter?
To test a thermostat with a multimeter, first, disconnect power. Set the multimeter to resistance (ohms). Connect the probes to the thermostat terminals. A working thermostat shows continuity (zero or near-zero resistance). Replace if the reading is infinite. Always consult the manual for specific instructions.
Conclusion
Testing a refrigerator thermostat is simple and important. It ensures your food stays fresh. Start by adjusting the temperature settings. Listen for a click. No click? It might be faulty. Use a multimeter for accuracy. Check for continuity. No continuity?
Consider replacement. Regular checks can prevent food spoilage. Maintaining your thermostat helps save energy too. Always consult a manual or expert if unsure. Keeping your refrigerator in top shape benefits your kitchen and wallet. Don’t ignore warning signs. Act promptly for efficient performance.
Happy testing!
Check Best Thermostat Pricing in Amazon
** As an Amazon Associate, I earn from qualifying purchases.