
Check Best Thermostat Pricing in Amazon
** As an Amazon Associate, I earn from qualifying purchases.
Testing a thermostat is straightforward. It helps ensure your heating or cooling system works well.
A faulty thermostat can lead to uncomfortable temperatures and high energy bills. Checking it regularly can save you time and money. In this guide, we’ll explain simple steps to test your thermostat. You’ll learn how to diagnose issues and decide if you need a replacement.
Whether you’re a homeowner or renter, this knowledge can help maintain a cozy home. Let’s dive in and make sure your thermostat is functioning correctly.
Credit: www.youtube.com
Introduction To Thermostat Testing
A thermostat is a crucial component of your home’s heating and cooling system. It regulates the temperature, ensuring your home stays comfortable. Knowing how to test a thermostat can save you from unexpected discomfort. This guide will help you understand the basics of thermostat testing.
Importance Of Accurate Testing
Accurate testing is key to maintaining a comfortable home. A faulty thermostat can lead to inefficient heating or cooling. This can increase your energy bills. Regular testing ensures your thermostat works correctly. It helps you spot problems early.
Common Signs Of A Faulty Thermostat
There are several signs that your thermostat might be faulty. One common sign is uneven temperatures in your home. Another is the HVAC system running constantly or not at all. You may also notice incorrect temperature readings. If you see any of these signs, it’s time to test your thermostat.
Gather Necessary Tools
Gather essential tools like a screwdriver, multimeter, and a thermometer. These tools help check the thermostat’s connections and temperature accuracy easily.
Testing a thermostat might seem daunting at first, but with the right tools, it becomes a simple task. Before you start, it’s essential to gather all the tools you need. This ensures the process runs smoothly and safely.Essential Tools List
To test your thermostat, you’ll need a few basic tools: – Screwdriver: A Phillips or flathead screwdriver, depending on your thermostat model. – Digital Multimeter: This will help you measure voltage and continuity. – Thermometer: An accurate way to verify the current room temperature. – Safety Gloves: Protect your hands from any electrical hazards. – User Manual: Always handy for model-specific instructions. These tools are usually available in most households or can be easily purchased from a hardware store.Safety Precautions
Safety should always be your top priority when working with electrical devices: – Turn Off Power: Ensure the power to your thermostat is turned off at the breaker box to avoid any electrical shocks. – Use Insulated Tools: If possible, use tools with insulated handles to reduce the risk of electric shock. – Wear Gloves: Safety gloves can protect your hands from sharp edges and electrical currents. By following these precautions, you can safely and effectively test your thermostat. Have you ever had an experience where you skipped a safety step and regretted it later? It’s always better to be cautious. Testing a thermostat might seem like a small task, but a little preparation goes a long way in ensuring your safety and getting accurate results.Locate The Thermostat
Testing a thermostat begins with finding its location. This step is crucial because you need easy access to the device. Without access, you can’t test it properly. Let’s look at how to locate it and ensure it’s safe to handle.
Finding The Thermostat
The thermostat is often on a wall in your home. It is usually in a central place like a hallway or living room. Check around light switches and other controls. Some homes might have more than one thermostat. Make sure you find all of them.
Ensuring Power Is Off
Before touching the thermostat, turn off the power. This step is very important for your safety. Go to your circuit breaker and switch off the power to the thermostat. Double-check by trying to turn the system on from the thermostat. If it does not respond, the power is off. Now, you can safely proceed with testing.
Remove Thermostat Cover
Testing your thermostat starts with removing its cover. This simple step allows you to access the internal components. Follow these steps to safely and effectively remove the thermostat cover.
Step-by-step Guide
First, turn off the power to your thermostat. This ensures safety. Locate the thermostat on your wall. Most covers snap or slide off. Gently pull or slide the cover. Use a screwdriver if necessary. Be careful not to force it. You don’t want to damage the cover or the unit.
Once the cover is off, place it in a safe spot. You will need it later. Now you can see the inner workings of your thermostat. You are ready to handle the internal components.
Handling Internal Components
Before touching anything, observe the components. Notice the wires and connections. Each part is essential for the thermostat’s function. Handle the internal components with care. Avoid yanking or pulling on wires. Use a multimeter to test the connections. This helps ensure everything is working properly.
Keep your hands steady. Take your time. If something seems off, make a note. You can refer to the thermostat’s manual for guidance. Ensuring you handle the components correctly helps maintain the device’s integrity. Once done, you can proceed to test the thermostat.
Inspect Wiring Connections
Inspecting wiring connections is a critical step when testing a thermostat. Faulty connections can lead to inaccurate temperature readings or complete system failures. This section will guide you through identifying and checking the thermostat wires to ensure everything is securely connected.
Identifying Wires
Before you start, turn off the power to your HVAC system. Safety first! Once you’ve done that, remove the thermostat cover to expose the wiring.
You will typically see several wires of different colors. Each color represents a specific function. For example, the red wire is usually the power wire, while the white wire controls the heating.
If you’re unsure, refer to your thermostat’s manual or look for labels on the wires. Taking a photo of the current setup can help you remember where each wire goes.
Checking For Loose Connections
Loose connections can cause all sorts of problems. Gently tug on each wire to see if it’s secure. If any wire feels loose, use a screwdriver to tighten the terminal screws.
While checking, look for any signs of wear or damage to the wires. Frayed or exposed wires can be dangerous and should be replaced.
Have you ever had a thermostat that seemed to have a mind of its own? It could be due to a loose connection. Fixing these can save you a lot of headaches.
Check Best Thermostat Pricing in Amazon
** As an Amazon Associate, I earn from qualifying purchases.
After securing all connections, replace the thermostat cover and turn the power back on. Your thermostat should now be ready for a test run. If problems persist, it might be time to call a professional.
Credit: www.allclaveparts.com
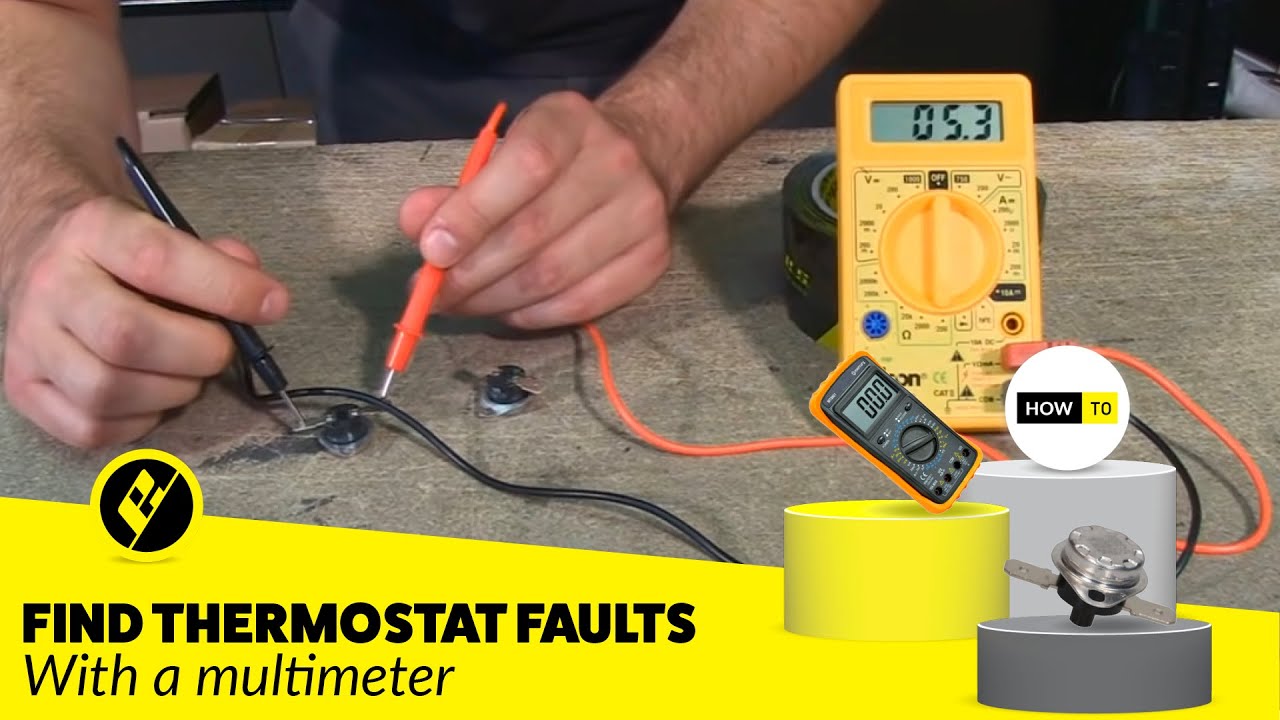
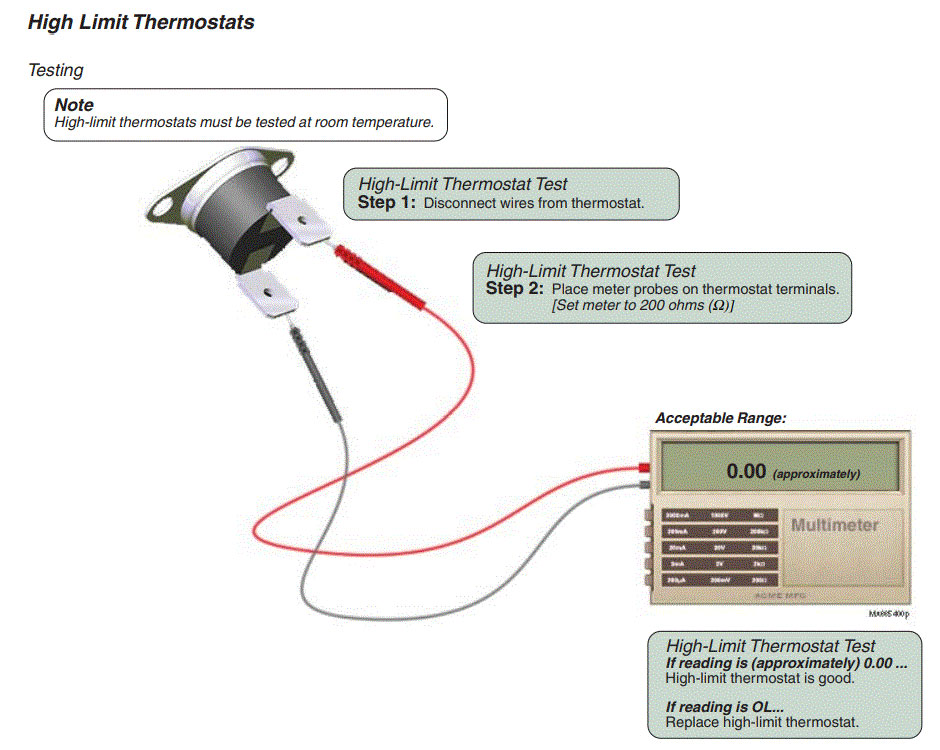
Test With A Multimeter
Testing a thermostat with a multimeter ensures your heating or cooling system works properly. Set the multimeter to the ohms setting. Then, place the probes on the thermostat terminals to check for continuity.
Testing a thermostat with a multimeter is a straightforward process that can help you determine if your thermostat is functioning correctly. Using a multimeter allows you to measure the electrical resistance and continuity, giving you clear insights into the health of your thermostat.Setting Up The Multimeter
First, ensure your multimeter is set to the correct setting. You’ll need to set it to measure resistance (Ohms), usually symbolized by the Greek letter Omega (Ω). Turn off the power to your HVAC system to avoid any electrical hazards. Next, remove the thermostat cover to expose the wiring. Connect the multimeter probes to the thermostat terminals. Typically, you’ll test between the R (power) and W (heat) terminals.Interpreting Readings
Look at the multimeter display. A reading of zero or close to zero Ohms indicates continuity, meaning the thermostat is likely working correctly. A high resistance reading or infinity (often shown as “OL” on digital meters) suggests an open circuit. This could mean the thermostat is faulty. If you’re unsure about the readings, compare them with the thermostat’s manual. It often provides expected resistance values. Have you ever found yourself puzzled by inconsistent heating or cooling? Testing your thermostat with a multimeter can save you time and money. Regular checks ensure your system runs efficiently, keeping your home comfortable year-round.Test With An Alternative Method
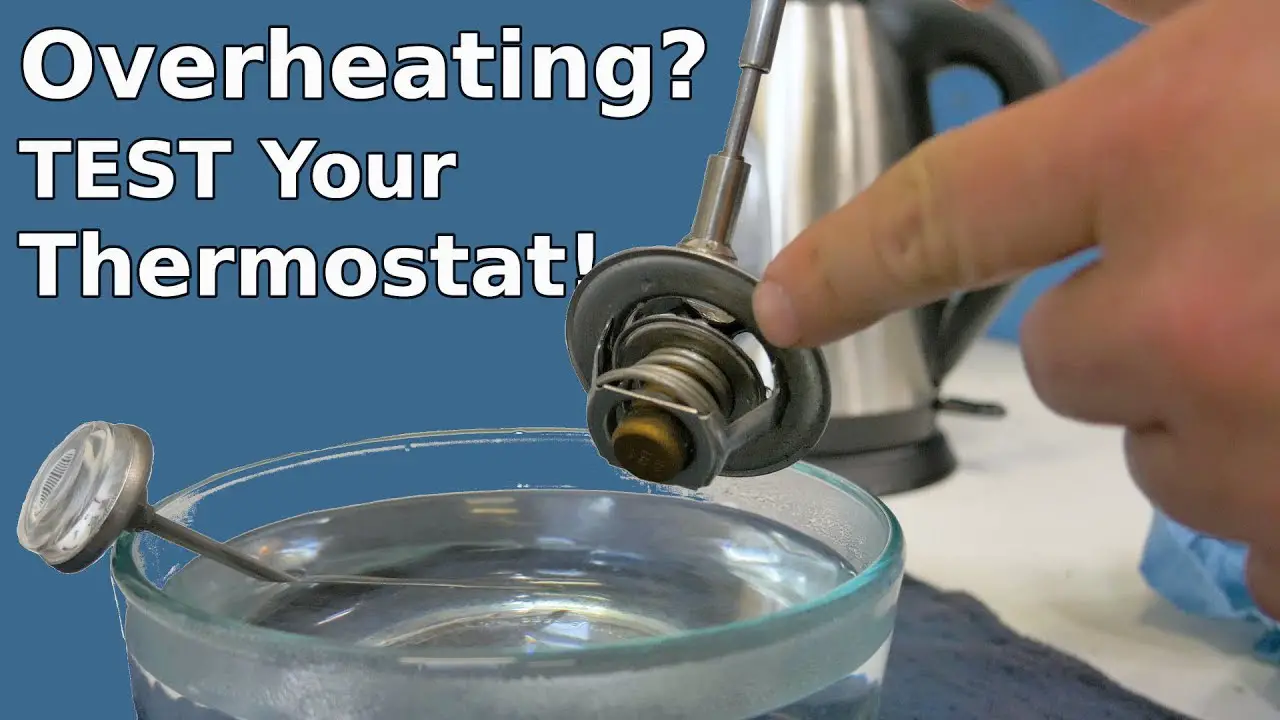
Testing a thermostat can sometimes be challenging. If the usual methods don’t work, try an alternative approach. This method involves using a thermometer to check the thermostat’s accuracy. It is an easy way to ensure your thermostat functions well.
Using A Thermometer
To start, get a reliable household thermometer. Place it near the thermostat. Ensure both devices are in the same room. Wait for 10 to 15 minutes. This allows the thermometer to stabilize.
Comparing Temperature Readings
After waiting, check the thermometer reading. Compare it with the thermostat’s display. If the readings match, your thermostat is likely accurate. If they differ, your thermostat might need calibration.
Repeat the test at different times of the day. This ensures consistent results. Always use a high-quality thermometer for best results. This method helps maintain a comfortable home temperature.

Credit: mechanics.stackexchange.com
Reassemble And Power On
Once you have tested your thermostat, the next step is to reassemble and power it on. This is a critical phase. A small mistake could result in your thermostat not functioning properly. Follow these steps to ensure your thermostat is reassembled and powered on correctly.
Reattaching The Cover
First, make sure the thermostat is turned off. Take the cover and align it with the base. You should feel it click into place. If it doesn’t fit, check for any obstructions. Ensure all wires are tucked in. This avoids any pinching or damage. Once aligned, press firmly but gently. This secures the cover to the base.
Restoring Power
After reattaching the cover, restore power to the thermostat. Go to your circuit breaker. Turn the breaker switch back on. If your thermostat uses batteries, insert new ones. Make sure they are fresh and installed correctly. Check the display. It should light up, indicating power has been restored.
Test the thermostat by setting it to a desired temperature. Listen for the heating or cooling system to activate. If it does, you’ve successfully restored power. If not, double-check your reassembly steps. Ensure all connections are secure and in place.
Evaluate Test Results
Testing your thermostat is only the first step. You must evaluate the test results to determine the next steps. This process involves careful analysis and decision-making based on the data gathered during the test.
Analyzing Data
First, compare the readings from your thermostat to the expected values. Note any discrepancies. Check the temperature readings at different times of the day. Observe if the thermostat maintains a consistent temperature.
Next, review the thermostat’s response time. Does it take too long to activate your heating or cooling system? An efficient thermostat should quickly respond to temperature changes.
Deciding On Repair Or Replacement
If your thermostat shows inaccurate readings or slow response times, you have two options. Decide whether to repair or replace it. Consider the age of your thermostat. Older models might not be worth repairing.
Also, think about the cost of repairs versus replacement. Sometimes, a new thermostat may be more cost-effective. If you choose replacement, look for a modern, energy-efficient model. This could save you money on energy bills.
Frequently Asked Questions
How Can I Test If My Thermostat Is Bad?
To test if your thermostat is bad, check if it responds to temperature changes. Verify the wiring and inspect for visible damage. Use a multimeter to test for continuity.
How Do I Manually Test My Thermostat?
Set the thermostat to heating mode. Adjust the temperature higher than room temperature. Wait for the heating system to start. Switch to cooling mode. Set temperature lower than room temperature. Confirm the cooling system activates.
What Are The Signs That Indicate That A Thermostat Needs To Be Replaced?
Signs of a faulty thermostat include erratic temperature readings, short cycling, and unresponsive controls. Higher energy bills and inconsistent home temperatures can also indicate the need for replacement.
How To Jump Start A Thermostat?
To jump start a thermostat, turn off the power, remove the cover, and connect the red and white wires. This bypasses the thermostat, allowing the system to run.
Conclusion
Testing a thermostat doesn’t need to be complex. Follow the steps outlined. Ensure your tools are ready. Check for common issues. Regular testing keeps your home comfortable. Remember, a well-functioning thermostat saves energy and money. Stay proactive. Happy testing!
Check Best Thermostat Pricing in Amazon
** As an Amazon Associate, I earn from qualifying purchases.