
Check Best Thermostat Pricing in Amazon
** As an Amazon Associate, I earn from qualifying purchases.
Taking a Honeywell thermostat off the wall is simple. First, turn off the power.
Next, remove the cover and unscrew the mounting plate. Honeywell thermostats are reliable devices, but sometimes you need to remove them. Whether it’s for replacement, cleaning, or troubleshooting, knowing how to safely take off your thermostat is crucial. Incorrect handling can lead to damage or injury.
In this guide, you’ll learn the right steps to remove your Honeywell thermostat from the wall. This process involves basic tools and precautions to ensure safe removal. Follow along to make sure your thermostat is off the wall without any issues.
Safety Precautions
Taking your Honeywell thermostat off the wall can seem daunting. Safety should be your first priority. Following the right precautions ensures a smooth process. This section will guide you through the necessary safety steps.
Power Off
First, turn off the power to your thermostat. Locate your home’s circuit breaker. Switch off the circuit controlling your thermostat. This step prevents electric shock. Confirm the power is off by checking the thermostat display. It should be blank or off.
Handling Wires
Next, handle the wires with care. Remove the thermostat cover gently. Identify and label each wire. Use masking tape for labeling. This helps during reinstallation. Avoid touching bare wires directly. Use insulated tools for safety. Keep track of all screws and parts. Store them in a small container. This avoids losing them.

Credit: www.youtube.com
Identifying Your Thermostat Model
Identifying your Honeywell thermostat model is crucial before taking it off the wall. Knowing the model ensures you follow the correct steps and avoid damage. Let’s go through how to locate this information.
Locating Model Number
The model number is often on the front of the thermostat. It can be a combination of letters and numbers. Sometimes, it is inside the battery compartment. You can also find it behind the faceplate. Carefully remove the faceplate to check.
Checking User Manual
The user manual is another resource for finding the model number. The manual contains detailed product information. Look at the cover page or the first few pages. The model number is usually listed there. If you do not have a physical copy, download it from the Honeywell website.
Removing Thermostat Cover
To remove the Honeywell thermostat cover, gently pull it from the base. Ensure the thermostat is off before starting.
Removing the thermostat cover might seem like a daunting task, but it’s quite simple with the right approach. Whether you want to clean it, check the wiring, or replace it entirely, knowing how to safely remove the cover is essential. Let’s walk through the steps to make this process seamless.Gently Pry Off
Start by turning off the power to your thermostat to avoid any electrical issues. Use a small flat-head screwdriver or a similar tool. Insert it into the seam where the cover meets the base. Apply gentle pressure to pry off the cover. Avoid using excessive force. You don’t want to damage the cover or the wall.Avoid Damage
Handle the cover with care. If you feel resistance, reposition the tool and try again. Pulling too hard can crack the cover. Take your time and work slowly. Once the cover is off, place it in a safe spot. You don’t want it to get lost or broken while you work on the thermostat. Here’s a tip: Keep a small container nearby to store any screws or small parts. This way, you avoid losing them. Have you ever removed a thermostat cover? What challenges did you face? Share your experiences in the comments below! By following these steps, you can safely remove your Honeywell thermostat cover without causing damage. Stay tuned for more tips on how to maintain your home’s HVAC system!
Credit: support.resideo.com
Disconnecting Wires
Removing a Honeywell thermostat from the wall involves disconnecting wires carefully. First, turn off the power. Then, gently detach the wires from the terminals.
Taking off a Honeywell thermostat from the wall can be a bit daunting, especially when it comes to disconnecting the wires. However, with a bit of patience and attention to detail, you can do it safely and effectively. This section will guide you through the process of disconnecting the wires with ease.Labeling Wires
Before you start disconnecting any wires, it’s essential to label them. This step is crucial to avoid confusion later on when you need to reconnect everything. Use small pieces of masking tape and a marker to label each wire according to the terminal it connects to. For example, if a wire is connected to the ‘R’ terminal, label it as ‘R’. This simple step will save you a lot of headaches. Trust me, I’ve been there—nothing’s more frustrating than not knowing which wire goes where.Using A Screwdriver
Once your wires are labeled, grab a screwdriver. You’ll need it to loosen the screws that hold the wires in place. Carefully unscrew each terminal screw just enough to release the wire. Remember, you don’t need to remove the screws entirely. Just loosen them enough to slide the wires out. Keep a small bowl or tray nearby to collect any screws you might accidentally drop. Disconnecting wires can seem tricky, but taking your time and being thorough will make all the difference. Have you ever tried reconnecting wires without labeling them first? It’s a puzzle you don’t want to solve.Unscrewing The Thermostat Base
Taking your Honeywell thermostat off the wall can seem like a daunting task, but it’s quite straightforward if you know what steps to follow. One crucial part of the process is unscrewing the thermostat base. This might sound simple, but there are a few tips and tricks that can make it easier and ensure you don’t damage your wall or the thermostat. Let’s dive into the details.
Locating Mounting Screws
The first step in unscrewing the thermostat base is to locate the mounting screws. These screws are typically hidden behind the thermostat cover. Gently pull or slide off the cover to expose the base.
If you’re unsure where the screws are, check the user manual. It often has diagrams showing their exact location. Alternatively, a quick search online for your thermostat model can also help.
Removing Screws
Once you have located the screws, it’s time to remove them. Use a screwdriver that fits the screws perfectly. This prevents stripping the screws, which can make removal difficult.
Carefully unscrew each one, holding the thermostat base so it doesn’t fall off the wall. Place the screws in a safe spot, so you don’t lose them.
With the screws removed, gently pull the base away from the wall. If it feels stuck, check for any additional screws or clips that might be holding it in place.
Check Best Thermostat Pricing in Amazon
** As an Amazon Associate, I earn from qualifying purchases.
Have you ever found yourself struggling with stuck screws? It’s frustrating, but using the right tools and a bit of patience can make all the difference. If you’re having trouble, try using a pair of needle-nose pliers to get a better grip.
By following these steps, you can easily unscrew the thermostat base without causing any damage. Always remember to turn off the power before you start working with electrical devices. Have you tried taking off your thermostat before? How did it go?
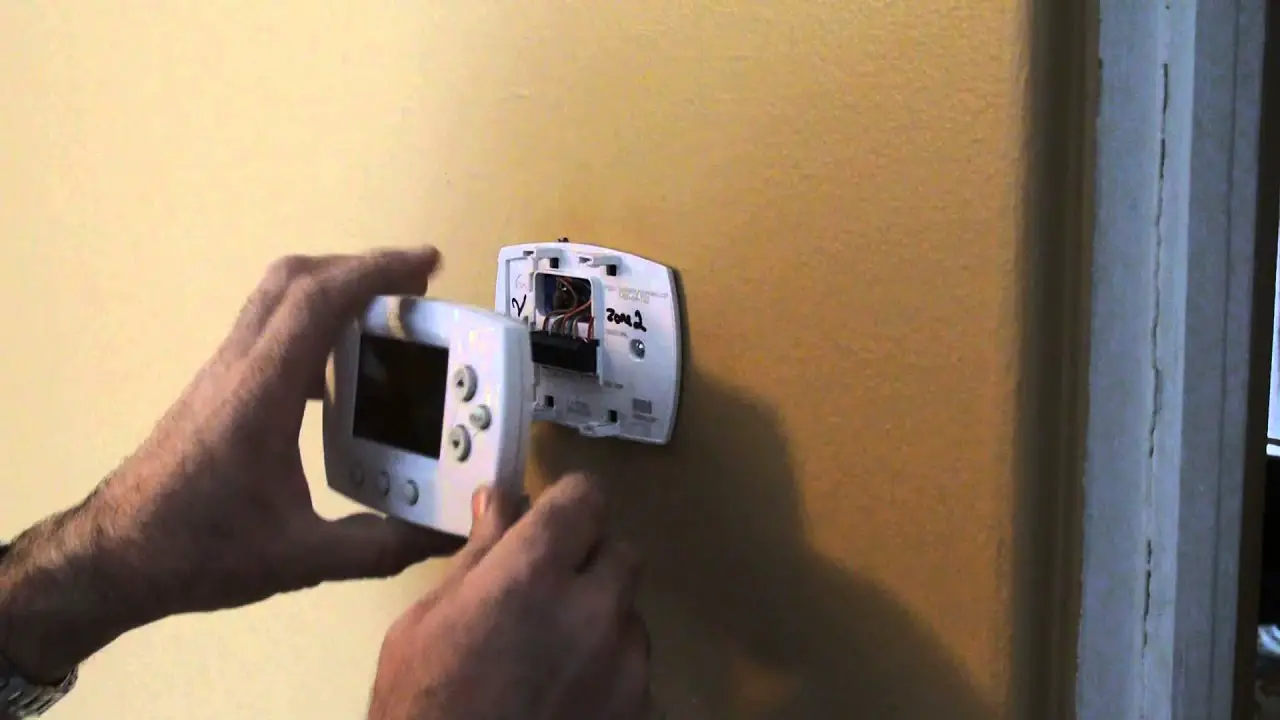
Removing The Thermostat From The Wall
Removing the Honeywell thermostat from the wall may seem daunting. But, with a few simple steps, you can do it easily. This guide will help you safely take your thermostat off the wall. Follow each step carefully to avoid damaging your device or wall.
Gently Pull Off
First, switch off the power to the thermostat. This is crucial for your safety. Use a screwdriver to remove the cover plate. Place the screws in a safe spot. Now, hold the thermostat gently. Pull it straight out from the wall. Do not twist or force it. If it does not come out easily, check for hidden screws.
Inspecting Wall Surface
Once the thermostat is off, inspect the wall surface. Look for any damage or holes. You may need to repair these spots before installing a new device. Check the wiring and ensure it is intact. Keep the wires organized and avoid tangling. This will help in the future installation process.
Post-removal Steps
Removing a Honeywell thermostat from your wall is just the first step. Properly handling the post-removal steps ensures the safety of your device and prepares your space for a new installation. Follow these guidelines to store the thermostat safely and get ready for the new setup.
Storing Thermostat Safely
After removal, place the thermostat in a safe, dry place. Use the original packaging if available. This packaging often provides the best protection. Label the packaging with the model number and any important details.
If the original packaging is not available, use a sturdy box. Wrap the thermostat in bubble wrap or soft cloth. This will prevent damage during storage. Ensure the box is sealed to keep dust and moisture out.
Preparing For New Installation
Before installing a new thermostat, clean the wall area. Remove any debris or leftover adhesive. This ensures a smooth surface for the new device.
Check the wiring. Ensure all wires are intact and undamaged. Use a wire nut to cap off any exposed wires temporarily. This is a safety measure to prevent electrical issues.
Gather all necessary tools and the new thermostat’s installation guide. Read the guide carefully to understand the installation steps. Having everything ready makes the process smoother.

Credit: willplumb.com
Frequently Asked Questions
How Do I Remove A Honeywell Thermostat From The Wall?
To remove a Honeywell thermostat, turn off the power. Detach the faceplate, unscrew the mounting plate, and disconnect the wires.
How To Take Honeywell Thermostat Off Wall To Change Battery?
To change the battery, gently pull the thermostat off the wall mount. Replace the batteries and reattach it.
How To Pull A Thermostat Off The Wall?
Turn off power. Remove the thermostat cover. Unscrew mounting screws. Gently pull the thermostat off the wall. Disconnect wires.
How To Take Honeywell Thermostat Off Of Temporary?
Press “Cancel” on your Honeywell thermostat. This will remove the temporary setting and resume the regular schedule.
Conclusion
Removing a Honeywell thermostat from the wall is simple. Start by turning off the power. Ensure safety first. Next, gently pull the thermostat cover. Use a screwdriver for screws. Label wires for easy reinstallation. Finally, disconnect the wires. Now, the thermostat is off the wall.
Follow these steps for a smooth process. Always keep instructions handy. This task is manageable with patience and care. Ready to upgrade or repair? You can do it yourself.
Check Best Thermostat Pricing in Amazon
** As an Amazon Associate, I earn from qualifying purchases.