
Check Best Thermostat Pricing in Amazon
** As an Amazon Associate, I earn from qualifying purchases.
To set up an Emerson thermostat, connect the wires to the appropriate terminals and follow the on-screen setup instructions. Setting up an Emerson thermostat is a straightforward process that enhances your home’s climate control.
Emerson thermostats are designed to be user-friendly, making installation and configuration simple for most homeowners. These thermostats offer advanced features like programmable schedules, energy-saving modes, and remote access via mobile apps. Whether you are replacing an old thermostat or installing a new one, Emerson provides clear instructions and support.
Proper setup ensures efficient heating and cooling, ultimately saving you energy and money. With just a few steps, you can enjoy a comfortable and well-regulated indoor environment.
Credit: sensi.copeland.com
- Introduction To Emerson Thermostats
- Pre-installation Considerations
- Removing The Old Thermostat
- Understanding Your Wiring
- Mounting The Emerson Thermostat
- Wiring The Emerson Thermostat
- Configuring The Thermostat Settings
- Testing And Troubleshooting
- Maintaining Your Emerson Thermostat
- Frequently Asked Questions
- Conclusion
Introduction To Emerson Thermostats
Emerson thermostats are a great choice for controlling your home’s temperature. They are easy to use and reliable. Setting up an Emerson thermostat can save you time and energy.
Benefits Of A Programmable Thermostat
A programmable thermostat offers many benefits. It can help you save money on energy bills. You can set it to adjust the temperature at different times of the day.
Here are some key benefits:
- Energy Efficiency: Automatically adjusts to save energy.
- Cost Savings: Lowers your monthly energy bills.
- Convenience: No need to manually change settings.
- Comfort: Keeps your home at the perfect temperature.
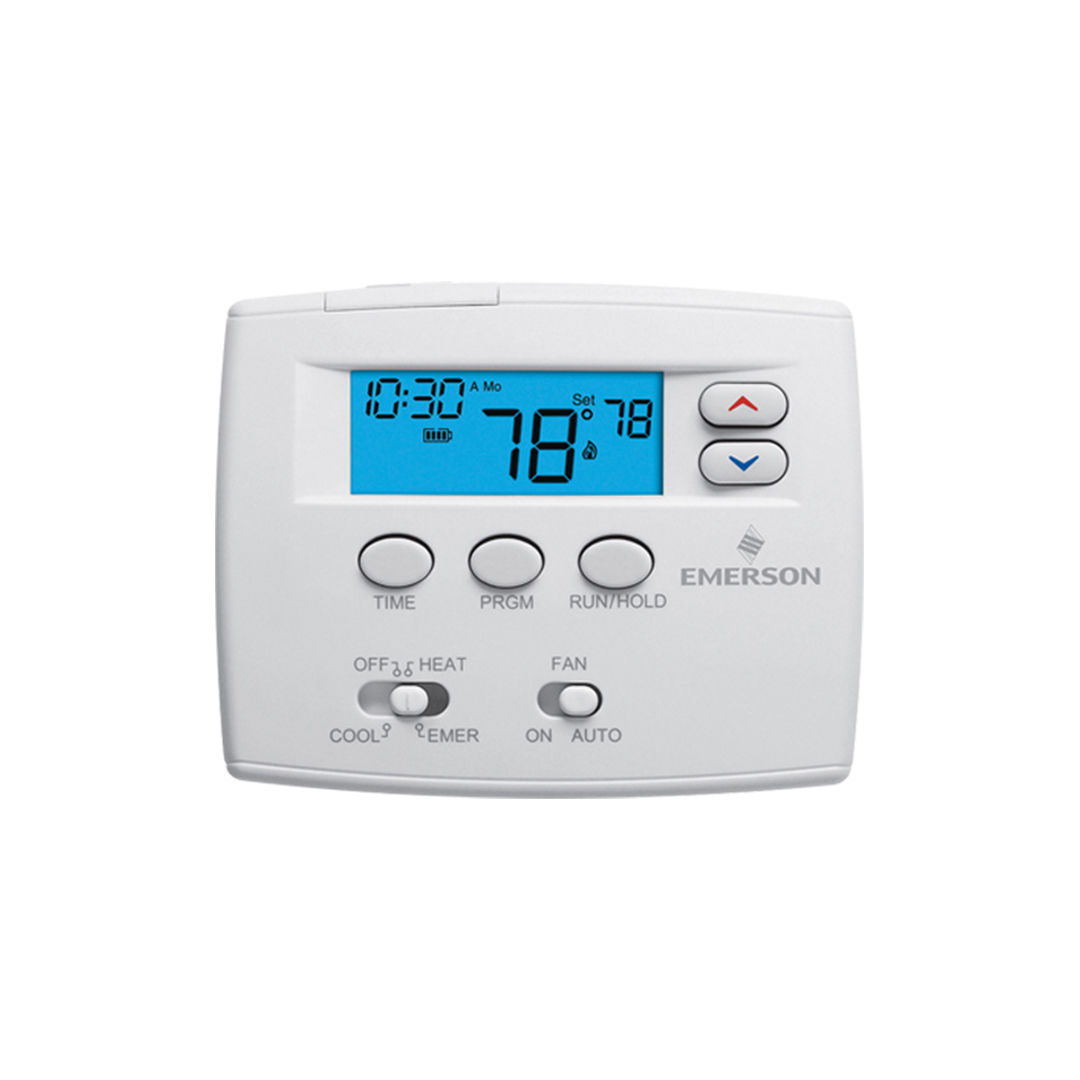
Types Of Emerson Thermostats
Emerson offers different types of thermostats. Each type has unique features. Here are some popular models:
| Thermostat Type | Features |
|---|---|
| Sensi Smart Thermostat | Wi-Fi enabled, works with smart home systems |
| Blue Series 2 | Large display, easy to read, touchscreen |
| Emerson Classic | Basic features, budget-friendly |
Each model serves different needs. Choose based on your preferences.
Credit: webapps.copeland.com
Pre-installation Considerations
Before you begin setting up your Emerson thermostat, it’s crucial to prepare. Proper preparation ensures a smooth and safe installation process. This section will guide you through the essential pre-installation considerations.
Tools And Materials Needed
Gather all necessary tools and materials before starting. Here’s a list to make things easier:
- Screwdriver (Phillips and flat-head)
- Drill with bits
- Level
- Wire strippers
- Thermostat mounting screws
- Masking tape
- Emerson thermostat unit
Having these tools and materials ready will save time and prevent interruptions.
Safety Precautions
Safety should always be a priority. Follow these safety measures to avoid accidents:
- Turn off the power to your HVAC system at the circuit breaker. This step is crucial to prevent electrical shock.
- Use a voltage tester to ensure no power is flowing to the thermostat wires.
- Wear safety gloves and glasses to protect yourself from potential hazards.
- Label the wires with masking tape before disconnecting them. This will help you reconnect them correctly.
- Keep children and pets away from the installation area.
By following these safety precautions, you ensure a safe installation process for your Emerson thermostat.
Removing The Old Thermostat
Removing the old thermostat is the first step in setting up your new Emerson thermostat. This process involves a few critical steps to ensure safety and efficiency. Follow these guidelines carefully to avoid any issues.
Shutting Off Power
Safety comes first. Before you start, you need to shut off the power to your HVAC system. Go to your home’s circuit breaker and locate the switch that controls the HVAC system. Flip the switch to the ‘off’ position.
Double-check that the power is off by trying to adjust the temperature on the old thermostat. If the display remains blank, you are good to go. This step ensures you won’t get an electric shock while working.
Detaching The Old Device
Begin by removing the thermostat cover. Some covers snap off, while others may require a screwdriver. Gently pull or unscrew the cover to reveal the internal components.
Next, take a picture of the wiring. This will help you reconnect the wires to your new Emerson thermostat. Label each wire with tape and write down the corresponding terminal letter.
Carefully unscrew the wires from the terminals. Make sure the wires do not fall back into the wall. Wrap the wires around a pencil or use tape to keep them in place.
Now, remove the mounting screws that hold the old thermostat base to the wall. Keep these screws in a safe place as you might need them later. Gently pull the base away from the wall.
| Step | Action |
|---|---|
| 1 | Shut off the power |
| 2 | Remove the cover |
| 3 | Take a picture of the wiring |
| 4 | Label the wires |
| 5 | Unscrew the wires |
| 6 | Remove the base |
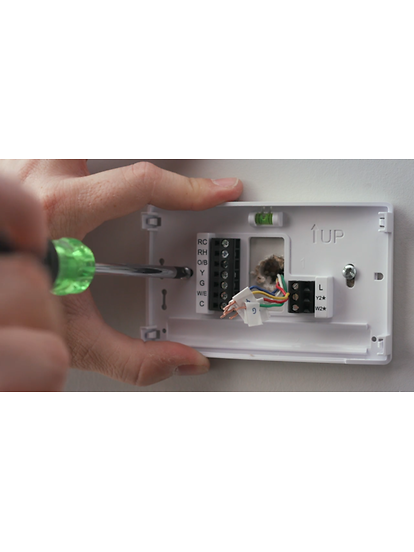
Understanding Your Wiring
Setting up an Emerson thermostat requires you to understand your home’s wiring. Proper wiring ensures your thermostat works well. This step is crucial for an efficient installation process.
Identifying Wires And Terminals
Start by turning off your HVAC system. This keeps you safe while you work. Next, remove the old thermostat’s cover. You will see several wires connected to different terminals.
Each wire has a specific color. The wires connect to labeled terminals. Common wire colors include red, white, yellow, and green. The red wire often connects to the R terminal. The white wire usually connects to the W terminal. The yellow wire connects to the Y terminal. The green wire connects to the G terminal.
Use this table for quick reference:
| Wire Color | Terminal Label |
|---|---|
| Red | R |
| White | W |
| Yellow | Y |
| Green | G |
Double-check the labels on your old thermostat and the new Emerson thermostat. This ensures you connect each wire to the correct terminal.
Taking A Picture For Reference
Before removing the wires, take a clear picture of the current wiring setup. This picture will serve as a reference. It helps ensure you reconnect each wire correctly.
Follow these steps to take a helpful picture:
- Use a smartphone or digital camera.
- Ensure the picture is well-lit.
- Focus on the wires and terminals.
- Make sure all labels are visible.
Store this picture safely. You might need to refer to it later. This step can save you time and prevent mistakes.
Understanding your wiring is key to a smooth installation. Identifying wires and taking a reference picture makes the process easier. This ensures your Emerson thermostat works efficiently.
Mounting The Emerson Thermostat
Mounting your Emerson thermostat correctly is crucial. A proper mount ensures accurate temperature readings and efficient operation. Follow these steps to mount your thermostat securely and correctly.
Positioning The Base Plate
First, choose the right spot for your thermostat. Avoid placing it near doors, windows, or direct sunlight. This helps in accurate temperature readings. Hold the base plate against the wall at your chosen spot.
Check Best Thermostat Pricing in Amazon
** As an Amazon Associate, I earn from qualifying purchases.
Use a level to make sure the base plate is straight. Mark the screw holes on the wall with a pencil. Drill holes at the marked spots if needed. Insert wall anchors into the holes if your wall is drywall or plaster.
Securing The Thermostat To The Wall
Next, align the base plate with the drilled holes. Secure the base plate to the wall using screws. Tighten the screws until the base plate is firmly attached. Do not over-tighten as this may damage the wall.
Connect the wires to the terminals on the base plate. Follow the wiring diagram in the user manual. Once the wires are connected, snap the thermostat onto the base plate. Ensure it clicks into place.
Your thermostat is now mounted and ready for setup. Double-check the stability of the mount. Ensure all connections are secure before proceeding to the next steps.
Credit: m.youtube.com
Wiring The Emerson Thermostat
Setting up your Emerson thermostat involves a critical step: wiring. Ensuring the correct connections can save you from many headaches. This guide will walk you through the wiring process.
Connecting The Wires
The first step is to connect the wires to your Emerson thermostat. Follow these steps:
- Turn off the power to your HVAC system.
- Remove the cover from your old thermostat.
- Take a picture of the existing wires for reference.
- Label each wire according to the terminal it connects to.
- Disconnect the wires from the old thermostat.
- Attach each wire to the corresponding terminal on the Emerson thermostat.
- Ensure each wire is securely connected.
Ensuring Proper Connections
Proper connections are crucial for your thermostat to function correctly. Here are some important tips:
- Make sure the wires are not frayed or damaged.
- Double-check that each wire is connected to the correct terminal.
- Use the wiring diagram provided in the Emerson thermostat manual.
- If you face any issues, refer to the troubleshooting section in the manual.
Testing the connections is the final step. Turn the power back on and test your thermostat. Ensure it responds correctly to your settings.
| Wire Color | Terminal |
|---|---|
| Red | R |
| Green | G |
| Yellow | Y |
| White | W |
With these steps, you can wire your Emerson thermostat correctly. Enjoy a comfortable and energy-efficient home!
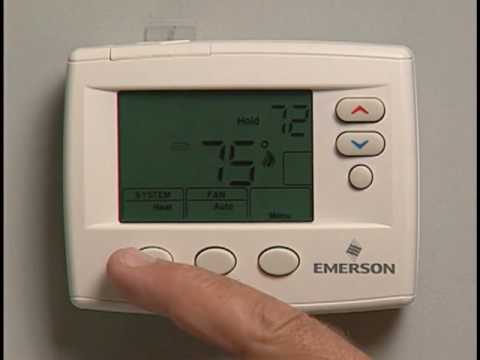
Configuring The Thermostat Settings
Setting up your Emerson thermostat can significantly improve your home’s energy efficiency. Configuring the thermostat settings is a crucial step. Proper settings ensure your home stays comfortable all year round. Let’s dive into the essential steps: Setting the Date and Time and Programming Temperature Settings.
Setting The Date And Time
To begin, locate the settings menu on your thermostat. Follow these steps:
- Press the Menu button.
- Use the arrow keys to navigate to Date & Time.
- Press Select.
- Adjust the date using the arrow keys. Press Next to move to the time settings.
- Set the time using the arrow keys. Confirm your settings by pressing Done.
Setting the correct date and time ensures your thermostat operates accurately.
Programming Temperature Settings
Programming your thermostat helps save energy and maintain comfort. Follow these steps to set your desired temperatures:
- Press the Menu button.
- Select Program using the arrow keys.
- Choose the Day you want to set the temperature for.
- Set the Wake, Leave, Return, and Sleep times and temperatures.
- Repeat for each day of the week or use the Copy feature to apply settings to multiple days.
Here’s an example of a weekly schedule:
| Day | Time | Temperature (°F) |
|---|---|---|
| Monday | Wake: 6:00 AM | 70°F |
| Monday | Leave: 8:00 AM | 62°F |
| Monday | Return: 5:00 PM | 70°F |
| Monday | Sleep: 10:00 PM | 65°F |
Repeat the process for each day. This schedule can help you save energy and keep your home comfortable.
Testing And Troubleshooting
Setting up an Emerson thermostat is just the beginning. Ensuring it works properly is crucial. This section will guide you through running system tests and addressing common issues.
Running System Tests
After installation, you need to run system tests. This ensures the thermostat controls your HVAC system correctly. Follow these steps to run the tests:
- Set the thermostat to the desired temperature.
- Turn on the heating or cooling system.
- Wait a few minutes. Listen for the system to activate.
- Check if the room temperature matches the set temperature.
If the system does not activate, check the power supply and wiring connections. Ensure everything is connected securely.
Addressing Common Issues
Sometimes, you may face issues with your Emerson thermostat. Here are some common issues and their solutions:
| Issue | Solution |
|---|---|
| Thermostat not turning on | Check the power source. Ensure it’s plugged in correctly. |
| Incorrect temperature readings | Make sure the thermostat is not near heat sources. |
| System not heating or cooling | Verify the HVAC system is working. Check for wiring issues. |
| Display is blank | Replace the batteries if needed. Check the circuit breaker. |
If these steps do not solve the problem, refer to the user manual. It contains detailed troubleshooting tips.
Maintaining Your Emerson Thermostat
Maintaining your Emerson Thermostat ensures it works efficiently. Regular care helps in extending its lifespan and optimizing performance. Below are essential maintenance tips for your thermostat.
Regular Cleaning
Dust and dirt can affect your thermostat’s accuracy. Cleaning it regularly is crucial. Follow these steps:
- Turn off the thermostat.
- Gently remove the cover.
- Use a soft brush or cloth to wipe away dust.
- Clean the sensors and vents carefully.
- Replace the cover and turn the thermostat back on.
Important: Always avoid using water or chemicals. This can damage the device.
Software Updates
Keeping the software updated ensures your thermostat functions optimally. Follow these steps to update the software:
- Check if an update is available.
- Connect the thermostat to Wi-Fi.
- Navigate to the settings menu.
- Select ‘Check for updates’.
- If an update is available, follow the prompts to install it.
Tip: Set up automatic updates if possible. This keeps your thermostat up-to-date without manual intervention.
Maintaining your Emerson Thermostat is simple. Regular cleaning and software updates keep it running smoothly.
Frequently Asked Questions
How Do I Change The Settings On My Emerson Thermostat?
Press the “Menu” button on your Emerson thermostat. Use the arrow keys to navigate settings. Select and adjust desired settings.
How Do You Reset An Emerson Thermostat?
To reset an Emerson thermostat, press and hold the “Menu” and “Backlight” buttons for about 5 seconds. Release the buttons when the display flashes.
Which Emerson Thermostat Do I Have?
To identify your Emerson thermostat, check the model number on the device or its user manual. You can also visit the Emerson website and use their support tools.
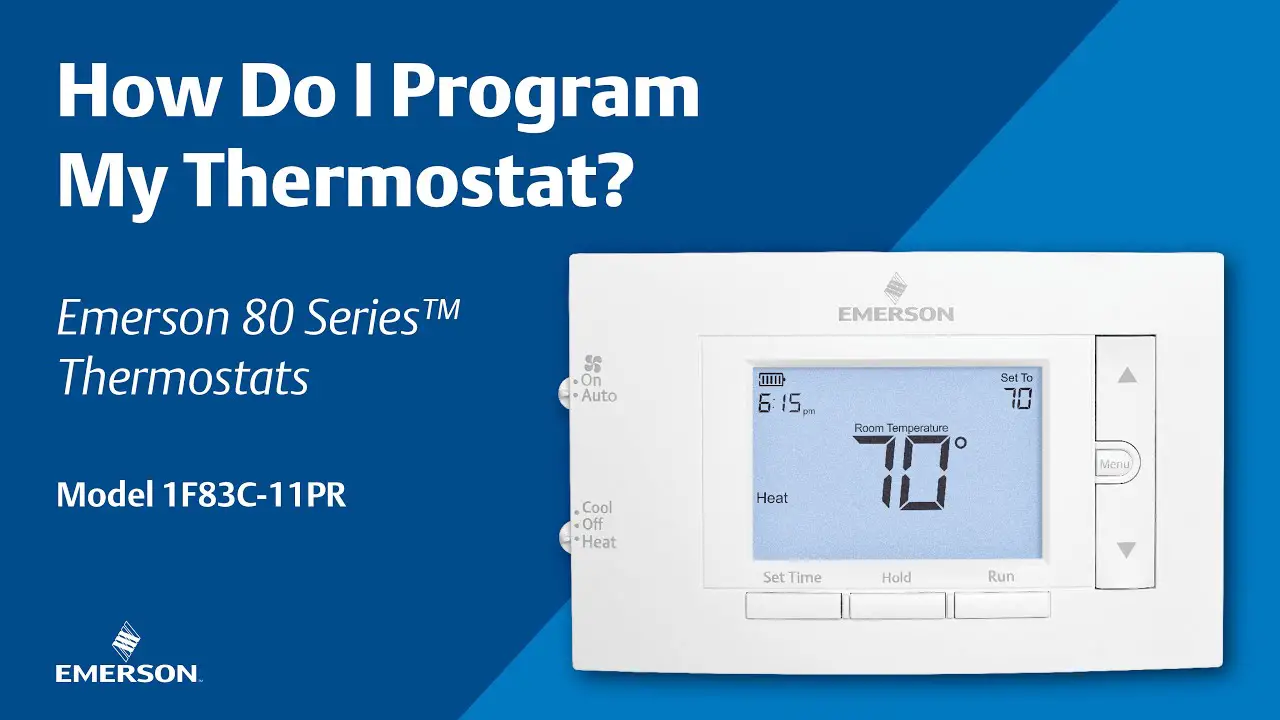
How Do I Program My Thermostat?
To program your thermostat, consult the user manual, access the settings menu, and follow the on-screen instructions. Adjust temperature schedules to your preference. Save changes.
Conclusion
Setting up an Emerson thermostat is straightforward with the right steps. Follow the guide to ensure optimal performance. Enjoy a comfortable and energy-efficient home environment. Regularly check for updates to keep your thermostat functioning smoothly. With proper setup, you can easily control your home’s temperature and save on energy costs.
Check Best Thermostat Pricing in Amazon
** As an Amazon Associate, I earn from qualifying purchases.