
Check Best Thermostat Pricing in Amazon
** As an Amazon Associate, I earn from qualifying purchases.
To set the temperature on a Luxpro thermostat, press the “Up” or “Down” arrow buttons. Adjust to your desired temperature.
Luxpro thermostats are popular for their ease of use and energy efficiency. Adjusting the temperature correctly ensures a comfortable home environment. These thermostats feature intuitive controls, making them user-friendly for all ages. With just a few button presses, you can regulate your home’s climate effectively.
Properly setting your Luxpro thermostat can also help reduce energy costs. Understanding how to use this device is crucial for maintaining optimal indoor conditions. This guide will walk you through the simple steps needed to set your desired temperature. Enjoy a comfortable living space with just a few adjustments on your Luxpro thermostat.
- Introduction To Luxpro Thermostat
- Getting Started With Your Luxpro Thermostat
- Understanding Your Luxpro Thermostat's Interface
- Step-by-step Temperature Adjustment
- Programming Your Luxpro For Different Times Of Day
- Troubleshooting Common Issues
- Maintaining Your Luxpro Thermostat
- Expert Tips For Luxpro Thermostat Users
- Faqs And Additional Resources
- Frequently Asked Questions
- Conclusion
Introduction To Luxpro Thermostat
Setting the right temperature in your home is crucial. The Luxpro Thermostat offers a simple solution. It ensures your home stays comfortable and energy-efficient. Learning how to set the temperature on a Luxpro Thermostat is easy.
Benefits Of Accurate Temperature Setting
Accurate temperature setting has several benefits:
- Energy Efficiency: Save on energy bills by not over-heating or over-cooling your home.
- Comfort: Maintain a consistent and comfortable environment.
- Longevity of HVAC Systems: Proper settings reduce wear and tear on heating and cooling systems.
Models And Variations
Luxpro offers different models to suit various needs. Below is a table summarizing some popular Luxpro Thermostat models:
| Model | Key Features | Suitable For |
|---|---|---|
| Luxpro PSP511LC | 5-2 day programming, Easy-to-read display | Residential Use |
| Luxpro PSP722E | 7-day programming, Touchscreen | Advanced Residential Use |
| Luxpro PSPA711 | 7-day programming, Wi-Fi enabled | Smart Home Integration |
Each model offers unique features. Choose one that best fits your requirements.
Getting Started With Your Luxpro Thermostat
Setting up your Luxpro Thermostat is simple and easy. This guide will help you get started. Follow the steps carefully to ensure your thermostat works correctly.
Tools And Materials Needed
- Luxpro Thermostat
- Screwdriver
- Battery (if required)
- User Manual
Safety Precautions
- Turn off the power to your HVAC system before starting.
- Read the user manual to understand the specific model.
- Handle the thermostat gently to avoid damage.
- Ensure your hands are dry when working with electrical components.
Start by gathering all the necessary tools and materials. Make sure you have everything you need before you begin. Turning off the power is crucial for your safety. Read the user manual to understand your specific Luxpro model. Handle the thermostat carefully to avoid any damage.
| Step | Description |
|---|---|
| 1 | Gather tools and materials |
| 2 | Turn off the power |
| 3 | Read the user manual |
| 4 | Handle the thermostat carefully |
Understanding Your Luxpro Thermostat’s Interface
Understanding your Luxpro thermostat’s interface is essential for efficient temperature control. This guide will help you navigate the interface with ease. Below, we will discuss key features and buttons and how to read the display effectively.
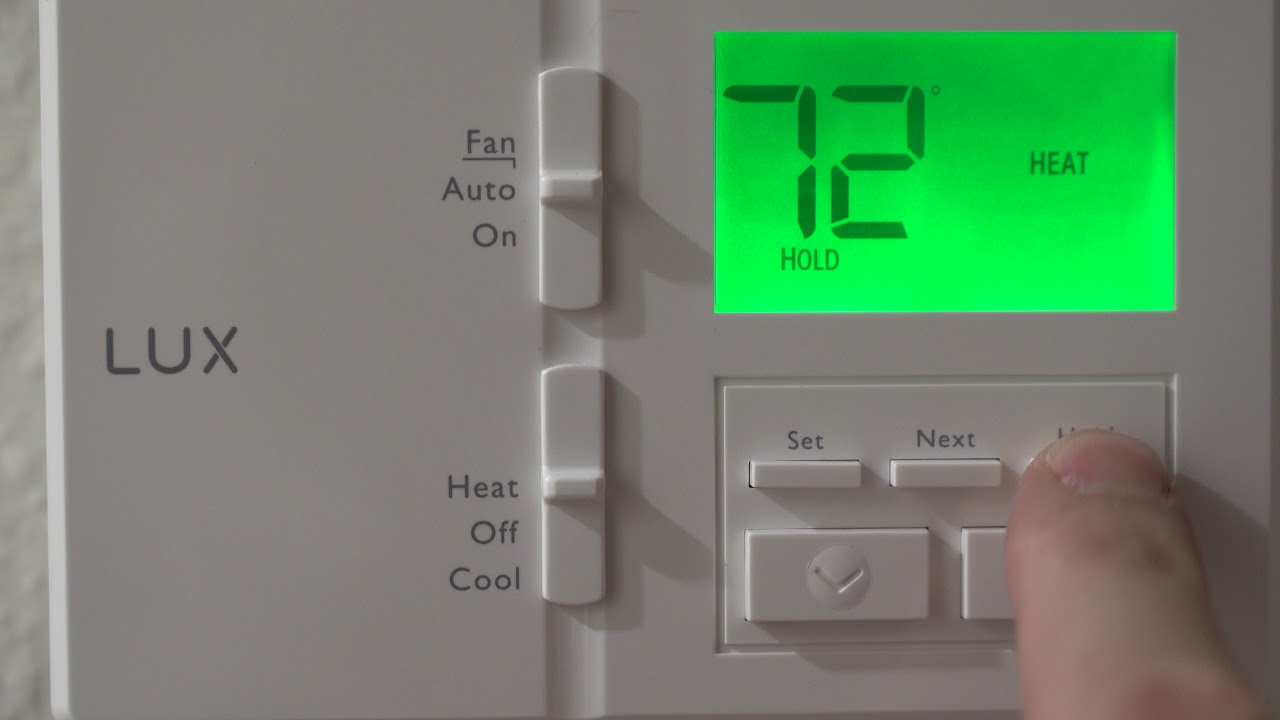
Key Features And Buttons
The Luxpro thermostat has several key features and buttons. Familiarizing yourself with these will make temperature setting easier.
- Power Button: This button turns the thermostat on and off. It’s usually located at the top.
- Mode Button: Use this to switch between heating, cooling, and auto modes.
- Up and Down Arrows: These buttons adjust the temperature settings.
- Fan Button: Controls the fan settings. You can set it to auto or on.
- Hold Button: This button maintains the set temperature, overriding the programmed schedule.
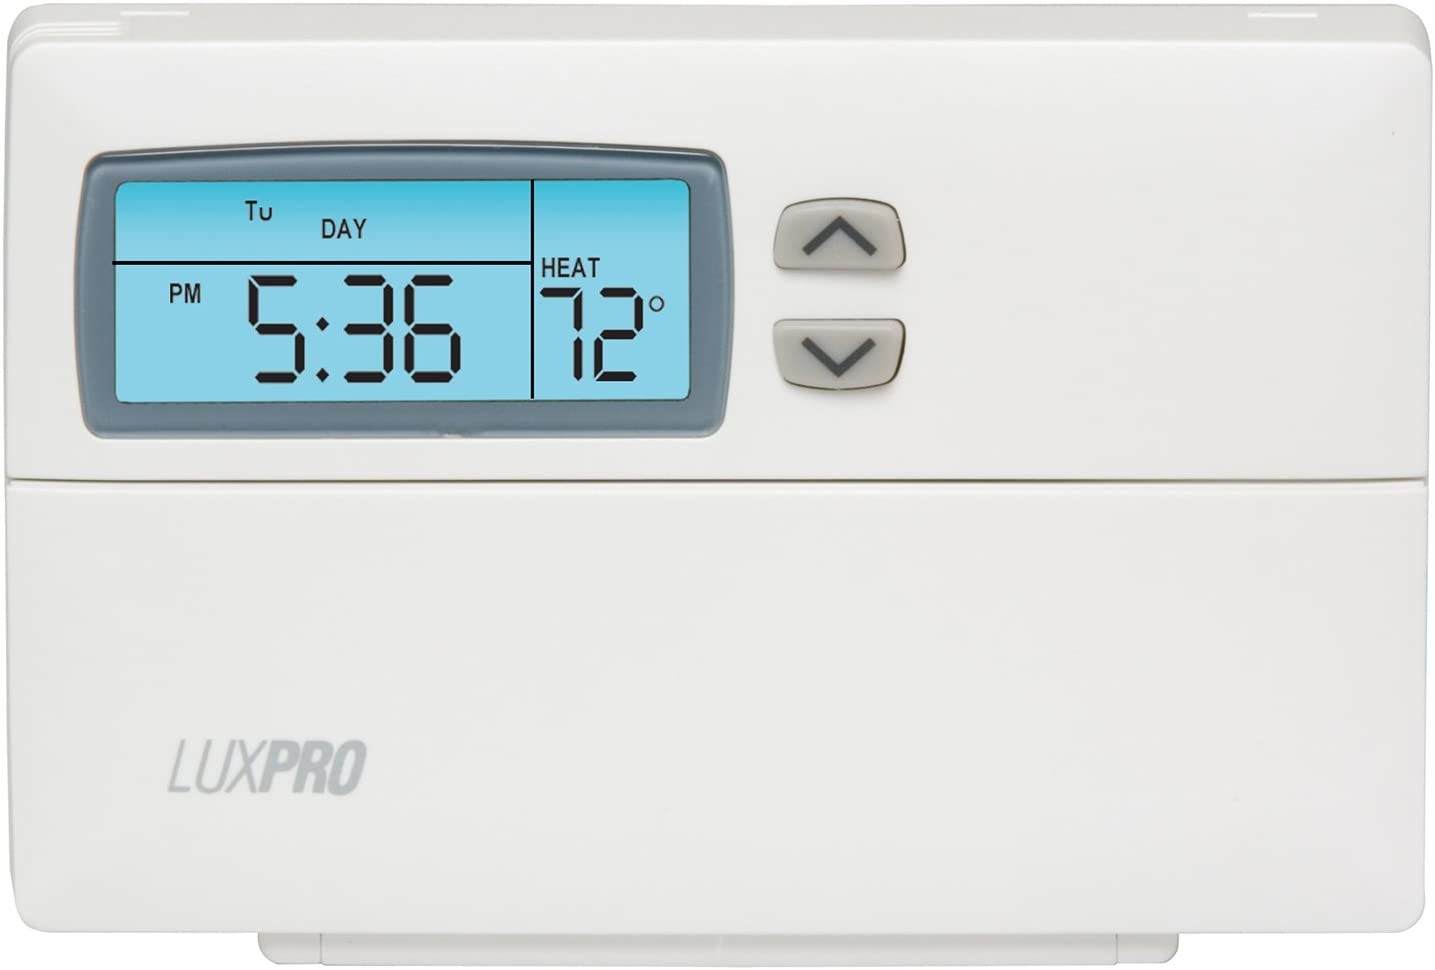
Reading The Display
The display provides essential information at a glance. Knowing how to read it is crucial.
| Element | Description |
|---|---|
| Current Temperature: | Shows the room’s current temperature. |
| Set Temperature: | Displays the temperature you have set. |
| Mode Indicator: | Indicates whether the thermostat is in heating, cooling, or auto mode. |
| Fan Status: | Shows whether the fan is on or set to auto. |
| Battery Level: | Indicates the current battery status. |
Pay attention to these elements to ensure your thermostat is working correctly. Understanding these features will help you set and manage your home’s temperature efficiently.
Step-by-step Temperature Adjustment
Adjusting the temperature on your Luxpro Thermostat is simple. Follow these steps to set your preferred temperature easily. This guide will help you enter the settings mode and set the desired temperature.
Entering The Settings Mode
To start adjusting the temperature, first, you need to enter the settings mode:
- Press the “Menu” button on the thermostat.
- Use the arrow keys to navigate through the menu options.
- Select “Settings” by pressing the “Select” button.
- Look for the “Temperature Adjustment” option and select it.
Now, you are ready to set the desired temperature.
Setting The Desired Temperature
Follow these steps to set your preferred temperature:
- Use the up and down arrow keys to increase or decrease the temperature.
- Once you reach your desired temperature, press the “Select” button to confirm.
- The thermostat will now adjust to the new temperature setting.
Here’s a quick table to summarize the steps:
| Step | Action |
|---|---|
| 1 | Press “Menu” |
| 2 | Navigate using arrow keys |
| 3 | Select “Settings” |
| 4 | Choose “Temperature Adjustment” |
| 5 | Use up and down arrow keys to set temperature |
| 6 | Press “Select” to confirm |
By following these steps, you can easily adjust the temperature on your Luxpro Thermostat. Enjoy a comfortable home environment with your ideal temperature settings.
Programming Your Luxpro For Different Times Of Day
Having a Luxpro thermostat makes managing your home’s temperature easy. By programming it for different times of the day, you can save energy and stay comfortable. This guide will show you how to set up the Wake, Leave, Return, and Sleep functions.
Setting Up Wake, Leave, Return, And Sleep Functions
The Luxpro thermostat allows you to set temperatures for different times of the day. These times include Wake, Leave, Return, and Sleep.
- Wake: Set this for the time you wake up. You want your home to be warm or cool when you get out of bed.
- Leave: Set this for when you leave the house. The thermostat will lower or raise the temperature to save energy.
- Return: Set this for when you come back home. Your home will be comfortable when you walk in the door.
- Sleep: Set this for your bedtime. A cooler temperature can help you sleep better.
Tips For Energy Efficiency
Energy efficiency is important for saving money and the environment. Here are some tips for using your Luxpro thermostat efficiently:
- Set lower temperatures in winter: Keep the thermostat at 68°F when you are home and lower when you are away.
- Set higher temperatures in summer: Keep the thermostat at 78°F when you are home and higher when you are away.
- Use programmable settings: Let the thermostat adjust the temperature automatically based on your schedule.
- Check for drafts: Make sure your home is well-insulated to keep the temperature steady.
- Regular maintenance: Keep your thermostat and HVAC system clean and in good working order.
By following these tips, you can ensure your Luxpro thermostat is set up for maximum comfort and efficiency.
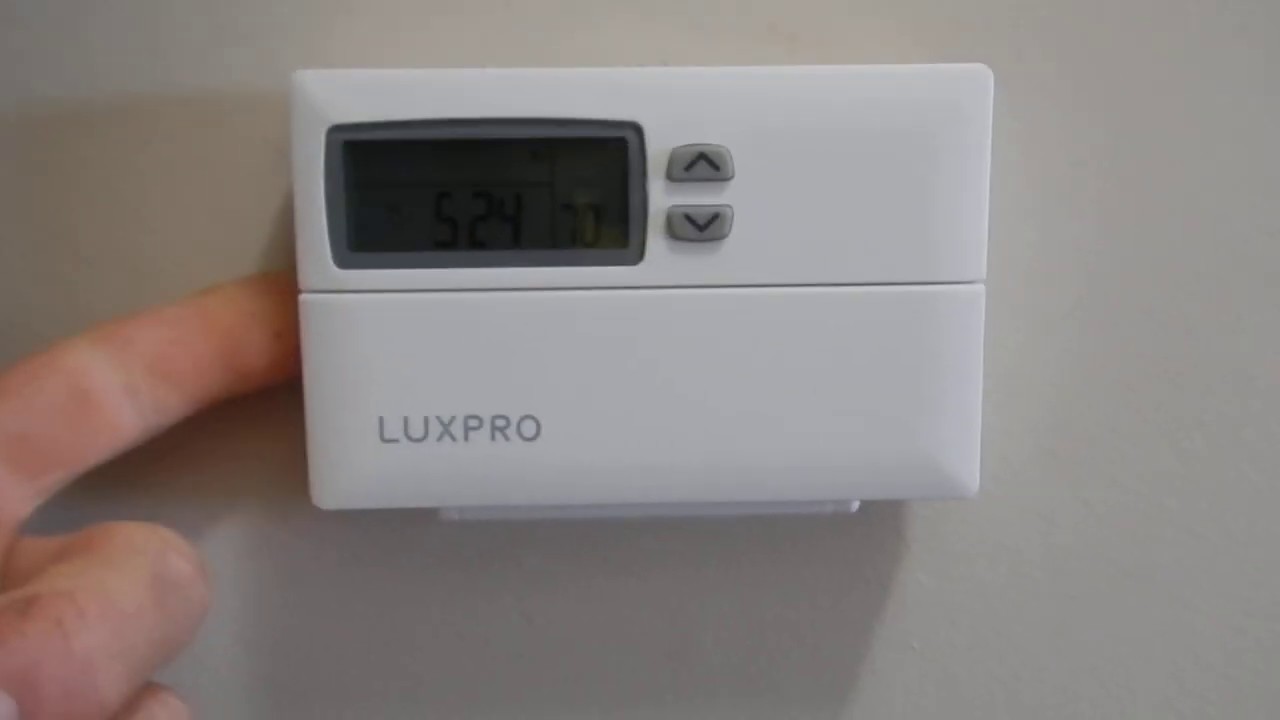
Credit: m.youtube.com
Troubleshooting Common Issues
Even the best thermostats can sometimes have issues. Luxpro thermostats are reliable, but you might face some common problems. This guide will help you troubleshoot and fix these issues.
Check Best Thermostat Pricing in Amazon
** As an Amazon Associate, I earn from qualifying purchases.
When The Thermostat Doesn’t Respond
Your Luxpro thermostat might not respond at times. Follow these steps to troubleshoot:
- Check the Batteries: Low or dead batteries can cause the thermostat to stop working. Replace them with new ones.
- Verify the Wiring: Loose or disconnected wires might be the issue. Make sure all wires are securely connected.
- Inspect the Settings: Ensure that the thermostat is set to the correct mode (heat, cool, or auto).
Resetting The Thermostat
If the above steps don’t work, resetting the thermostat can help. Here’s how:
- Locate the Reset Button: The reset button is usually on the front or side of the thermostat.
- Press and Hold: Press and hold the reset button for about 5 seconds.
- Wait for the Display: The thermostat display will turn off and then back on. This indicates a successful reset.
If resetting doesn’t solve the problem, you might need to consult the user manual. Luxpro customer support can also assist with further troubleshooting.
| Issue | Possible Cause | Solution |
|---|---|---|
| Thermostat not turning on | Dead batteries | Replace batteries |
| Incorrect temperature readings | Misplaced thermostat | Move thermostat to a central location |
| System not heating or cooling | Incorrect mode set | Set to correct mode |
Maintaining Your Luxpro Thermostat
To keep your Luxpro thermostat working efficiently, regular maintenance is essential. This will help ensure it runs smoothly and lasts longer. Proper care involves cleaning, battery management, and more. Let’s look at how to maintain your Luxpro thermostat.
Regular Cleaning
Dust and dirt can affect your thermostat’s performance. Regular cleaning helps maintain its efficiency. Follow these steps to clean your Luxpro thermostat:
- Turn off the thermostat.
- Use a soft, dry cloth to wipe the surface.
- For stubborn dirt, dampen the cloth slightly with water.
- Avoid using any harsh chemicals or abrasive materials.
Keeping the thermostat clean ensures accurate temperature readings.
Battery Replacement And Management
Batteries power your Luxpro thermostat. Regularly checking and replacing them is crucial. Follow these steps to manage your thermostat’s batteries:
- Check the battery indicator on the thermostat display.
- If the battery is low, replace it immediately.
- Use only the recommended battery type.
- Remove the old batteries carefully.
- Insert the new batteries, ensuring correct polarity.
Proper battery management helps avoid sudden power failures and keeps the thermostat functional.
By following these steps, you can maintain your Luxpro thermostat easily. Regular cleaning and timely battery replacement ensure it works efficiently. This helps provide a comfortable environment in your home.
Credit: m.youtube.com
Expert Tips For Luxpro Thermostat Users
Setting the temperature on your Luxpro thermostat can be tricky. These expert tips will make it easy. You will enjoy a comfortable home year-round.
Optimizing Temperature Settings For Seasonal Changes
Adjusting your thermostat for different seasons is crucial. It helps maintain comfort and save energy. Here is a simple table to guide you:
| Season | Suggested Temperature (Day) | Suggested Temperature (Night) |
|---|---|---|
| Summer | 78°F (25.5°C) | 72°F (22°C) |
| Winter | 68°F (20°C) | 62°F (16.5°C) |
Use these settings to keep your home comfortable. Also, save money on your energy bills. Remember to adjust the temperatures gradually. Sudden changes can cause your HVAC system to work harder.
Integrating With Home Automation Systems
Luxpro thermostats work well with home automation systems. This integration offers convenience and efficiency. Here are some tips to get started:
- Check Compatibility: Ensure your Luxpro model is compatible with your home automation system.
- Follow Instructions: Use the manual provided by Luxpro for setup.
- Use Smartphone Apps: Control your thermostat remotely using apps like Google Home or Amazon Alexa.
These steps make your home smarter and more efficient. You can control your thermostat from anywhere. This saves time and increases comfort.
Faqs And Additional Resources
Setting the temperature on a Luxpro thermostat can sometimes be challenging. Many users have questions that need quick answers. This section will address the most common questions and provide additional resources for help.
Top Questions From Users
| Question | Answer |
|---|---|
| How do I set the temperature? | Press the “Up” or “Down” buttons to adjust the temperature. |
| What do I do if my thermostat is not responding? | Check the batteries or reset the device. |
| Can I schedule temperature changes? | Yes, you can use the “Program” button to set a schedule. |
Where To Find Further Help
If you need more detailed instructions, there are various resources available:
- User Manual: The user manual provides step-by-step instructions.
- Customer Support: Reach out to Luxpro’s customer support for direct assistance.
- Online Tutorials: Many tutorials are available online for visual guidance.
Pro Tip: Always keep your user manual handy. It can solve most issues quickly.

Credit: pro.luxproducts.com
Frequently Asked Questions
How Do I Set The Temperature On My Luxpro?
Press the “Menu” button on your Luxpro thermostat. Use the arrows to select “Set Temperature. ” Adjust the temperature using the up and down arrows. Press “Enter” to save.
How Do I Set My Thermostat To A Certain Temperature?
Press the “Set” button on your thermostat. Use the up or down arrows to choose your desired temperature. Confirm by pressing “Enter” or “Set” again.
What Is The Hold Button On A Lux Thermostat?
The hold button on a Lux thermostat maintains your set temperature indefinitely, bypassing the programmed schedule. This is useful for consistent comfort.
How To Control Lux Thermostat?
To control a Lux thermostat, press the “Menu” button. Navigate through options using the arrow keys. Adjust temperature settings as needed. Save changes by pressing “Enter. “
Conclusion
Setting the temperature on your Luxpro thermostat is straightforward. Follow the steps outlined to ensure optimal comfort. Properly managing your thermostat can save energy and reduce costs. Enjoy a perfectly regulated home environment with ease. Stay informed and make the most of your Luxpro thermostat for ultimate convenience.
Check Best Thermostat Pricing in Amazon
** As an Amazon Associate, I earn from qualifying purchases.