
Check Best Thermostat Pricing in Amazon
** As an Amazon Associate, I earn from qualifying purchases.
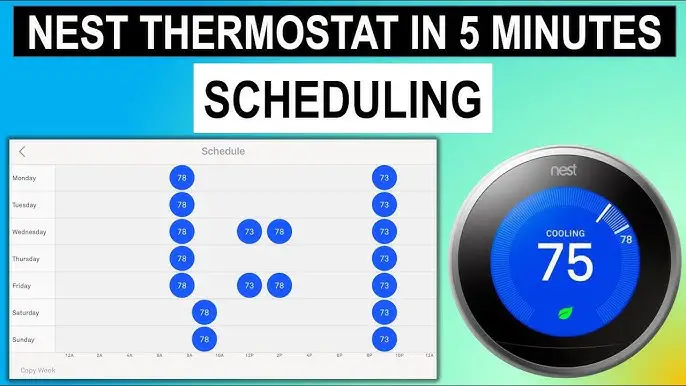
Setting up a schedule on your Nest Thermostat is straightforward. With a few steps, you can optimize your home’s temperature.
A Nest Thermostat helps you save energy and create a comfortable living space. By setting a schedule, you ensure your home is always at the perfect temperature. Imagine waking up to a warm house in winter or coming home to a cool oasis in summer.
Scheduling your Nest Thermostat allows for this convenience. It adjusts automatically based on your preferences. This blog post will guide you through the steps needed to set up your Nest Thermostat schedule effectively. Whether you’re tech-savvy or new to smart home devices, this guide will simplify the process for you. Let’s dive in and make your home smarter and more efficient.

Credit: support.google.com
Getting Started
Getting started with your Nest Thermostat is an exciting step towards a smarter, more energy-efficient home. But if you’re unsure where to begin, don’t worry. This guide will walk you through the initial setup and connecting to Wi-Fi, making the process smooth and hassle-free.
Initial Setup
First, unbox your Nest Thermostat and locate the installation guide. The guide is your friend; it breaks down the process in simple steps.
Next, turn off the power to your heating and cooling system. You don’t want any surprises while you work with the wiring.
Mount the Nest Thermostat on your wall. Use the built-in level to make sure it’s straight. Secure it with the screws provided in the package.
Connect the wires to the corresponding terminals. If you’re unsure, the Nest app has a handy wiring guide. Once done, turn the power back on.
Connecting To Wi-fi
Once your thermostat is installed, you’ll need to connect it to your Wi-Fi network. This step is crucial for remote access and updates.
Navigate to the Settings menu on your Nest Thermostat. Select the Network option to start the Wi-Fi setup process.
Choose your Wi-Fi network from the list. Enter your password when prompted. Once connected, your thermostat will automatically download any available updates.
Having trouble connecting? Ensure your Wi-Fi signal is strong. Consider moving your router closer to the thermostat for a better connection.
By now, your Nest Thermostat should be up and running, connected to your Wi-Fi, and ready to make your home more comfortable and energy-efficient. Have you ever faced any challenges during the setup? Share your experiences in the comments below!

Credit: www.howtogeek.com
Setting Up Your Schedule
Learn how to set a schedule for your Nest Thermostat easily. Adjust the temperature to fit your daily routine and save energy. Make your home comfortable with just a few taps.
Setting up your schedule on a Nest Thermostat can make your home more comfortable and energy-efficient. Imagine walking into a cozy home after a long day at work or waking up to a perfectly warmed room. By setting a custom schedule, you can ensure that your thermostat adjusts the temperature based on your daily routine, saving both energy and money. Let’s dive into how you can easily set up your schedule with just a few steps.Accessing The Schedule Menu
First, you need to access the schedule menu. Start by pressing the thermostat ring to open the Quick View menu. Scroll to the ‘Schedule’ option and select it. This is where you can create or adjust your temperature settings. It’s like having a personalized climate control system right at your fingertips.Creating Time Blocks
Creating time blocks is the next step. These blocks define when your thermostat will change temperature settings throughout the day. For instance, set a time block for when you wake up in the morning. You can adjust the temperature to warm up just before you get out of bed. Another block can be set for when you leave the house for work, ensuring the heating or cooling is minimized to save energy. It’s all about finding what works best for your daily routine. Think about when you’re home, when you sleep, and when you’re away. Do you prefer a cooler house while you sleep? Set a time block for bedtime. By customizing these settings, you can create a comfortable environment while optimizing energy usage. Have you ever forgotten to adjust the thermostat before leaving the house? With a well-set schedule, you won’t have to worry about it anymore.Customizing Temperature Settings
Customizing temperature settings on your Nest Thermostat can help you save energy. It ensures your home is always at the perfect temperature. You can adjust temperatures for different times of the day. This helps you stay comfortable and lower energy bills. Let’s explore two key features: Adjusting temperature for each block and using auto-schedule.
Adjusting Temperature For Each Block
The Nest Thermostat allows you to set temperatures for specific times. You can create blocks of time throughout the day. For example, set a cooler temperature during the night. Then set a warmer temperature for the morning. Open the Nest app on your phone. Select your thermostat. Tap on the schedule tab. Here, you can add, edit, or remove time blocks. Set the desired temperature for each block. This way, your home adjusts to your routine.
Using Auto-schedule
Auto-Schedule is a smart feature of the Nest Thermostat. It learns your schedule and preferences. Over time, it adjusts the temperature automatically. To enable this feature, go to the settings menu in the Nest app. Find the Auto-Schedule option. Turn it on. The thermostat will then start learning. Make manual adjustments during the first few days. The thermostat will remember these changes. Soon, it will set temperatures on its own. This makes managing your home’s climate simple and efficient.
Advanced Features
Easily set a schedule on your Nest Thermostat to manage your home’s temperature. Customize settings for each day to fit your routine. Enjoy comfort and energy savings with just a few simple steps.
Setting up your Nest Thermostat can be a breeze, especially when you dive into its advanced features. These features not only enhance your comfort but also help you save energy and money. Let’s explore some of the advanced options that can take your home automation to the next level.Energy History
Understanding your energy usage is crucial. The Energy History feature gives you a detailed view of how much energy you’re using and when. You can see daily and monthly reports. This information helps you identify patterns and make adjustments. For instance, if you notice a spike in energy use on certain days, you can tweak your schedule to reduce consumption. Imagine the savings over time. You can monitor changes and see immediate results. It’s satisfying to know your efforts are paying off.Home/away Assist
Home/Away Assist is a game-changer. It automatically adjusts your thermostat based on whether you’re home or away. The best part? You don’t have to lift a finger. The Nest Thermostat uses sensors and your phone’s location to determine your presence. This feature can lead to significant energy savings. If you forget to turn off the heat or AC when you leave, the thermostat does it for you. Think about the peace of mind. No more worrying if you left the heat running. It’s smart technology that adapts to your lifestyle. In conclusion, these advanced features make your Nest Thermostat more than just a temperature controller. They offer insights, convenience, and savings. Have you explored these features yet? If not, now’s the perfect time to start!Troubleshooting
Setting up a Nest Thermostat can be a breeze, but what happens when things don’t go as planned? Troubleshooting is a crucial step in ensuring your smart thermostat functions efficiently. Let’s dive into some common issues you might face and how to fix them.
Common Issues
One common issue is the thermostat not connecting to Wi-Fi. This can be frustrating, especially when you want to control your home’s temperature remotely. Another frequent problem is incorrect temperature readings, which can lead to uncomfortable living conditions.
Sometimes, the Nest Thermostat might not turn on at all. This can be alarming, but it’s often due to power issues. You might also encounter problems with the thermostat not holding the schedule you set. Identifying these issues early can save you a lot of hassle.
Check Best Thermostat Pricing in Amazon
** As an Amazon Associate, I earn from qualifying purchases.
Fixes And Tips
If your thermostat isn’t connecting to Wi-Fi, check your internet connection first. Ensure that other devices are connected and working fine. Restart your router and the thermostat. This simple step can resolve connectivity issues.
For incorrect temperature readings, calibrate your thermostat. Make sure it’s placed away from direct sunlight and drafts. Also, clean it regularly to prevent dust from affecting the sensors. Accurate placement and maintenance can greatly improve its performance.
If the Nest Thermostat isn’t turning on, check the power source. Ensure the wires are properly connected. Sometimes, a quick reset can solve this issue. Hold down the thermostat’s ring for 10 seconds, and it should restart.
Is your thermostat not following the set schedule? Double-check your settings. Ensure that the schedule is saved correctly. Also, check the time zone settings; an incorrect time zone can cause scheduling conflicts. Regularly update your thermostat’s software to avoid bugs and glitches.
Have you faced any other issues with your Nest Thermostat? Share your experiences in the comments below. Your insights could help others troubleshoot their devices more effectively!

Credit: www.youtube.com
Maintenance
Maintaining your Nest Thermostat is crucial to ensure it runs smoothly and efficiently. Regular maintenance not only extends the life of your device but also helps you save energy and money. Let’s explore some practical tips to keep your Nest Thermostat in top shape.
Regular Updates
Keeping your Nest Thermostat software up-to-date is essential. Regular updates provide new features and security enhancements. Check for updates at least once a month.
Updating is simple. Go to the settings menu on your thermostat, select ‘Software Update,’ and follow the instructions. If your device is connected to Wi-Fi, it may update automatically.
Don’t ignore those update notifications. They are crucial for maintaining optimal performance and getting the most out of your thermostat.
Cleaning Tips
Dust and dirt can accumulate on your thermostat, affecting its sensors. Cleaning it regularly ensures accurate temperature readings.
Use a soft, dry cloth to wipe the exterior of the thermostat. Avoid using water or cleaning solutions, as they can damage the device.
Pay special attention to the display screen and the edges. A clean thermostat not only looks good but also works better.
Ever noticed a dusty screen? It can be annoying, right? A quick wipe every week can prevent that and keep your device looking new.
Are you keeping your Nest Thermostat well-maintained? If not, start today and see the difference it makes in your energy savings and comfort.
Frequently Asked Questions
Can I Set A Schedule On My Nest Thermostat?
Yes, you can set a schedule on your Nest thermostat. Customize heating and cooling times to fit your routine.
How Do I Set My Thermostat Schedule?
To set your thermostat schedule, access the settings menu. Choose “schedule” or “program. ” Select desired times and temperatures. Save changes.
How Do I Set My Nest Thermostat To Come On In The Morning?
Set your Nest thermostat to come on in the morning by creating a schedule in the Nest app. Select the thermostat, choose “Schedule,” and set the desired time and temperature. Save your settings.
How To Program Nest Thermostat Manually?
To program your Nest thermostat manually, go to the thermostat and press the display. Select “Settings,” then “Schedule,” and adjust temperature settings as needed.
Conclusion
Setting a schedule on your Nest Thermostat is easy. Follow the steps outlined in this blog. You will enjoy consistent comfort at home. Your energy bills will likely decrease. This smart device learns your preferences. Adjust the settings to match your daily routine.
You can control it from your phone. Convenience is key with the Nest Thermostat. Enjoy a cozy and efficient home environment.
Check Best Thermostat Pricing in Amazon
** As an Amazon Associate, I earn from qualifying purchases.