
Check Best Thermostat Pricing in Amazon
** As an Amazon Associate, I earn from qualifying purchases.
To set a Hunter thermostat, press the “Program” button and use the up/down arrows to adjust the time and temperature. Confirm by pressing “Program” again.
A properly set thermostat can significantly improve home comfort and energy efficiency. Hunter thermostats are known for their user-friendly design and reliability. Understanding how to set your Hunter thermostat ensures you can maintain the ideal temperature in your home. This guide will walk you through the simple steps to program your device, helping you save on energy bills and achieve optimal comfort.
By following these steps, you can maximize your thermostat’s potential and enjoy a perfectly controlled indoor climate.

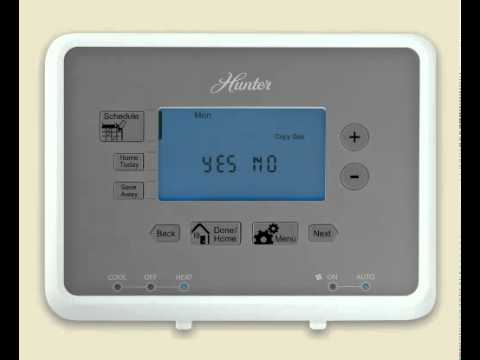
Credit: www.youtube.com
- Introduction To Hunter Thermostats
- Pre-installation Checklist
- Understanding Your Hunter Thermostat Model
- Removing The Old Thermostat
- Installing The Hunter Thermostat
- Programming Your Hunter Thermostat
- Troubleshooting Common Issues
- Maintaining Your Hunter Thermostat
- Maximizing Energy Savings
- Frequently Asked Questions
- Conclusion
Introduction To Hunter Thermostats
Hunter thermostats are a reliable choice for modern homes. They offer advanced features and easy-to-use interfaces. These thermostats help you manage your home’s temperature efficiently. They also save energy and reduce utility bills.
Benefits Of Using A Programmable Thermostat
Programmable thermostats provide many benefits. They allow you to set schedules for heating and cooling. This means your home can be comfortable when you are there and save energy when you are not.
- Energy Efficiency: You can program the thermostat to lower or raise the temperature when you are away.
- Cost Savings: Using less energy means lower utility bills.
- Consistent Comfort: The thermostat maintains your desired temperature throughout the day.
- Convenience: Set it once, and it manages the temperature for you.
Why Choose Hunter For Your Home
Hunter thermostats are designed with user-friendly features. They are easy to install and program. Hunter offers a range of models to suit different needs.
- Reliability: Hunter is known for producing durable and dependable products.
- Advanced Technology: Their thermostats come with smart features like Wi-Fi connectivity.
- Easy Installation: Most models can be installed without professional help.
- Customer Support: Hunter provides excellent customer service and support.
Here is a quick comparison of two popular Hunter thermostat models:
| Model | Features | Price |
|---|---|---|
| Hunter Model A | Wi-Fi, Programmable, Energy Star Rated | $80 |
| Hunter Model B | Wi-Fi, Touchscreen, Voice Control | $120 |
Choosing a Hunter thermostat helps you manage your home’s climate easily. The benefits and features make them a top choice for energy efficiency and comfort.
Pre-installation Checklist
Before setting up your Hunter thermostat, ensure you have completed the pre-installation checklist. This will help you avoid any issues during the installation process. Follow the steps below to get started.
Tools And Materials Needed
Having the right tools and materials can make the installation process smooth. Here is what you need:
- Flathead screwdriver
- Phillips screwdriver
- Wire stripper
- Electrical tape
- New Hunter thermostat
- Mounting screws
- Level (optional but recommended)
Safety Precautions
Safety is crucial during the installation. Follow these safety tips to stay safe:
- Turn off the power to your heating and cooling system. This prevents electrical shock.
- Use a voltage tester to ensure the power is off. Double-check for extra safety.
- Label the wires before removing the old thermostat. This helps you connect them correctly later.
- Read the manual of your new Hunter thermostat. Follow all the provided instructions.
By following this pre-installation checklist, you can ensure a smooth and safe installation of your Hunter thermostat.
Understanding Your Hunter Thermostat Model
Setting your Hunter thermostat correctly ensures your home stays comfortable all year. To achieve this, it’s essential to understand the specific model you own. Each model has unique features and specifications. This guide will help you get familiar with your Hunter thermostat model.
Key Features And Specifications
Hunter thermostats come with a variety of features. Knowing these features helps you utilize your thermostat better.
- Programmable Schedules: Set different temperatures for various times of the day.
- Energy-Saving Mode: Save energy while keeping your home comfortable.
- Touchscreen Display: Easy-to-use interface for quick adjustments.
- Wi-Fi Connectivity: Control your thermostat from your smartphone.
- Temperature Alerts: Receive notifications when the temperature goes beyond set limits.
Model Variations And Compatibility
Hunter offers several thermostat models. Each model is designed to meet different needs and preferences. The table below highlights some popular models and their unique features.
| Model | Key Features | Compatibility |
|---|---|---|
| Hunter 44155C | 7-day programmable, large display | Compatible with most HVAC systems |
| Hunter 44360 | Touchscreen, Wi-Fi enabled | Works with Amazon Alexa and Google Home |
| Hunter 44157 | Energy-saving mode, humidity control | Compatible with multi-stage heating/cooling |
Before purchasing or setting up your Hunter thermostat, make sure it is compatible with your home’s HVAC system. This ensures optimal performance and efficiency.
Removing The Old Thermostat
Setting up your new Hunter thermostat starts with removing the old one. Follow these steps to ensure a smooth transition. This guide will walk you through the entire process. Let’s get started!
Step-by-step Removal Process
To begin, turn off the power to your HVAC system. This will keep you safe from electrical shocks. Locate the circuit breaker and switch it off.
Next, take off the cover of your old thermostat. Most covers pop off easily, but some might have screws. Use a screwdriver if needed.
Once the cover is off, you will see the wires connected to the thermostat. Take a picture of the wiring setup. This will help you later when connecting the new thermostat.
Now, label each wire with tape. Write down the letter that corresponds to each terminal. This step is crucial for the installation of the new unit.
Unscrew the wires from the terminals. Carefully pull each wire out. Make sure the wires do not fall back into the wall. You can wrap them around a pencil to keep them in place.
Finally, unscrew the thermostat from the wall. Remove the mounting plate if there is one. Your old thermostat is now ready for disposal.
Disposing Of The Old Unit
It is important to dispose of the old thermostat properly. Many thermostats contain mercury, which is hazardous.
Check with your local waste management facility for disposal instructions. Some places have special programs for recycling thermostats.
Do not throw the old thermostat in the trash. Proper disposal helps protect the environment.
Now that you have removed the old thermostat, you can move on to installing your new Hunter thermostat.
Installing The Hunter Thermostat
Setting up your Hunter Thermostat is a simple process. Follow these steps to ensure your home maintains the perfect temperature. This section will guide you through Installing the Hunter Thermostat, covering mounting the base, connecting wires, and attaching the faceplate.
Mounting The Thermostat Base
First, select a spot on your wall. Make sure it’s away from direct sunlight and drafts. Use a level to ensure the thermostat base is straight. Mark the screw holes with a pencil.
- Drill pilot holes at the marked spots.
- Insert the wall anchors if necessary.
- Place the thermostat base against the wall.
- Screw the base into place using the provided screws.
Connecting The Wires
Before connecting wires, ensure the power to your HVAC system is off. This prevents electric shock. Follow these steps to connect the wires correctly:
- Remove the cover of your old thermostat.
- Label the wires according to their terminals.
- Disconnect the wires from the old thermostat.
- Connect each wire to the corresponding terminal on the Hunter Thermostat base.
- Tighten the terminal screws to secure the wires.
Refer to the Hunter Thermostat manual for specific wire labels and their corresponding terminals.
Attaching The Faceplate
Once the wires are securely connected, attach the faceplate to the thermostat base. Align the faceplate with the base and snap it into place. Ensure it clicks securely.
Turn the power back on to your HVAC system. Test the thermostat to ensure it works correctly. Adjust the settings to your desired temperature.
Installing the Hunter Thermostat is easy if you follow these steps. Enjoy a comfortable home with your new thermostat.
Check Best Thermostat Pricing in Amazon
** As an Amazon Associate, I earn from qualifying purchases.

Credit: thermostat.guide
Programming Your Hunter Thermostat
Programming your Hunter thermostat allows you to maintain a comfortable home temperature and save energy. You can set it to follow your daily routine, ensuring that your home is always at the right temperature. This guide will help you through the steps of setting up your Hunter thermostat.
Setting Up The Date And Time
The first step in programming your thermostat is to set the date and time. This ensures that your programmed settings run accurately.
| Step | Action |
|---|---|
| 1 | Press the “Day/Time” button. |
| 2 | Use the up and down arrows to set the current hour. |
| 3 | Press “Next” to set the minutes. |
| 4 | Adjust the minutes using the up and down arrows. |
| 5 | Press “Next” to set the current day. |
| 6 | Use the arrows to select the correct day. |
Customizing Temperature Settings
Customizing temperature settings allows you to set different temperatures for various times of the day. This feature helps you stay comfortable and optimize energy use.
- Press the “Program” button.
- Select the day you want to program using the arrows.
- Press “Next” to move to the time period setting.
- Set the temperature for the “Morning” period using the up and down arrows.
- Press “Next” to set the “Day” period temperature.
- Repeat for “Evening” and “Night” periods.
Using Pre-programmed Settings
Using pre-programmed settings can save you time if you prefer not to customize each period manually. Hunter thermostats come with default settings that suit most homes.
- Press the “Program” button.
- Select “Pre-Programmed” option using the arrows.
- Press “Enter” to activate the pre-programmed settings.
These settings are designed to provide optimal comfort and energy efficiency. You can always adjust them later if needed.
Troubleshooting Common Issues
Setting up your Hunter thermostat can be straightforward. But sometimes, you might run into issues. This guide will help you troubleshoot common problems.
Dealing With Display Problems
If your thermostat display is blank or hard to read, it could be an issue with the power supply or settings.
- Check the Batteries: Ensure the batteries are fresh and properly installed. Replace them if needed.
- Power Source: Verify that the thermostat is connected to a power source. Check the circuit breaker if necessary.
- Reset the Thermostat: Sometimes, a simple reset can solve display issues. Refer to the manual for reset instructions.
What To Do If Heating/cooling Doesn’t Start
If your heating or cooling system doesn’t start, several factors could be causing the issue.
- Check the Settings: Ensure the thermostat is set to the correct mode (heat or cool) and temperature.
- Inspect the Wiring: Make sure all wires are securely connected. Loose wires can prevent the system from starting.
- Examine the System: Check your heating/cooling system for any visible issues. Sometimes, the problem lies within the HVAC system itself.
Below is a table summarizing these troubleshooting steps:
| Issue | Possible Solution |
|---|---|
| Blank Display | Check batteries, power source, and reset thermostat |
| Heating/Cooling Doesn’t Start | Check settings, inspect wiring, and examine system |

Credit: www.flickr.com
Maintaining Your Hunter Thermostat
To keep your Hunter Thermostat working well, regular maintenance is key. Proper care ensures it runs efficiently, saving you energy and money. Follow these simple steps to maintain your thermostat and enjoy a comfortable home environment.
Regular Cleaning Tips
Dust and dirt can affect your thermostat’s performance. Clean it every few months.
- Use a soft cloth to wipe the surface.
- Do not use water or cleaning sprays.
- Check and clean around the vents.
Remove the cover carefully. Use a small brush to clean inside. Avoid touching the electrical parts.
Battery Replacement And Disposal
Replace the batteries in your thermostat once a year. This prevents interruptions in performance.
- Remove the thermostat cover.
- Take out the old batteries.
- Insert new batteries, matching the positive and negative ends.
- Replace the cover.
Dispose of old batteries properly. Check local recycling programs for battery disposal options.
When To Seek Professional Help
Call a professional if your thermostat does not work after cleaning and battery replacement.
Look for these signs:
- Display is blank or unresponsive.
- Incorrect temperature readings.
- System does not turn on or off as expected.
A trained technician can diagnose and fix complex issues. This ensures your thermostat works efficiently.
Maximizing Energy Savings
Maximizing energy savings with your Hunter thermostat is simple. By following a few key steps, you can reduce your energy bills. This ensures your home remains comfortable year-round.
Best Practices For Efficient Thermostat Use
Set your thermostat to the recommended temperature ranges. In winter, set it to 68°F during the day. At night or when you are away, lower it to 60°F. In summer, set it to 78°F when you are home. Increase it to 85°F when you are away.
Use a programmable schedule. Program your Hunter thermostat to match your daily routine. Set it to lower or raise the temperature when you are asleep or out of the house. This minimizes energy use without sacrificing comfort.
Avoid frequent temperature changes. Constant adjustments can increase energy consumption. Set it and forget it for maximum savings.
Utilizing Hunter’s Energy-saving Features
Hunter thermostats come with built-in features designed to save energy. Here are some of the most effective ones:
- Eco Mode: Activates energy-saving settings automatically. Keeps your home comfortable while saving energy.
- Smart Recovery: Learns your schedule and adjusts the temperature ahead of time. Ensures your home is at the perfect temperature when you arrive.
- Filter Change Reminder: Reminds you to change your HVAC filter. Clean filters improve efficiency and air quality.
Using these features can significantly reduce your energy consumption.
Locking the thermostat can prevent unauthorized changes. This ensures that your energy-saving settings remain intact.
To lock or unlock the thermostat, follow these steps:
- Press the Menu button.
- Select “Settings.”
- Choose “Lock/Unlock.”
- Enter your PIN code if prompted.
By following these tips and utilizing Hunter’s energy-saving features, you can enjoy a comfortable home while keeping your energy bills low.
Frequently Asked Questions
How Do I Adjust A Hunter Thermostat?
To adjust a Hunter thermostat, press the “Program” button. Use the arrow keys to set the desired temperature. Press “Program” again to confirm.
How Do I Reset My Hunter Thermostat?
To reset your Hunter thermostat, press and hold the “Program” button. Then, press the “Up” and “Down” buttons simultaneously.
What Is The Hold Button On The Hunter Thermostat?
The hold button on the Hunter thermostat maintains the current temperature setting. This bypasses the programmed schedule temporarily.
How To Use Hunter Ac Thermostat?
To use a Hunter AC thermostat, set the desired temperature using the up and down arrows. Press “Mode” to select heating or cooling. Ensure the fan setting is on “Auto” for automatic control. Adjust settings as needed for comfort.
Conclusion
Setting your Hunter thermostat is straightforward with the right steps. Follow the guide to ensure optimal home comfort. Proper setup can save energy and reduce bills. Always refer to the manual for specific instructions. Enjoy a perfectly controlled home climate all year round with your Hunter thermostat.
Check Best Thermostat Pricing in Amazon
** As an Amazon Associate, I earn from qualifying purchases.