
Check Best Thermostat Pricing in Amazon
** As an Amazon Associate, I earn from qualifying purchases.
Setting your Honeywell Home Thermostat is simple. You just need the right steps.
A well-adjusted thermostat means comfort at home. It saves energy and money. Honeywell thermostats are popular for their reliability and ease of use. Still, some users find the setup process tricky. This guide will help you navigate through the setup process.
Understanding the basics can make a huge difference. It ensures your home stays cozy in winter and cool in summer. So, let’s dive in. Learn how to set your Honeywell Home Thermostat with ease. This will make your daily life a bit more comfortable.
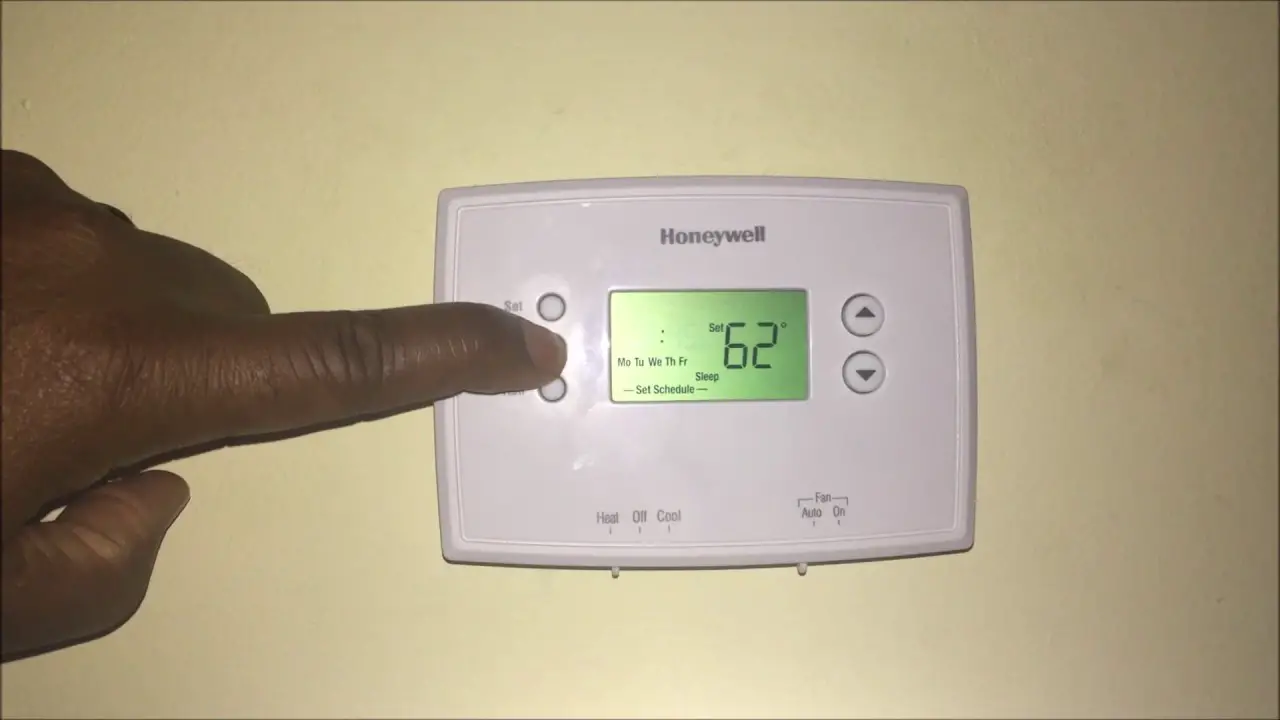
Credit: www.honeywellstore.com
Unboxing Your Honeywell Thermostat
Unboxing your Honeywell Home Thermostat can be an exciting experience. You are about to take control of your home’s temperature. It’s essential to know what to expect and how to get started.
Let’s begin by checking the contents and understanding the components of your new thermostat.
Checking The Contents
First, open the box and check for all the items. You should find the thermostat unit. Look for the wall plate and screws. There should be a user manual as well. Ensure the batteries are present, if required by your model. Missing parts may affect installation.
Understanding The Components
Identify each component of your Honeywell thermostat. The thermostat unit is the main device. The wall plate helps in mounting the unit. Screws secure the wall plate to the wall. The user manual contains important instructions. Batteries, if included, power the device. Understanding these parts helps in a smooth setup process.
Installing The Thermostat
Installing a Honeywell Home Thermostat can seem like a daunting task. But with the right steps, you can do it yourself. This guide will help you through the process. Let’s start with turning off the power.
Turning Off Power
Safety is the first priority. Turn off the power at the circuit breaker. This prevents any electrical accidents. Ensure the HVAC system is off. Use a voltage tester to confirm there is no power. Be thorough in this step.
Removing The Old Thermostat
Gently take off the cover of the old thermostat. Most covers snap off easily. Unscrew the mounting screws and remove the unit. Label the wires before disconnecting them. This helps in the next steps. Use the labels included with your new thermostat.
Mounting The New Thermostat
Attach the new thermostat’s mounting plate to the wall. Use the screws provided in the kit. Ensure it is level before tightening the screws. Connect the wires to the corresponding terminals. Refer to the labels you made earlier. After connecting the wires, secure the thermostat unit to the mounting plate. Turn the power back on and test your new thermostat.
Connecting The Wires
Connecting the wires to your Honeywell Home Thermostat is a crucial step. Proper connection ensures your heating and cooling systems work efficiently. Follow these steps to get it right.
Identifying Wire Labels
First, identify the labels on the wires. Most thermostats have wires labeled with letters. Common labels include R, W, Y, G, and C. Each label corresponds to a specific function. For example, R stands for power, W for heat, Y for cooling, G for fan, and C for common wire. Match each wire to its label correctly. This step prevents potential issues.
Attaching Wires To Terminals
Next, attach the wires to their respective terminals. Loosen the screws on the terminals first. Then, insert the wire under the screw. Tighten the screw to secure the wire. Ensure each wire is firmly attached. Loose wires can cause malfunctions. Double-check each connection for security. Finally, push any extra wire back into the wall. This keeps everything neat and organized.
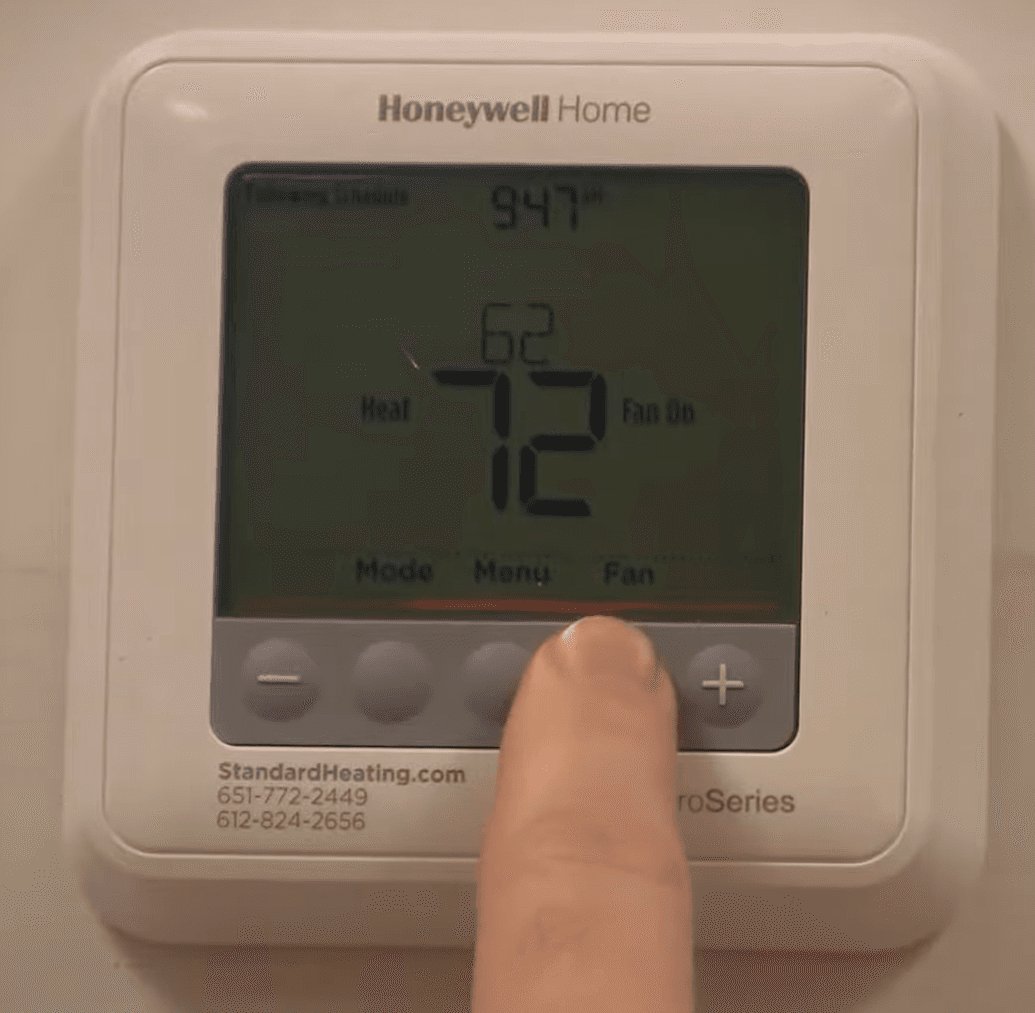
Credit: www.standardheating.com
Powering Up And Initial Setup
Power up your Honeywell Home Thermostat by connecting it to a power source. Follow the on-screen prompts to complete the initial setup. Adjust settings to suit your preferences and ensure optimal comfort.
Setting up your Honeywell Home Thermostat doesn’t have to be a daunting task. Whether you are a tech-savvy individual or a beginner, this step-by-step guide will walk you through the initial process. From restoring power to configuring the initial settings, we have got you covered. ###Restoring Power
First things first, you need to restore power to your Honeywell Home Thermostat. If you’re like me, you might have had a few moments of doubt about whether you’ve connected everything correctly. Ensure that your thermostat is securely attached to the wall plate. Double-check the wires to confirm they are snug and correctly placed. Once everything is in place, switch the power back on at your circuit breaker. You should see your thermostat light up immediately. If it doesn’t, don’t panic. Recheck the wiring connections and the power source. ###Configuring Initial Settings
With the power restored, it’s time to configure the initial settings on your Honeywell Home Thermostat. This is where the fun begins. Start by setting the date and time. A correctly set date and time ensure your thermostat operates accurately. Use the up and down arrows to navigate through the settings. Next, select your preferred language. This step is crucial if you want to easily understand and navigate the thermostat’s interface. English, Spanish, and French are commonly available options. Now, choose the system type. Depending on your home’s heating and cooling setup, select either a single-stage or multi-stage system. This ensures your thermostat controls your system effectively. Finally, set your temperature preferences. Decide on your ideal temperature for different times of the day. For instance, you might prefer a cooler temperature at night and a warmer one during the day. Are you ready to make your home more comfortable and energy-efficient? Setting up your Honeywell Home Thermostat is just the beginning. Start enjoying the convenience and savings today!Programming The Thermostat
Set your Honeywell Home Thermostat easily by selecting the mode and desired temperature. Follow the menu prompts to schedule heating and cooling times. Enjoy a comfortable home environment.
Programming the Thermostat Programming your Honeywell Home Thermostat can seem like a daunting task, but it doesn’t have to be. With a bit of guidance, you can easily set it to suit your lifestyle. Let’s dive into two essential steps: Setting the Date and Time and Creating Temperature Schedules.Setting The Date And Time
First things first, you need to set the date and time on your thermostat. This is crucial because accurate scheduling depends on it. Start by pressing the “Menu” button on your thermostat. Navigate to the “Date and Time” option. Use the arrow keys to select and confirm your choices. Setting the correct date and time ensures your thermostat runs programs at the right times. This avoids any confusion or discomfort in your home.Creating Temperature Schedules
Now that the date and time are set, you can create temperature schedules. This allows your home to be at the perfect temperature when you need it. Begin by accessing the “Schedule” menu. You can typically find this by pressing the “Menu” button and selecting “Schedule.” Think about your daily routine. Do you wake up at 7 AM? Set the morning temperature to something comfortable. If you leave for work at 8 AM, adjust the temperature to save energy while you’re away. Repeat this process for each part of your day: morning, day, evening, and night. Customizing the schedule helps you save on energy bills without sacrificing comfort. Remember to review your schedule regularly. Your routine might change, and your thermostat should reflect that. Have you ever felt the frustration of coming home to a cold house? With the right schedule, you can ensure your home is always welcoming. In conclusion, taking the time to properly program your Honeywell Home Thermostat can make a significant difference in your comfort and energy savings. Follow these steps, and you’ll be on your way to a more efficient and cozy home.Connecting To Wi-fi
Setting up your Honeywell Home Thermostat to connect with Wi-Fi can be a game-changer. It allows you to control your home’s temperature from anywhere using your smartphone. Let’s dive into the steps to get your thermostat online.
Accessing Wi-fi Settings
First things first, grab your thermostat and wake it up by pressing any button. Look for the menu option on the screen. You should see an option labeled “Wi-Fi Setup” or similar. Select it to get started.
If you can’t find it, consult your thermostat’s user manual. It often has a step-by-step guide. Navigating through the menu can vary by model, so having the manual handy helps.
Entering Network Credentials
Once you’re in Wi-Fi Setup, your thermostat will scan for available networks. You will see a list of Wi-Fi names (SSIDs) appear on the screen. Select your home network from this list.
Next, you’ll need to enter your Wi-Fi password. Use the thermostat’s on-screen keyboard to type it in. Double-check your password to avoid connection issues.
Check Best Thermostat Pricing in Amazon
** As an Amazon Associate, I earn from qualifying purchases.
After entering the password, confirm your entry. Your thermostat should now connect to your Wi-Fi network. This process might take a few moments, so be patient.
Have you ever had issues connecting devices to Wi-Fi at home? Troubleshooting tips are often just a search away. If your thermostat struggles to connect, consider moving it closer to your router temporarily.
Connecting your Honeywell Home Thermostat to Wi-Fi is straightforward but essential. It gives you control and convenience, fitting perfectly into your smart home setup. So, take a few minutes to get it connected and enjoy the comfort it brings.
Troubleshooting Common Issues
Setting up your Honeywell Home Thermostat can bring comfort and energy efficiency to your home. However, like any tech device, you might encounter some common issues. This section will help you troubleshoot these problems so you can get the most out of your thermostat.
Resolving Connectivity Problems
Connectivity issues can prevent your thermostat from functioning correctly. Make sure your Wi-Fi is working properly. If your thermostat isn’t connecting, check if other devices in your home can connect to the same network.
Sometimes, simply rebooting your thermostat can resolve the issue. Unplug it for a few minutes and then plug it back in. This can refresh the connection.
If the problem persists, verify that your router is not blocking the thermostat. Check your router settings and ensure it’s compatible with the thermostat’s requirements. Your thermostat’s manual will have specific details on this.
Fixing Incorrect Temperature Readings
Incorrect temperature readings can make your home either too hot or too cold. Ensure your thermostat is installed in a location that accurately reflects your home’s temperature. Avoid placing it near windows, doors, or vents.
If you’ve recently changed the batteries, double-check that they are properly installed. Weak or improperly installed batteries can affect the thermostat’s performance.
Calibrating your thermostat might solve the issue. Refer to the user manual for detailed steps on how to calibrate. If you’re still facing problems, contacting Honeywell support can provide specialized help.
Have you faced other issues with your thermostat? What steps did you take to fix them? Share your experiences in the comments below!
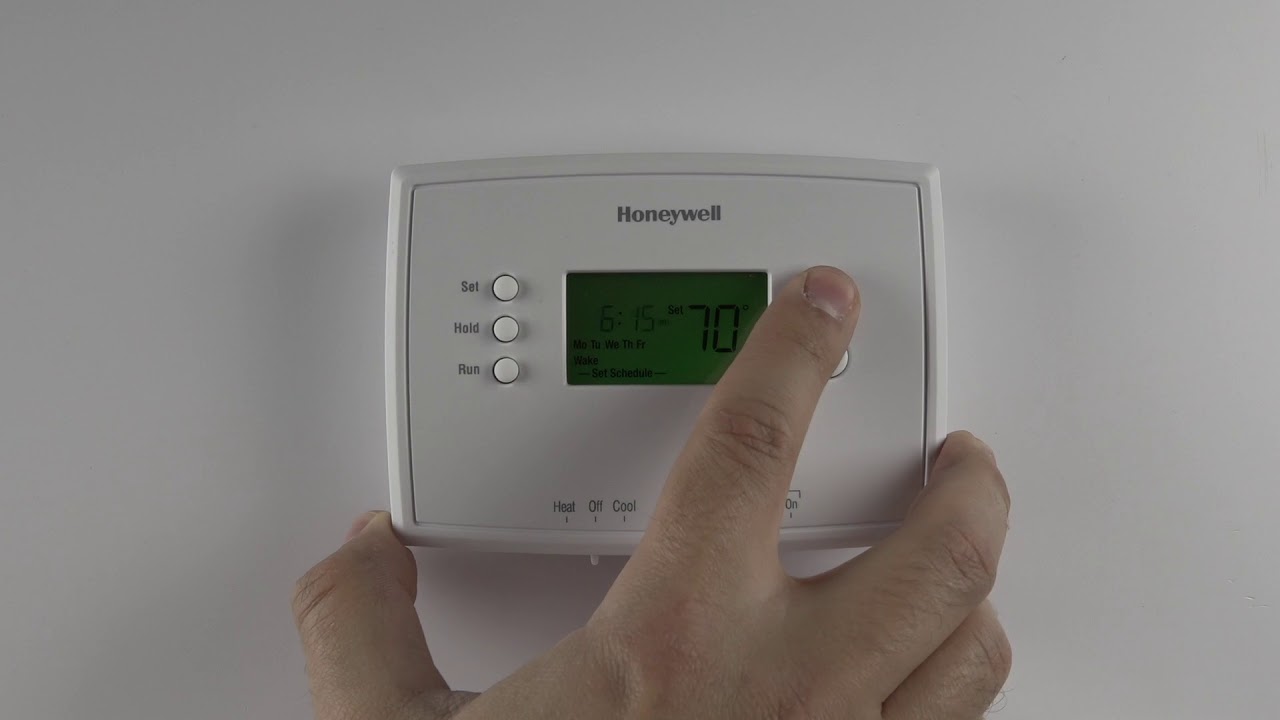
Credit: www.youtube.com
Maintenance Tips
Maintaining your Honeywell Home Thermostat ensures it works efficiently. Regular upkeep extends its life and improves performance. This guide will help you keep your thermostat in top shape.
Regular Cleaning
Dust and dirt can affect your thermostat’s efficiency. Clean it monthly. Use a soft, dry cloth to wipe the exterior. Avoid using water or cleaning sprays. Clean the vent openings gently. This simple routine keeps your thermostat working well.
Software Updates
Ensure your thermostat has the latest software. Software updates fix bugs and improve functions. Check for updates every few months. Follow the instructions in the user manual. Updating software is easy and boosts performance.
Frequently Asked Questions
How Do I Set My Honeywell Thermostat?
To set your Honeywell thermostat, press the “Menu” button. Select “Schedule” or “Program. ” Adjust the temperature settings as needed. Save changes.
How Do You Set And Hold Temperature On A Honeywell Thermostat?
To set the temperature, press the “Up” or “Down” arrow buttons. Hold the temperature by pressing “Hold” and selecting your desired temperature.
How Do I Turn Off The Schedule On My Honeywell Thermostat?
To turn off the schedule on your Honeywell thermostat, press the “Hold” button. This will maintain the current temperature.
How Do I Manually Control My Honeywell Thermostat?
To manually control your Honeywell thermostat, press the ‘Mode’ button to select heating or cooling. Adjust the temperature using the arrow buttons.
Conclusion
Setting your Honeywell Home thermostat is easy and quick. Follow the steps, and you’ll enjoy a comfortable home. Remember to refer to your user manual for specifics. Regularly check and adjust settings for optimal performance. A well-set thermostat can save energy and money.
Feel free to reach out to Honeywell support for any issues. Enjoy the comfort and efficiency of your Honeywell Home thermostat. Happy adjusting!
Check Best Thermostat Pricing in Amazon
** As an Amazon Associate, I earn from qualifying purchases.