
Check Best Thermostat Pricing in Amazon
** As an Amazon Associate, I earn from qualifying purchases.
Replacing the battery in a Honeywell thermostat is simple. It ensures your thermostat works correctly.
Many people struggle with this task, but it’s easy once you know the steps. Thermostats are essential for maintaining a comfortable home. A dead battery can disrupt your heating and cooling system. Understanding how to replace the battery can save you time and hassle.
This guide will walk you through the process. You will learn the tools needed and the steps to follow. By the end, you will be confident in handling this task on your own. Let’s get started and ensure your thermostat runs smoothly again.

Credit: willplumb.com
Preparation
Replacing the battery in your Honeywell thermostat is a straightforward task, but preparation is key to ensuring a smooth process. The right tools and safety measures can make all the difference. Let’s dive into what you need to get ready.
Tools Needed
Before you start, gather the essential tools. Here’s a list to keep you on track:
- New Batteries: Check your thermostat model to know the correct type.
- Screwdriver: A small Phillips or flathead screwdriver will usually do the trick.
- Soft Cloth: Useful for cleaning any dust or debris around the battery compartment.
Having these tools handy will save you time and frustration. Once you have everything, you’re ready for the next step.
Safety Precautions
Your safety is paramount. Here are some precautions to take:
- Turn Off Power: Switch off the power to your thermostat from the circuit breaker. This prevents any accidental electric shock.
- Handle Batteries Carefully: Batteries can leak or explode if mishandled. Always check for leaks and dispose of old batteries properly.
- Clean Hands: Ensure your hands are dry and clean to avoid any moisture getting into the thermostat.
These steps might seem simple, but they are crucial. Taking a few minutes to secure your safety can prevent bigger issues down the line.
Have you ever started a project only to realize you’re missing a key tool? It can be frustrating. Imagine being halfway through replacing your thermostat battery and realizing you don’t have the right screwdriver. Avoid that hassle by preparing in advance.
Now that you’re prepared, you can replace the battery in your Honeywell thermostat with confidence. What’s the most challenging part of home maintenance you’ve faced recently? Share your thoughts in the comments below!

Credit: www.homeserve.com
Locating The Battery
Replacing the battery in your Honeywell thermostat might seem like a daunting task, but it’s easier than you think. One of the first steps is locating the battery. This crucial step ensures you can perform the replacement quickly and efficiently. Here’s how you can find the battery in your Honeywell thermostat.
Types Of Honeywell Thermostats
Before you begin, it’s important to know that Honeywell offers various thermostat models. Some are digital, while others are programmable. The location of the battery compartment can vary between these models.
For instance, digital models like the Honeywell 5000 series often have a battery compartment on the back. On the other hand, programmable models like the Honeywell 8000 series might have it behind the front panel.
Finding The Battery Compartment
To locate the battery compartment, start by turning off your thermostat to ensure safety. Carefully examine the thermostat for any signs indicating the battery location.
In many models, you will see a small latch or tab on the top or side. Gently press or pull this tab to reveal the battery compartment. Sometimes, the entire front face of the thermostat will need to be removed.
If you’re unsure, consult your thermostat’s user manual. It usually contains diagrams and detailed instructions to help you find the battery compartment. You can also check online resources for a quick tutorial.
Have you ever struggled to find the battery in your thermostat? What tricks did you discover along the way? Share your experiences in the comments below!
Removing The Old Battery
Replacing the battery in your Honeywell thermostat is an important task. It ensures your thermostat works efficiently. The first step is removing the old battery. This process involves a few simple steps. Let’s break it down for you.
Opening The Thermostat
Locate your Honeywell thermostat on the wall. Carefully grasp the sides of the thermostat. Pull the thermostat away from the wall plate. It should come off easily. Make sure you don’t use too much force. You don’t want to damage the device.
Taking Out The Old Battery
Once the thermostat is open, look for the battery compartment. It’s usually at the back of the device. Open the battery compartment cover. You might need to use your fingernail or a small tool. Take out the old batteries. Note how they are positioned. This will help you insert the new batteries correctly.
Installing The New Battery
Replacing the battery in your Honeywell thermostat is a simple task. Doing it yourself can save time and money. This guide will help you install the new battery correctly.
Check Best Thermostat Pricing in Amazon
** As an Amazon Associate, I earn from qualifying purchases.
Choosing The Right Battery
First, check your thermostat’s manual. It will tell you the correct battery type. Most Honeywell thermostats use AA or AAA batteries. Buy high-quality batteries. They last longer and work better.
Inserting The New Battery
Now, you are ready to insert the new battery. Open the battery compartment carefully. Remove the old batteries. Look at the compartment for the plus (+) and minus (-) signs. Match these signs with the new battery’s ends.
Insert the new batteries in the correct direction. Close the battery compartment. Make sure it clicks shut. Your thermostat should now power on.
Reassembling The Thermostat
After replacing the battery in your Honeywell thermostat, reassembling it correctly is crucial. This process ensures your thermostat works without issues. Follow these steps to complete the reassembly.
Securing The Battery Compartment
First, ensure the new batteries are secure in their compartment. Check that they are aligned properly with the positive and negative terminals. If not, the thermostat may not power on. Once the batteries are in place, close the battery compartment cover firmly. Make sure it snaps shut to avoid any loose connections.
Reattaching The Thermostat Cover
Next, align the thermostat cover with the base. Ensure the tabs on the cover fit into the slots on the base. Gently press the cover until you hear a click. This sound indicates the cover is securely attached. Double-check all sides to confirm the cover is properly aligned. This step is important for the thermostat to function correctly.
Finally, restore power to your thermostat. Turn on the power supply or replace the thermostat on its mounting plate. Your Honeywell thermostat should now be operational with its new battery.
Testing The Thermostat
To replace the battery in a Honeywell thermostat, first, remove the thermostat from the wall plate. Next, open the battery compartment and insert new batteries, ensuring correct polarity. Finally, reattach the thermostat to the wall plate.
Once you’ve replaced the battery in your Honeywell thermostat, it’s crucial to test it. This ensures the device works correctly and maintains your desired temperature settings. Follow these simple steps to check if your thermostat is functioning properly.Powering On
Turn the power back on to your thermostat. Check if the display lights up. If it doesn’t, recheck the battery installation. Ensure the batteries are inserted correctly. Once the display is on, proceed to the next step.Checking Functionality
Set your thermostat to a desired temperature. Wait a few minutes. Listen for the sound of your heating or cooling system starting up. If the system responds, your thermostat is working. Check if the temperature changes accordingly. If everything works as expected, you have successfully replaced the battery. Your Honeywell thermostat should now operate smoothly. If there are issues, refer to the user manual. Make sure all steps were followed correctly. “`Troubleshooting
Replacing the battery in a Honeywell thermostat can be straightforward. But sometimes, things don’t go as planned. Here, we’ll discuss some common issues and when to seek professional help.
Common Issues
Sometimes, the thermostat screen stays blank after replacing the battery. This can be due to improper battery placement. Double-check the battery orientation. Ensure the positive and negative ends are aligned correctly.
Another issue could be loose battery contacts. Gently press the batteries to ensure they are making proper contact. If the screen remains blank, try using a different set of fresh batteries.
Occasionally, the thermostat may not respond to new batteries. This could indicate a deeper problem. Resetting the thermostat might help. Refer to your thermostat manual for reset instructions.
When To Seek Professional Help
If the thermostat still does not work, it might be time to seek professional help. A blank screen despite new batteries can indicate a wiring issue. It could also be a sign of internal damage.
Another reason to call a professional is frequent battery drain. If you find yourself replacing batteries often, the thermostat might have an underlying issue. Professionals can diagnose and fix these problems.
Lastly, consider professional help if you feel uncertain. Handling electrical devices can be tricky. A professional can ensure your thermostat is safe and working properly.

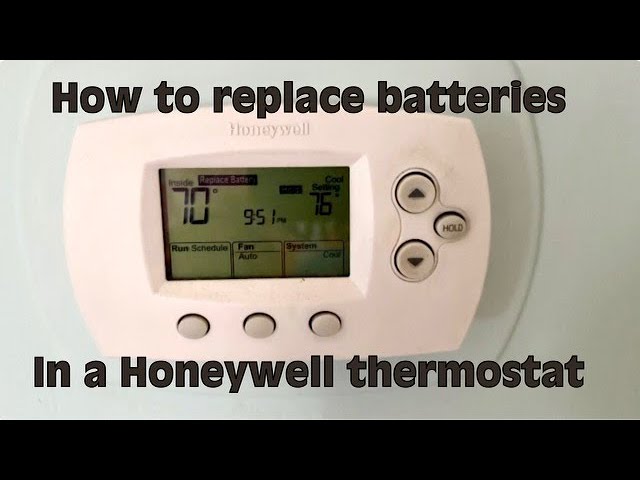
Credit: www.youtube.com
Frequently Asked Questions
How Do I Open My Honeywell Thermostat To Change The Battery?
To open your Honeywell thermostat, gently pull the thermostat cover off the base. Replace the batteries and snap the cover back on.
How Do You Take The Cover Off Of A Honeywell Thermostat?
Gently pull the thermostat’s front cover straight off. Ensure you grip both sides for even pressure.
How To Remove Thermostat Cover To Replace Battery?
To remove the thermostat cover, gently pry it off using your fingers or a flat tool. Replace the batteries inside. Ensure you fit the cover back securely.
How Do I Know If My Honeywell Thermostat Needs Batteries?
Check the thermostat display for a low battery warning. Dim or blank screen also indicates battery replacement.
Conclusion
Replacing the battery in your Honeywell thermostat is easy. Just follow the steps. A fresh battery ensures your thermostat works well. Regular checks prevent issues and save energy. Always keep spare batteries handy. This simple task can prolong your thermostat’s life.
Stay comfortable all year round. Remember, a well-maintained thermostat means a cozy home. Take a few minutes now to avoid problems later. Enjoy a hassle-free experience with your Honeywell thermostat.
Check Best Thermostat Pricing in Amazon
** As an Amazon Associate, I earn from qualifying purchases.