
Check Best Thermostat Pricing in Amazon
** As an Amazon Associate, I earn from qualifying purchases.
Replacing batteries on a Honeywell thermostat is a simple task. It ensures your thermostat works correctly.
Thermostats control your home’s heating and cooling. They need power to function. Many Honeywell models use batteries as a backup power source. If your thermostat’s display is blank or there’s a warning, it’s time to change the batteries. This process is easy and quick.
You don’t need special tools. With a few steps, you can have your thermostat working again. This guide will show you how to replace the batteries on a Honeywell thermostat. Let’s dive in and get your thermostat back to its best.

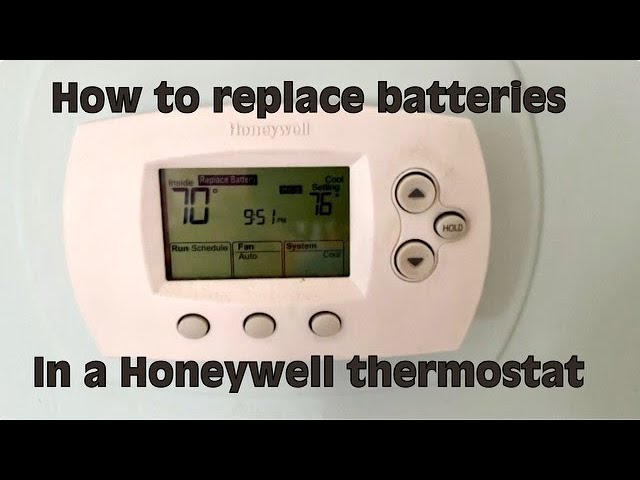
Credit: www.youtube.com
Tools And Materials Needed
Replacing the batteries in your Honeywell thermostat is a simple task. It ensures your device runs smoothly. To get started, gather all the necessary tools and materials. This guide will walk you through what you need. Let’s dive in!
Required Tools
You need only a few basic tools. Here’s the list:
- Screwdriver: A small Phillips-head screwdriver is best.
- Flathead screwdriver: Use this to gently pry open the thermostat cover.
Recommended Materials
Besides tools, have these materials ready:
- New batteries: Check your thermostat’s manual for the correct type. AA or AAA batteries are common.
- Soft cloth: Use this to clean the battery compartment.

Credit: willplumb.com
Safety Precautions
Ensure the thermostat is turned off to avoid electric shock. Use the correct battery type to prevent damage. Handle batteries carefully to avoid leaks.
When it comes to replacing batteries on a Honeywell thermostat, safety should be your top priority. It’s easy to overlook, but taking a few extra precautions can prevent accidents. Let’s dive into some essential safety steps you should follow. ###Turn Off Power
Before you even think about opening your thermostat, turn off the power. This means going to your circuit breaker and flipping the switch that controls your HVAC system. Powering down ensures that you won’t accidentally cause a short circuit. It also keeps you safe from potential electric shocks. ###Avoid Electrical Shock
Electric shock is a real danger when working with electrical devices. Always use insulated tools when handling your thermostat. Make sure your hands are dry and you’re standing on a non-conductive surface. Rubber-soled shoes can provide an extra layer of protection. Taking these simple steps can go a long way in keeping you safe. Have you ever had a close call with electricity? It’s not something you want to experience. By following these safety precautions, you can replace your Honeywell thermostat batteries confidently and safely.Accessing The Thermostat
Replacing batteries on a Honeywell thermostat can be simple. First, you need to access the thermostat. This section will guide you through the steps. Let’s start with locating the thermostat and then removing its cover. Follow these easy steps to get started.
Locate Thermostat
Find the thermostat on your wall. It is usually in a central location. Most likely, it is in the living room or hallway. Make sure the area is well-lit. This will help you see what you are doing. Ensure that the thermostat is off before you begin.
Remove Thermostat Cover
Gently pull the thermostat cover towards you. Use both hands for a firm grip. Be careful not to use too much force. The cover should come off easily. If it is stuck, check for any screws. Some models have screws securing the cover. Use a screwdriver to remove them if needed. Once the cover is off, you will see the battery compartment.
Removing Old Batteries
Replacing the batteries in your Honeywell thermostat is a simple task that ensures your device continues to function efficiently. One of the first steps in this process is removing the old batteries. This might seem straightforward, but handling it correctly can prevent damage and make the whole process smoother. Here’s how you can do it.
Identify Battery Location
First, you need to find where the batteries are located. This can vary depending on the model of your Honeywell thermostat. Typically, they are located behind the front cover or within a battery compartment.
To access the batteries, gently pull the thermostat away from the wall mount. If you’re unsure, refer to your thermostat’s manual. It will provide specific instructions on accessing the battery compartment.
Safely Remove Batteries
Once you’ve located the batteries, it’s time to remove them. Ensure your hands are dry to avoid any moisture getting into the device. If the batteries are stuck, do not use metal objects to pry them out as this can damage the contacts.
Instead, try gently tapping the thermostat or using a plastic tool to ease them out. Carefully observe the orientation of the batteries as you remove them. This will help you insert the new ones correctly.
Have you ever struggled with removing batteries from a device? It can be frustrating, but patience is key. Take your time to avoid any mishaps.
By following these steps, you’re well on your way to successfully replacing the batteries in your Honeywell thermostat. Have any tips from your own experience? Share them in the comments below!
Choosing Replacement Batteries
To replace the batteries on a Honeywell thermostat, first, remove the thermostat from the wall plate. Next, locate the battery compartment and replace the old batteries with new ones, ensuring the correct polarity.
When it comes to replacing the batteries in your Honeywell thermostat, choosing the right replacement batteries is crucial. Using the wrong type can affect the performance of your thermostat or even damage it. Let’s dive into the specifics to ensure you make the best choice.Battery Type
First things first, you need to know what type of batteries your Honeywell thermostat requires. Most Honeywell thermostats use AA or AAA alkaline batteries. Check the manual. It’s always a good idea to double-check your user manual for the exact battery type. Avoid mixing battery types. If your thermostat uses two or more batteries, make sure they are all the same type. Mixing different types can lead to inconsistent performance.Battery Specifications
Now that you know the type, let’s talk about the specifications. Alkaline vs. Lithium. Alkaline batteries are most commonly recommended. Lithium batteries can last longer but might not be suitable for all models. Check the manual to be sure. Battery life. Consider the lifespan of the batteries. High-quality brands usually offer longer-lasting performance. This means fewer replacements and less hassle for you. Voltage. Ensure the batteries you choose match the voltage requirements of your thermostat. Most thermostats use 1.5V batteries, but it’s always good to confirm. Choosing the right batteries might seem like a small task, but it can make a big difference. Have you ever found your thermostat not working during a cold snap because of dead batteries? It’s a small oversight that can lead to big discomfort. So, take a moment to choose wisely. Your comfort and peace of mind are worth it.Installing New Batteries
Replacing batteries in your Honeywell thermostat is simple. Follow these steps to ensure your thermostat works efficiently. This guide will help you install new batteries correctly.
Check Best Thermostat Pricing in Amazon
** As an Amazon Associate, I earn from qualifying purchases.
Insert Batteries Correctly
Open the battery compartment of your Honeywell thermostat. Check the markings for battery polarity. Insert the batteries with the correct orientation. Place the positive end to the positive terminal. Align the negative end with the negative terminal.
Ensure Proper Contact
After inserting the batteries, check for secure contact. Press the batteries firmly into place. Ensure the terminals touch the battery ends. A loose connection can cause the thermostat to malfunction. Double-check the battery position if needed.
Reassembling The Thermostat
Reassembling the thermostat after replacing the batteries is a crucial step. It’s easy to overlook the details, but this can make a big difference in ensuring your thermostat functions correctly. Here’s a clear guide on how to reassemble your Honeywell thermostat effectively.
Replace Thermostat Cover
Once the new batteries are in place, it’s time to replace the cover. Align the cover with the base of the thermostat. Make sure the pins and connectors fit perfectly into their respective slots.
Press the cover gently but firmly onto the base. You should hear a slight click indicating that the cover is secured. If you don’t hear a click, double-check the alignment.
Secure The Cover
Now, ensure that the cover is securely attached. Gently tug on the cover to check if it’s properly affixed. It should not come off easily.
Consider using a small piece of tape if the cover seems loose. This can provide added security until you can properly secure it. Have you ever had the cover come loose and cause issues? Taking this extra step can save you that trouble.
Once the cover is secure, power on the thermostat to confirm everything is working correctly. If the display turns on and the settings are accurate, you’ve done a great job!
Reassembling your Honeywell thermostat can be quick and easy if you follow these steps. Have you found any other tricks to make this process smoother? Share them in the comments below!
Testing The Thermostat
After replacing the batteries in your Honeywell thermostat, it’s crucial to test it. This ensures everything works properly. You don’t want any surprises later.
Turn On Power
First, turn on the power to the thermostat. Go to your circuit breaker. Flip the switch that controls the thermostat. The display should light up. If it doesn’t, check the batteries and connections.
Verify Functionality
Next, verify the thermostat’s functionality. Set your desired temperature. Wait for the heating or cooling system to start. Listen for the system to engage. Feel for changes in the room’s temperature.
If the system responds, the thermostat works correctly. If not, double-check the battery installation. Ensure everything is connected and secure.

Credit: www.homeserve.com
Frequently Asked Questions
How Do I Open My Honeywell Thermostat To Change The Battery?
To open your Honeywell thermostat, gently pull the thermostat cover off the wall plate. Replace the batteries and reattach the cover.
How Do You Take The Cover Off Of A Honeywell Thermostat?
To remove the cover of a Honeywell thermostat, gently pull it from the bottom or sides. Avoid using excessive force.
How To Remove Thermostat Cover To Replace Battery?
To remove the thermostat cover, gently pull it off or unscrew it. Replace the battery with a new one. Reattach the cover securely.
What Kind Of Battery Goes In A Honeywell Thermostat?
Honeywell thermostats typically use AA or AAA alkaline batteries. Check your thermostat model for specific battery requirements.
Conclusion
Replacing batteries on a Honeywell thermostat is simple. Follow these steps for quick results. First, gather the required tools. Next, remove the thermostat cover. Then, replace old batteries with fresh ones. Ensure proper battery alignment. Finally, reattach the cover securely.
Regular battery changes keep your thermostat functioning well. This task is easy and ensures your home stays comfortable. Follow these tips for an effective battery replacement process. Now, your Honeywell thermostat is ready to perform efficiently.
Check Best Thermostat Pricing in Amazon
** As an Amazon Associate, I earn from qualifying purchases.