
Check Best Thermostat Pricing in Amazon
** As an Amazon Associate, I earn from qualifying purchases.
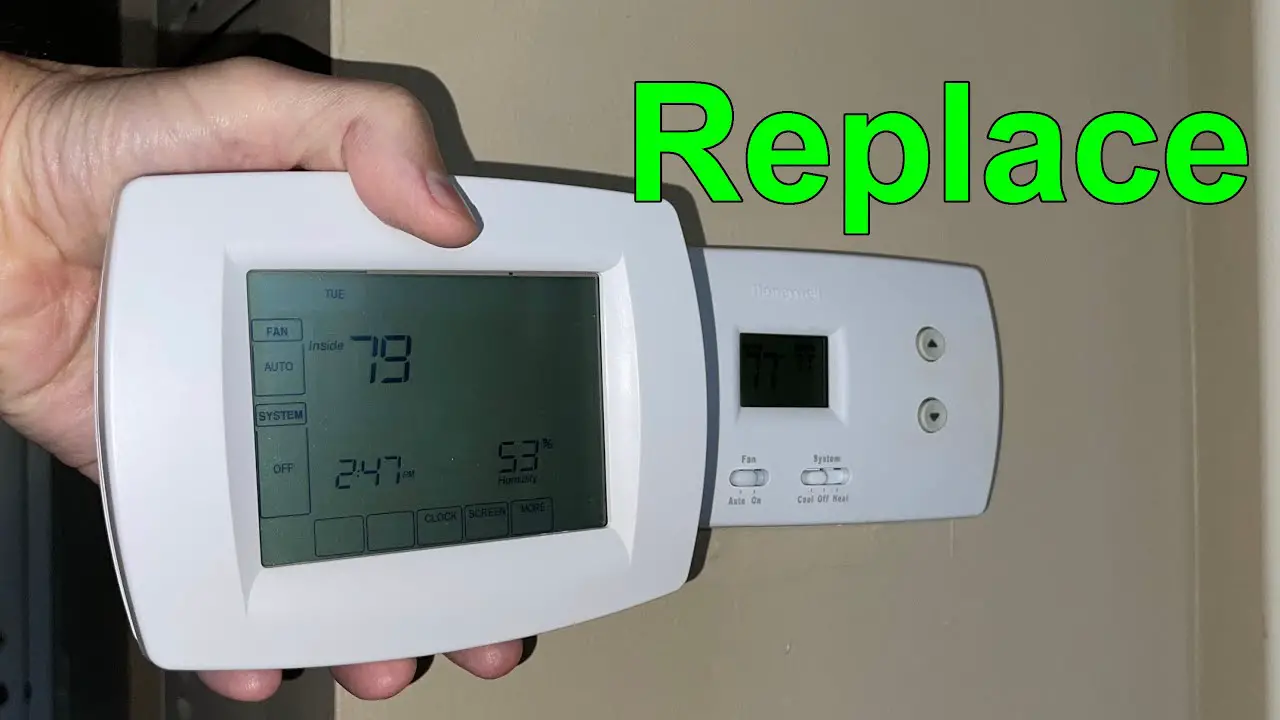
Removing a Honeywell thermostat is simple. First, turn off the power to the thermostat.
Next, detach the device from the wall. Many homeowners need to remove their old Honeywell thermostat for various reasons. Perhaps it’s time for an upgrade, or maybe it’s malfunctioning. Regardless of the reason, the process might seem daunting at first.
But don’t worry, it’s easier than you think. With a few basic tools and some simple steps, you can safely and efficiently remove your Honeywell thermostat. This guide will walk you through the necessary steps, ensuring you have the knowledge to complete the task without any issues. Whether you’re a seasoned DIYer or a novice, follow along to make the process smooth and stress-free.

Credit: willplumb.com
Tools Required
Removing a Honeywell thermostat requires a few essential tools and safety equipment. Having the right tools makes the process easier and safer. This section outlines the necessary tools and safety gear you will need for the job.
Essential Tools
First, gather the essential tools. You will need a Phillips head screwdriver. This will help in unscrewing the thermostat from the wall. A flat-head screwdriver is also needed. It assists in prying the thermostat cover off. Needle-nose pliers are useful too. They help in handling small wires. A voltage tester is crucial. It ensures there is no live electricity. Have electrical tape ready. It is used to secure wires.
Safety Equipment
Safety is paramount. Wear safety gloves to protect your hands. Safety goggles shield your eyes from dust and debris. Use a dust mask if needed. It prevents inhaling any particles. Ensure you have a flashlight. It helps in seeing wires clearly. A step stool or ladder might be required. It provides better access to the thermostat.

Credit: www.youtube.com
Preparation Steps
First, turn off the power to the thermostat. Next, remove the cover by gently pulling it off. Finally, disconnect the wires and label them for easy reinstallation.
Are you planning to remove your Honeywell thermostat? It’s a task you can handle with some basic preparation. Taking the right steps before starting ensures your safety and helps you remove the thermostat without issues. Let’s dive into the preparation steps.Turn Off Power
Safety first. Always make sure to turn off the power to your thermostat before you begin. Go to your circuit breaker and locate the switch that controls the power to your HVAC system. Flip it to the “off” position. Double-check by trying to turn on your heating or cooling. If nothing happens, you’ve successfully turned off the power. This step protects you from electrical shocks and prevents damage to your system.Gather Materials
Having the right tools at hand makes the job easier. You don’t need a lot, but a few key items are essential. Here’s a quick list: – A flathead screwdriver – A Phillips screwdriver – Masking tape – A pen or marker Use masking tape and a pen to label the wires. This will help when you install a new thermostat. Having everything ready means you won’t need to stop midway through the process. It also minimizes the risk of making mistakes. Are you ready to get started? Removing a Honeywell thermostat is simpler than it seems when you prepare properly. What other home projects are you tackling? Share your thoughts and experiences in the comments below!Removing Faceplate
Removing the faceplate of a Honeywell thermostat might seem like a daunting task, but it’s actually quite simple. This process is essential if you’re planning to clean, replace, or troubleshoot your thermostat. Let’s break down the steps to make it as straightforward as possible.
Detach Faceplate
First, locate the faceplate of your Honeywell thermostat. It is the outer cover that you interact with daily. Gently grasp the sides of the faceplate.
Apply a small amount of pressure and pull it straight towards you. It should come off without much resistance. If it feels stuck, wiggle it slightly to loosen it.
Remember to turn off the power to the thermostat before starting this process. This ensures your safety and prevents any accidental damage to the device.
Handle With Care
Once the faceplate is off, handle it with care. Place it on a soft surface to avoid scratches or damage.
Inspect the back of the faceplate for any dust or debris. Cleaning it can improve the thermostat’s performance.
While the faceplate is off, you can now access the internal components for further maintenance or replacement. Be mindful of delicate parts and wires.
Have you ever struggled with removing a thermostat faceplate? How did you overcome it? Share your experiences in the comments below!
Disconnecting Wires
Disconnecting the wires from your Honeywell thermostat can feel like a daunting task. But with a step-by-step approach, you can do it easily. This guide will help you safely disconnect the wires from your thermostat. Let’s break it down into manageable steps.
Label Wires
First, switch off the power to your thermostat. It’s crucial for safety. Next, take a photo of the wires connected to the thermostat. This will help you remember where each wire goes. Now, label each wire with masking tape or wire labels. Write down the letter or number near each terminal on the thermostat. This will make reinstallation easier.
Loosen Screws
After labeling the wires, you need to remove them. Use a small screwdriver to loosen the screws holding the wires in place. Turn the screws counterclockwise until they are loose enough to release the wires. Be gentle to avoid stripping the screws. Once the screws are loose, carefully pull the wires out. Make sure the labels stay attached to the wires. This step completes the disconnection process.
Removing Wall Plate
Removing the wall plate of a Honeywell thermostat is a crucial step. This step allows you to check the wiring and make necessary repairs. It’s simple and requires basic tools. Follow these steps to ensure a smooth process.
Unscrew Wall Plate
First, turn off the power to the thermostat. This ensures safety while working. Use a screwdriver to unscrew the wall plate. There are usually two screws holding it in place. Keep the screws safe for later use.
Check For Damage
After removing the wall plate, inspect the wall and wiring. Look for any signs of damage or wear. Check if the wires are loose or frayed. If you find any issues, you may need to repair or replace parts. This step ensures your thermostat works efficiently.
Dealing With Old Thermostat
Removing an old Honeywell thermostat can seem like a daunting task. But with the right approach, it becomes manageable. You must first ensure proper handling of the old unit. This ensures safety and environmental responsibility.
Check Best Thermostat Pricing in Amazon
** As an Amazon Associate, I earn from qualifying purchases.
Proper Disposal
Old thermostats often contain hazardous materials. Mercury is a common component. It’s crucial to dispose of these units properly. Avoid throwing them in regular trash. This can lead to contamination. Instead, follow local disposal guidelines.
Recycling Options
Recycling is an eco-friendly choice. Many communities offer recycling programs. These programs safely handle old thermostats. Check with your local waste management services. They can provide information on recycling centers. Some hardware stores also accept old thermostats. They ensure proper recycling and disposal. This not only protects the environment but also keeps your home safe.
Installing New Thermostat
Installing a new thermostat can seem daunting, but with the right steps, it becomes a straightforward task. Whether you’re upgrading for better energy efficiency or replacing a faulty unit, knowing how to install your new thermostat correctly is crucial. Here’s a step-by-step guide to help you through the process.
Mount New Wall Plate
First, you need to mount the new wall plate. This is the foundation for your thermostat. Ensure it’s level and secure on the wall.
Use the screws provided with your new thermostat. They should fit perfectly into the mounting holes.
If you’re drilling new holes, use a drill bit that’s slightly smaller than the screws. This will ensure a tight fit.
Connect Wires
Next, connect the wires to your new thermostat. This step is crucial for proper functionality.
Make sure to match each wire to the corresponding terminal. Most thermostats have labels like R, W, Y, G, and C for easy identification.
Secure each wire by tightening the terminal screws. Double-check to ensure no wires are loose.
Installing a new thermostat can be a simple process if you follow these steps. Have you ever installed a thermostat before? What challenges did you face, and how did you overcome them? Share your experiences in the comments below!
Testing New Installation
Testing the new installation of your Honeywell thermostat is crucial. It ensures everything works correctly and your home stays comfortable. Follow these steps to restore power and check functionality.
Restore Power
First, turn the power back on at the circuit breaker. Make sure all switches are in the correct positions. Wait for the thermostat to power up. This may take a few moments. Once powered, the display should light up. If it doesn’t, double-check the wiring connections.
Check Functionality
Next, test the thermostat functions. Set a temperature higher than the current room temperature. The heating system should activate. Listen for the system to turn on. Feel for warm air from the vents.
Then, set a temperature lower than the current room temperature. The cooling system should activate. Again, listen for the system to turn on. Feel for cool air from the vents. Ensure both heating and cooling systems respond correctly.
Finally, test the fan settings. Switch the fan to the ‘On’ position. The fan should start running. Switch it back to ‘Auto’ to ensure it stops when the system cycles off. If all functions work, your installation is successful.

Credit: willplumb.com
Frequently Asked Questions
How Do You Take A Honeywell Thermostat Off The Wall?
Turn off the power to the thermostat. Remove the faceplate by pulling it straight off. Unscrew the mounting screws. Disconnect the wires, labeling them for reinstallation. Carefully remove the thermostat from the wall.
How To Take Honeywell Thermostat Off Wall To Change Battery?
To remove a Honeywell thermostat, gently pull the unit away from the wall plate. Replace the batteries and snap it back.
How To Remove A Thermostat From A Wall?
Turn off the power. Remove the thermostat cover. Unscrew the mounting screws. Disconnect the wires, labeling them first. Carefully detach the thermostat from the wall.
How To Unbind A Honeywell Thermostat?
Go to your Honeywell thermostat settings. Select “Unbind” or “Disconnect” option. Follow the on-screen instructions to complete the process.
Conclusion
Removing a Honeywell thermostat is straightforward with the right steps. Carefully follow the instructions to ensure safety. Double-check the wiring before disconnecting. Keep screws and parts organized. Clean the wall area after removal. Remember to consult the user manual for specific models.
Proper handling prevents damage. Once removed, dispose of the old thermostat responsibly. Enjoy your new thermostat setup with improved efficiency. Always prioritize safety and accuracy during installation. A smooth removal process ensures a seamless transition to your new device.
Check Best Thermostat Pricing in Amazon
** As an Amazon Associate, I earn from qualifying purchases.