
Check Best Thermostat Pricing in Amazon
** As an Amazon Associate, I earn from qualifying purchases.
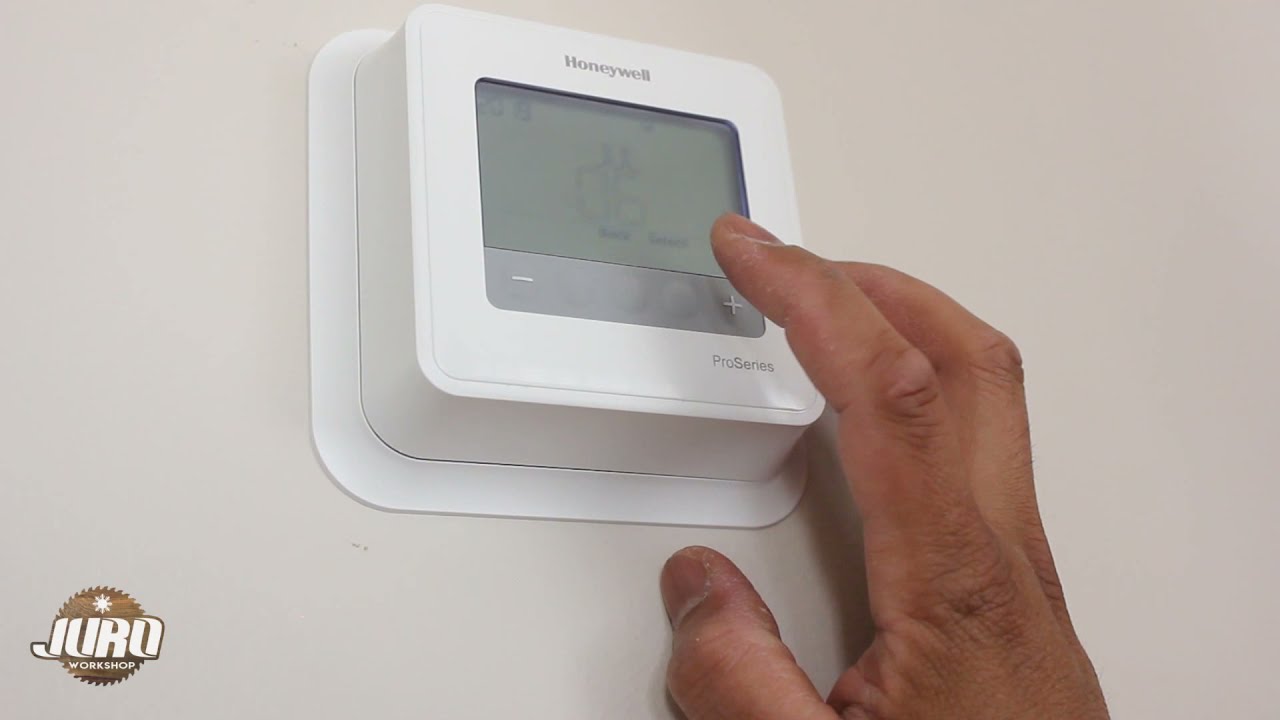
Removing a Honeywell Pro Series thermostat from the wall is straightforward. First, turn off the power.
Then, detach the thermostat from its base. Understanding how to remove your thermostat is important for maintenance or upgrades. Sometimes, you need to replace or relocate it. This guide will help you safely remove your Honeywell Pro Series thermostat. Whether you’re a homeowner or a renter, knowing the process can save you time and money.
Proper removal prevents damage and ensures a smooth transition to a new device. Follow these steps to successfully detach your thermostat from the wall. Your HVAC system will thank you for your careful handling. Ready to get started? Let’s dive in and make this task easy for you.

Credit: www.tiktok.com
Tools Needed
To successfully remove your Honeywell Pro Series thermostat from the wall, you’ll need to gather some essential tools. Having the right tools at hand makes the process smoother and helps you avoid any damage to the thermostat or the wall. Let’s dive into the tools you’ll need, breaking them down into essential and optional categories.
Essential Tools
First, let’s talk about the essential tools. These are the must-have items that you can’t do without:
- Phillips Head Screwdriver: This is crucial for removing the screws that hold the thermostat onto the wall plate. Make sure it’s the right size to avoid stripping the screws.
- Flat Head Screwdriver: Sometimes you may need a flat head screwdriver to pry open any stubborn clips or covers. It’s also handy for loosening any tight spaces.
- Small Container: A small container or a dish can help you keep all the screws and small parts in one place. This ensures you don’t lose any components during the removal process.
Optional Tools
Now, let’s look at some optional tools. These can make the job easier but are not strictly necessary:
- Needle-Nose Pliers: These can help you grip and pull wires or small components that are hard to reach with your fingers.
- Labeling Tape: If you want to be extra cautious, you can use labeling tape to mark the wires as you remove them. This will make it easier when you’re reinstalling or replacing the thermostat.
- Level: If you plan to install a new thermostat, a level can help ensure it’s perfectly aligned on the wall.
Do you have all these tools ready? Gathering everything beforehand saves you a lot of time and effort. You won’t have to run back and forth looking for tools in the middle of the job. Plus, it ensures a smooth and safe removal process.
Have you ever had to improvise with tools you had on hand? Sometimes creativity can get you through, but having the right tools from the start makes things a lot easier.

Credit: willplumb.com
Safety Precautions
Ensure safety by turning off the power supply. Use a screwdriver to carefully detach the thermostat from the wall. Handle the wires gently to avoid damage.
When removing a Honeywell Pro Series Thermostat from the wall, it’s crucial to follow some important safety precautions. These steps ensure that you avoid any potential hazards and protect your home from electrical accidents. Let’s dive into the essential safety measures you need to take. ###Turn Off Power
Before you start, always turn off the power to your thermostat at the circuit breaker. This step is non-negotiable. It prevents electrical shock and protects your thermostat’s internal components from damage. Locate your home’s circuit breaker box. Find the switch that controls the power to your thermostat and flip it to the off position. Double-check by trying to turn on the thermostat—if it doesn’t power up, you’re good to go. ###Wear Safety Gear
Wearing the right safety gear can make a significant difference in protecting yourself during the removal process. Consider wearing insulated gloves to avoid any accidental contact with electrical components. Safety goggles are also a good idea. They protect your eyes from dust and small particles that might dislodge while you’re working. Have you ever had dust fly into your eyes while working? Not fun, right? Better safe than sorry! By taking these safety precautions, you ensure a smooth and hazard-free removal of your Honeywell Pro Series Thermostat. Ready to proceed? Let’s get started!Preparation Steps
Removing a Honeywell Pro Series thermostat from the wall involves several key steps. Before you begin, it’s important to prepare properly. This ensures a smooth and safe removal process. Let’s explore the necessary preparation steps.
Read Manual
Start by reading the thermostat’s manual. The manual provides specific instructions for your model. It details important safety information and steps. Understanding these will help you avoid damaging the device or wall. Don’t skip this step.
Gather Tools
Next, gather the tools you need. Common tools include a screwdriver and a small level. You might also need a flashlight if the area is dim. Having the right tools ready saves time and effort.
Removing Thermostat Cover
Removing the cover of your Honeywell Pro Series thermostat is a simple task. This step is crucial before you can remove the thermostat from the wall. Follow these steps to ensure you do it safely and correctly.
Locate Screws
First, find the screws holding the cover in place. These screws are usually at the top or bottom of the thermostat. Use a small screwdriver to unscrew them. Be careful not to lose them.
Remove Cover
Once the screws are out, gently pull the cover off. Start from the bottom and lift upwards. If the cover feels stuck, wiggle it slightly. This will help loosen any clips holding it in place. Now, you can see the internal components of the thermostat.
Disconnecting Wires
Disconnecting the wires from your Honeywell Pro Series thermostat is a crucial step. This ensures that the thermostat can be safely removed from the wall. Let’s break this process down into simple steps to make it easy for you.
Label Wires
First, locate the wires connected to the thermostat. These wires control different functions of your HVAC system. Use small pieces of tape to label each wire. Write down the letter or number that corresponds to the terminal it was connected to. This will help you remember where each wire goes when you install the new thermostat.
Disconnect Wires
After labeling the wires, use a screwdriver to loosen the screws holding the wires in place. Gently pull each wire out of its terminal. Be careful not to pull too hard. You don’t want to damage the wires. Keep the wires straight and untangled. This will make the installation process smoother later on.
Check Best Thermostat Pricing in Amazon
** As an Amazon Associate, I earn from qualifying purchases.
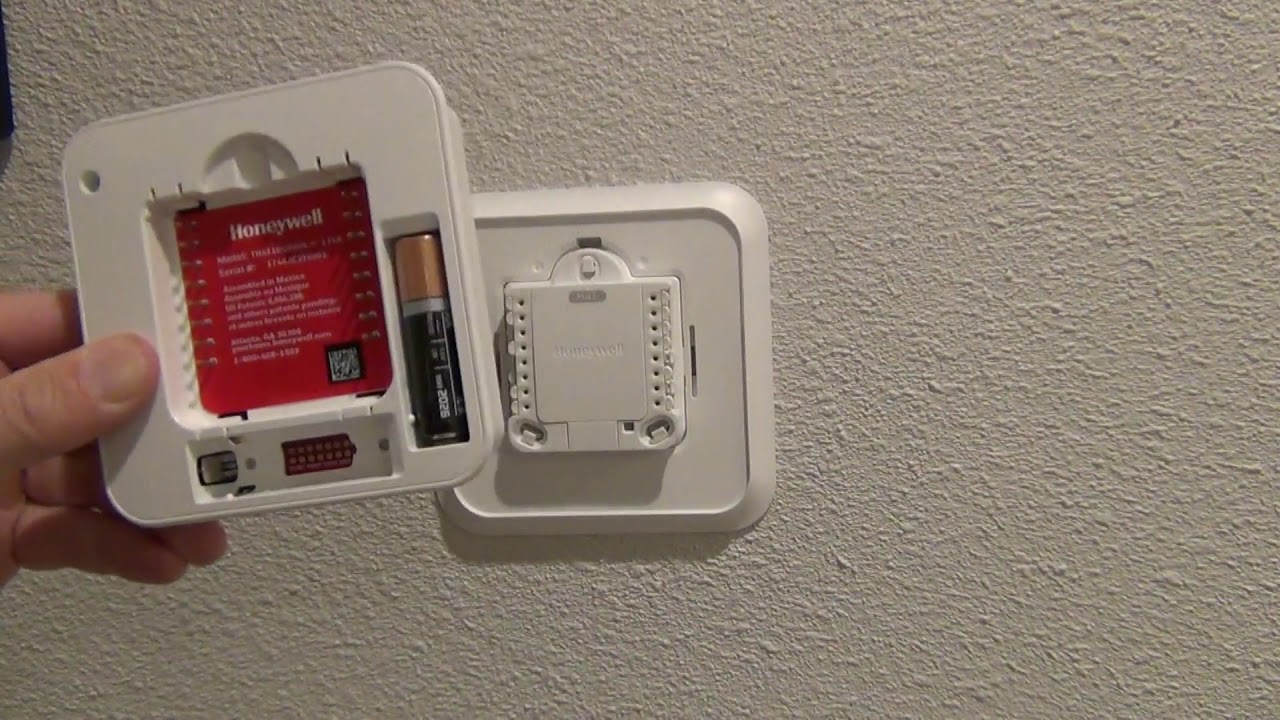
Detaching Mounting Plate
To remove the Honeywell Pro Series Thermostat from the wall, begin by detaching the mounting plate. Carefully unscrew and separate it from the wall.
Detaching the mounting plate is a crucial step when removing your Honeywell Pro Series thermostat from the wall. This process ensures you can safely access and remove the thermostat without causing damage to the wall or the device. Let’s walk through the steps to make this task simple and stress-free.Unscrew Plate
Begin by turning off the power to your thermostat at the circuit breaker. This step is essential to avoid any electrical mishaps. Next, locate the screws holding the mounting plate in place. These screws are usually found at the corners of the plate. Use a Phillips head screwdriver to carefully unscrew each one. Keep the screws in a small container or a magnetic tray. This way, you won’t lose them during the process.Remove Plate
Once the screws are removed, gently pull the mounting plate away from the wall. Hold onto the plate firmly to avoid dropping it. Check for any remaining wires connected to the plate. If there are any, carefully detach them, noting their original positions for easier reinstallation. With the wires detached, you can now completely remove the mounting plate from the wall. Place it aside safely. Removing the mounting plate should be a straightforward task. Have you ever had to detach a different type of thermostat before? How did it compare to this process? Your experiences might offer helpful tips for others.Cleaning Wall Area
After successfully removing your Honeywell Pro Series Thermostat, it’s crucial to clean the wall area. This ensures your wall looks neat and ready for any new installations or decorations. Cleaning the wall area involves a few simple steps that you can easily follow.
Remove Debris
Begin by removing any debris left behind. This might include dust, small screws, or wall anchors. Use a small brush to sweep away these particles. Make sure to also check for any loose paint chips. Removing these will help create a smooth surface.
Wipe Clean
Next, use a damp cloth to wipe the area clean. This helps remove any remaining dust and dirt. Avoid using too much water to prevent damage. Gently wipe in a circular motion. Let the wall air dry completely before proceeding to the next steps.
Credit: www.youtube.com
Final Steps
You’ve successfully removed your Honeywell Pro Series thermostat from the wall. The final steps are crucial to ensure the safe storage of your device and the cleanliness of your space. Here’s what you need to do next.
Store Thermostat
First, find a safe place to store your thermostat. This could be a drawer, a box, or any secure location where it won’t get damaged. Make sure to wrap it in a soft cloth or bubble wrap to protect the screen and buttons.
Label the storage container with the thermostat’s model number and purchase date. This helps in case you need to refer back to it for warranty or reinstallation purposes. Keeping the user manual and any extra parts together with the thermostat is also a good idea.
Have you ever misplaced something important? By keeping everything together, you avoid the hassle of searching for missing parts later on. It’s like organizing your tools before starting a DIY project; it makes life easier!
Inspect Wall
Take a close look at the wall where the thermostat was mounted. Check for any damage like holes or marks. If you see any issues, now’s the time to fix them.
Fill any small holes with spackle and smooth it out with a putty knife. Once it’s dry, sand it lightly and paint over it to match the rest of the wall. This quick fix will make your wall look as good as new.
Do you have some extra paint left over from when you last painted your room? Use it to touch up the area. It’s a small step that makes a big difference in maintaining a clean and polished look.
By following these final steps, you ensure that your Honeywell Pro Series thermostat is safely stored and your wall remains in great condition. Ready to tackle your next home project?
Frequently Asked Questions
How Do I Take My Honeywell Thermostat Off The Wall?
To remove your Honeywell thermostat, first turn off the power. Next, gently pull the thermostat away from the wall plate.
How To Remove Honeywell Pro Series Thermostat Cover To Replace Battery?
To remove the Honeywell Pro Series thermostat cover, gently pull the cover from the bottom. Replace the batteries and snap the cover back into place.
How To Detach A Thermostat From A Wall?
Turn off the power. Remove the thermostat cover. Unscrew the mounting plate. Disconnect the wires. Carefully detach the thermostat from the wall.
How Do I Remove The Hold On My Honeywell Home Pro Series Thermostat?
Press the “Hold” button on your Honeywell Home Pro Series thermostat. Select “Run Schedule” to remove the hold.
Conclusion
Removing a Honeywell Pro Series thermostat is straightforward. Follow the simple steps outlined above. Ensure you disconnect the power before starting. Handle the thermostat carefully to avoid damage. Always keep the installation manual handy for guidance. Proper removal can extend the thermostat’s life.
Store it safely for future use or disposal. Regular maintenance helps in avoiding frequent replacements. Understanding your thermostat ensures efficient home temperature management. Thank you for reading. Stay safe and enjoy a comfortable home.
Check Best Thermostat Pricing in Amazon
** As an Amazon Associate, I earn from qualifying purchases.