

Check Best Thermostat Pricing in Amazon
** As an Amazon Associate, I earn from qualifying purchases.
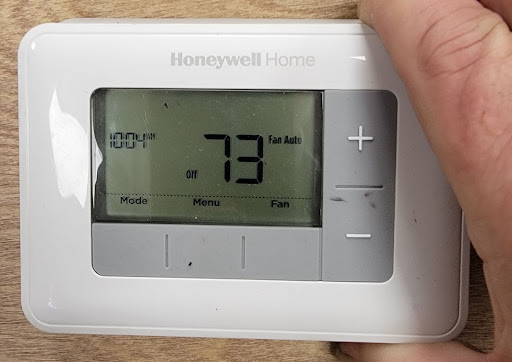
Are you looking to remove your Honeywell Home thermostat but don’t know where to start? Taking out a thermostat might seem tricky, but with the right steps, you can do it safely and quickly.
Whether you’re upgrading to a new model or fixing an issue, this guide will walk you through the process in simple terms. By the end, you’ll feel confident handling your thermostat removal without any hassle. Keep reading, and let’s make this task easy for you.
Tools Needed
Removing a Honeywell Home thermostat requires a few simple tools. These tools help you work safely and avoid damage. Having the right tools ready makes the process faster and easier.
Screwdriver
A screwdriver is essential to remove the thermostat cover and wall plate. Most Honeywell thermostats use either a flathead or Phillips head screwdriver. Check your thermostat screws to choose the correct type.
Voltage Tester
Use a voltage tester to ensure the power is off before you start. This tool helps prevent electric shocks. Safety first—always confirm no power is running to the thermostat wires.
Wire Labels
Wire labels keep track of each wire’s connection. Label the wires before disconnecting them. This step makes reinstalling or replacing the thermostat simple and error-free.
Needle-nose Pliers
Needle-nose pliers help in gripping and pulling wires gently. They work well for tight spaces and small wires. Use them carefully to avoid damaging the wire ends.
Small Container
A small container holds screws and small parts. It keeps everything safe and prevents losing pieces. Use a bowl or box to collect all hardware during removal.
Credit: environmentmasters.com
Power Off The System
Powering off your Honeywell Home thermostat is the first step before removal. This ensures safety and avoids damage to the system.
Turning off the power stops electricity flow. It prevents short circuits and protects the thermostat’s wiring.
Follow these simple steps to power off your system correctly.
Locate The Circuit Breaker
Find the circuit breaker panel in your home. It is usually in the basement, garage, or utility room.
Look for the breaker labeled HVAC, furnace, or air conditioner. This controls the power to your thermostat.
Switch Off The Breaker
Flip the breaker switch to the “off” position. This cuts power to the thermostat and HVAC system.
Double-check by pressing buttons on the thermostat. The screen should go blank or show no response.
Confirm Power Is Off
Test the thermostat by trying to adjust the temperature. No change means the power is off.
Use a non-contact voltage tester on the thermostat wires for extra safety.
After confirming, you can safely proceed with thermostat removal.
Remove The Thermostat Cover
Removing the thermostat cover is the first step in taking off your Honeywell Home thermostat. This step gives access to the screws and wiring behind the device. Doing this carefully helps avoid damage to the thermostat or wall.
Most Honeywell thermostats have a snap-on cover. It fits tightly but can be removed with gentle pressure. You do not need tools yet for this part.
Locate The Thermostat Cover
Look closely at the front of the thermostat. The cover is the part with the screen and buttons. It usually snaps onto the base attached to the wall.
Grip The Cover Firmly
Place your fingers on the edges of the cover. Hold it firmly but without squeezing too hard. This grip helps you pull the cover off evenly.
Pull The Cover Straight Out
Pull the cover straight away from the wall. Avoid twisting or bending it. A smooth, steady pull will release the clips holding it in place.
Set The Cover Aside Safely
After removal, place the cover on a soft surface. Keep it safe from dust or scratches. This protects the screen and buttons during the rest of the process.

Credit: www.youtube.com
Label And Disconnect Wires
Labeling and disconnecting wires is a key step in removing your Honeywell Home thermostat. This step helps keep track of each wire’s position. Proper labeling avoids confusion when installing a new thermostat.
Disconnecting wires carefully prevents damage to your system. It also makes the removal process safer. Take your time and follow each step closely.
Turn Off Power To Your Hvac System
Before touching wires, switch off power at the breaker. This stops any electrical shocks. Confirm the power is off by trying to change the thermostat settings. No response means it is safe to proceed.
Take A Clear Photo Of Wire Connections
Use your phone to snap a photo of the wires connected to the thermostat. This picture serves as a reference for wiring later. It shows exactly where each wire is attached.
Check Best Thermostat Pricing in Amazon
** As an Amazon Associate, I earn from qualifying purchases.
Label Each Wire With Tape
Wrap small pieces of tape around each wire. Write the terminal letter or color on the tape. Common labels include R, W, Y, G, and C. Labeling keeps wire order clear and simple.
Gently Disconnect The Wires
Loosen the screws or clips holding the wires. Pull wires out carefully, avoiding any damage. Keep wires separated and neat to prevent tangling.
Unscrew The Mounting Plate
Removing the mounting plate is a key step in taking down your Honeywell Home thermostat. The mounting plate holds the thermostat to the wall. Unscrewing it carefully helps avoid damage to the wall and wiring.
Use the right screwdriver for the screws. Keep the screws safe for later use. Handle the plate gently as you remove it.
Gather Your Tools
Find a screwdriver that fits the screws on the mounting plate. Most Honeywell thermostats use a small Phillips head. Having the right tool makes the job easy and safe.
Locate The Mounting Screws
Look closely at the thermostat base. The screws are usually visible at the corners. Sometimes, a small cover hides them. Remove the cover carefully before unscrewing.
Turn the screwdriver counterclockwise to loosen the screws. Remove each screw fully before pulling the plate away. Keep the screws in a safe spot for reinstallation.
Remove The Mounting Plate
Gently pull the plate from the wall. Avoid pulling on wires behind the plate. If it feels stuck, check for missed screws or clips.
Handle The Wiring Safely
Handling the wiring safely is the most important step when removing a Honeywell Home thermostat. Incorrect handling can cause electrical problems or damage. Always turn off the power at the circuit breaker before touching any wires. Use a voltage tester to confirm no current flows through the wires. Safety first ensures a smooth removal process without risks.
Cap The Wires
After disconnecting the thermostat wires, cap each wire with a wire nut. This prevents wires from touching each other or metal surfaces. Use the right size wire nuts for a secure fit. Capped wires avoid accidental shorts and keep your system safe until you install a new thermostat.
Avoid Short Circuits
Short circuits can cause sparks or damage your HVAC system. Never let exposed wires touch each other or metal parts. Keep wires separated and secure with electrical tape if needed. Check twice before turning the power back on. Avoiding short circuits protects your home and equipment.
Clean The Wall Surface
After removing your Honeywell Home thermostat, the wall surface often needs cleaning. Dust, dirt, and leftover adhesive can stay on the wall. Cleaning the area helps prepare for a new thermostat or fresh paint. A clean wall also improves the look of your space.
Remove Dust And Dirt
Start by wiping the wall with a dry cloth. This removes loose dust and dirt. Use a soft cloth to avoid scratching the paint.
Clean Sticky Residue
Use a small amount of warm water and mild soap. Dampen a cloth and gently rub the sticky spots. Avoid soaking the wall to prevent damage.
Use Rubbing Alcohol For Tough Residue
Apply rubbing alcohol on a cotton ball for stubborn glue. Test a small area first to protect paint. Rub gently until the residue disappears.
Dry The Wall Surface
After cleaning, dry the wall with a clean cloth. Let the wall air dry completely before installing anything new.

Credit: www.reddit.com
Prepare For New Thermostat Installation
Preparing for a new thermostat installation is a key step. It helps ensure a smooth and safe process. Taking time to get ready prevents mistakes and saves time later. Follow simple steps to prepare your space and tools. This makes swapping your Honeywell thermostat easier and faster.
Turn Off Power To The Hvac System
Start by turning off power to your heating and cooling system. This prevents electrical shocks and damage. Use the circuit breaker or switch near your furnace or air handler. Confirm power is off by checking the thermostat display. It should go blank or show no activity.
Gather Necessary Tools And Materials
Collect tools such as a screwdriver, drill, and voltage tester. Have your new thermostat and mounting hardware ready. Keep a small container nearby for screws and parts. Having everything close avoids interruptions during installation.
Note Existing Wiring Connections
Label each wire connected to the old thermostat with tape and a marker. Take a clear photo of the wiring setup for reference. This helps connect wires correctly to the new thermostat. Avoid guesswork that could cause errors or damage.
Remove Old Thermostat Carefully
Unscrew the thermostat from the wall gently. Pull it away from the base to expose wires. Avoid yanking or pulling wires forcefully. Keep the wires straight and organized for the next step. Handle the thermostat with care to prevent breaking parts.
Frequently Asked Questions
How Do I Safely Remove A Honeywell Home Thermostat?
Turn off power to the HVAC system first. Remove the thermostat cover gently. Unscrew the mounting plate and disconnect wires carefully. Label wires for easy reconnection. Avoid pulling wires forcefully to prevent damage.
What Tools Are Needed To Remove Honeywell Thermostats?
You generally need a screwdriver, labels, and a voltage tester. A small flathead or Phillips screwdriver works best. Labels help identify wires. A voltage tester ensures power is off, keeping you safe during removal.
Can I Remove Honeywell Thermostat Without Turning Off Power?
No, always turn off power at the breaker. This prevents electrical shock and damage. Working on a live thermostat risks injury and equipment failure. Safety first during thermostat removal.
How Do I Disconnect Wires From Honeywell Thermostat?
Loosen terminal screws with a screwdriver. Gently pull wires free without damaging them. Label each wire to remember its connection. Avoid yanking wires to prevent damage to the terminals.
Conclusion
Removing your Honeywell Home thermostat is simple with clear steps. Always turn off the power before starting. Carefully detach the thermostat from the wall to avoid damage. Label the wires for easy reconnection later. Take your time to avoid mistakes or accidents.
Following these steps helps ensure a smooth removal process. Now, you can replace or upgrade your thermostat safely. This guide makes the task less stressful and easy to follow. Keep these tips handy for future thermostat changes.
Check Best Thermostat Pricing in Amazon
** As an Amazon Associate, I earn from qualifying purchases.