
Check Best Thermostat Pricing in Amazon
** As an Amazon Associate, I earn from qualifying purchases.
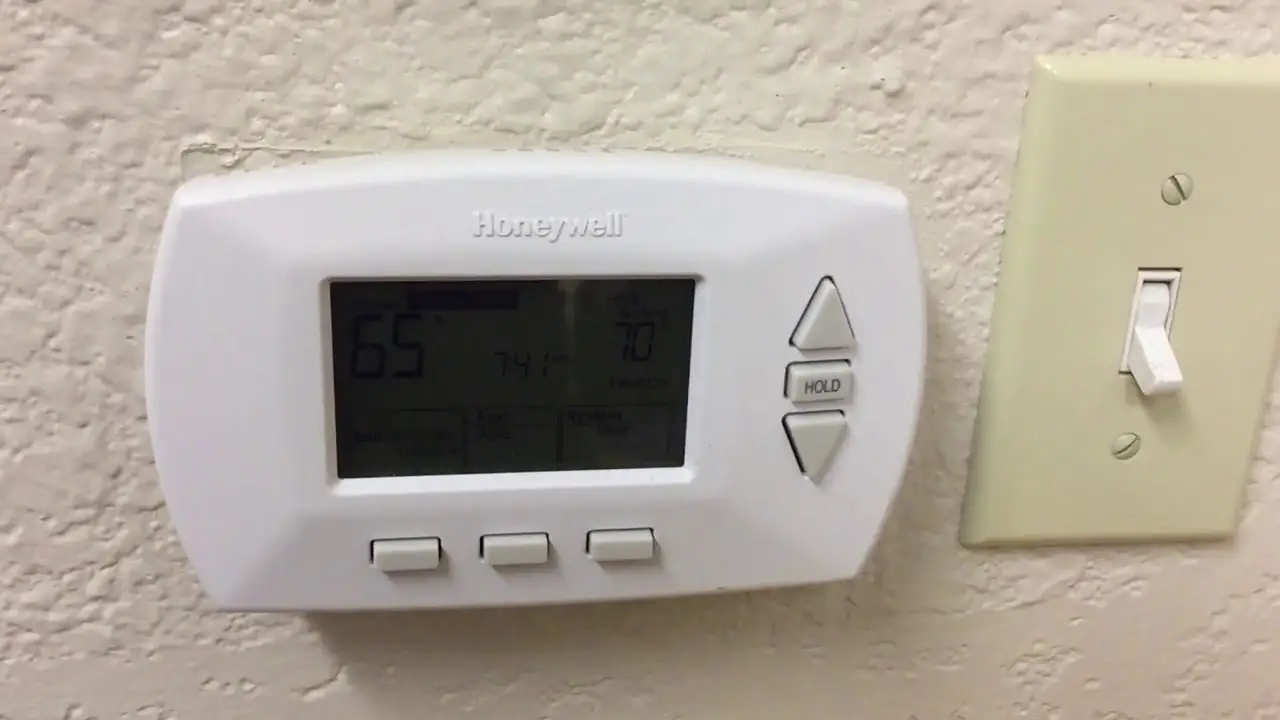
To remove the cover on a Honeywell thermostat, gently pull the cover straight off. Ensure the thermostat is off.
Honeywell thermostats are essential for maintaining home comfort, but sometimes they need maintenance or battery replacement. Removing the cover is a straightforward task that can be done without professional help. Knowing how to do this can save time and money.
Always ensure the thermostat is turned off before attempting to remove the cover. This prevents any accidental changes to your settings. The cover typically snaps on and off easily. Regular maintenance, including cleaning and battery checks, can extend the life of your thermostat. Keeping your thermostat in good condition ensures your home remains comfortable year-round.
Introduction To Honeywell Thermostats
Honeywell thermostats are a popular choice for home temperature control. They offer reliability and ease of use. These devices help maintain the perfect temperature in your home.
Popularity And Reliability
Honeywell thermostats are known for their popularity and reliability. They are trusted by many homeowners and businesses. The brand offers various models to suit different needs. Honeywell devices are durable and can last for many years. Their user-friendly interface makes them easy to program and adjust.
People choose Honeywell for its advanced features. Some models even offer smart home integration. This allows you to control your thermostat from your smartphone. Honeywell thermostats also have a sleek design. They blend well with modern home décor.
Common Reasons For Cover Removal
There are several common reasons for removing the cover on a Honeywell thermostat. One reason is to change the batteries. Most Honeywell models use batteries to keep the settings intact. Replacing old batteries can ensure your thermostat works properly.
Another reason is to clean the inside of the thermostat. Dust and debris can accumulate over time. Cleaning the inside can help maintain the device’s performance. Sometimes, you may need to check the wiring or troubleshoot a problem. Removing the cover allows you to inspect the internal components.
Here is a quick overview of the common reasons for cover removal:
| Reason | Description |
|---|---|
| Change Batteries | Replace old batteries to keep settings intact. |
| Clean Inside | Remove dust and debris for better performance. |
| Check Wiring | Inspect internal components for troubleshooting. |
Understanding these reasons can help you maintain your Honeywell thermostat. Regular maintenance ensures it works efficiently. Next, we will discuss how to safely remove the cover.

Credit: www.reddit.com
Safety Precautions
Removing the cover on a Honeywell thermostat requires careful steps to ensure safety. Below are key precautions to consider.
Power Shutdown
Always disconnect the power before starting. This prevents electric shocks.
- Locate the circuit breaker for the thermostat.
- Switch off the circuit breaker.
- Confirm the power is off by checking the display on the thermostat.
Tools Handling
Use the right tools to avoid damage. Keep tools handy before starting.
| Tool | Purpose |
|---|---|
| Phillips Screwdriver | Remove screws |
| Flathead Screwdriver | Gently pry the cover |
Handle tools carefully. Avoid using excessive force to prevent breaking the cover or internal components.
Identifying Your Thermostat Model
Identifying your thermostat model is crucial before attempting to remove the cover. Honeywell offers a variety of thermostat models, each with distinct features. Knowing your model ensures you follow the correct steps for removal.
Checking The Model Number
The model number is usually located on the thermostat’s front or inside. Follow these steps to find it:
- Turn off the power to your thermostat to ensure safety.
- Carefully inspect the front of the thermostat for a model number.
- If not visible, gently remove the cover to check inside.
Refer to the table below for common locations of model numbers:
| Thermostat Type | Model Number Location |
|---|---|
| Programmable | Inside the cover |
| Non-Programmable | Front panel |
| Smart | Inside battery compartment |
Types Of Honeywell Thermostats
Honeywell manufactures various thermostat types. Identifying yours helps in following the correct removal steps:
- Programmable Thermostats: These allow you to set schedules for heating and cooling.
- Non-Programmable Thermostats: These control temperature settings manually.
- Smart Thermostats: These connect to Wi-Fi and offer advanced features.
- Mechanical Thermostats: These use a dial or switch for temperature control.
To remove the cover, understanding your thermostat type is essential. Each type may have different steps for cover removal.

Credit: willplumb.com
Tools You’ll Need
Removing the cover on a Honeywell thermostat is a simple task. However, it is important to have the right tools to avoid any damage. Below is a list of essential tools you’ll need.
Basic Toolkit
Having a basic toolkit is essential. These tools will help you safely remove the thermostat cover.
- Phillips Head Screwdriver: This is used to unscrew any screws holding the cover.
- Flat-Head Screwdriver: Useful for gently prying open the cover if it is stuck.
- Needle-Nose Pliers: These can help in removing any small parts or wires.
Protective Gear
Safety should always come first. Wearing protective gear ensures you do not get injured during the process.
- Safety Gloves: These protect your hands from sharp edges or electrical components.
- Safety Glasses: These protect your eyes from any small debris or accidental sparks.
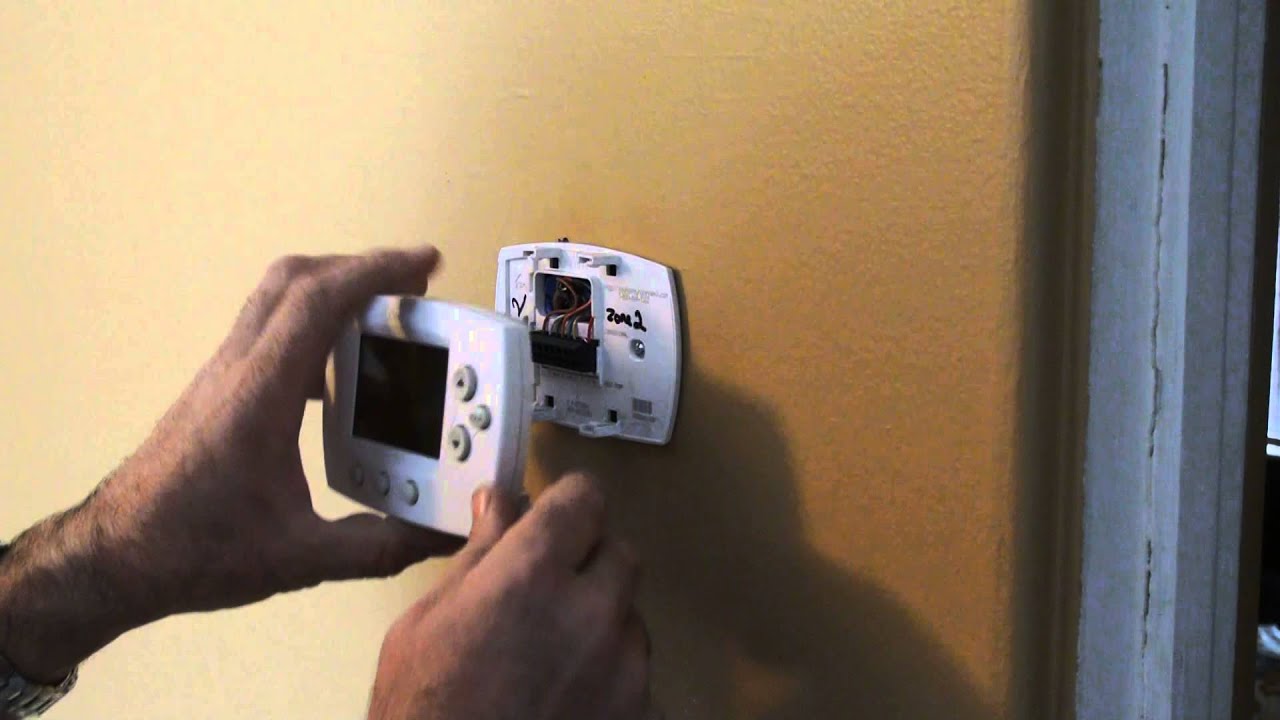
Step-by-step Cover Removal
Removing the cover on a Honeywell thermostat can seem daunting. This step-by-step guide will make it easy. Follow these instructions to safely and efficiently remove the cover.
Check Best Thermostat Pricing in Amazon
** As an Amazon Associate, I earn from qualifying purchases.
Unlocking The Thermostat
The first step is to unlock the thermostat. Check for any visible screws. Some models have them near the base. Use a screwdriver to remove these screws.
Next, look for locking tabs. These tabs are often on the sides or top. Gently press or slide them to unlock the cover.
Detaching The Cover
Now it’s time to detach the cover. Place your fingers on the edges of the cover. Apply gentle pressure to pull it away from the base.
If the cover is stuck, use a flat tool. Insert it between the cover and the base. Carefully twist the tool to loosen the cover.
Once the cover is loose, lift it off completely. Be mindful of any wires or connectors that may be attached.
Now you have successfully removed the cover of your Honeywell thermostat!
Credit: m.youtube.com
Troubleshooting Common Issues
Removing the cover on a Honeywell thermostat can sometimes present challenges. Identifying and resolving these issues ensures your thermostat functions smoothly. Below are some common problems and how to address them.
Stuck Covers
If the cover on your Honeywell thermostat is stuck, try these steps:
- Gently wiggle the cover: Sometimes, covers get stuck due to slight misalignment. Gently wiggling can help.
- Use a flat-head screwdriver: Insert a flat-head screwdriver into the seam. Apply gentle pressure to lift the cover.
- Check for hidden screws: Some models have screws hidden under labels or decorative covers. Remove these to access the main screws.
Damaged Clips
Damaged clips can make removing the cover difficult. Here are some tips to handle damaged clips:
- Inspect the clips: Check if the clips are bent or broken. This can make removal tricky.
- Use a small tool: A small tool, like a precision screwdriver, can help manipulate damaged clips.
- Replace damaged clips: Consider replacing the clips if they are too damaged. This ensures easier removal in the future.
By following these steps, you can troubleshoot and resolve common issues with Honeywell thermostat covers.
After Removing The Cover
After successfully removing the cover of your Honeywell thermostat, several tasks can be performed to keep it running efficiently. This section will guide you through essential maintenance tasks and the steps to reattach the cover.
Maintenance Tasks
Once the cover is off, it’s a good time to perform some maintenance tasks. This ensures your thermostat functions correctly.
- Dust Removal: Use a soft brush to remove dust from the internal components.
- Check Wiring: Inspect the wires for any signs of wear or damage.
- Battery Replacement: If your thermostat has batteries, replace them to avoid future issues.
- Inspect Connections: Ensure all connections are secure and free of corrosion.
These tasks help maintain the efficiency and longevity of your thermostat. Always handle components gently to avoid damage.
Reattaching The Cover
After completing the maintenance tasks, reattaching the cover is simple. Ensure all internal components are in place.
- Align the Cover: Position the cover correctly over the thermostat.
- Snap into Place: Gently press the cover until it snaps securely.
- Check Fit: Ensure the cover is firmly attached and there are no gaps.
Reattaching the cover properly ensures your Honeywell thermostat is protected and functions correctly.
Professional Help And Support
Sometimes you may need professional help to remove the cover on your Honeywell thermostat. Seeking expert assistance ensures the task is done safely and correctly. This section will guide you on when to call a technician and how to find authorized service providers.
When To Call A Technician
- Complex Issues: If the thermostat has complex wiring or connections, call a technician.
- Unit Not Responding: If the unit doesn’t respond even after removing the cover, professional help is needed.
- Warranty Concerns: If your thermostat is under warranty, tampering might void it.
- Lack of Tools: If you lack the right tools, a technician can safely handle the job.
Finding Authorized Service Providers
Finding the right service provider ensures quality and reliability. Here are steps to locate authorized Honeywell service providers:
- Visit Honeywell’s Official Website: The website often lists authorized technicians.
- Customer Support: Call Honeywell’s customer support for recommendations.
- Local Listings: Check local business directories for certified professionals.
- Online Reviews: Look for reviews to find trusted service providers.
Always ensure the technician is certified and has good reviews. This guarantees safe and proper handling of your thermostat.
Frequently Asked Questions
How Do I Take The Cover Off My Honeywell Thermostat To Change The Battery?
Gently pull the thermostat cover straight off the wall. Locate and remove the old batteries. Insert new batteries correctly. Snap the cover back into place.
How Do I Open My Honeywell Thermostat?
To open your Honeywell thermostat, gently pull the thermostat cover off the wall plate. Ensure the power is off first.
How To Remove A Honeywell Thermostat Faceplate?
To remove a Honeywell thermostat faceplate, gently pull the edges away from the wall. It should pop off easily. Ensure power is off before starting.
How To Get A Honeywell Thermostat Off The Wall?
Turn off the power supply. Remove the thermostat cover. Unscrew the mounting plate. Disconnect the wires. Gently pull the thermostat off the wall.
Conclusion
Removing the cover on a Honeywell thermostat is straightforward. Follow the steps outlined for a hassle-free experience. Regular maintenance ensures optimal performance. Keep your thermostat clean and functional. Share your tips and experiences in the comments. Proper care extends the life of your device and ensures efficient energy use.
Check Best Thermostat Pricing in Amazon
** As an Amazon Associate, I earn from qualifying purchases.