
Check Best Thermostat Pricing in Amazon
** As an Amazon Associate, I earn from qualifying purchases.
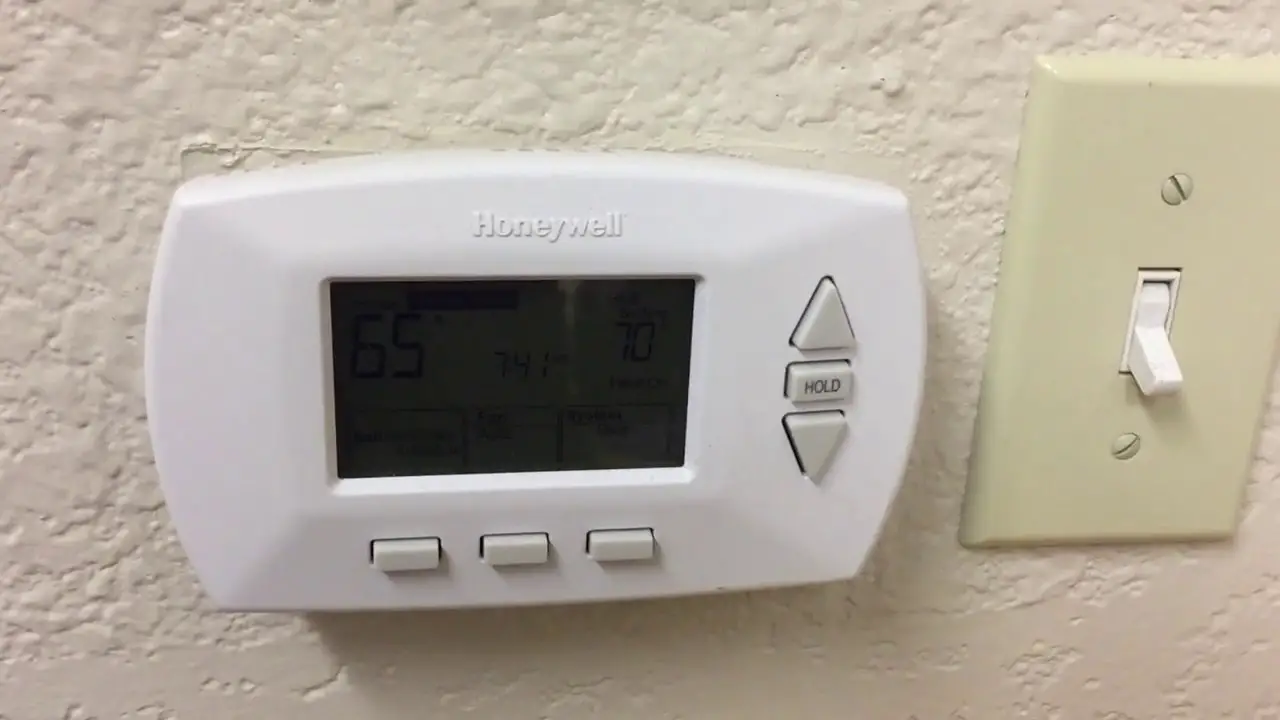
To remove the cover of a Honeywell thermostat, grip the edges and gently pull it off. Ensure the thermostat is off before starting.
Honeywell thermostats are popular for their reliability and user-friendly design. Sometimes, you may need to remove the cover for maintenance or battery replacement. Understanding how to do this correctly can prevent damage and ensure your thermostat continues to function properly.
Safety is crucial, so always turn off the power before attempting any adjustments. Knowing the correct procedure saves time and avoids potential issues. This guide provides clear steps for safely removing the cover, ensuring your Honeywell thermostat remains in top condition. Follow these instructions to maintain your thermostat efficiently and effectively.
- Introduction To Honeywell Thermostat Maintenance
- Identifying Your Honeywell Thermostat Model
- Tools And Materials Needed
- Preparatory Steps
- Removing The Cover Step By Step
- Troubleshooting Common Issues
- After The Cover Is Off
- Reattaching The Cover Securely
- Final Steps And Testing
- Professional Help And Resources
- Frequently Asked Questions
- Conclusion
Introduction To Honeywell Thermostat Maintenance
Honeywell thermostats are known for their reliability. But they need regular maintenance to work well. Regular upkeep helps your thermostat run smoothly and last longer. Knowing how to remove the cover is a key part of this maintenance.
Importance Of Regular Thermostat Upkeep
Regular thermostat upkeep is crucial for many reasons. First, it ensures your home stays at the right temperature. Second, it helps save energy and lowers your bills. Third, it can prevent costly repairs in the future. A clean and well-maintained thermostat means fewer issues.
Dust and dirt can build up inside the thermostat. This can affect its performance. Cleaning the inside parts helps to keep everything working well. Checking the batteries regularly is also important. Fresh batteries ensure the thermostat functions correctly.
Safety Precautions Before Starting
Safety first is a must when working with any electrical device. Before removing the thermostat cover, take these steps:
- Turn off the power to the thermostat. This can be done at the circuit breaker.
- Wear safety gloves. This protects your hands from sharp edges.
- Use a flashlight if the area is not well-lit.
- Keep a small container for screws. This ensures you don’t lose any small parts.
Always read the user manual for your specific Honeywell model. Each model may have different instructions. Following these steps helps to ensure your safety and the safety of your thermostat.
Identifying Your Honeywell Thermostat Model
Before removing your Honeywell thermostat cover, it’s crucial to identify its model. Different models have unique ways of cover removal. Knowing your model helps avoid damage.
Where To Find The Model Number
The model number is essential for identifying your thermostat. You can find it in a few places:
- Thermostat Body: Look on the thermostat body itself. It’s usually on the side or back.
- User Manual: Check the user manual that came with your thermostat.
- Packaging: The original packaging often lists the model number.
Differences In Cover Removal By Model
Honeywell thermostats have different models, each with a unique cover removal process:
| Model | Cover Removal Instructions |
|---|---|
| Honeywell T4 Pro | Gently pull the cover off from the bottom. |
| Honeywell RTH9585WF | Use a flat tool to pry the cover from the side. |
| Honeywell 6000 Series | Press the tabs on the top and pull the cover forward. |
Tools And Materials Needed
Removing the cover of a Honeywell thermostat is a simple task. However, having the right tools and materials can make the process smoother. This section will guide you through what you need.
Gathering Essential Equipment
Before starting, ensure you have the following tools:
- Phillips Screwdriver: A small-sized Phillips screwdriver is essential for most thermostat models.
- Flathead Screwdriver: Use this to gently pry open the cover if it is stuck.
- Soft Cloth: Keep a soft cloth handy to clean any dust or debris.
These are the basic tools you need. Having them ready can save time and effort.
Optional Items For An Easier Process
Some optional items can make the process easier:
| Item | Purpose |
|---|---|
| Headlamp | Provides extra light in dimly lit areas. |
| Gloves | Protects your hands from sharp edges or dust. |
| Small Container | Holds screws and small parts to avoid losing them. |
These items are not mandatory but can significantly ease the task.
Having the right tools and materials ensures a smooth and efficient process. It minimizes the risk of damage to your thermostat.
Preparatory Steps
Before you start removing the cover of your Honeywell thermostat, it’s crucial to take some preparatory steps. This ensures your safety and protects the device from damage. Follow these simple steps to get started.
Turning Off The Power
The first and most important step is to turn off the power. Locate the circuit breaker panel in your home. Find the switch labeled “Thermostat” or “HVAC”. Flip this switch to the “off” position. This will cut the power to your thermostat, preventing any risk of electric shock.
Clearing The Area Around The Thermostat
Next, you need to clear the area around the thermostat. Remove any furniture or objects that are close to the thermostat. This will give you easy access and prevent any accidental damage.
Make sure the wall around the thermostat is clean and free of dust. This will help you see the screws and tabs clearly. Use a cloth to wipe the area if needed.
| Step | Action | Reason |
|---|---|---|
| 1 | Turn off the power | Prevents electric shock |
| 2 | Clear the area | Ensures easy access |
By following these preparatory steps, you’ll make the process of removing the cover of your Honeywell thermostat much safer and easier.
Removing The Cover Step By Step
Removing the cover of a Honeywell thermostat can seem tricky. Follow these easy steps to do it safely. This guide helps you avoid damaging your device. Let’s get started!
Detaching The Faceplate
The faceplate is the front part of your thermostat. It covers the buttons and display. To remove it, follow these steps:
- Turn off the power to your thermostat. This prevents electrical shock.
- Look for a small notch or gap along the edge of the faceplate.
- Insert a flat-head screwdriver into the notch. Gently twist the screwdriver to pry the faceplate off.
Important: Use gentle pressure to avoid breaking the faceplate.
Handling Clips And Tabs With Care
Many Honeywell thermostats have clips or tabs that hold the cover in place. These can be delicate. Follow these tips:
- Examine the cover for visible clips or tabs.
- Press the tabs gently to release the cover. Avoid using too much force.
- If the cover doesn’t come off easily, check for hidden screws. Remove them with a screwdriver.
Remember: Taking your time ensures you won’t damage the clips or tabs.

Credit: www.reddit.com
Troubleshooting Common Issues
Removing the cover of a Honeywell thermostat can be straightforward. First, ensure the thermostat is turned off. Gently pull the cover from the base, using light pressure to avoid damage.
Removing the cover of a Honeywell thermostat can sometimes be tricky. This guide will help you troubleshoot common issues and ensure a smooth process. By understanding and addressing these issues, you can avoid potential damage to your thermostat.What To Do If The Cover Is Stuck
If the cover is stuck, don’t force it. Forcing the cover could damage the thermostat. Follow these simple steps to safely remove it:- Check for any screws or clips holding the cover.
- Use a flathead screwdriver to gently pry the edges.
- Apply light pressure evenly around the cover.
- Look for any hidden latches or tabs.
Avoiding Damage To The Thermostat
To avoid damaging the thermostat, follow these best practices:- Turn off the power to the thermostat before attempting to remove the cover.
- Use the correct tools such as a flathead screwdriver.
- Handle the cover gently to prevent cracks or breaks.
- Check for any screws and remove them carefully.
- If unsure, refer to the user manual for guidance.
| Issue | Solution |
|---|---|
| Cover is stuck | Use a screwdriver to gently pry the edges and check for hidden latches. |
| Risk of damage | Turn off power, use correct tools, handle gently, and consult the manual. |
After The Cover Is Off
After successfully removing the cover of your Honeywell thermostat, several tasks can help maintain its functionality. These tasks include cleaning the interior components and checking if the batteries need replacement. This guide will walk you through these essential steps.
Cleaning The Interior Components
Once the cover is off, you will see the interior components of your thermostat. Dust and grime can accumulate over time, affecting the thermostat’s performance. It’s important to clean these parts carefully.
- Turn off the power to your thermostat to avoid any electrical issues.
- Use a soft brush or compressed air to remove dust and debris.
- Avoid using water or any liquid cleaners, as these can damage the components.
- Gently clean around the sensor and circuit board areas.
Regular cleaning helps keep your thermostat running smoothly and extends its life.
When To Replace The Batteries
Honeywell thermostats often use batteries to store settings and keep the display running. Knowing when to replace these batteries is crucial for uninterrupted operation.
Check Best Thermostat Pricing in Amazon
** As an Amazon Associate, I earn from qualifying purchases.
- Check the display for a low battery indicator.
- Open the battery compartment, usually found behind the cover.
- Remove the old batteries and replace them with new ones.
- Make sure to use the correct battery type as specified in the manual.
Regularly replacing batteries ensures your thermostat functions correctly and avoids sudden shutdowns.
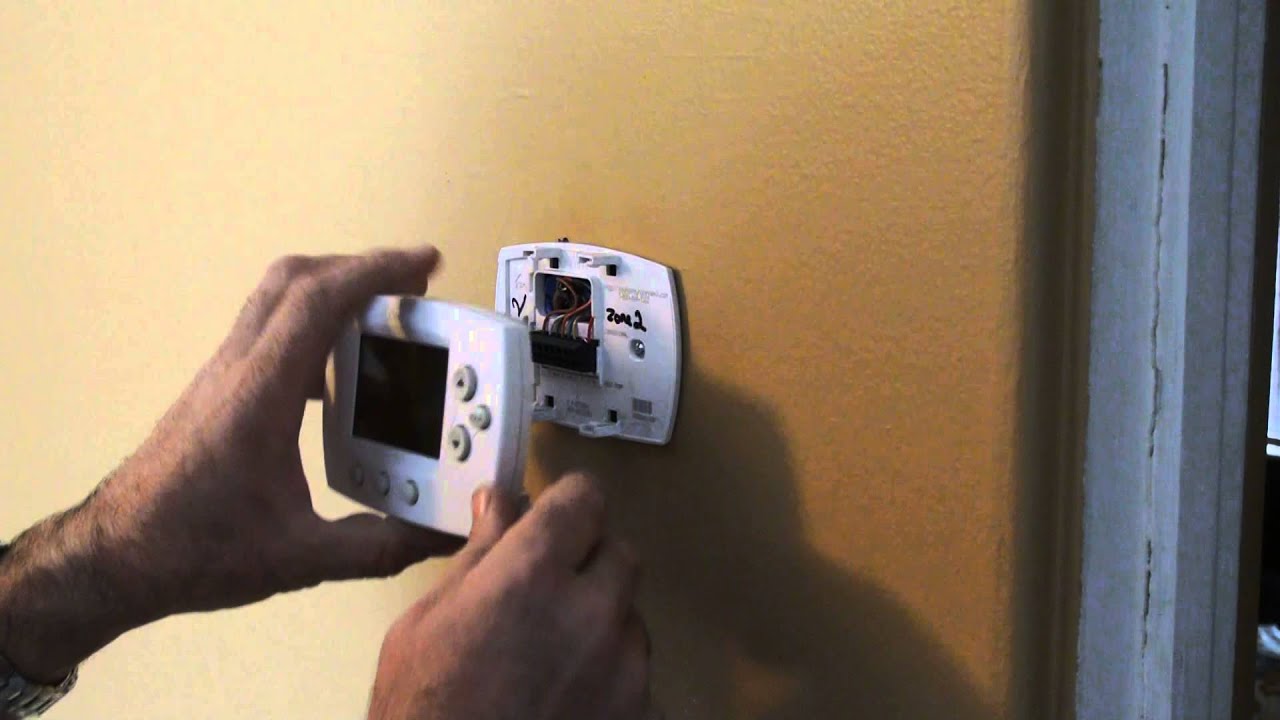
Credit: m.youtube.com
Reattaching The Cover Securely
After removing the cover of your Honeywell thermostat, you must reattach it properly. This ensures your thermostat functions correctly and looks neat.
Ensuring Proper Alignment
Before snapping the cover back on, align it correctly with the base. Look for any grooves or tabs on the cover. These should fit into the corresponding slots on the thermostat base.
Here’s a simple guide to ensure proper alignment:
- Hold the cover with both hands.
- Position it directly over the base.
- Match the tabs and slots carefully.
Take your time to align everything. This prevents any damage to the cover or thermostat.
Confirming The Cover Is Snapped In Place
Once aligned, gently press the cover onto the base. Listen for a clicking sound. This sound indicates the cover has snapped into place.
To confirm the cover is secure, follow these steps:
- Press around the edges of the cover.
- Check for any gaps between the cover and the base.
- Ensure the cover is flush with the wall.
If the cover is not snapped in place, it may cause operational issues. Double-check if the cover feels loose.
By following these steps, you ensure that your Honeywell thermostat cover is reattached securely. This keeps your device in top working condition and maintains its aesthetic appeal.
Final Steps And Testing
The final steps in removing the cover of your Honeywell thermostat are crucial. These steps involve restoring power and testing the thermostat’s functionality. Follow these steps carefully to ensure your thermostat works correctly.
Restoring Power To The Thermostat
After you have removed the cover and completed any necessary maintenance, it is time to restore power. Turn the power back on at the circuit breaker. Make sure the thermostat’s display lights up. This indicates that power has been successfully restored.
If you have batteries in your thermostat, insert new batteries if needed. Ensure they are placed correctly, matching the positive and negative ends with the labels inside the battery compartment.
Testing The Thermostat’s Functionality
Once the power is restored, it is essential to test the thermostat’s functionality. Start by setting the thermostat to a desired temperature. Listen for the click sound which indicates the system is engaging.
Check if your heating or cooling system responds correctly. Feel for warm or cool air coming from your vents. This confirms that the thermostat is communicating properly with your HVAC system.
Use the following table to ensure all functions are working correctly:
| Function | Check |
|---|---|
| Display | Is the screen on and readable? |
| Temperature Setting | Does the system respond to temperature changes? |
| Fan Control | Does the fan turn on/off as set? |
| Heating/Cooling | Is the correct system (heat/cool) activating? |
If all checks are positive, your thermostat is back to normal. If you encounter any issues, recheck the steps to ensure nothing was missed. Properly testing your thermostat ensures comfort and efficiency in your home.
Professional Help And Resources
Removing the cover of a Honeywell thermostat may seem simple. But sometimes, it can be tricky. If you face any difficulties, it’s best to seek professional help. In this section, we will discuss when to call a technician and where to find online guides and support.
When To Call A Technician
Call a technician if you are unsure about the wiring or other internal components. This ensures safety and prevents damage.
Complex thermostat models can have intricate parts. A professional can handle these without causing harm.
If the thermostat is not working after you remove the cover, a technician can diagnose the issue. They have the tools and knowledge to fix it quickly.
Online Guides And Support
There are many online guides available that show how to remove the cover of a Honeywell thermostat. These guides often include step-by-step instructions and pictures.
Support forums are also helpful. You can ask questions and get answers from experts and other users. These forums cover many models and issues.
Video tutorials on platforms like YouTube can be very useful. Watching a video can make the process easier to understand. Search for your specific Honeywell model to find the right tutorial.
Useful Online Resources:
| Resource Type | Link |
|---|---|
| Step-by-step Guides | Honeywell Home |
| Support Forums | Reddit HVAC |
| Video Tutorials | YouTube |

Credit: willplumb.com
Frequently Asked Questions
How Do I Take The Cover Off My Honeywell Thermostat To Change The Battery?
Gently pull the thermostat cover straight off the wall plate. Locate the battery compartment. Replace the old batteries with new ones, ensuring correct polarity. Reattach the cover by pressing it back into place until it clicks.
How Do I Take The Front Off A Honeywell Thermostat?
To remove the front of a Honeywell thermostat, gently pull the cover straight off. Ensure the thermostat is powered off first.
How Do I Open My Honeywell Thermostat?
To open your Honeywell thermostat, gently pull the thermostat cover straight off. If resistance is felt, use a flathead screwdriver to pry it open carefully.
How To Remove Honeywell Home Thermostat Faceplate?
To remove the Honeywell Home thermostat faceplate, gently pull it away from the wall. Ensure the thermostat is off.
Conclusion
Removing the cover of a Honeywell thermostat is simple with the right steps. Follow the instructions carefully. Always ensure the power is off for safety. This guide helps you handle your thermostat without any hassle. Mastering this process can enhance your home maintenance skills.
Keep your devices working efficiently.
Check Best Thermostat Pricing in Amazon
** As an Amazon Associate, I earn from qualifying purchases.