
Check Best Thermostat Pricing in Amazon
** As an Amazon Associate, I earn from qualifying purchases.
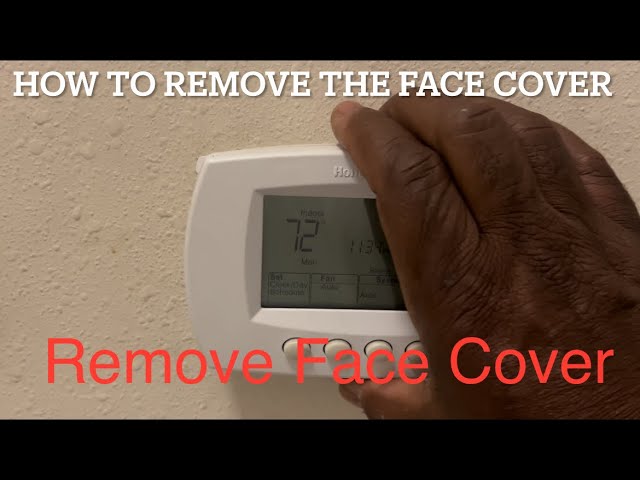
Removing the cover of a Honeywell thermostat is quite simple. You just need to follow a few steps.
Many homeowners find themselves needing to remove the cover of their Honeywell thermostat. Whether it’s for cleaning, replacing batteries, or troubleshooting, it’s a common task. Some people may feel intimidated by this, but there’s no need to worry. With a little guidance, you’ll have it off in no time.
Understanding the basic steps can save you time and prevent potential damage. This guide will walk you through the process, ensuring you can handle it safely and efficiently. Let’s get started on how to remove the cover of your Honeywell thermostat.
Tools Needed
Gather a small flat-head screwdriver and a Phillips head screwdriver. These tools will help you remove the Honeywell thermostat cover.
When you’re ready to remove the cover of your Honeywell thermostat, having the right tools on hand is essential. You don’t want to be mid-task and realize you’re missing something important. Let’s dive into the tools you need to get started.Screwdrivers
First and foremost, you’ll need screwdrivers. A Phillips head screwdriver is typically required for most Honeywell thermostats. Make sure it’s the right size to avoid stripping the screws. You might also need a flathead screwdriver. This can help with prying the cover gently if it’s stuck. Always handle screwdrivers with care to avoid damaging the thermostat.Safety Gear
Safety should never be an afterthought. Wear protective gloves to safeguard your hands from sharp edges or unexpected debris. Safety glasses are also a good idea. They protect your eyes from any small parts that might spring loose during the process. Have you ever accidentally dropped a screw while working on a project? It’s frustrating! Keep a small container nearby to hold any screws you remove. This way, you won’t lose any tiny pieces. By preparing these tools and gear, you’ll ensure a smoother and safer experience when removing your Honeywell thermostat cover. What tools do you find indispensable for home maintenance tasks? Share your thoughts and tips in the comments below!Safety Precautions
Ensure the thermostat is powered off to avoid electrical hazards. Gently pull the cover from the base, using minimal force.
Removing the cover of a Honeywell thermostat might seem like a simple task, but it’s crucial to prioritize safety. Ensuring that you follow the necessary precautions can prevent accidents and damage to your device. Let’s delve into the key safety steps you need to take.Turn Off Power
First and foremost, always turn off the power before you begin. This is not just a suggestion; it’s a must. Flipping the switch on your circuit breaker ensures that you won’t accidentally get shocked while working on the thermostat. Remember, electricity is invisible but dangerous. Even a small shock can be harmful. So, take a moment to locate your circuit breaker and turn off the power to your HVAC system.Use Insulated Tools
Using the right tools can make a big difference. Insulated tools are designed to protect you from electric shocks. They have a coating that prevents the electricity from reaching your hands. Imagine using a regular screwdriver and accidentally touching a live wire. The consequences could be severe. Insulated tools are a small investment for your safety and peace of mind. Do you have a set of insulated tools in your toolbox? If not, consider getting one before you start your project. It’s better to be safe than sorry. By following these safety precautions, you can remove your Honeywell thermostat cover without any issues. Safety should always be your top priority.Locate The Thermostat
Removing the cover from your Honeywell thermostat starts with locating it. The thermostat is usually on a wall in a central part of your home. This makes it easier to control the temperature. It is often found in a living room, hallway, or near the kitchen. Once you find the thermostat, you can begin the process of removing the cover.
Identify Thermostat Model
First, identify the model of your Honeywell thermostat. This information is usually on the front of the device. Look for a model number or name. Knowing the model helps you follow the right steps. Different models may have different cover removal methods.
Access The Thermostat
Now that you know the model, access the thermostat. Make sure the thermostat is off. This ensures safety while you work. Next, gently pull the cover towards you. Some models require a little more force. If it feels stuck, check for hidden screws. Use a small screwdriver to remove them. Once the screws are out, the cover should come off easily.

Credit: willplumb.com
Detach The Thermostat Cover
To maintain your Honeywell thermostat, you may need to remove its cover. This process is simple and ensures your thermostat works well. Follow these steps to detach the thermostat cover.
Remove Mounting Screws
First, find the screws securing the thermostat cover. These screws are usually on the sides or bottom. Use a suitable screwdriver to remove them. Be careful to keep the screws safe for reassembly.
Gently Pry Off The Cover
Once the screws are out, you can pry off the cover. Use a small tool like a flathead screwdriver. Insert it gently into the seam of the thermostat. Carefully work around the edges to loosen the cover. Avoid using too much force to prevent damage.
Clean The Thermostat
Keeping your Honeywell thermostat clean is essential. It ensures accurate temperature readings. A clean thermostat also helps it last longer. Follow these steps to clean your thermostat.
Dust The Interior
First, remove the cover gently. Use a soft brush to dust the interior. Pay attention to the small crevices. Dust can affect the thermostat’s performance. A clean interior will work more efficiently.
Check For Damage
After dusting, inspect the thermostat for damage. Look for loose wires or broken parts. Damaged components can cause malfunctions. Fix or replace any damaged parts to ensure proper operation. This step is crucial for maintaining your thermostat’s performance.
Credit: www.reddit.com
Reattach The Thermostat Cover
Reattaching the thermostat cover after removing it is essential to ensure your Honeywell thermostat functions correctly. It might seem like a simple task, but doing it right can prevent future issues. Let’s walk through the process step by step.
Align The Cover
First, check the alignment of the cover. Make sure it matches perfectly with the base. Misalignment can cause the buttons or touch screen not to respond correctly.
I remember the first time I reattached my thermostat cover, I didn’t align it properly. The thermostat wouldn’t turn on, and I spent hours troubleshooting a problem that wasn’t there. Save yourself the headache by aligning it right the first time.
Look for any clips or hooks on the cover. These should fit snugly into the corresponding slots on the thermostat base. Gently press the cover into place until you hear a click.
Check Best Thermostat Pricing in Amazon
** As an Amazon Associate, I earn from qualifying purchases.
Secure With Screws
Once the cover is aligned, it’s time to secure it with screws. Locate the screw holes at the corners of the cover. Use a screwdriver to tighten them.
But don’t over-tighten! I once did that and cracked the cover, which led to an unnecessary replacement. Just a firm twist will do. If you notice the cover isn’t sitting flush against the wall, loosen the screws slightly and adjust the cover’s position.
Have you ever noticed the thermostat acting up after you’ve fiddled with it? It could be because the cover wasn’t secured properly. Ensure the screws are tight but not forced.
Reattaching the thermostat cover correctly is a small task that can save you a lot of trouble. Have you ever faced issues because of a loose cover? Share your experiences in the comments below!
Restore Power
Restoring power to your Honeywell thermostat is crucial after removing the cover. It ensures that your device functions correctly. Follow these steps to turn the power back on and test your thermostat.
Turn On Power
First, locate your circuit breaker. Find the switch labeled for your thermostat or HVAC system. Flip the switch to the ‘on’ position. This will restore power to your thermostat.
Test The Thermostat
Once power is restored, check if your thermostat is working. Look at the display screen. It should show the current temperature and settings.
Set the thermostat to a desired temperature. Wait a few minutes. Ensure your heating or cooling system activates as set.
If everything runs smoothly, you have successfully restored power. Your Honeywell thermostat should now be operational.
Troubleshooting
Having trouble with your Honeywell thermostat? You might need to remove the cover. Sometimes, it’s not as easy as it seems. Let’s troubleshoot some common issues you might face.
Cover Doesn’t Fit
Struggling to fit the cover back on? Check for any misalignment. The cover should snap on smoothly. Make sure there are no obstructions. Sometimes, wires can be in the way. Gently move them aside. Another tip, ensure the cover is facing the right direction. A simple mistake but easy to fix.
Thermostat Malfunction
If the thermostat malfunctions after removing the cover, don’t panic. First, check the wiring. A loose connection can cause problems. Ensure all wires are secure. Next, look at the batteries. Weak batteries can cause malfunctions. Replace them if needed. Finally, reset the thermostat. This can solve many issues. Hold the reset button for a few seconds. This gives the thermostat a fresh start.
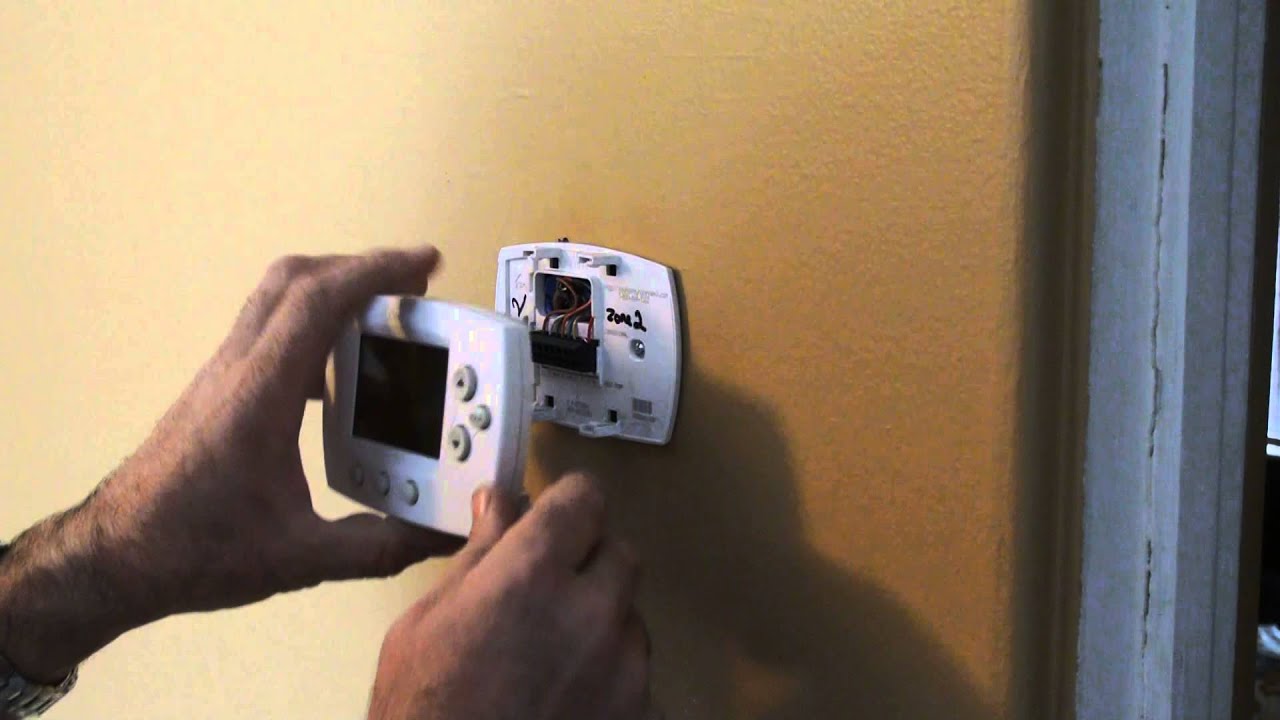
Credit: www.youtube.com
Frequently Asked Questions
How Do I Remove The Honeywell Thermostat Cover?
To remove the Honeywell thermostat cover, gently pull the cover from the base. Use your fingers to release any clips.
How Do I Open Up A Honeywell Thermostat?
To open a Honeywell thermostat, gently pull the thermostat cover straight off. Consult the user manual for detailed instructions.
How To Remove Thermostat Cover To Replace Battery?
To remove the thermostat cover, gently pull or unscrew it. Locate the battery compartment, remove old batteries, and replace with new ones.
How To Take Honeywell Thermostat Off Wall To Change Battery?
To change the battery, gently pull the Honeywell thermostat off the wall mount. Replace the battery with a new one. Securely snap the thermostat back onto the wall mount.
Conclusion
Removing the cover of a Honeywell thermostat is simple. Follow the steps carefully. Make sure to turn off the power first. Gently pull the cover to avoid breaking it. Keep the screws safe for reassembly. Regular maintenance ensures your thermostat works efficiently.
Don’t forget to clean the inside. Dust can affect its performance. Knowing how to remove the cover helps with troubleshooting. It also makes cleaning easier. Remember to check the manual for specific instructions. Enjoy a well-functioning Honeywell thermostat in your home.
Check Best Thermostat Pricing in Amazon
** As an Amazon Associate, I earn from qualifying purchases.