
Check Best Thermostat Pricing in Amazon
** As an Amazon Associate, I earn from qualifying purchases.
Relocating a thermostat may seem tricky, but it’s doable with some guidance. First, turn off power to the HVAC system.
Second, remove the thermostat’s cover and base. Relocating a thermostat can improve your home’s comfort and efficiency. Maybe your current thermostat is in a bad location, like near a window or heat source. This can cause inaccurate readings and uneven heating or cooling.
Moving the thermostat to a better spot can help maintain consistent temperatures. In this guide, we’ll walk you through the steps to safely and effectively relocate your thermostat. You’ll learn what tools you’ll need and the best practices to follow. Whether you’re a DIY enthusiast or just looking to save on energy bills, this tutorial will help you achieve your goal.
Tools And Materials Needed
Relocating a thermostat requires specific tools and materials. Having the right items makes the process smooth and efficient. This section outlines everything you need for the job.
Essential Tools
A variety of tools are essential for this task. A screwdriver set is necessary to remove the thermostat from the wall. Use a drill to make new holes. A stud finder helps locate wall studs, ensuring secure mounting. Wire strippers are important for handling the thermostat wires safely. A level ensures your thermostat is straight.
Required Materials
Several materials are also needed. Get a new thermostat wall plate to cover any old holes. Wire nuts are vital for connecting wires. Electrical tape provides extra safety for wire connections. You will need a pencil for marking the new location. Finally, have a patch kit ready to cover any holes left behind.

Credit: www.youtube.com
Safety Precautions
Relocating a thermostat requires turning off the power supply to avoid electric shocks. Handle the wires with insulated tools.
Relocating a thermostat can be a straightforward task if you follow the right steps. However, ensuring safety is paramount. Taking necessary precautions will help you avoid any hazardous situations and ensure a smooth process.Turning Off Power
Before you even think about unscrewing the thermostat from the wall, turn off the power. Locate your circuit breaker and switch off the power supply to the thermostat. This step is critical to avoid any electrical shocks. Double-check that the power is off. Use a voltage tester to be sure. Don’t skip this step, even if it feels redundant. Your safety is worth the extra effort.Avoiding Electrical Hazards
Handle wires with caution. Keep them separated to prevent short circuits. Insulate exposed wires with electrical tape to avoid accidental contact. Use insulated tools. These tools are designed to protect you from electrical hazards. If you don’t have them, consider investing in a basic set. If you feel unsure, consult a professional. It’s better to be safe than sorry. Electrical work can be dangerous if not done correctly. Don’t hesitate to call an electrician. By following these safety precautions, you can relocate your thermostat without any issues. Have you ever had to deal with an unexpected electrical hazard? How did you handle it? Share your experiences in the comments below.Choosing The New Location
Relocating a thermostat can be tricky, but choosing the right new location is crucial for optimal performance. The placement of your thermostat impacts the efficiency of your heating and cooling system. Let’s dive into the factors you need to consider for the best results.
Ideal Placement
The thermostat should be placed in a central location. Ideally, install it on an interior wall away from direct sunlight or drafts. Living rooms or hallways are typically good choices.
Ensure the thermostat is at an average height, around 52 to 60 inches from the floor. This height helps it accurately gauge the average room temperature. Avoid placing it near windows, doors, or vents, as these can affect its readings.
Avoiding Common Mistakes
One common mistake is placing the thermostat near kitchens or bathrooms. These areas often have fluctuating temperatures. Avoid these spots to ensure consistent readings.
Another error is installing the thermostat behind furniture or curtains. This can block airflow and skew temperature readings. Always keep the area around the thermostat clear for accurate measurements.
Have you ever found your living room too warm while your bedroom stays chilly? This could be due to a poorly placed thermostat. By choosing the right location, you can maintain a more consistent temperature throughout your home.
Think about your daily routine. Where do you spend most of your time? Placing the thermostat in a location where you often are can lead to more comfortable living conditions.
What other factors do you think might affect thermostat placement? Share your thoughts and experiences in the comments below. Your insights might just help someone else make the perfect choice!

Credit: merrypad.com
Removing The Old Thermostat
Removing the old thermostat might seem daunting, but with the right steps, you can easily handle it yourself. Whether you’re upgrading to a smart thermostat or simply relocating it, the first step is to safely remove the existing one. Let’s dive into the process.
Disconnecting Wires
Before you start, make sure the power to your HVAC system is turned off at the breaker. Safety first! Once that’s done, carefully remove the cover of your old thermostat. You’ll see several wires connected to terminals. These wires are often color-coded and labeled, making the process easier.
Take a picture of the wiring setup with your phone. This simple step can save you a headache later on. Label each wire with masking tape and a marker, noting which terminal they connect to. For example, ‘R’ for red wire, ‘G’ for green wire, and so on.
Gently disconnect each wire from its terminal. If the wires are secured with screws, loosen them with a screwdriver. Be cautious not to let the wires fall back into the wall. You can wrap them around a pencil or use a small clip to keep them in place.
Removing Wall Mount
With the wires safely disconnected, it’s time to remove the wall mount. Most thermostats are attached to the wall with screws. Use a screwdriver to remove these screws and gently pull the thermostat away from the wall.
Check if there are any additional components like a backplate that need to be removed. If so, unscrew and remove them as well. Take your time to avoid damaging the wall or the thermostat.
Once the wall mount is removed, you might notice some holes or marks on the wall. This is a good opportunity to patch up any imperfections before installing the new thermostat. A bit of spackle and paint can go a long way in making your wall look good as new.
Have you ever had to patch a wall before? How did it go? Share your thoughts and tips in the comments below!
Preparing The New Location
Relocating a thermostat requires careful preparation. Choosing and preparing the new location is crucial for optimal performance. Ensure the new spot is away from drafts, direct sunlight, or heat sources. This will help maintain accurate temperature readings. The following steps will guide you through the preparation.
Check Best Thermostat Pricing in Amazon
** As an Amazon Associate, I earn from qualifying purchases.
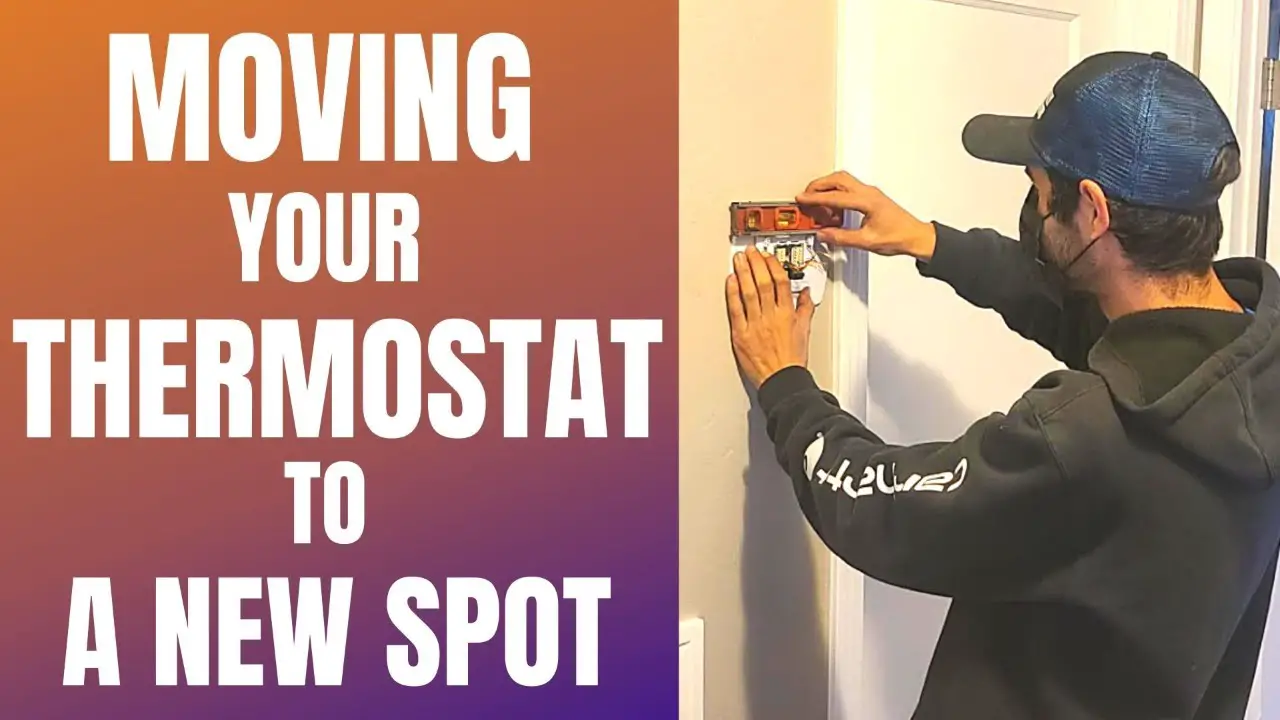
Mounting The Bracket
First, turn off the power to your thermostat. This prevents electrical accidents. Next, mark the spot where you want to place the bracket. Use a level to ensure it is straight. Drill holes for the screws. Attach the bracket securely to the wall. This provides a stable base for your thermostat. Make sure the bracket is firmly in place.
Running The Wires
Now, you need to run the wires to the new location. Fish the wires through the wall to the new spot. Use a wire snake or coat hanger to guide the wires. Pull the wires through the bracket. Ensure there is enough slack for easy connection. Label each wire for easy identification. This will help during the connection process. Secure the wires so they do not hang loose.
Installing The New Thermostat
Relocating a thermostat might seem like a daunting task, but with the right guidance, you can do it yourself. The final step in this process is installing the new thermostat. Let’s break it down into simple, actionable steps to get the job done efficiently.
Connecting The Wires
First, ensure the power to your HVAC system is turned off at the circuit breaker. This step is crucial for your safety. Once you have confirmed the power is off, you can start connecting the wires.
Match the wires from the wall to the corresponding terminals on the new thermostat. Each wire is usually color-coded, making it easier to identify where each one should go. For example, the red wire often connects to the “R” terminal.
If you’re unsure about the wiring, refer to the wiring diagram provided in the thermostat’s manual. It’s always better to double-check than to guess. Have a small screwdriver handy, as you’ll need it to secure the wires into the terminals.
Securing The Unit
Once the wires are connected, you need to secure the thermostat unit to the wall. Most thermostats come with a mounting plate. Attach this plate to the wall using screws and a drill. Ensure it’s level before tightening the screws completely.
After the mounting plate is secure, attach the thermostat unit onto it. You should hear a click or snap, indicating it’s properly in place. Give it a gentle tug to make sure it’s firmly attached.
Turn the power back on at the circuit breaker and test the new thermostat. Set the temperature and ensure your HVAC system responds accordingly. If everything works as expected, congratulations—you’ve successfully relocated and installed your thermostat!
Have you ever faced any challenges while doing a DIY project like this? Share your experiences and tips in the comments below!
Testing And Calibration
After relocating your thermostat, it’s crucial to test and calibrate it. This ensures the device functions accurately in its new location. Proper testing and calibration guarantee your heating and cooling systems work efficiently. Below, we outline the steps for restoring power and ensuring proper function.
Restoring Power
First, turn the power back on to your thermostat. Go to your main circuit breaker and flip the switch. This restores electricity to the thermostat. Once powered, the thermostat display should light up. If it doesn’t, double-check the wiring connections. Secure any loose wires before trying again.
Ensuring Proper Function
Next, check if the thermostat functions correctly. Set the temperature to a few degrees higher or lower than the current room temperature. Listen for a click or the sound of your HVAC system turning on. This indicates the thermostat is communicating with your system. Monitor the temperature change for accuracy.
If the temperature does not change as expected, recalibrate the thermostat. Refer to the user manual for specific instructions. Follow the steps to adjust the settings until the temperature readings match your expectations. Testing and calibration ensure your thermostat operates efficiently in its new location.
Troubleshooting Common Issues
When relocating a thermostat, you may face some common issues. Troubleshooting these problems ensures your thermostat works efficiently. Let’s explore how to handle these issues.
Dealing With Wiring Problems
Wiring problems can disrupt your thermostat’s function. Check the wires for damage. Loose connections can cause errors. Use a voltage tester to ensure power flow. Secure any loose wires. Replace damaged ones to maintain a steady connection. Double-check the wire colors match the terminals.
Addressing Calibration Errors
Calibration errors can lead to inaccurate temperature readings. Start by ensuring the thermostat is level. An uneven installation can affect accuracy. Clean the thermostat’s sensors gently. Dust can interfere with readings. If problems persist, reset the thermostat. Refer to the manual for the correct procedure. A reset often solves calibration issues.

Credit: www.reddit.com
Frequently Asked Questions
Can You Change The Location Of A Thermostat?
Yes, you can change the location of a thermostat. Professional installation ensures optimal performance and prevents wiring issues.
How Much Does It Cost To Move A Thermostat Location?
Moving a thermostat costs between $100 and $300. The price varies based on complexity and labor rates.
Where Should Your Thermostat Be Located In Your House?
Place your thermostat on an interior wall, away from direct sunlight, drafts, and heat sources. Position it centrally for accurate temperature readings. Avoid kitchens and hallways. This ensures efficient home heating and cooling.
Can A Room Thermostat Be Moved?
Yes, a room thermostat can be moved. Ensure it’s relocated to a central, draft-free location for accurate readings. Consult professionals for safe installation.
Conclusion
Relocating a thermostat requires careful planning and execution. First, choose a new location that ensures accurate temperature readings. Second, safely disconnect the thermostat from its old spot. Third, reconnect it in the new position following proper guidelines. Ensure the wiring is correct and secure.
Test the thermostat to confirm it works effectively. By following these steps, you can successfully move your thermostat without issues. Enjoy a more comfortable and well-regulated home environment.
Check Best Thermostat Pricing in Amazon
** As an Amazon Associate, I earn from qualifying purchases.