
Check Best Thermostat Pricing in Amazon
** As an Amazon Associate, I earn from qualifying purchases.
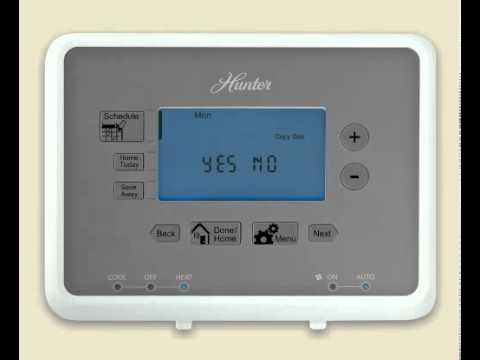
To program a Hunter thermostat, press the “Program” button and set your desired time and temperature settings. Adjust each day and period as needed.
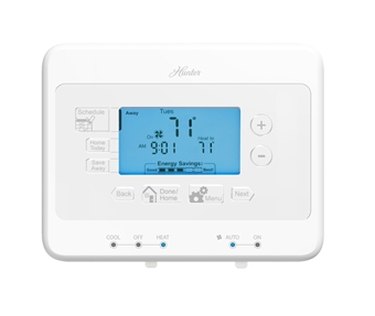
Hunter thermostats offer precise control over your home’s climate, enhancing comfort and energy efficiency. Programming your Hunter thermostat ensures your home maintains the perfect temperature while saving on energy costs. Start by pressing the “Program” button and follow the on-screen prompts.
Set your desired temperatures and times for each day or period. This allows you to customize your home’s heating and cooling schedule to fit your lifestyle. With a properly programmed thermostat, you can enjoy a comfortable home environment and lower utility bills. Hunter thermostats make it simple to achieve optimal comfort and efficiency with easy-to-follow programming steps.
Credit: www.hunker.com
- Introduction To Hunter Thermostats
- Preparing For Installation
- Removing Your Old Thermostat
- Installing The Hunter Thermostat
- Programming Basics
- Setting Up Schedules
- Advanced Features
- Troubleshooting Common Issues
- Maintenance Tips For Longevity
- Enhancing Your Smart Home Experience
- Frequently Asked Questions
- Conclusion
Introduction To Hunter Thermostats
Hunter thermostats are a great tool for controlling your home’s climate. They help you save energy and money. These devices are easy to use and come with many features. This guide will help you understand Hunter thermostats better.
The Rise Of Smart Home Climate Control
Smart home climate control is becoming popular. Many people now use smart thermostats to manage their home’s temperature. Smart thermostats can be controlled using your phone or voice assistants like Alexa. They learn your habits and adjust the temperature automatically. This makes your home more comfortable and efficient.
Hunter Thermostat Models
Hunter offers various thermostat models to suit different needs. Here are some popular models:
- Hunter 44260: This model is programmable and has a digital display. It’s simple to use and affordable.
- Hunter 44360: This model has more advanced features. It includes a touch screen and can be connected to Wi-Fi.
- Hunter 44860: This is a smart thermostat. It has many features like voice control and remote access.
Below is a table summarizing the key features of these models:
| Model | Features | Price Range |
|---|---|---|
| Hunter 44260 | Programmable, Digital Display | $30 – $50 |
| Hunter 44360 | Touch Screen, Wi-Fi Connected | $60 – $80 |
| Hunter 44860 | Smart Features, Voice Control | $100 – $150 |
Each model has unique features to meet your specific needs. Choose the one that best fits your lifestyle and budget.
Preparing For Installation
Preparing for the installation of your Hunter thermostat is crucial for a smooth and successful setup. This section will guide you through the necessary tools and materials, as well as important safety precautions. With proper preparation, you can ensure your thermostat functions correctly and efficiently.
Tools And Materials Needed
- Philips screwdriver – Essential for removing the old thermostat and installing the new one.
- Flathead screwdriver – Useful for prying off the old thermostat cover.
- Drill with bits – Needed for mounting the thermostat on the wall.
- Level – Ensures that your thermostat is mounted straight.
- Wire stripper – For preparing the wires to connect to the new thermostat.
- Thermostat manual – Always keep it handy for reference.
- New batteries – Some thermostats require batteries to operate.
- Masking tape and pen – To label the wires during disconnection.
Safety Precautions
Safety should be your top priority during installation. Follow these precautions to ensure a safe setup:
- Turn off the power – Switch off the power to your HVAC system at the breaker box to avoid electrical shocks.
- Use a voltage tester – Check to make sure the power is off before you begin working with wires.
- Label the wires – Use masking tape and a pen to label each wire as you disconnect it from the old thermostat.
- Handle wires carefully – Avoid touching exposed wire ends to prevent shocks.
- Secure loose wires – Make sure all wires are properly secured and not hanging loose.
By gathering the right tools and following these safety precautions, you can confidently proceed with installing your Hunter thermostat. Stay safe and organized to achieve the best results.
Removing Your Old Thermostat
Removing your old thermostat is the first step to installing a new Hunter thermostat. This process is simple but requires careful attention. Follow these steps to ensure a smooth transition.
Shutting Off Power
Always shut off the power before removing your old thermostat. This ensures your safety and prevents electrical damage.
To do this:
- Find your home’s circuit breaker panel.
- Locate the switch for your heating and cooling system.
- Turn the switch to the “Off” position.
Double-check that the power is off by trying to turn on the heating or cooling system.
Disconnecting Wires
Disconnecting the wires from your old thermostat is crucial. Follow these steps:
- Remove the thermostat cover. This might require a screwdriver.
- Take a picture of the wiring. This helps during the installation of the new thermostat.
- Label each wire. Use masking tape or wire labels for this.
- Unscrew the terminals. This releases the wires from the old thermostat.
After disconnecting, keep the wires separated to prevent them from touching.
Installing The Hunter Thermostat
Installing the Hunter Thermostat is a straightforward process. Follow these steps to ensure a smooth installation. You will need some basic tools and a bit of patience.
Mounting The Base Plate
To start, locate the ideal spot on your wall. Make sure it is away from any direct sunlight or drafts. Use a level to ensure the base plate is straight. Mark the holes with a pencil.
Drill pilot holes where you marked. Use the provided screws to secure the base plate to the wall. Double-check that the plate is still level before tightening the screws.
Connecting The Wires
Turn off the power to your HVAC system at the breaker. This step is crucial for safety. Carefully remove the old thermostat, making sure to label each wire with the provided stickers.
Match each labeled wire to the corresponding terminal on the Hunter Thermostat base plate. Use the wire nuts to secure them. Refer to the wiring diagram included in the package for guidance.
Attaching The Thermostat Body
Align the thermostat body with the base plate. Press it firmly until it snaps into place. Ensure all wires are tucked neatly behind the thermostat.
Turn the power back on at the breaker. Your new Hunter Thermostat should light up. Follow the on-screen prompts to complete the setup process.
Check the functionality by adjusting the temperature settings. Make sure the HVAC system responds correctly.
Programming Basics
Learning how to program your Hunter thermostat can save energy and reduce costs. This guide will walk you through the fundamental steps to get your thermostat set up correctly.
Navigating The Interface
The interface of your Hunter thermostat is user-friendly. It has a clear display and simple buttons.
You’ll find the menu button, arrow keys for navigation, and a select button to confirm choices.
- Menu Button: Access the main settings.
- Arrow Keys: Move through options.
- Select Button: Confirm your selection.
Understanding these buttons is key to programming your thermostat efficiently.
Setting The Date And Time
Setting the correct date and time is essential for the thermostat to function properly.
- Press the menu button to access settings.
- Use the arrow keys to find the Date & Time option.
- Press the select button to enter the Date & Time settings.
- Adjust the date using the arrow keys and confirm with the select button.
- Repeat the process for setting the time.
Make sure the date and time are accurate for your thermostat to follow the correct schedule.
Setting Up Schedules
Programming your Hunter Thermostat to fit your daily routine is crucial for energy efficiency and comfort. Setting up schedules allows you to create a personalized heating and cooling plan. This guide will walk you through the steps to set up daily programs and customize temperature settings.
Creating Daily Programs
Start by accessing the main menu on your Hunter Thermostat. Navigate to the “Scheduling” option and select it. You can set up different programs for weekdays and weekends.
- Weekdays: Monday to Friday
- Weekends: Saturday and Sunday
For each day, you can create up to four time periods. These time periods are typically:
- Wake Up
- Leave
- Return
- Sleep
Each period allows you to set a specific time and temperature. Use the arrow keys to adjust the time and temperature settings. Press “Save” to confirm each period.
Customizing Temperature Settings
To customize temperature settings, go to the “Temperature” menu. Here, you can set different temperatures for heating and cooling.
Heating and cooling settings are usually represented as:
Check Best Thermostat Pricing in Amazon
** As an Amazon Associate, I earn from qualifying purchases.
| Time Period | Heating Temperature (°F) | Cooling Temperature (°F) |
|---|---|---|
| Wake Up | 70°F | 78°F |
| Leave | 62°F | 85°F |
| Return | 70°F | 78°F |
| Sleep | 65°F | 82°F |
Adjust these temperatures to match your comfort level. Use the arrow keys to change the temperatures. Press “Save” to confirm the settings.
By setting up daily programs and customizing temperature settings, you can make your home more comfortable and energy-efficient. Follow these steps to get the best performance from your Hunter Thermostat.
Advanced Features
Unlock the full potential of your Hunter Thermostat with its advanced features. These options help you save energy, increase comfort, and add convenience to your daily life. Let’s explore how to make the most of these functions.
Using Adaptive Recovery
Adaptive Recovery is a smart feature that learns how long it takes to reach your desired temperature. It starts heating or cooling early to ensure your home is at the perfect temperature at the scheduled time.
Follow these steps to use Adaptive Recovery:
- Press the Menu button on your thermostat.
- Select Settings using the arrow buttons.
- Scroll down to Adaptive Recovery and press Enter.
- Choose On or Off to enable or disable the feature.
- Press Save to confirm your selection.
With Adaptive Recovery, your home will always feel just right, exactly when you need it.
Vacation Mode Explained
Vacation Mode helps you save energy while you’re away from home. It temporarily adjusts your thermostat settings, ensuring minimal energy use without compromising safety or comfort.
To activate Vacation Mode, follow these simple steps:
- Press the Menu button.
- Select Vacation Mode from the menu options.
- Enter the start and end dates of your trip.
- Set the desired temperature for the duration of your vacation.
- Press Save to activate Vacation Mode.
With Vacation Mode, you can leave home without worrying about energy waste.

Credit: www.youtube.com
Troubleshooting Common Issues
Programming your Hunter thermostat can be straightforward. Yet, you might face some common issues. This section helps you tackle these problems. Below, we discuss display errors and connectivity problems.
Dealing With Display Errors
Your Hunter thermostat display might show unusual errors. Here are some common display issues and their solutions:
| Issue | Possible Cause | Solution |
|---|---|---|
| Blank Screen | Power outage or dead batteries | Check power supply and replace batteries |
| Incorrect Temperature Reading | Thermostat location or calibration | Recalibrate or move the thermostat |
| Flashing Symbols | Settings conflict or system error | Reset the thermostat |
Always ensure your thermostat has fresh batteries. Check the power connection regularly. Recalibrate your thermostat if you see incorrect readings.
Connectivity Problems And Solutions
Your Hunter thermostat might face connectivity issues. These problems can disrupt your thermostat’s performance. Here are some common connectivity issues and solutions:
- Wi-Fi Connection Loss: Ensure your Wi-Fi is stable. Restart your router if needed. Check if the thermostat is within range.
- App Sync Issues: Update the thermostat app. Reconnect the thermostat to the app. Ensure both devices are on the same network.
- Firmware Update Failures: Check for available updates. Ensure a stable internet connection. Restart the thermostat and try updating again.
Stable Wi-Fi is crucial for connectivity. Update the app and firmware regularly. Keep the thermostat within the router’s range.
Maintenance Tips For Longevity
To ensure your Hunter Thermostat works well for years, follow these maintenance tips. Regular care can prevent issues and extend the life of your device.
Regular Cleaning
Dust and dirt can affect your thermostat’s performance. Clean your thermostat regularly to keep it working efficiently.
- Turn off the thermostat before cleaning.
- Use a soft cloth to wipe the surface.
- Avoid using water or harsh chemicals.
- Remove any visible dust from the buttons and screen.
Battery Replacement And Updates
Replace the batteries in your thermostat to ensure it functions properly. Weak batteries can cause the thermostat to malfunction.
- Check the battery compartment for signs of corrosion.
- Replace old batteries with new ones of the same type.
- Dispose of old batteries safely.
Regular software updates can also help. Updated software can fix bugs and improve performance.
| Task | Frequency |
|---|---|
| Clean the thermostat | Monthly |
| Replace batteries | Yearly |
| Check for software updates | Every 6 months |
By following these maintenance tips, you can ensure your Hunter Thermostat stays in top condition for a long time.

Credit: www.reddit.com
Enhancing Your Smart Home Experience
Upgrading to a Hunter Thermostat can greatly improve your smart home experience. It offers advanced features for comfort and efficiency. Learning to program it is straightforward and rewarding.
Integrating With Other Devices
Integrating your Hunter Thermostat with other smart devices can bring many benefits. Use the thermostat with smart speakers like Amazon Echo or Google Home. This allows you to control the temperature using voice commands.
Connect the thermostat to smart lighting systems. Create a cozy atmosphere by adjusting lights and temperature together. This integration enhances your home environment seamlessly.
Hunter Thermostats also work well with smart home hubs. These hubs unify control of various devices. They provide a central point for managing your smart home efficiently.
Exploring Hunter Thermostat Accessories
Hunter offers a range of accessories to enhance your thermostat experience. These accessories add functionality and convenience to your smart home setup.
Consider adding remote sensors to your system. These sensors provide accurate temperature readings from different rooms. This helps in maintaining a consistent temperature throughout your home.
Another useful accessory is the smart plug. Use smart plugs to control devices based on your thermostat’s settings. This can help in automating tasks and saving energy.
Hunter also provides protective covers for thermostats. These covers protect the device from dust and damage. They keep your thermostat clean and working efficiently.
Explore these accessories to get the most out of your Hunter Thermostat. They help in creating a more comfortable and efficient smart home environment.
Frequently Asked Questions
How To Set Hunter Programmable Thermostat?
To set a Hunter programmable thermostat, press “Program,” select “Day,” then set the desired time and temperature. Repeat for each day.
How Do You Reset A Hunter Thermostat?
To reset a Hunter thermostat, press and hold the “System” and “Fan” buttons simultaneously for about 5 seconds. The display will flash, indicating the reset is complete.
How Do I Set My Thermostat Program?
To set your thermostat program, press the “Program” button. Select the desired time and temperature settings. Save the changes.
What Is The Hold Button On The Hunter Thermostat?
The hold button on a Hunter thermostat maintains the current temperature setting indefinitely. This overrides scheduled temperature changes.
Conclusion
Mastering your Hunter thermostat boosts comfort and energy efficiency. Follow the steps provided for optimal performance. Regular updates and maintenance ensure long-lasting functionality. Enjoy a perfectly controlled home environment with your newly programmed Hunter thermostat. Feel free to revisit this guide whenever needed.
Happy programming!
Check Best Thermostat Pricing in Amazon
** As an Amazon Associate, I earn from qualifying purchases.