
Check Best Thermostat Pricing in Amazon
** As an Amazon Associate, I earn from qualifying purchases.
Programming your Honeywell Proseries Thermostat is simpler than you might think. With the right guidance, you can control your home’s temperature with ease.
The Honeywell Proseries Thermostat offers a user-friendly way to manage your home environment. Whether you want to save on energy bills or ensure your home is always comfortable, knowing how to program this device is essential. In this guide, we’ll break down the steps to help you set up your thermostat.
You don’t need any special skills or tools. Just follow the steps, and you’ll have your thermostat programmed in no time. Let’s dive in and make your home more efficient and comfortable.
Introduction To Honeywell Proseries Thermostat
The Honeywell Proseries Thermostat is a modern, user-friendly device designed to manage home temperatures efficiently. It offers precise control and customizable settings to ensure comfort. In this guide, we will explore its features and benefits.
What Is Honeywell Proseries?
The Honeywell Proseries is a line of thermostats known for their reliability and ease of use. These devices help manage heating and cooling systems in homes. They come with clear displays and simple controls. Even beginners find them easy to navigate.
The Proseries includes different models to fit various needs. From basic to advanced, each model offers unique features. They all aim to provide comfort and energy savings. The intuitive interface makes programming straightforward.
Benefits Of Using Honeywell Proseries
Using a Honeywell Proseries thermostat has many advantages. First, it helps save energy. You can set schedules to match your lifestyle. This ensures your system runs only when needed. This helps lower energy bills.
Second, it offers convenience. The clear display and easy controls make it simple to adjust settings. Many models also include smart features. These can be controlled via a smartphone app. This means you can manage your home’s climate from anywhere.
Third, the Proseries enhances comfort. You can set different temperatures for different times of the day. This ensures your home is always at the ideal temperature. It adapts to your routines, providing a cozy environment.
Preparing For Installation
Preparing for installation is an essential step when programming your Honeywell Proseries Thermostat. Proper preparation ensures a smooth and effective installation process. Let’s dive into the necessary tools and safety precautions to get started.
Necessary Tools
Before starting, gather all the tools you need. A Phillips screwdriver is essential. You will also need a small flat-head screwdriver. A level will help ensure your thermostat is straight. Lastly, have a drill with the right bit for your wall type.
Safety Precautions
Safety should always come first. Turn off the power to your HVAC system. This prevents any electrical accidents. Use a voltage tester to ensure the power is off. Wear safety glasses to protect your eyes from dust and debris. These steps help create a safe installation environment.
Installation Process
Install the Honeywell Proseries Thermostat by following the user manual. Connect the wires to the correct terminals. Then, set up the desired temperature schedule.
### Installation Process Are you excited to install your new Honeywell Proseries Thermostat? Great choice! This smart thermostat not only helps you control your home temperature with ease but also improves energy efficiency. Let’s break down the installation process step-by-step to make it as smooth as possible. ### Removing the Old Thermostat First things first, you need to remove your old thermostat. Start by turning off the power to your HVAC system. This ensures your safety during the installation process. Once the power is off, remove the cover of your old thermostat. You’ll see several wires connected to it. Take a picture of these connections or label each wire with masking tape to remember where they go. Unscrew the old thermostat from the wall and gently pull it away, leaving the wires exposed. Make sure none of the wires fall back into the wall. You might find it helpful to wrap the wires around a pencil to keep them in place. ### Mounting the Honeywell Proseries Thermostat With your old thermostat out of the way, it’s time to mount your new Honeywell Proseries Thermostat. Start by attaching the new thermostat’s baseplate to the wall. Use a level to ensure it’s straight. Insert the wall anchors if needed and screw the baseplate into place. Now, connect the wires to their corresponding terminals on the new thermostat. This is where your earlier photo or labels come in handy. Once the wires are connected, snap the thermostat onto the baseplate. Turn the power back on to your HVAC system. Your thermostat should light up, signaling that it’s receiving power. Wasn’t that easier than you thought? Now, the next step is to configure your thermostat settings, but we’ll get to that in another section. How did your installation go? Any unexpected challenges? Feel free to share your experience in the comments below!
Credit: blog.supplyhouse.com
Wiring The Thermostat
Easily program your Honeywell Proseries Thermostat by navigating the user-friendly interface. Follow the step-by-step instructions to set your desired temperature schedules. Save energy and maintain comfort effortlessly.
When it comes to programming your Honeywell Proseries Thermostat, wiring is a crucial step. Understanding the wiring process ensures your thermostat functions correctly and keeps your home at the perfect temperature. Let’s dive into the essential steps to wire your thermostat correctly.Identifying Wires
Before you begin connecting wires, you need to identify them. Typically, you’ll see different colored wires connected to your old thermostat. For example, you might find red (power), white (heat), yellow (cooling), and green (fan) wires. Each color corresponds to a specific function, so knowing which wire does what is essential. Take a picture of your old thermostat’s wiring setup. This way, you have a reference and won’t mix up the wires.Connecting Wires To Terminals
Now that you know what each wire does, it’s time to connect them to the new thermostat. Start by turning off the power to your HVAC system. This is crucial for safety. Once the power is off, use a small screwdriver to connect each wire to the corresponding terminal on the Honeywell Proseries Thermostat. For instance, connect the red wire to the ‘R’ terminal, the white wire to the ‘W’ terminal, the yellow wire to the ‘Y’ terminal, and the green wire to the ‘G’ terminal. Ensure each wire is securely connected. Double-check your connections to avoid any loose wires. Loose connections can cause the thermostat to malfunction. Wiring your Honeywell Proseries Thermostat might seem daunting at first, but it’s manageable with a bit of attention to detail. Have you ever wondered why proper wiring is so critical for your thermostat’s performance? Share your thoughts and experiences with us!Powering Up The Thermostat
Learn how to program your Honeywell Proseries Thermostat easily. Set your desired temperature and schedule for optimal comfort. Save energy and enjoy a cozy home.
### Powering Up the Thermostat Getting your Honeywell Proseries Thermostat up and running is the first step to a more comfortable home. It might seem daunting at first, but with a little guidance, you’ll have it powered up in no time. Let’s walk through this process together. #### Checking Connections Before you power up your thermostat, ensure all connections are secure. Loose wires can lead to malfunction or damage. Check that the wires are firmly connected to the corresponding terminals. Refer to the user manual if you’re unsure about the wiring configuration. A quick tip: take a photo of the wiring before you start. This can serve as a reference if you need to reconnect anything. #### Turning on the Power Once your connections are checked and secure, it’s time to turn on the power. Head to your main circuit breaker panel. Flip the switch that controls the thermostat’s power. You’ll know the thermostat is receiving power when you see the display light up. If the display doesn’t turn on, double-check your connections and ensure the breaker is fully engaged. Powering up your Honeywell Proseries Thermostat is a straightforward process when you break it down step by step. Have you encountered any challenges while setting up your thermostat? Share your experiences in the comments!
Credit: www.ecicomfort.com
Configuring Settings
Programming your Honeywell Proseries Thermostat can seem daunting at first, but with the right guidance, it becomes a breeze. The key to a well-configured thermostat is understanding how to set it up properly. In this section, we will cover the essential steps for configuring your thermostat’s settings, ensuring your home stays comfortable and energy-efficient.
Setting Date And Time
To begin, you need to set the correct date and time on your Honeywell Proseries Thermostat. This is crucial as it ensures that your programmed schedules run accurately. Follow these steps:
Check Best Thermostat Pricing in Amazon
** As an Amazon Associate, I earn from qualifying purchases.
- Press the “Menu” button on the thermostat.
- Navigate to the “Date & Time” option using the arrow buttons.
- Press “Select” and use the arrow buttons to adjust the date and time accordingly.
- Once done, press “Done” to save your settings.
This simple step ensures that your thermostat’s clock is synchronized, which is vital for setting up precise schedules.
Adjusting Temperature Settings
Next, let’s configure the temperature settings. This allows you to set your preferred heating and cooling levels for different times of the day. Follow these instructions:
- Press the “Menu” button and select “Schedule”.
- Choose the period you want to set: Wake, Away, Home, or Sleep.
- Adjust the heating and cooling temperatures using the up and down arrow buttons.
- Press “Next” to move to the next period or “Done” to save your settings.
Imagine waking up to a cozy warm house in the winter or a cool room in the summer. Properly adjusting these settings can make your home much more comfortable and energy-efficient.
Have you ever wondered how much energy you could save by optimizing your thermostat settings? A well-programmed thermostat not only enhances comfort but also cuts down on energy bills. Take the time to configure your Honeywell Proseries Thermostat, and experience the difference it makes in your daily life.
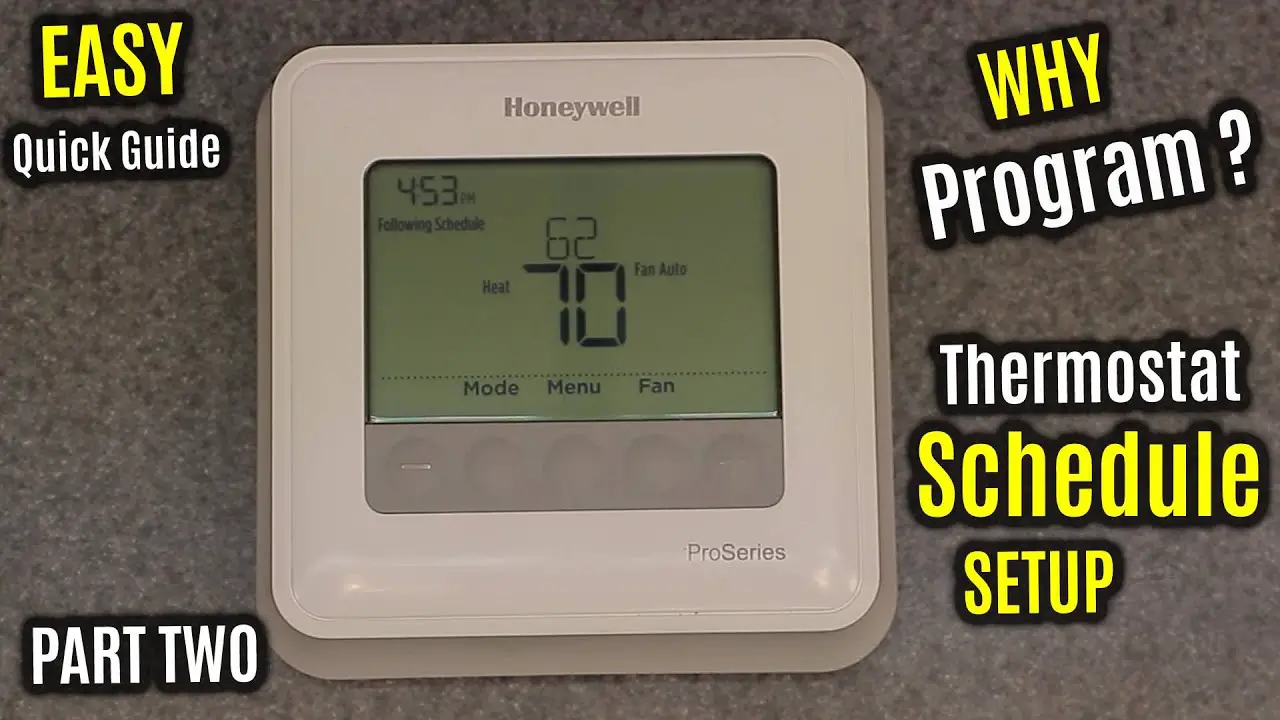
Programming Schedule
Programming the schedule on your Honeywell Proseries Thermostat ensures your home stays comfortable. You can set different temperatures for various times of the day. This helps in saving energy and maintaining comfort. Let’s look into creating daily schedules and setting weekend preferences.
Creating Daily Schedules
To create a daily schedule, start by selecting the “Schedule” option on your thermostat. Choose the day you want to program. You can set up to four time periods: Wake, Leave, Return, and Sleep. For each period, set the time and desired temperature.
Wake up to a warm home by setting a higher temperature for the Wake period. Lower the temperature during the Leave period when no one is home. Set a comfortable temperature for the Return period when everyone comes back. Finally, reduce the temperature during the Sleep period to save energy overnight.
Setting Weekend Preferences
Weekends often have different routines. To set weekend preferences, select the days you consider as weekends. Usually, this is Saturday and Sunday. Follow the same steps as creating daily schedules but adjust the times and temperatures to match your weekend routine.
Enjoy a cozy home by setting a comfortable temperature for mornings. Lower it during the day if you are out. Raise it again for the evening and lower it for night time. This way, you ensure comfort and energy efficiency even during weekends.
Troubleshooting Common Issues
Programming a Honeywell Proseries thermostat can sometimes be tricky. Issues often arise from incorrect settings or wiring problems. Follow these steps to troubleshoot and fix common issues efficiently.
When it comes to programming your Honeywell Proseries Thermostat, encountering a few bumps along the road is quite normal. You might face error messages, connectivity issues, or other common problems. But don’t worry; most of these issues can be easily fixed. Let’s dive into some common troubleshooting tips to help you get back on track.Error Messages
Error messages on your Honeywell Proseries Thermostat can be frustrating, but they often provide clues to the problem. For instance, if you see a “Wi-Fi Disconnected” message, it usually means your device has lost its internet connection. Check your Wi-Fi settings to ensure your network is up and running. Sometimes, just restarting your router can fix the issue. If you see a “Low Battery” warning, replace the batteries immediately to keep your thermostat functioning smoothly. Always keep spare batteries on hand for such situations.Fixing Connectivity Problems
Connectivity problems are common with smart devices. If your thermostat isn’t connecting to Wi-Fi, ensure you are within range of your router. Thick walls and electronic devices can interfere with the signal. Make sure your Wi-Fi network name and password are entered correctly. A simple typo can cause connectivity issues. You can also try resetting your thermostat. Hold down the ‘Menu’ button until the settings menu appears, then navigate to the ‘Reset’ option. This can resolve many minor issues. Remember, connectivity problems can often be solved with a bit of patience and troubleshooting. Always follow the user manual for specific instructions. Have you ever experienced these issues with your Honeywell Proseries Thermostat? What solutions worked for you? Share your tips in the comments!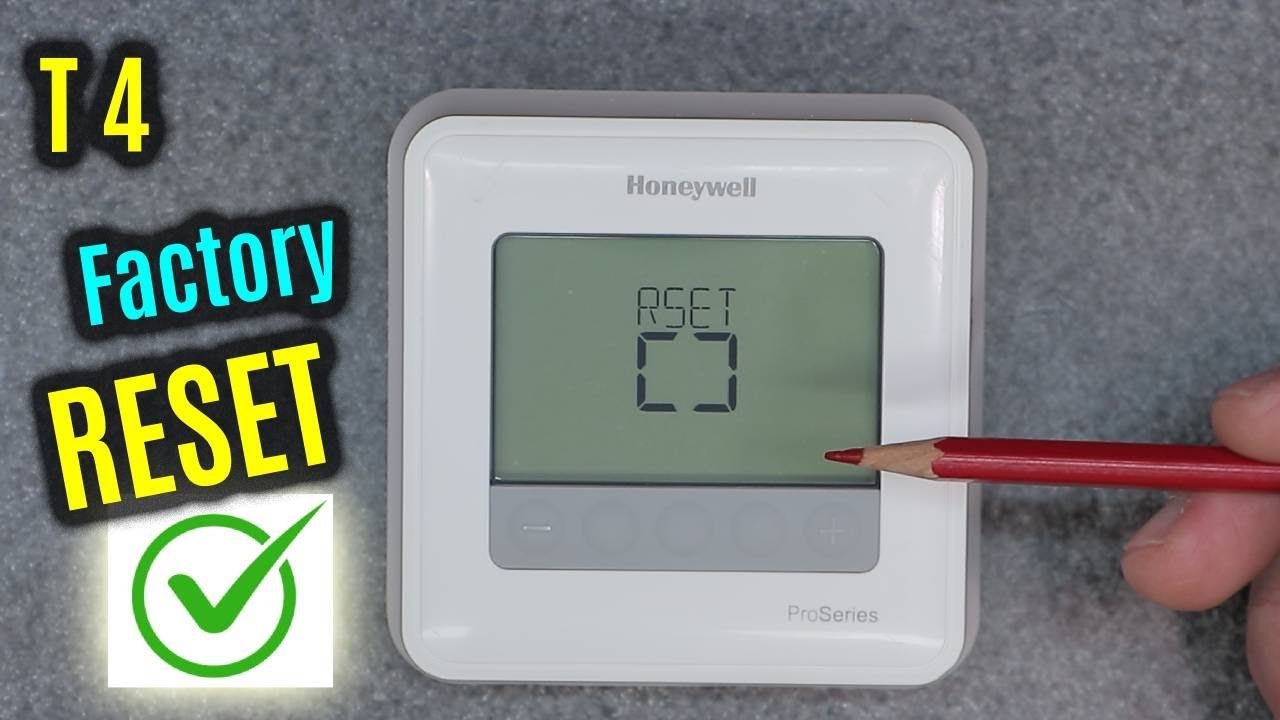
Credit: www.youtube.com
Frequently Asked Questions
How Do You Program A Honeywell Pro Series Thermostat?
To program a Honeywell Pro series thermostat, press “Menu”, select “Schedule”, and follow on-screen instructions. Adjust time and temperature settings as needed. Save changes.
How Do I Change The Settings On My Honeywell Proseries Thermostat?
Press “Menu” on your Honeywell Proseries thermostat. Use the arrow keys to navigate and select settings. Adjust settings as desired.
How Do I Reprogram My Honeywell Thermostat?
Press “System” and then “Program” on your Honeywell thermostat. Select “Day” to set your schedule. Adjust time and temperature using the arrow keys. Press “Done” to save changes.
How To Set Schedule On Honeywell Thermostat?
Press “Schedule” on the thermostat. Select the day and time. Set the desired temperature. Save your settings.
Conclusion
Programming your Honeywell Proseries thermostat is straightforward. Follow the steps carefully. Enjoy consistent comfort at home. Your thermostat settings will save energy. This guide simplifies the process. Now, you can easily manage your home’s temperature. Experiment with different settings. Find what works best for you.
Stay warm in winter and cool in summer. Efficient use of your thermostat makes a difference. Happy programming!
Check Best Thermostat Pricing in Amazon
** As an Amazon Associate, I earn from qualifying purchases.