
Check Best Thermostat Pricing in Amazon
** As an Amazon Associate, I earn from qualifying purchases.
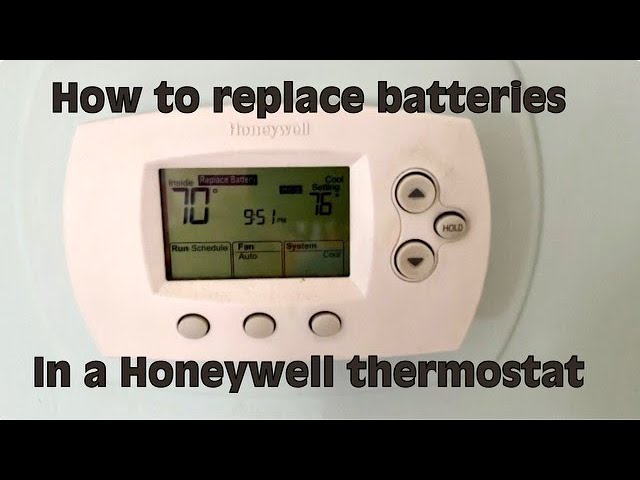
Replacing the batteries in a Honeywell thermostat is straightforward. Knowing how to open the device can save time and frustration.
Honeywell thermostats are essential for maintaining home comfort, but like any device, they need regular maintenance. If the screen goes blank or displays a low battery warning, it’s time for a battery change. This task may seem daunting, but it’s simple once you know the steps.
In this guide, we’ll walk you through the process of opening your Honeywell thermostat to replace the batteries. You’ll learn the tools needed and the correct way to handle the device. With these easy instructions, you’ll have your thermostat up and running in no time.
Preparation
Opening your Honeywell thermostat to replace the batteries might seem daunting. But with a bit of preparation, you can do it easily. This section will guide you through the necessary preparations to make the process smooth and safe.
Gather Tools
First, collect the tools you need. The good news is, you don’t need many. A small screwdriver is often enough. Check your thermostat model’s manual to confirm. Make sure you have the right type of batteries on hand. Most Honeywell thermostats use AA or AAA batteries. Having everything ready will save you time.
Safety Precautions
Safety is crucial. Always turn off your thermostat before starting. This prevents any electrical issues. Be gentle when opening the thermostat cover. Excessive force can cause damage. If you feel resistance, check for hidden screws. Follow these steps to ensure a safe and smooth battery replacement.
Locate The Thermostat
When it’s time to change the batteries in your Honeywell thermostat, the first step is to locate the thermostat itself. This might seem straightforward, but if you’re like me, you may need a bit of guidance. Let’s dive into the details!
Identify Model
Before you start, it’s crucial to know which Honeywell thermostat model you have. This information is typically found on the front of the thermostat or within the user manual. If you’ve misplaced the manual, a quick search online with the model number can provide the necessary details.
Knowing the model helps you understand the specific steps needed. Different models have slightly different ways of accessing the battery compartment.
Access The Thermostat
Now that you’ve identified the model, it’s time to access the thermostat. This often involves gently removing the thermostat from its base. With some models, you may need to press a release button or lift the thermostat up from the bottom.
Be careful not to use excessive force. Trust me, you don’t want to damage your thermostat. If it’s not coming off easily, double-check your model specifics—there might be a trick to it.
If you’re unsure, look up a video online. Seeing someone else do it can be incredibly helpful. Have you ever wondered why these things are not more intuitive?
Once you have the thermostat off the wall, you’ll see the battery compartment. This is where the real fun begins!
Remember, changing the batteries in your Honeywell thermostat is a simple task. It just requires a bit of patience and the right steps. Have you had any challenges while doing this? Share your experiences in the comments!
Remove The Thermostat Cover
Replacing the batteries in your Honeywell thermostat is a simple task. The first step is to remove the thermostat cover. This process is easy and requires no special tools. Follow the steps below to ensure you can access the battery compartment without any trouble.
Release Clips
Most Honeywell thermostats have clips holding the cover in place. These clips are usually located on the sides or the bottom of the device. Look for small indentations or tabs. Press these gently with your fingers to release the cover.
Lift The Cover
Once the clips are released, lift the cover carefully. Hold the cover by its edges to avoid touching any internal parts. Some models may have a hinge on the top. If so, lift the bottom part first and then gently tilt the cover upwards.
After removing the cover, you will see the battery compartment. Replace the old batteries with new ones, ensuring the correct orientation. Then, align the cover back into place and press it until the clips snap back. Your thermostat is now ready to use again.
Credit: environmentmasters.com
Access The Battery Compartment
Accessing the battery compartment of your Honeywell thermostat is an easy task that can save you from unnecessary hassles and ensure your thermostat works efficiently. Whether you’re a seasoned DIY enthusiast or just starting out, replacing the batteries is straightforward. Let’s break down the process step-by-step.
Find Battery Slot
First, you need to locate where the batteries are. Most Honeywell thermostats have the battery compartment either on the back or front of the unit. Sometimes, it’s hidden behind a small cover.
Take a close look at your thermostat. If you’re unsure, check the user manual for guidance. This saves time and prevents any confusion. If you’ve misplaced the manual, a quick search online with your thermostat model number will do the trick.
Open Compartment
After you’ve found the battery slot, it’s time to open it. Honeywell thermostats are designed to be user-friendly, so you won’t need any special tools. Simply press the tab or slide the cover off, depending on your model.
Gently lift the cover to reveal the batteries. Be careful not to use too much force, as this can damage the compartment. You’ll typically find AA or AAA batteries inside.
Once the compartment is open, you can easily remove the old batteries and replace them with new ones. Remember to dispose of the old batteries properly. This small maintenance task can significantly extend the life of your thermostat.
Check Best Thermostat Pricing in Amazon
** As an Amazon Associate, I earn from qualifying purchases.
Have you ever struggled with a thermostat that suddenly stopped working? How did you resolve it? Share your experiences and tips for fellow readers in the comments below!
Remove Old Batteries
Opening a Honeywell thermostat to replace the batteries is an easy task. But before adding new batteries, you must remove the old ones. This step is crucial. It ensures the thermostat functions well.
Check Battery Type
First, check the type of batteries in your Honeywell thermostat. Most models use AA or AAA batteries. Look at the label on the battery compartment. This provides the correct battery type. Using the right batteries ensures the thermostat works properly.
Dispose Properly
After removing the old batteries, dispose of them properly. Do not throw them in the regular trash. Batteries contain chemicals that can harm the environment. Use a designated battery recycling bin or take them to a recycling center.

Credit: willplumb.com
Install New Batteries
Opening a Honeywell thermostat to replace the batteries can seem tricky. Yet, it is a simple task when you know the steps. This section will guide you through the process of installing new batteries. Follow these steps to ensure your thermostat works efficiently.
Insert Correctly
First, locate the battery compartment. It is usually on the back of the thermostat. Remove the old batteries. Dispose of them safely. Check the markings in the compartment. They show the correct way to insert the new batteries. Follow these markings carefully.
Ensure Proper Fit
Once the batteries are in place, check their fit. They should sit snugly in the compartment. Loose batteries can cause the thermostat to malfunction. If the batteries do not fit properly, check their size. Make sure you are using the correct battery type.
After ensuring the batteries are correctly inserted and fit well, close the battery compartment. Now, your Honeywell thermostat should work perfectly with the new batteries.
Reattach The Cover
Reattaching the cover of your Honeywell thermostat after replacing the batteries might seem like a simple task, but doing it correctly ensures your thermostat functions properly. Here’s a detailed guide to help you through the process efficiently and correctly.
Align Cover
First, you need to align the cover with the base of the thermostat. Look for the guiding slots or grooves on the cover and the base. These are your indicators to ensure you’re putting it back correctly.
It’s easy to get frustrated if it doesn’t align immediately. Take a deep breath and gently adjust the cover until you feel it fit snugly into place. If it helps, I once spent 10 minutes aligning my cover until I realized I was holding it upside down!
Secure Clips
Once the cover is aligned, you’ll need to secure the clips. Most Honeywell thermostats have small clips or latches that hold the cover in place. Gently press down on the cover until you hear a click.
Don’t press too hard. Firm but gentle pressure ensures that the clips snap into place without breaking. If you’re unsure, give it a light tug to see if it’s secured properly.
Have you ever struggled with reattaching something and feared you might break it? Take your time with these clips. Better slow and steady than a broken piece and a trip to the hardware store!
By following these steps, you can reattach the cover of your Honeywell thermostat confidently, knowing it’s secure and ready to function properly. Have any tips or personal experiences to share? Drop a comment below!

Credit: www.youtube.com
Test The Thermostat
Easily open your Honeywell thermostat to replace the batteries by gently pulling the cover. Locate the battery compartment and insert fresh batteries. Ensure the cover snaps back in place securely.
After you’ve successfully replaced the batteries in your Honeywell thermostat, it’s crucial to test the thermostat to ensure everything is functioning correctly. This step will confirm that your thermostat is ready to continue managing your home’s temperature efficiently. Here’s how you can do it:Power On
First, you need to power on your thermostat. Ensure the cover is securely back in place. This is important for safety and proper functioning. Now, reconnect the thermostat to its power source. If your thermostat is hardwired, reattach it to the wall and switch the circuit breaker back on. If it’s battery-operated, it should power on automatically once the batteries are in place.Check Functionality
Once the thermostat is powered on, check its display. It should light up and display the current temperature and settings. If the display is blank, you may need to double-check the battery installation. Next, test the heating and cooling functions. Set your thermostat to a temperature higher than the current room temperature to test the heating. You should hear your heating system turn on. Similarly, set it to a lower temperature to test the cooling system. Look at the thermostat settings. Ensure all previously set schedules and preferences are intact. If any settings were lost during the battery replacement, reprogram them according to your preferences. Testing your thermostat ensures it’s ready to manage your home’s temperature effectively. Have you ever discovered any unusual issues when you tested your thermostat? Share your experiences in the comments! Remember, taking a few minutes to test your thermostat can save you from future discomfort and energy inefficiency.Frequently Asked Questions
How To Open Honeywell Thermostat To Replace Battery?
Remove the Honeywell thermostat cover by gently pulling it off. Replace the old batteries with new ones. Reattach the cover securely.
How Do You Take The Cover Off Of A Honeywell Thermostat?
To remove the cover of a Honeywell thermostat, gently pull the cover from the base. Apply even pressure to avoid damage.
How To Remove Thermostat Cover To Replace Battery?
To remove the thermostat cover, gently pull or slide it off. Replace the battery and snap the cover back on.
Why Is My Honeywell Thermostat Beeping?
Your Honeywell thermostat may beep due to low battery, maintenance reminders, or system errors. Check the display for error codes.
Conclusion
Replacing batteries in your Honeywell thermostat is simple. Follow the steps carefully. Open the thermostat cover gently. Remove old batteries and insert new ones. Ensure correct orientation. Close the cover securely. Your thermostat will work efficiently again. Regular battery checks can prevent issues.
Always use fresh batteries. Enjoy consistent home comfort. For any complications, refer to the user manual. This guide helps you maintain your thermostat easily. Keep your home cozy year-round.
Check Best Thermostat Pricing in Amazon
** As an Amazon Associate, I earn from qualifying purchases.