
Check Best Thermostat Pricing in Amazon
** As an Amazon Associate, I earn from qualifying purchases.
Installing a C wire for your thermostat can be tricky. It’s essential for proper function.
A C wire, or common wire, is a crucial component in many modern thermostats. It provides a continuous flow of power, ensuring your thermostat operates efficiently. Without a C wire, your thermostat may not work correctly, causing frustration and discomfort.
Understanding how to install a C wire can save you time and money. This guide will walk you through the steps, making the process straightforward and manageable. Whether you’re upgrading your system or facing issues with your current setup, knowing how to handle the C wire installation is vital. Let’s dive in and simplify the process for you.
Introduction To C Wire
Have you ever upgraded your thermostat only to find out it needs something called a C wire? You’re not alone. Many people face this challenge when installing a new smart thermostat. But don’t worry, installing a C wire is simpler than it sounds.
First, let’s understand what a C wire is and why it’s important.
Purpose Of C Wire
The C wire, or “common” wire, is a low-voltage power wire. It provides a continuous flow of electricity to your thermostat. This is crucial for modern smart thermostats that have advanced features like Wi-Fi connectivity and touch screens.
Without a C wire, your thermostat won’t have the power it needs to run these features. Some older systems might not have a C wire, but there are ways to add one. This is where things get interesting.
Importance In Modern Thermostats
Modern thermostats do more than just control temperature. They learn your habits, save energy, and even connect to your smartphone. All these features need a steady power supply, which the C wire provides.
Imagine coming home to a perfectly heated house without lifting a finger. That’s the power of a smart thermostat. But it all starts with a C wire.
Installing a C wire might sound technical, but it’s worth the effort. It ensures your thermostat works efficiently and reliably. Plus, it opens the door to a smarter, more comfortable home.
So, are you ready to make your home smarter and more efficient? Let’s get started with installing that C wire!
Tools And Materials Needed
Installing a C wire for your thermostat can seem daunting, but with the right tools and materials, the job becomes a lot easier. Having everything ready before you start can save you time and frustration. Let’s break down what you need to get started.
Essential Tools
First, gather your essential tools. A basic tool kit can go a long way.
- Wire Strippers: These are crucial for stripping the ends of the wire without damaging it.
- Screwdrivers: A Phillips and flat-head screwdriver will help you unscrew and secure wires and components.
- Drill: Useful if you need to create new holes for running the wire.
- Voltage Tester: Safety first! Ensure no live wires are present before you start working.
Having these tools at hand will make your installation process smoother and more efficient.
Required Materials
Now, let’s talk about the materials you will need. These items are specific to the installation of a C wire.
- C Wire Adapter: If your HVAC system doesn’t have a C wire, an adapter can help you create one.
- Thermostat Wire: This is the actual wire that you will run from your HVAC system to your thermostat.
- Electrical Tape: Use this to secure and insulate connections.
- Wire Nuts: These are essential for connecting wires securely.
It’s also a good idea to have a flashlight handy, especially if you’re working in a dimly lit area.
Preparing these tools and materials beforehand can save you from making unnecessary trips to the hardware store. Have you ever started a project and realized halfway through that you’re missing something crucial? Avoid that frustration by double-checking this list before you begin.
By ensuring you have everything you need, you’re setting yourself up for a successful and stress-free installation. What other tools have you found essential for home projects like this? Share your thoughts in the comments!
Safety Precautions
Installing a C wire for your thermostat can improve its functionality. But safety should always come first. Following proper safety precautions ensures a smooth and accident-free installation process.
Turn Off Power
First, turn off the power to your HVAC system. This prevents electrical shocks. Locate your home’s circuit breaker. Switch off the breaker connected to your HVAC system. Confirm that power is off by trying to turn on the thermostat. If it does not power up, you are safe to proceed.
Use Protective Gear
Always wear protective gear during the installation. This includes gloves and safety glasses. Gloves protect your hands from sharp objects and wires. Safety glasses shield your eyes from debris. These simple precautions can prevent injuries.

Credit: m.youtube.com
Locating The C Wire Terminal
Installing a new thermostat often needs a common wire, or C wire. The C wire delivers continuous power to your thermostat. Locating the C wire terminal in your HVAC system is crucial. This section will guide you on how to find it.
Checking Existing Wiring
First, check your existing wiring. Turn off the power to your HVAC system. Remove the thermostat cover. Look at the wires connected to the thermostat.
Count the wires. If you see a blue or black wire not connected, it might be your C wire. If there are only four wires connected, you need to locate the C wire terminal in your HVAC system.
Identifying The C Terminal
Go to your HVAC control board. This is usually inside the furnace or air handler. Look for a terminal marked with a “C”. This is the C wire terminal. It may also be labeled as “COM”.
If you find a wire connected to this terminal, trace it. Ensure it reaches your thermostat. If no wire is connected, you need to run a new wire from the terminal to your thermostat.
Installing The C Wire
Installing the C wire for your thermostat can seem daunting. This guide will make it simple. The C wire, or common wire, powers your smart thermostat. Without it, your thermostat won’t work properly. Follow these steps to install the C wire in your home.
Connecting To Hvac System
First, turn off the power to your HVAC system. Safety is vital. Find the control board inside your HVAC unit. It’s usually behind a panel. Look for a terminal labeled “C” or “Common”. This is where the C wire connects. If you don’t see a “C” terminal, check the manual. Some units label it differently.
Next, locate the unused wire in your thermostat cable. Strip about half an inch of insulation from the end. Connect this wire to the “C” terminal on the control board. Tighten the screw to secure it. Ensure the wire is firmly in place. Replace the panel and turn the power back on.
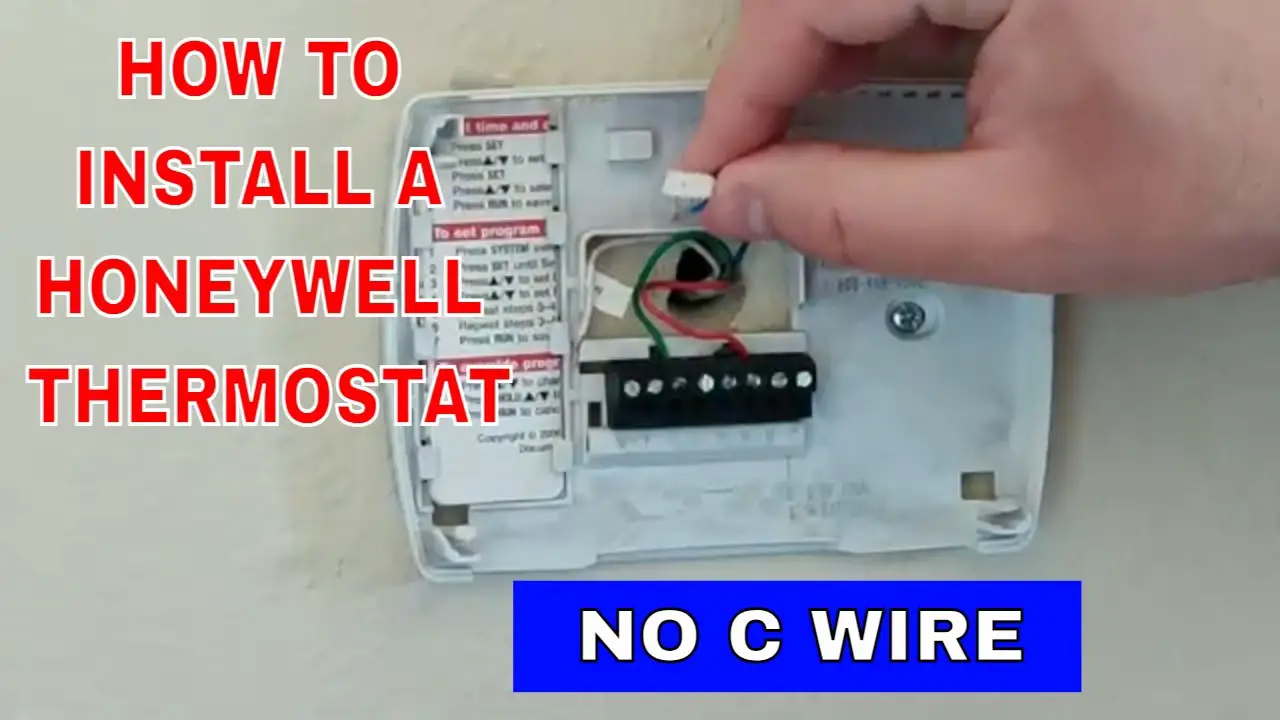
Attaching To Thermostat
Now, attach the other end of the C wire to the thermostat. Remove the thermostat from the wall. Locate the terminal labeled “C”. Insert the wire into the terminal. Tighten the screw to secure it. Make sure the wire is firmly connected.
Reattach the thermostat to the wall. Power up your HVAC system. Your thermostat should now receive power from the C wire. Check if it functions correctly. If you face issues, refer to the thermostat manual. It will offer troubleshooting tips.
Installing the C wire may require patience. But it ensures your smart thermostat works efficiently. Follow these steps for a smooth installation.
Check Best Thermostat Pricing in Amazon
** As an Amazon Associate, I earn from qualifying purchases.
Alternative Solutions
Installing a C wire for your thermostat can seem daunting. But, there are alternative solutions that can make the process easier. These solutions include using a C wire adapter or power extender kits.
Using A C Wire Adapter
A C wire adapter is a simple and effective solution. It helps provide constant power to your smart thermostat. The adapter connects to your existing wiring. This means you don’t need to run new wires through your walls. It simplifies the installation process.
Most C wire adapters come with clear instructions. Follow these to connect the adapter to your HVAC system. Once installed, your thermostat will have the power it needs. This method saves time and reduces the need for professional help.
Power Extender Kits
Power extender kits are another great alternative. These kits work with systems that lack a C wire. They provide a reliable power source for your thermostat. The kits include all necessary components and instructions.
Installing a power extender kit is straightforward. You connect it to your HVAC system and thermostat. The kit ensures your thermostat functions properly without a dedicated C wire. This option is ideal for older homes or complex wiring systems.
Both C wire adapters and power extender kits offer practical solutions. They make installing a smart thermostat easier and less invasive.
Testing The Installation
After installing the C wire for your thermostat, it is crucial to test the installation. Testing ensures that everything works correctly and safely. This process involves powering up the system and checking for proper functionality.
Powering Up The System
First, turn the power back on at the circuit breaker. This step is essential to supply electricity to the thermostat. Make sure the thermostat’s display lights up. This indicates that the system is receiving power. If the display remains off, double-check your wiring connections.
Ensuring Proper Functionality
Next, set your thermostat to heating or cooling mode. Listen for the system to activate. If the heating or cooling system turns on, it confirms a successful installation. If not, review the wiring instructions again. Confirm that all wires are connected correctly.
Finally, check the temperature settings. Adjust the thermostat to different temperatures. Observe if the system responds accurately. If everything works as expected, your installation is complete.

Credit: diy.stackexchange.com
Troubleshooting Common Issues
When installing a C wire for your thermostat, encountering issues can be frustrating. However, troubleshooting common problems doesn’t have to be daunting. Let’s look at some frequent hiccups and how to fix them.
No Power To Thermostat
You might find that your thermostat displays no power or remains unresponsive. This can often be due to power issues with your HVAC system.
First, check your HVAC system’s circuit breaker. Ensure it hasn’t tripped. If it has, reset it and see if that resolves the issue.
If the breaker is fine, inspect the furnace switch. Sometimes, the power switch located near your furnace might be turned off. Flip it back on if needed.
Still no power? Verify that the C wire is securely connected. A loose connection can prevent the thermostat from receiving power.
Incorrect Wiring
Incorrect wiring is another common issue. It can cause your thermostat to malfunction or not work at all.
Double-check your wiring against the thermostat’s manual. Ensure each wire is connected to the correct terminal.
If you’re unsure, take a photo of your current setup before making changes. This can be a helpful reference.
Make sure all wires are stripped to the appropriate length—about 1/4 inch. Too much or too little exposed wire can cause poor connections.
Finally, if you’ve tried everything and it still doesn’t work, you might need to consult a professional. Sometimes, HVAC systems have unique wiring configurations that require expert knowledge.
Have you faced any challenges while installing a C wire? How did you overcome them? Share your experience in the comments below. Your insights might help someone else!
Expert Tips For Success
Installing a C wire for your thermostat can be tricky. But with a few expert tips, you can make the process smoother and more successful. These tips will help ensure your connections are secure and that you know when to seek professional help.
Double-check Connections
Always double-check your connections. Loose wires can cause problems. Ensure each wire is firmly connected. A loose wire might lead to thermostat malfunction. Use a wire nut to secure each connection. This simple step can save you a lot of trouble.
Consulting Professionals
If you’re unsure, consult a professional. They have the expertise to handle complex wiring. Sometimes it’s best to leave it to the experts. This can prevent potential damage to your system. Remember, safety comes first. A professional can ensure everything is installed correctly.

Credit: www.honeywellhome.com
Frequently Asked Questions
How Can I Add A C Wire To My Thermostat?
To add a C wire to your thermostat, first turn off the power. Then, locate the HVAC control board. Connect the C wire to the “C” terminal. Finally, connect the other end to the thermostat’s C terminal. Ensure all connections are secure before restoring power.
What To Do If There Is No C Wire For A Thermostat?
Install a C-wire adapter or use a power extender kit. Check if the thermostat supports battery power. Consult a professional if unsure.
How Much Does It Cost To Install C Wire For A Thermostat?
Installing a C wire for a thermostat costs between $120 and $200. Prices vary based on location and complexity.
Where Does The C Wire Adapter Go?
The C wire adapter connects to your HVAC system’s control board. It provides continuous power to your smart thermostat.
Conclusion
Installing a C wire for your thermostat can be straightforward. Follow the steps carefully, and you’ll ensure smooth operation. Always turn off power before starting any work. Double-check connections to avoid issues later. With patience, you can complete this task successfully.
Your thermostat will work more efficiently with a reliable C wire. Enjoy the benefits of a well-functioning home climate control. If unsure, consult a professional for assistance. Safe installation guarantees long-term comfort and convenience. Happy DIY!
Check Best Thermostat Pricing in Amazon
** As an Amazon Associate, I earn from qualifying purchases.