
Check Best Thermostat Pricing in Amazon
** As an Amazon Associate, I earn from qualifying purchases.
Are you tired of constantly adjusting your home’s temperature? Installing an auto thermostat can change that.
Imagine a device that learns your schedule and keeps your space comfortable without you lifting a finger. In this guide, you’ll discover simple, step-by-step instructions to install your auto thermostat quickly and safely. By the end, you’ll enjoy perfect temperatures and lower energy bills—all with your own hands.
Ready to make your home smarter and more comfortable? Let’s get started!
Choosing The Right Thermostat
Choosing the right auto thermostat is key for home comfort and energy savings. The correct thermostat controls your heating and cooling efficiently. It matches your lifestyle and HVAC system. This guide helps you pick the best one for your needs.
Types Of Auto Thermostats
Basic thermostats allow manual temperature control. Programmable thermostats let you set schedules for different times. Smart thermostats connect to Wi-Fi for remote control. Some learn your habits and adjust automatically. Pick the type that fits your daily routine.
Features To Consider
Look for easy-to-use controls. A clear display helps with quick adjustments. Energy-saving modes reduce bills. Some thermostats offer alerts for maintenance. Voice control adds convenience. Choose features that improve comfort and save energy.
Compatibility With Hvac Systems
Check if the thermostat works with your heating and cooling system. Some fit only specific systems like gas or electric. Others support multiple types, including heat pumps. Verify voltage and wiring requirements. Proper compatibility avoids installation issues and ensures performance.

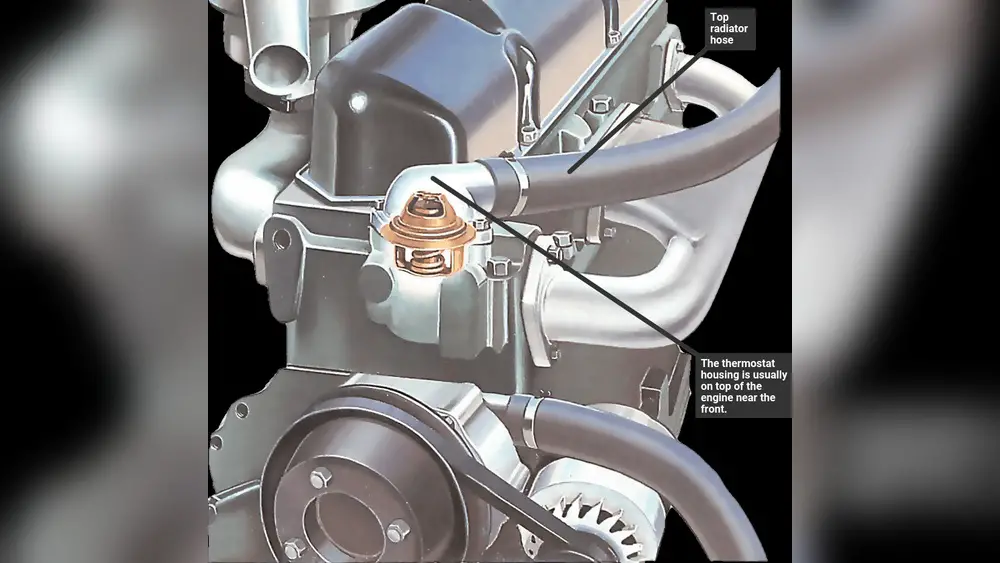
Credit: www.youtube.com
Gathering Necessary Tools
Gathering the right tools is the first step to install an auto thermostat. Having everything ready saves time and avoids frustration. Proper tools help you work safely and efficiently. Prepare your workspace and check your tool list before starting the job.
Basic Tools Checklist
Start with a screwdriver set, both flathead and Phillips. A voltage tester is essential to check power before handling wires. Wire strippers make connecting wires easier and safer. Needle-nose pliers help grip and twist wires. A drill may be needed to mount the thermostat on the wall. Have extra screws and anchors on hand. A level tool ensures your thermostat installs straight.
Safety Equipment
Safety glasses protect your eyes from dust and debris. Insulated gloves prevent electrical shocks while handling wires. Wear a dust mask if drilling into drywall. Keep a flashlight nearby for better visibility in dark areas. Avoid loose clothing that can catch on tools or wires. Always turn off power before starting any electrical work. Safety first keeps accidents away.
Preparing For Installation
Preparing for the installation of an auto thermostat is an important first step. Taking time to prepare helps avoid mistakes and ensures safety. Follow these simple steps to get ready before starting the installation.
Turning Off Power
Switch off the power to your heating and cooling system. Locate the circuit breaker that controls the thermostat and turn it off. This step prevents electric shock and protects your device. Double-check that the power is off by testing the thermostat display or using a voltage tester.
Removing Old Thermostat
Carefully take off the old thermostat from the wall. Unscrew the faceplate and gently pull it away. Avoid yanking the wires to prevent damage. Set the old thermostat aside and keep all screws for later use. This clears the space for your new thermostat.
Labeling Wires
Identify each wire connected to the old thermostat. Use small pieces of tape to label them according to their terminal letters. This step makes reconnecting easier and reduces confusion. Take a photo of the wiring for reference before disconnecting the wires. Accurate labeling helps ensure the new thermostat works properly.
Installing The New Thermostat
Installing a new thermostat is a simple way to control your home’s temperature. This process involves a few careful steps. Follow these instructions to set up your new device correctly.
Mounting The Base
Start by removing the old thermostat’s base. Use a screwdriver to take out the screws. Hold the new base against the wall. Make sure it is level for proper function. Mark the screw holes with a pencil. Drill holes if needed. Attach the base to the wall with screws. Check that it is secure and stable.
Connecting The Wires
Turn off the power to your heating system first. This prevents any electric shock. Look at the old thermostat’s wires. Note their colors and labels carefully. Match each wire to the new base terminals. Use the labels or the manual for guidance. Insert wires firmly into the correct slots. Tighten the terminal screws to hold them in place. Double-check all connections before moving on.
Attaching The Thermostat Unit
Once the base and wires are ready, attach the thermostat unit. Align it with the base’s hooks or slots. Push gently until it clicks into place. The unit should sit flush against the wall. Turn the power back on to test the device. Follow the setup instructions on the screen. Your new thermostat is now ready to use.
Configuring The Thermostat Settings
After installing your auto thermostat, the next step is to configure its settings. This process ensures your thermostat works efficiently and matches your daily routine. Proper setup can save energy and keep your home comfortable. Follow these simple steps to set up your thermostat correctly.
Check Best Thermostat Pricing in Amazon
** As an Amazon Associate, I earn from qualifying purchases.
Setting Date And Time
Start by setting the correct date and time on your thermostat. This is important for accurate scheduling. Use the thermostat buttons or touchscreen to enter the current date and time. Check the AM or PM settings carefully. This helps the thermostat follow your temperature schedule precisely.
Programming Temperature Schedules
Next, program your temperature schedules based on your daily activities. Set different temperatures for morning, daytime, evening, and night. Choose warmer or cooler settings depending on the season. Many thermostats allow you to set different schedules for weekdays and weekends. This saves energy when you are away or asleep.
Connecting To Wi-fi (if Applicable)
If your thermostat supports Wi-Fi, connect it to your home network. This allows remote control through a smartphone app. Follow the on-screen instructions to select your Wi-Fi network and enter the password. A stable connection helps you monitor and adjust settings anytime. It also enables software updates and smart home integration.
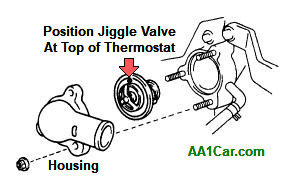
Credit: www.aa1car.com
Testing The System
Testing the system is a key step after installing an auto thermostat. It ensures the device works correctly and keeps your home comfortable. This step confirms both heating and cooling functions operate smoothly. Checking the system helps find problems early and fix them quickly. Follow the steps below to test your new thermostat properly.
Verifying Heating And Cooling
Start by setting the thermostat to heating mode. Increase the temperature above the current room temperature. Wait a few minutes to see if the heating turns on. Feel the vents or radiators for warm air or heat. Next, switch the thermostat to cooling mode. Lower the temperature below the room temperature. Check if the cooling system activates and cold air flows out. This process confirms the thermostat controls both heating and cooling.
Troubleshooting Common Issues
If the system does not respond, check the thermostat settings first. Ensure the batteries have power or the unit is wired correctly. Look for error messages or blinking lights on the thermostat display. Confirm the HVAC system’s circuit breaker is not tripped. Clean any dust or dirt blocking vents and sensors. Reset the thermostat by turning it off and on again. These steps fix most common installation problems.
Maintaining Your Thermostat
Maintaining your auto thermostat helps it run smoothly and last longer. Regular care keeps the device accurate and efficient. Small tasks can prevent bigger problems and save energy costs.
Regular Cleaning
Dust and dirt can block the thermostat’s sensors. Gently wipe the surface with a soft cloth. Avoid using water or harsh cleaners. Clean the vents and nearby walls too. Keep the area around the thermostat clear.
Battery Replacement
Check the battery every six months or as needed. A weak battery may cause the thermostat to work poorly. Use the correct battery type for your model. Replace batteries in a timely manner to avoid errors. Always turn off the thermostat before changing batteries.
Software Updates
Smart thermostats often need software updates. These updates fix bugs and add new features. Connect your thermostat to Wi-Fi for automatic updates. Check the manufacturer’s app or website for manual updates. Regular updates improve performance and security.
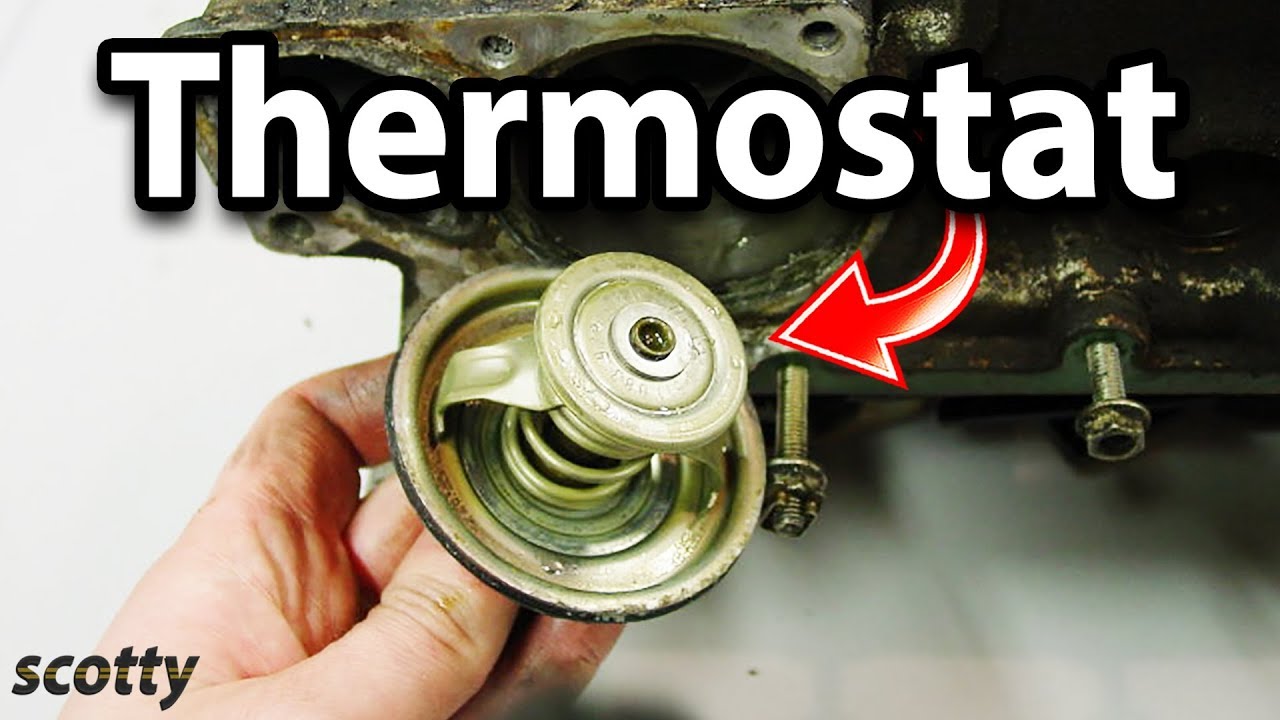
Credit: www.youtube.com
Frequently Asked Questions
What Tools Are Needed To Install An Auto Thermostat?
You need a screwdriver, wire stripper, drill, and voltage tester. These tools help safely remove the old thermostat and secure the new one. Ensure you turn off power before starting installation to avoid electric shock.
How Do I Wire An Auto Thermostat Correctly?
Match the thermostat wires to your HVAC system terminals. Use the wiring diagram in the manual for guidance. Connect wires securely and label them if needed to avoid confusion during installation.
Can I Install An Auto Thermostat Without Professional Help?
Yes, if you follow instructions carefully and have basic electrical skills. Turn off power first and use a voltage tester. However, hire a professional if unsure to ensure safety and proper setup.
How Do I Calibrate My Auto Thermostat After Installation?
Follow the manufacturer’s calibration steps in the manual. Usually, this involves setting the desired temperature and testing system response. Calibration ensures accurate temperature control for energy efficiency and comfort.
Conclusion
Installing an auto thermostat can save energy and money. The steps are simple and clear. Always follow safety rules during installation. Double-check connections to avoid problems later. A properly installed thermostat keeps your home comfortable. Take your time and work carefully.
Enjoy the benefits of better temperature control. Small effort, big comfort.
Check Best Thermostat Pricing in Amazon
** As an Amazon Associate, I earn from qualifying purchases.