
Check Best Thermostat Pricing in Amazon
** As an Amazon Associate, I earn from qualifying purchases.
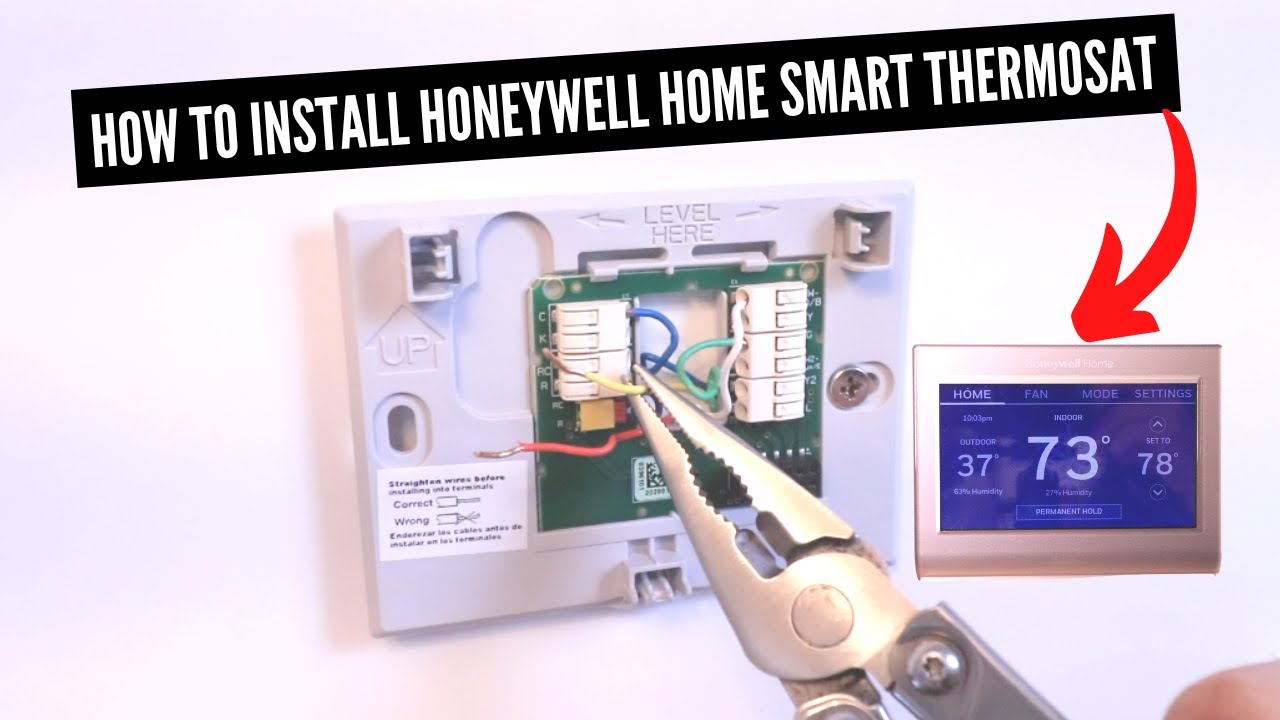
Installing a Honeywell thermostat is a straightforward process. Anyone can do it with the right guidance.
Follow this guide to make your home more comfortable. A Honeywell thermostat can help save energy and manage your home’s climate. This handy device lets you control the temperature with ease. Whether you have an old thermostat or are installing one for the first time, the steps are simple.
In this blog post, we will walk you through the process. You’ll learn how to remove your old thermostat, wire the new one, and set it up properly. Let’s get started and make your home more efficient and comfortable!
Preparation
Installing a Honeywell thermostat can improve your home’s comfort and efficiency. Before diving into the installation, proper preparation is key. This ensures a smooth process and avoids potential problems. Let’s look at the necessary steps to get ready.
Tools Needed
Gathering the right tools makes the job easier. Here’s what you need:
- Screwdriver (flathead and Phillips)
- Drill (if needed for new holes)
- Level
- Wire stripper
- Masking tape
- Pencil
Having these tools on hand saves time. It also helps to avoid interruptions during installation.
Safety Precautions
Safety should always come first. Follow these precautions to stay safe:
- Turn off power at the circuit breaker. This prevents electrical shock.
- Use a voltage tester. Ensure wires are not live.
- Read the thermostat’s manual. Understand the instructions fully.
- Mark wires with masking tape. Label them as you disconnect.
- Work in a well-lit area. See clearly what you are doing.
Taking these steps ensures your safety. It also helps the installation go smoothly.

Credit: diy.stackexchange.com
Choosing The Right Thermostat
Choosing the right thermostat is a key step in ensuring your home’s comfort. Not all thermostats work the same. So, understanding your options helps you make the best choice for your needs.
Types Of Honeywell Thermostats
Honeywell offers a variety of thermostats. Each type has its own features and benefits. Let’s explore some popular options:
Programmable Thermostats: These let you set a schedule for heating and cooling. You can save energy by adjusting the temperature based on your daily routine.
Wi-Fi Thermostats: Control these remotely using your smartphone or tablet. They offer great convenience, especially if you travel often.
Smart Thermostats: These can learn your habits and adjust settings automatically. They offer advanced features like voice control and energy reports.
Compatibility Check
Before buying a Honeywell thermostat, check your current system. Not all thermostats are compatible with every heating and cooling system. Look at the wiring of your old thermostat. This will help you determine what kind you need.
If unsure, consult your HVAC system manual. It usually provides details about compatible thermostats. You can also visit Honeywell’s website for their compatibility tool. This tool helps ensure you pick the right model for your system.
Removing The Old Thermostat
Removing the old thermostat is a crucial step when installing your new Honeywell thermostat. It’s not just about taking the device off the wall; there are several key steps to ensure you do it safely and correctly. Let’s break it down into manageable parts to make your installation as smooth as possible.
Power Off
First things first, you need to turn off the power to your heating and cooling system. This step is non-negotiable. You don’t want to risk an electric shock or damage your system. Go to your circuit breaker and switch off the power to your HVAC system.
Double-check by trying to turn on the heating or cooling. If nothing happens, you’re good to go. This might seem like an obvious step, but it’s easy to overlook. Safety should always be your top priority.
Disconnecting Wires
Once the power is off, it’s time to disconnect the wires. Remove the cover of your old thermostat to expose the wiring. You might want to take a quick photo of the wiring setup. This can act as a handy reference later.
Label each wire with the corresponding terminal. Use small pieces of masking tape and a pen for this. For example, if a wire is connected to the ‘R’ terminal, label it ‘R’. This ensures you know exactly where each wire goes when you install the new thermostat.
Carefully unscrew the wires from the terminals. Keep the screws in a safe place—you might need them for your new thermostat. Gently pull the wires out, making sure they don’t slip back into the wall. Using some tape to secure them temporarily can be very helpful.
Removing the old thermostat might seem daunting, but with these steps, you can do it efficiently and safely. Ready to move on? Let’s get that new Honeywell thermostat up and running!
Installing The New Thermostat
Ready to install your Honeywell thermostat? This guide will walk you through the process. Installing a new thermostat can seem daunting, but with clear steps, it’s manageable. Let’s get started.
Mounting The Base Plate
First, position the base plate against the wall. Use a level to ensure it’s straight. Mark the screw holes with a pencil. Drill pilot holes for the screws. Place the base plate back on the wall. Secure it with the provided screws. Make sure it’s firmly attached.
Connecting Wires
Next, connect the wires to the thermostat. Look at the labels on the back of the thermostat. Match each wire to the corresponding terminal. Use the wire labels you made earlier. Insert each wire into its terminal. Tighten the screws to secure the wires. Ensure no wires are loose.
Once all wires are connected, double-check your work. Make sure each wire is in the correct terminal. This step is crucial for proper functionality. After verification, you’re ready to attach the thermostat unit.
Configuring Settings
Configuring the settings on your Honeywell thermostat is an important step to ensure it works effectively for your home. Proper configuration can help you save on energy bills and maintain a comfortable environment. Let’s dive into setting the date and time, and programming the temperature.
Setting The Date And Time
First things first, setting the date and time correctly is crucial for your thermostat to function properly. If these are not set correctly, your programmed schedules won’t run as expected.
Start by pressing the “Menu” button on your thermostat. Navigate to the “Date & Time” option using the arrow buttons.
Check Best Thermostat Pricing in Amazon
** As an Amazon Associate, I earn from qualifying purchases.
Once there, you can adjust the date by using the “+” and “-” buttons. Set the correct month, day, and year. Repeat this process for the time, ensuring you select AM or PM accurately.
Don’t forget to save your changes before exiting the menu. This simple step ensures your thermostat runs on the correct schedule.
Programming Temperature
Programming the temperature is where you can really make the most of your Honeywell thermostat. You can set different temperatures for various times of the day to maximize comfort and efficiency.
Start by pressing the “Program” button. You’ll see options for weekdays and weekends. Select the period you want to program.
Use the arrow buttons to set the desired temperature for each time period—morning, day, evening, and night. This flexibility allows you to have a warmer home in the morning and cooler at night, or vice versa, based on your preference.
Don’t be afraid to experiment with different settings. You might find that a slight adjustment can lead to significant energy savings. For instance, setting the temperature a few degrees lower while you’re asleep can make a big difference.
Have you ever wondered how much energy you could save by optimizing your thermostat settings? Give it a try and monitor your energy bills for noticeable improvements.
Credit: m.youtube.com
Testing The Installation
Testing the installation of your Honeywell thermostat is crucial. This ensures it works correctly and optimally. Follow these steps for effective testing. You’ll confirm the thermostat is installed properly.
Turning The Power On
First, locate your circuit breaker. Turn the power back on to your HVAC system. This will activate your Honeywell thermostat. Wait a few moments for the system to initialize. The display on the thermostat should light up. If it does, the power is successfully restored.
Checking System Functionality
Now, test the thermostat settings. Set the thermostat to heat mode. Adjust the temperature to a level higher than the room temperature. Listen for the heating system to start. Feel for warm air from the vents.
Next, switch to cool mode. Set the temperature lower than the room temperature. Listen for the cooling system to start. Feel for cool air from the vents. This confirms the thermostat can control both heating and cooling.
Finally, test the fan settings. Switch the fan to ‘on’. The fan should run continuously. Switch the fan back to ‘auto’. The fan should only run when heating or cooling is active. This ensures the fan settings work correctly.
Troubleshooting
Installing a Honeywell thermostat involves connecting wires, securing the unit, and configuring settings. Following the manual ensures proper setup and functionality.
Installing a Honeywell thermostat can be a straightforward task, but sometimes things don’t go as planned. You might encounter a few hiccups along the way. Let’s dive into some common issues and their solutions to help you troubleshoot effectively.Common Issues
One common issue is that the thermostat display is blank. This can be frustrating, especially if you’re eager to get your new device up and running. Another frequent problem is incorrect temperature readings. You might notice that the room feels warmer or cooler than what the thermostat indicates. Lastly, some users find that their thermostat isn’t communicating with their HVAC system. This could mean no heating or cooling, which isn’t ideal.Solutions
If your thermostat display is blank, check the power source. Ensure the batteries are properly installed or replace them if needed. If it’s a wired model, verify that the circuit breaker hasn’t tripped. For incorrect temperature readings, consider the placement of your thermostat. It should be in a central location, away from direct sunlight, windows, and doors. This helps ensure accurate readings. If your thermostat isn’t communicating with your HVAC system, double-check the wiring. Make sure all connections are secure. It’s a good idea to refer to the wiring diagram in the user manual. Remember, patience is key. If troubleshooting gets too complex, don’t hesitate to consult a professional. Have you encountered any other issues while installing your thermostat? Share your experience in the comments!
Credit: www.reddit.com
Maintenance Tips
Keeping your Honeywell thermostat in top shape is crucial for maintaining a comfortable and energy-efficient home. Regular maintenance ensures that your thermostat works flawlessly and lasts longer. Here are some practical maintenance tips to help you keep your Honeywell thermostat in excellent condition.
Regular Cleaning
Dust and debris can build up inside your thermostat, affecting its performance. Make it a habit to clean your thermostat every few months. Use a soft, dry cloth to gently wipe the exterior.
If you need to clean the inside, remove the cover carefully. Use a can of compressed air to blow away any dust. Avoid using any liquid cleaners as they can damage the internal components.
Have you ever noticed your thermostat screen looking a bit grimy? Regular cleaning can prevent this, ensuring a clear display and accurate readings. A clean thermostat is a happy thermostat!
Software Updates
Just like your smartphone, your Honeywell thermostat may receive software updates. These updates can improve functionality and fix bugs. Check for updates regularly through the Honeywell app or the thermostat’s menu.
Updating the software is usually a straightforward process. Follow the on-screen instructions or refer to the user manual for guidance. Keep an eye out for notifications about available updates.
Why not take a moment now to check if there are any pending updates? Staying up-to-date ensures your thermostat works at its best. Have you updated yours recently?
By following these simple maintenance tips, you can keep your Honeywell thermostat running smoothly and efficiently. Regular cleaning and software updates are small tasks that make a big difference in the long run. So, take a few minutes now to give your thermostat the attention it deserves!
Frequently Asked Questions
What Color Wires Go Where On A Honeywell Thermostat?
On a Honeywell thermostat, connect the red wire to R, white to W, yellow to Y, green to G, and blue to C.
Are Honeywell Thermostats Easy To Install?
Yes, Honeywell thermostats are easy to install. They come with clear instructions and user-friendly interfaces. Most models require basic tools and minimal time.
How Many Wires Are Needed For A Honeywell Thermostat?
Most Honeywell thermostats need 4-5 wires. The typical wiring includes R, C, Y, W, and G wires.
How Do You Install A Thermostat Yourself?
Turn off power. Remove old thermostat. Install the new thermostat base. Connect wires to terminals. Secure new thermostat. Restore power.
Conclusion
Installing a Honeywell thermostat is simple and straightforward. Follow the steps carefully. Make sure to turn off power before starting. Connect the wires correctly. Mount the thermostat securely on the wall. Follow the manufacturer’s instructions. Test the thermostat to ensure it works.
Enjoy a comfortable home with your new Honeywell thermostat. Now, you can easily control the temperature. Save energy and stay cozy. Happy installing!
Check Best Thermostat Pricing in Amazon
** As an Amazon Associate, I earn from qualifying purchases.