
Check Best Thermostat Pricing in Amazon
** As an Amazon Associate, I earn from qualifying purchases.
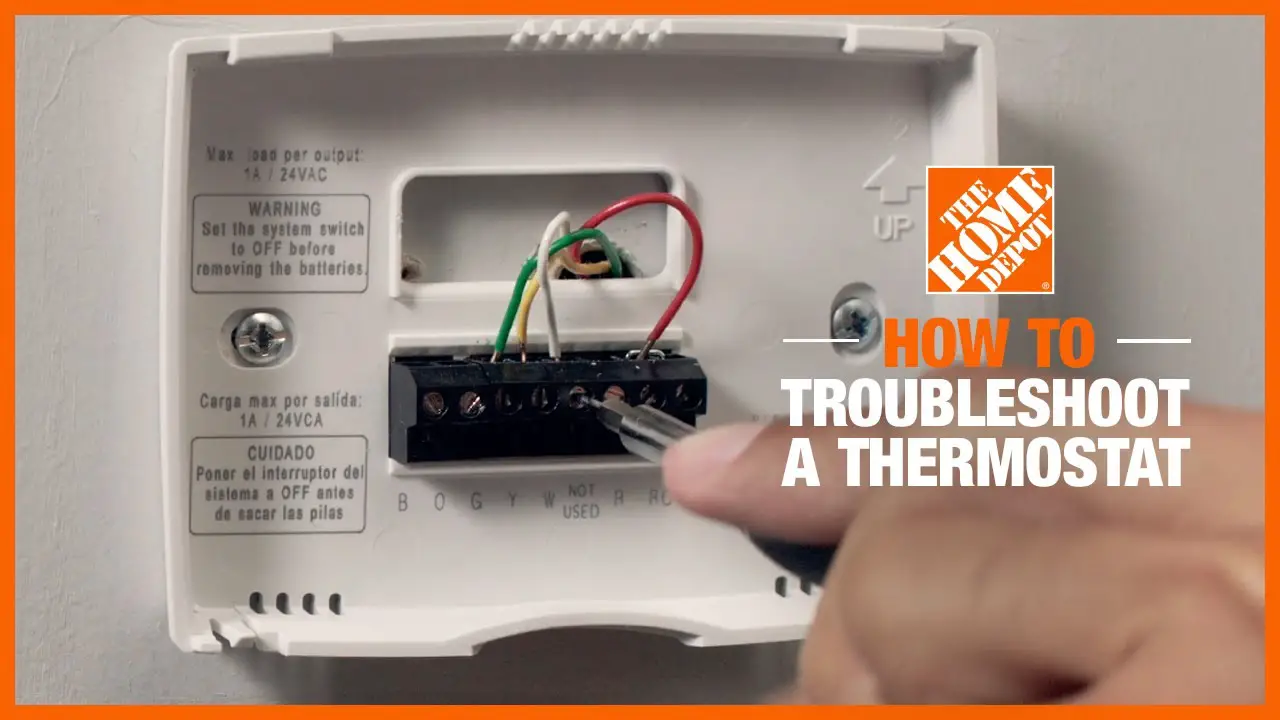
To fix a Honeywell thermostat, first check the power supply and replace batteries if necessary. Ensure correct settings and reset the device.
A Honeywell thermostat is a crucial device in maintaining your home’s temperature. Sometimes, it may malfunction, leading to discomfort. Common issues can include power supply problems, incorrect settings, or outdated software. To troubleshoot, start by ensuring the thermostat receives power.
Replace the batteries if they are low or dead. Check that the thermostat settings match your preferred temperature and schedule. If the problem persists, try resetting the device to its factory settings. Proper maintenance and timely troubleshooting can ensure your Honeywell thermostat functions efficiently, providing comfort and energy savings.
Credit: renewdenver.org
- Introduction To Honeywell Thermostat Issues
- Initial Troubleshooting Steps
- Resetting The Honeywell Thermostat
- Dealing With Display Problems
- Fixing Thermostat Connectivity Issues
- Temperature Calibration Techniques
- Software Updates And Firmware
- Professional Repair Vs. Diy
- Preventive Maintenance For Longevity
- Conclusion: Ensuring Continuous Comfort
- Frequently Asked Questions
- Conclusion
Introduction To Honeywell Thermostat Issues
Honeywell thermostats are popular for their reliability and ease of use. They help control your home’s temperature. But sometimes, these devices can experience issues. Identifying and fixing these problems early can save you time and money.
Common Symptoms Of Malfunction
Recognizing the signs of a faulty thermostat is essential. Here are some common symptoms:
- Inaccurate Temperature Readings: The thermostat shows the wrong temperature.
- System Not Responding: Your HVAC system doesn’t turn on or off.
- Short Cycling: The system turns on and off frequently.
- Unresponsive Display: The screen is blank or slow to respond.
Importance Of Timely Repair
Addressing thermostat issues promptly is crucial. Delays can lead to larger problems. Here are some reasons why timely repair is important:
- Energy Efficiency: Fixing issues can save energy and reduce bills.
- Comfort: A functioning thermostat keeps your home comfortable.
- Preventing Damage: Early repairs can prevent damage to your HVAC system.
- Cost Savings: Fixing small issues early can avoid costly repairs later.

Credit: www.homeserve.com
Initial Troubleshooting Steps
Facing issues with your Honeywell thermostat? Start with basic troubleshooting. It can save time and money. Follow these initial steps for a quick fix.
Safety First: Powering Down
Before you begin any troubleshooting, ensure safety first. Turn off the power to your thermostat. This prevents any accidental shocks.
Locate the circuit breaker for your HVAC system. Switch it off. This step ensures that no power flows to the thermostat.
If unsure about the circuit breaker, you can also remove the thermostat from the wall. This effectively cuts off its power.
Basic Checks: Batteries And Circuit Breakers
Check the batteries first. Dead batteries are a common cause of thermostat issues. Remove the thermostat cover. Look for the battery compartment.
- Replace old batteries with fresh ones.
- Ensure batteries are inserted correctly.
Next, inspect the circuit breaker. Ensure it hasn’t tripped. If tripped, reset it. Turn it off and then back on.
Check the thermostat display after resetting the circuit breaker. If the display is still blank, proceed to further troubleshooting steps.
Ensure all wires are connected properly. Loose wires can cause connection issues. Secure any loose connections.
If the thermostat still doesn’t work, you might need to consult a professional. Complex issues require expert attention.
Resetting The Honeywell Thermostat
Is your Honeywell thermostat not working right? Sometimes, a simple reset can solve many issues. This guide will walk you through the process of resetting your Honeywell thermostat.
Step-by-step Reset Process
Resetting your Honeywell thermostat can be easy. Follow these steps:
- Turn off the thermostat. Find the power switch and switch it off.
- Remove the thermostat from its wall plate. Gently pull it off.
- Take out the batteries. Open the battery compartment and remove them.
- Wait for 10 seconds. This allows the device to fully power down.
- Reinsert the batteries. Place them back in their slots.
- Attach the thermostat back to the wall plate. Make sure it clicks into place.
- Turn the thermostat back on. Flip the power switch back on.
When To Opt For A Reset
Resetting the thermostat is helpful in many situations:
- Unresponsive controls: If the buttons do not work.
- Incorrect temperature readings: When the displayed temperature is wrong.
- Connection issues: If it is not connecting to your Wi-Fi.
- Frequent system errors: When you see error messages often.
If these issues sound familiar, a reset might be the solution. Remember, resetting will restore the default settings. You may need to reprogram your thermostat after the reset.
Dealing With Display Problems
Many homeowners face issues with their Honeywell thermostats. Display problems are common and can be frustrating. This section will help you solve some of the most common display issues.
Blank Screen Troubles
A blank screen can be worrying. Here are some steps to fix it:
- Check the Power Source: Ensure the thermostat is receiving power. Check if the circuit breaker is tripped.
- Inspect the Batteries: Many Honeywell thermostats use batteries. Replace old batteries with new ones.
- Loose Wiring: Inspect the wiring at the back of the thermostat. Tighten any loose wires.
Incorrect Temperature Readings
Incorrect temperature readings can cause discomfort. Follow these steps to correct them:
- Calibrate the Thermostat: Most Honeywell thermostats have a calibration setting. Refer to the user manual for instructions.
- Clean the Thermostat: Dust and dirt can affect readings. Gently clean the thermostat with a soft cloth.
- Check Sensor Placement: Ensure the thermostat is not in direct sunlight or near heat sources.
Fixing Thermostat Connectivity Issues
Is your Honeywell thermostat not connecting properly? Don’t worry. Fixing connectivity issues can be simple. This guide will help you address common problems. Let’s start with Wi-Fi and wiring solutions.
Wi-fi Connection Solutions
Does your thermostat fail to connect to Wi-Fi? Follow these steps:
- Check your Wi-Fi network: Ensure your Wi-Fi is working. Try connecting another device.
- Restart your router: Unplug the router. Wait 30 seconds. Plug it back in.
- Move your thermostat closer: Place the thermostat closer to the router. This may help with weak signals.
- Update Wi-Fi settings: Go to your thermostat settings. Re-enter the Wi-Fi password.
- Reset the thermostat: Hold the reset button for 10 seconds. This can fix many issues.
Repairing Wiring Disconnections
If your thermostat has wiring issues, you can fix it yourself. Here’s how:
- Turn off power: Switch off the power to your thermostat. This is important for safety.
- Remove the thermostat cover: Use a screwdriver to open the cover. Be gentle.
- Check the wiring: Look for loose or disconnected wires. Ensure all wires are secure.
- Reconnect loose wires: Use a wire nut to reconnect any loose wires. Make sure they are tight.
- Close the cover: Put the cover back on. Tighten the screws.
- Turn on power: Switch the power back on. Test the thermostat to see if it works.
Following these steps can help fix connectivity issues. Enjoy a comfortable home with a properly working thermostat.
Temperature Calibration Techniques
Ensuring your Honeywell thermostat provides accurate temperature readings is crucial for home comfort. Proper calibration helps maintain energy efficiency and prevents unnecessary wear on your HVAC system. Below, we’ll explore essential techniques for calibrating and testing your thermostat for precise temperature control.
Calibrating For Accurate Readings
Calibration involves adjusting your thermostat to match the actual room temperature. This process ensures that the thermostat’s settings align with the true climate in your home.
Steps to calibrate your Honeywell thermostat:
Check Best Thermostat Pricing in Amazon
** As an Amazon Associate, I earn from qualifying purchases.
- Remove the thermostat cover.
- Locate the calibration screw inside the device.
- Use a small screwdriver to turn the calibration screw.
- Adjust the screw until the displayed temperature matches the actual room temperature.
- Replace the thermostat cover.
Testing Thermostat Accuracy
After calibration, it’s important to test the thermostat’s accuracy. This ensures that your thermostat maintains the correct temperature over time.
Steps to test your thermostat accuracy:
- Place an accurate thermometer next to your thermostat.
- Leave the thermometer in place for at least 15 minutes.
- Compare the thermometer reading with the thermostat display.
- If there’s a significant difference, recalibrate the thermostat.
Repeat the testing process every few months to ensure continued accuracy. Consistent monitoring helps maintain a comfortable and energy-efficient home environment.
Software Updates And Firmware
Keeping your Honeywell thermostat up-to-date is essential for optimal performance. Software updates and firmware enhancements often include new features, bug fixes, and improved functionality. They can help your thermostat run more efficiently and effectively.
Finding And Installing Updates
Finding and installing updates for your Honeywell thermostat is straightforward. Follow these steps to ensure your device is running the latest version.
- Open the Honeywell Home app on your smartphone or tablet.
- Navigate to the settings menu.
- Select your thermostat from the list of devices.
- Check for available updates.
- If an update is available, follow the on-screen instructions to install it.
Always ensure your thermostat is connected to Wi-Fi during the update process. This will guarantee a smooth and quick installation.
Resolving Glitches With Updates
Sometimes, updates can cause glitches or issues with your thermostat. Here are some common problems and how to fix them.
| Issue | Solution |
|---|---|
| Thermostat not responding | Restart the device. If the issue persists, reset it to factory settings. |
| Incorrect temperature readings | Calibrate the thermostat through the settings menu. |
| Wi-Fi connectivity problems | Ensure your router is working. Reconnect the thermostat to your network. |
If these steps do not resolve the issue, contact Honeywell customer support for further assistance. They can provide specific guidance for your model.
Regularly checking for updates is crucial. It ensures your thermostat operates at its best, providing comfort and efficiency in your home.
Professional Repair Vs. Diy
Fixing a Honeywell thermostat can be simple or complex. Deciding between professional repair vs. DIY depends on the problem’s nature. This section will help you understand when to call a professional and how to tackle DIY repairs.
When To Call A Professional
There are times when fixing a Honeywell thermostat is beyond your skills. Here are some instances when you should call a professional:
- Electrical Issues: If the thermostat is not getting power, it might be an electrical issue.
- Complex Wiring: The wiring can be intricate. If you’re unsure, it’s best to get help.
- Recurrent Problems: If the same issue keeps coming back, a pro can provide a lasting fix.
- System Compatibility: If you’re unsure about compatibility with your HVAC system.
Diy Repair: Tools And Tips
If you decide to fix your Honeywell thermostat yourself, you’ll need some tools and tips. Below is a table of common tools you might need:
| Tool | Purpose |
|---|---|
| Phillips Screwdriver | Removing and securing screws |
| Multimeter | Checking electrical connections |
| Wire Stripper | Stripping wires for connections |
| Level | Ensuring the thermostat is level |
Here are some tips to help you with the DIY repair:
- Turn Off Power: Always turn off the power before starting any electrical work.
- Label Wires: Label each wire before removing it to avoid confusion.
- Follow Instructions: Use the Honeywell manual for guidance. It has step-by-step instructions.
- Check Batteries: Sometimes, the issue is as simple as replacing the batteries.
- Test After Repair: Test the thermostat after making repairs to ensure it works correctly.
By following these tips and using the right tools, you can fix many issues with your Honeywell thermostat yourself.
Preventive Maintenance For Longevity
Maintaining your Honeywell thermostat extends its life and ensures efficient operation. Regular preventive maintenance is key. Proper care can prevent common issues and reduce the need for repairs.
Regular Cleaning And Care
Regular cleaning keeps your thermostat working well. Dust and dirt can affect performance. Clean it every few months.
- Turn off the power to the thermostat.
- Remove the cover gently.
- Use a soft brush to remove dust from the interior.
- Wipe the exterior with a damp cloth.
Be careful not to damage any parts. Regular care helps maintain accuracy and efficiency.
Scheduling Professional Inspections
Schedule professional inspections once a year. Experts can identify issues early. They can clean and calibrate the thermostat properly.
- Contact a licensed HVAC technician.
- Set up an appointment for a thorough check-up.
- Discuss any issues you’ve noticed.
Professional inspections help avoid major problems. They ensure your thermostat runs smoothly for years.
Conclusion: Ensuring Continuous Comfort
Fixing your Honeywell thermostat ensures your home stays comfortable. It saves energy and keeps your HVAC system running smoothly. Regular check-ups and quick fixes help prevent bigger issues. Follow the steps and tips mentioned earlier to keep your thermostat in top shape.
Recap Of Solutions
Here’s a quick recap of the solutions discussed:
- Check the power supply: Ensure your thermostat is getting power.
- Replace batteries: Use fresh batteries for optimal performance.
- Inspect wiring: Look for loose or damaged wires.
- Clean the thermostat: Dust and debris can affect functionality.
- Reset to factory settings: Restore default settings to resolve issues.
Maintaining Optimal Thermostat Performance
Regular maintenance keeps your thermostat functioning well. Follow these steps:
- Check settings: Ensure the thermostat is set to the correct mode.
- Schedule inspections: Have a professional check your HVAC system annually.
- Update software: Keep the thermostat firmware up to date.
- Monitor temperature: Use a separate thermometer to verify accuracy.
- Replace old units: Consider upgrading if your thermostat is outdated.
By following these steps, you ensure your Honeywell thermostat operates efficiently. It keeps your home comfortable all year round.

Credit: www.crystalcleanvents.com
Frequently Asked Questions
Why Is The Honeywell Thermostat Not Working?
The Honeywell thermostat might not work due to dead batteries, a tripped circuit breaker, or loose wiring connections.
How Do I Reset A Honeywell Home Thermostat?
To reset a Honeywell home thermostat, press and hold the “System” button. Next, hold the center blank button until the screen changes. Finally, adjust settings as needed.
How To Tell If A Honeywell Thermostat Is Bad?
Check for unresponsive buttons, incorrect temperature readings, and frequent cycling. Ensure the display is clear and stable.
How Do I Fix An Unresponsive Thermostat?
First, check the batteries and replace if needed. Ensure proper wiring connections. Reset the thermostat. Clean any dust or debris. If still unresponsive, consider professional help.
Conclusion
Fixing a Honeywell thermostat can be simple with the right steps. Follow the troubleshooting tips outlined above. Regular maintenance ensures optimal performance. Don’t hesitate to seek professional help if needed. A well-functioning thermostat enhances home comfort and energy efficiency. Keep your Honeywell thermostat in top shape for a cozy living environment.
Check Best Thermostat Pricing in Amazon
** As an Amazon Associate, I earn from qualifying purchases.