
Check Best Thermostat Pricing in Amazon
** As an Amazon Associate, I earn from qualifying purchases.
Are you looking to change your Honeywell thermostat’s schedule but don’t know where to start? Managing your thermostat’s schedule can save you energy and money, but sometimes you need to delete old settings to make room for new ones.
If your current schedule isn’t working for you, or you just want a fresh start, this guide will show you exactly how to delete a schedule on your Honeywell thermostat—quickly and easily. Keep reading, and you’ll gain full control over your home’s comfort with just a few simple steps.
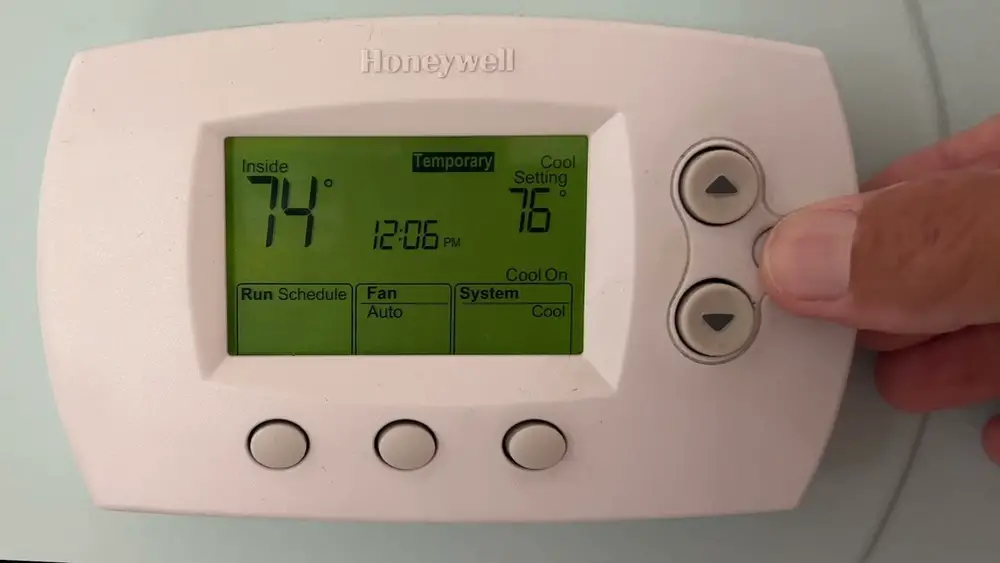
Credit: www.manualslib.com
Accessing The Thermostat Menu
Accessing the thermostat menu is the first step to delete a schedule on your Honeywell thermostat. This menu holds all the settings you need to adjust your heating and cooling preferences. Knowing how to reach it quickly saves time and hassle.
The process is simple and user-friendly. Follow clear steps to find and change your schedule settings. Let’s explore how to get into the menu efficiently.
Locating The Main Screen
Start by waking up your thermostat. Tap the screen gently or press the main button. The main screen shows the current temperature and system mode. This screen acts as your control center for adjustments.
Look for icons or menu buttons on the main screen. These usually appear at the bottom or sides of the display. The exact layout depends on your Honeywell model but should be easy to spot.
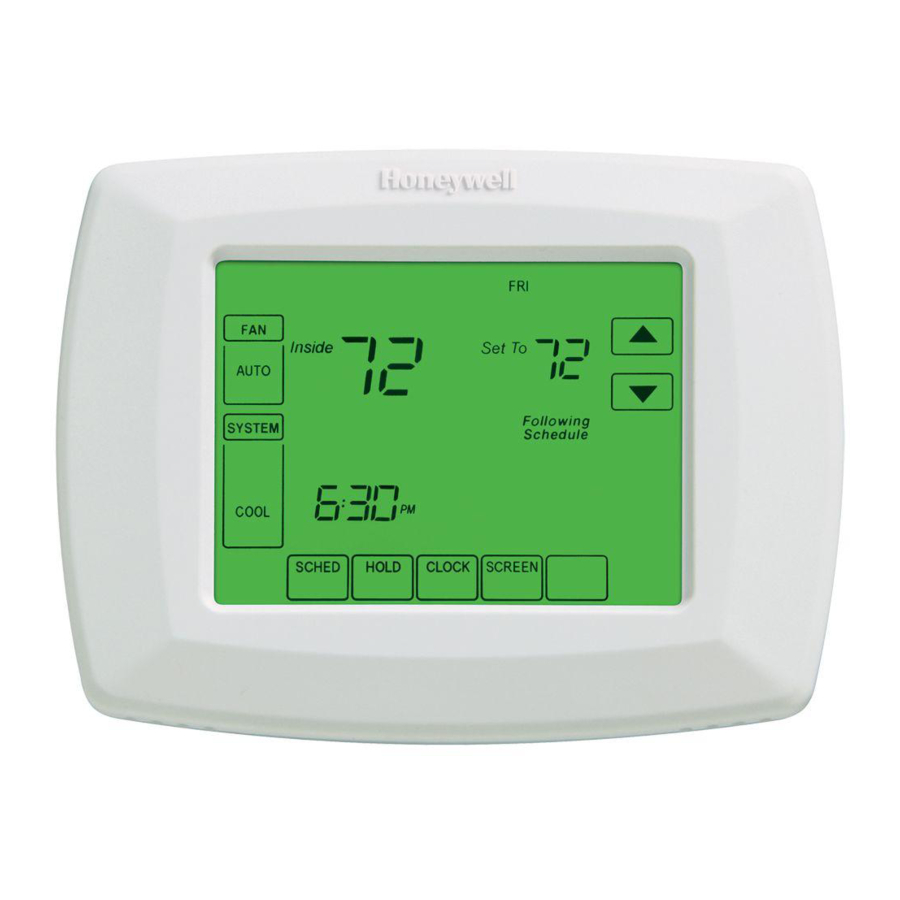
Navigating To Schedule Settings
Once on the main screen, find the menu or settings icon. Tap it to open the main menu options. Look for “Schedule” or “Program” in the list and select it.
This section contains all your programmed time and temperature settings. From here, you can view, edit, or delete any schedule as needed. Take your time to understand the options before making changes.

Credit: www.reddit.com
Selecting The Schedule To Delete
Selecting the schedule to delete on your Honeywell thermostat is a key step. It helps you remove only the unwanted program. This keeps your heating and cooling working just right. Follow the steps carefully to find the right schedule.
Knowing which schedule is active helps avoid mistakes. You can see which one controls your thermostat now. This makes the delete process safe and simple.
Identifying Active Schedules
Start by turning on your Honeywell thermostat. Look at the screen for the schedule menu. Active schedules usually show up clearly. They might be marked with a symbol or bold text.
Use the arrow buttons to scroll through the list. Check the time and days each schedule covers. This helps you spot the one currently running. Note the name or number of that schedule for easy reference.
Choosing The Target Schedule
Decide which schedule you want to delete. It could be an old plan or one causing problems. Confirm it is not the active schedule unless you want to stop it.
Select the schedule by highlighting its name. Press the OK or Select button. This locks in your choice and prepares the thermostat for deletion. Double-check the schedule details before moving on.
Deleting The Schedule
Deleting a schedule on your Honeywell thermostat helps you reset your heating and cooling preferences. This process is simple and quick. You can clear old schedules to create new ones that fit your routine better.
Follow these steps to remove a schedule without any hassle. The thermostat’s interface guides you through each action clearly.
Using The Delete Option
Start by accessing the schedule menu on your thermostat. Look for the schedule you want to delete. Select it carefully to avoid removing the wrong one.
Next, find the delete option. This is usually a trash bin icon or a button labeled “Delete.” Tap or press this option to remove the schedule.
Check Best Thermostat Pricing in Amazon
** As an Amazon Associate, I earn from qualifying purchases.
Some models require you to hold the delete button for a few seconds. This prevents accidental deletions. Wait for a confirmation prompt before continuing.
Confirming Schedule Removal
After selecting delete, the thermostat asks you to confirm. This step ensures you really want to erase the schedule.
Choose “Yes” or “Confirm” on the screen. The schedule will then be removed from the device.
Check the schedule list once more. Make sure the unwanted schedule is gone. This avoids confusion later on.

Credit: www.youtube.com
Saving Changes And Exiting
Saving changes and exiting is an important step after deleting a schedule on your Honeywell thermostat. This step makes sure your changes are kept. It also prevents old schedules from coming back. Follow these steps carefully to save your work and leave the settings menu safely.
Ensuring Schedule Is Deleted
After deleting the schedule, check the list to confirm removal. Look for the time slots or days you erased. Make sure none of them still appear. This confirms the schedule is fully deleted. If you see any, delete them again. Double-checking avoids mistakes later.
Returning To Home Screen
Press the back or home button on the thermostat to exit the settings. This action saves your changes automatically on most models. Wait a few seconds for the screen to update. The main screen shows the current temperature and settings. You have now safely saved changes and exited the schedule menu.
Troubleshooting Common Issues
Troubleshooting common issues with your Honeywell thermostat schedule can save time and frustration. Some users face problems deleting schedules or resetting settings. Simple steps often fix these problems quickly. Understanding these fixes helps keep your thermostat working well.
Schedule Not Deleting
Sometimes, the schedule may not delete from your Honeywell thermostat. This issue often happens due to a software glitch or incorrect button use. Make sure you follow the correct steps on your model. Press the “Menu” button, select “Schedule,” then choose the day and time to delete. Confirm the deletion before exiting.
Check if the thermostat screen freezes or does not respond. Restarting the device can clear minor bugs. Try deleting again after reboot. If the problem stays, check for a firmware update. Updated software improves performance and fixes bugs.
Resetting The Thermostat
Resetting the Honeywell thermostat can fix persistent schedule problems. This step restores factory settings and clears all schedules. Use this option only if deleting schedules does not work. To reset, press the “Menu” button and find “Reset.”
Select “Factory Reset” and confirm your choice. The thermostat will restart and erase all data. After resetting, set up your schedule from scratch. This action often resolves hidden software errors.
Frequently Asked Questions
How Do I Delete A Schedule On Honeywell Thermostat?
To delete a schedule, access the thermostat menu, select “Schedule,” then choose the day or time block. Press “Delete” or “Clear” to remove it.
Can I Delete Multiple Schedules At Once On Honeywell?
No, Honeywell thermostats require deleting schedules individually by selecting each time block or day and then confirming deletion.
Will Deleting A Schedule Affect My Thermostat Settings?
Deleting a schedule removes programmed times but does not reset other settings like temperature preferences or system mode.
How To Reset Honeywell Thermostat If Schedule Deletion Fails?
If deletion fails, try restarting the thermostat or perform a factory reset to clear all schedules and start fresh.
Conclusion
Deleting a schedule on your Honeywell thermostat is simple and quick. Just follow the clear steps you learned here. This helps you control your home temperature better. Saving energy and money becomes easier. You can change or remove schedules anytime you want.
Keeping your thermostat set right improves comfort. Try these steps today to manage your device with ease. Enjoy a smarter, more flexible heating and cooling system.
Check Best Thermostat Pricing in Amazon
** As an Amazon Associate, I earn from qualifying purchases.