

Check Best Thermostat Pricing in Amazon
** As an Amazon Associate, I earn from qualifying purchases.
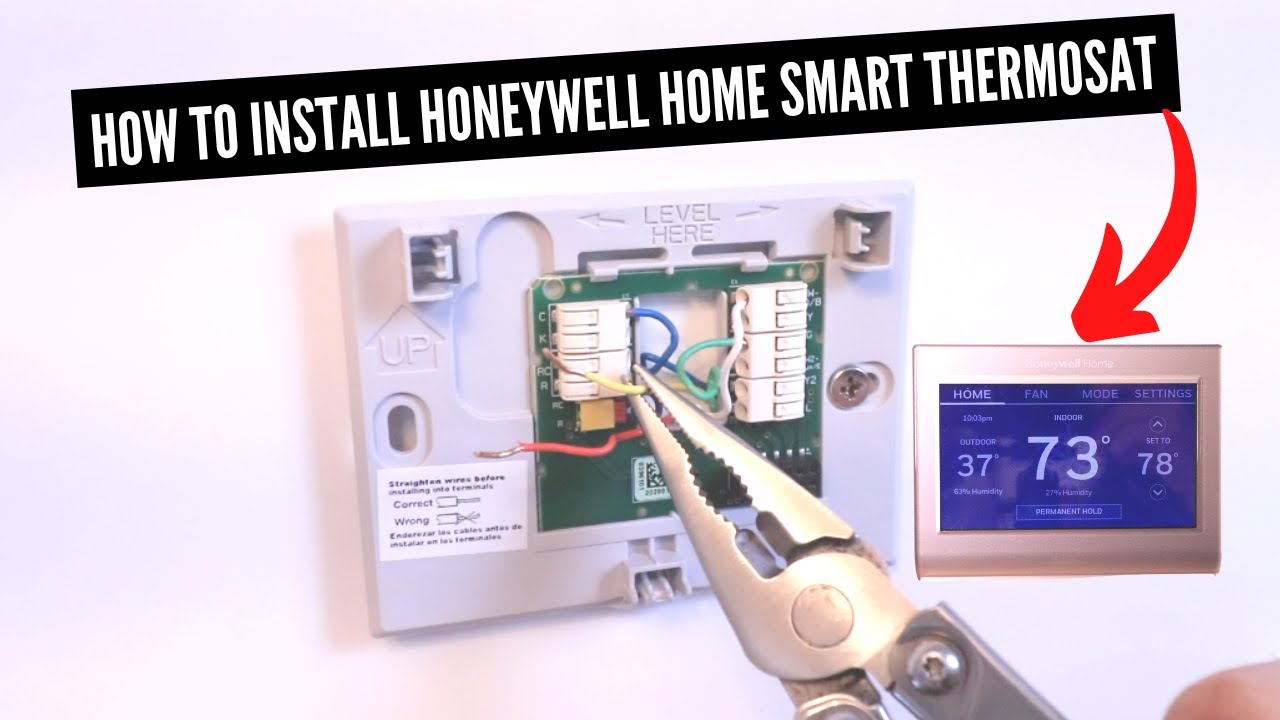
Connecting your Honeywell thermostat to WiFi is straightforward. Start by accessing the thermostat’s settings.
Then, select your network and enter the password. In today’s digital age, smart home devices offer convenience and control at your fingertips. Honeywell thermostats are a prime example, allowing you to manage your home temperature from anywhere. Connecting your thermostat to WiFi unlocks these features, making it easy to adjust settings via your smartphone or tablet.
This guide will walk you through the steps to connect your Honeywell thermostat to WiFi, ensuring a seamless setup. Whether you’re tech-savvy or new to smart devices, you’ll find the process simple and quick, letting you enjoy a more efficient, comfortable home environment.

Credit: diy.stackexchange.com
Pre-installation Checklist
Connecting your Honeywell thermostat to WiFi can make managing your home’s comfort a breeze. Before diving into the setup, it’s crucial to ensure you have everything in place. This pre-installation checklist will save you from any mid-process hiccups and ensure a smooth connection.
Required Tools
Having the right tools on hand can make the installation process much smoother. You’ll need:
- A Phillips head screwdriver
- A flathead screwdriver
- Smartphone or tablet
- Your WiFi network name and password
Ensure your devices are charged and your tools are within reach to avoid unnecessary delays.
Compatibility Check
Not all thermostats are created equal. Verify that your Honeywell model is compatible with WiFi connectivity.
Check the model number on the back of the thermostat or in the user manual. If unsure, visit the Honeywell website and search for your model.
Ensure your WiFi network is 2.4 GHz, as many Honeywell thermostats do not support 5 GHz networks.
Have you ever tried setting up a device only to find out halfway through it’s not compatible? Avoid this frustration by double-checking compatibility before you start.
Once you have your tools ready and have confirmed compatibility, you’re all set for the next steps. Ready to connect your thermostat and enjoy the convenience of remote control? Let’s do this!
Credit: m.youtube.com
Setting Up Your Thermostat
Setting up your Honeywell thermostat for the first time can be a breeze if you follow the right steps. Whether you’re upgrading from an older model or setting up a thermostat for the first time, the process is straightforward. Let’s walk through the key steps to get your Honeywell thermostat connected to WiFi.
Initial Setup
Start by unboxing your Honeywell thermostat and ensure you have all the components. You should have the thermostat itself, a wall plate, screws, and possibly some wire labels.
If you’re like me, the sight of multiple wires can be intimidating. But fear not; Honeywell provides clear instructions. Begin by labeling your existing wires using the provided stickers. This step is crucial because it will make connecting the wires to your new thermostat much easier.
Next, remove your old thermostat from the wall, but leave the base plate as it is. This will help you compare the wiring and ensure everything matches up. Once you’ve done that, you’re ready to install the new wall plate that comes with your Honeywell thermostat.
Powering On The Device
After you have securely mounted the new wall plate and connected the wires, it’s time to power on your device. Simply snap the thermostat onto the wall plate. You should hear a click indicating it’s securely in place.
Turn on your home’s power supply to the HVAC system. The thermostat should light up immediately. If it doesn’t, double-check the wiring and ensure all connections are tight.
Once powered on, follow the on-screen prompts to set the basic settings. You will be asked to select your language, set the date and time, and connect to your WiFi network. Make sure you have your WiFi password handy. This step can be a bit tedious, but it’s essential for the thermostat to function properly.
If you face any issues, Honeywell’s customer support is quite helpful. They guided me through a minor hiccup when my thermostat didn’t connect to WiFi initially. Sometimes all it takes is a quick reboot of your router.
Have you ever had trouble setting up a smart device? How did you resolve it? Share your experiences in the comments!
Connecting To Wifi
Connecting your Honeywell thermostat to WiFi is simple. This guide will help you through the process. Follow these steps to enjoy remote control of your home’s temperature.
Accessing Wifi Settings
First, access the thermostat’s main menu. Look for the “WiFi Setup” option. Select it to start the WiFi connection process.
The thermostat will scan for available networks. Choose your home network from the list. If your network is hidden, manually enter the network name.
Entering Network Information
Next, you will need to enter your network password. Use the on-screen keyboard to type it in. Ensure the password is correct to avoid connection issues.
After entering the password, the thermostat will attempt to connect. Wait for a confirmation message. Once connected, your thermostat will display a WiFi icon.
Check Best Thermostat Pricing in Amazon
** As an Amazon Associate, I earn from qualifying purchases.
Now, you can control your thermostat from the Honeywell app. Enjoy the convenience of adjusting your home’s temperature from anywhere.

Credit: www.wikihow.com
Troubleshooting Connection Issues
Connecting your Honeywell thermostat to WiFi can sometimes be tricky. You might face issues during the process. Don’t worry. We have you covered. This section will help you troubleshoot common connection issues.
Common Problems
Many users face similar problems. Here are some common issues:
- Weak WiFi signal
- Incorrect WiFi password
- Router compatibility
- Firmware issues
- Network congestion
Solutions And Tips
There are solutions and tips for each problem. Let’s explore:
Weak WiFi signal: Place the thermostat closer to the router. Avoid walls or objects in between.
Incorrect WiFi password: Double-check the password. Ensure it matches exactly. Watch for caps lock.
Router compatibility: Check if your router supports 2.4GHz. Most Honeywell thermostats need this.
Firmware issues: Update your thermostat’s firmware. Check the Honeywell website for updates.
Network congestion: Disconnect other devices. Try connecting the thermostat again.
Following these tips can help you resolve most issues. If problems persist, consult the Honeywell support team.
Verifying Connection
Ensure the Honeywell thermostat is powered on. Access the settings menu to select the Wi-Fi option. Follow the prompts to connect to your home network.
### Verifying Connection Once you’ve connected your Honeywell thermostat to your WiFi, it’s crucial to ensure that the connection is stable. This step is vital for making sure your thermostat operates smoothly. By verifying the connection, you can avoid potential issues and make sure you’re maximizing your device’s capabilities. ###Testing Connectivity
Begin by checking if your thermostat is displaying the WiFi icon. This small symbol confirms that the device has recognized the network. If it’s not visible, you might need to repeat the setup process. Next, open the Honeywell app on your smartphone. Try adjusting the temperature via the app. If the thermostat responds, your connection is solid. If not, ensure your WiFi network is functioning properly. ###Confirming Successful Setup
To fully confirm a successful setup, monitor your thermostat for a few hours. Check if the scheduled changes are being implemented. Pay attention to any error messages or connectivity alerts. You can also use the app to check the device’s status. Look for notifications or alerts that indicate any issues. If everything appears in order, you can be confident that your thermostat is properly connected to your WiFi. Have you ever faced issues connecting smart devices to your network? What steps helped you resolve them? Share your experiences in the comments below!Using The Honeywell App
Easily connect your Honeywell thermostat to Wi-Fi using the Honeywell app. Follow the step-by-step instructions within the app. Control your home’s temperature remotely.
Connecting your Honeywell thermostat to Wi-Fi can be a game-changer for your home automation. It offers remote control, scheduling flexibility, and energy efficiency. One of the easiest ways to set this up is by using the Honeywell app. This guide will walk you through the steps to ensure a seamless connection.Downloading The App
First things first, you need the Honeywell app on your smartphone. It’s available for both iOS and Android devices. Simply go to the App Store or Google Play Store and search for “Honeywell Home.” Once you locate the app, tap the download button. The app is free and should install quickly. After installation, open the app and create an account if you haven’t already.Pairing Your Thermostat
Now that you have the app, let’s move on to pairing your thermostat. Ensure your thermostat is powered on and in Wi-Fi setup mode. The exact steps may vary depending on your model, so refer to your user manual if needed. Open the Honeywell app and log in to your account. Navigate to the “Add Device” option, usually found in the main menu. Follow the on-screen instructions. The app will guide you through connecting your thermostat to your Wi-Fi network. You will need your Wi-Fi password handy. After successfully connecting, you can now control your thermostat remotely. Adjust the temperature, set schedules, and even monitor energy usage—all from your smartphone. Isn’t it convenient to manage your home’s climate control without getting up from your couch? What are you waiting for? Get your Honeywell thermostat connected today and enjoy the comfort of a smart home.Advanced Features
Connecting your Honeywell thermostat to WiFi opens up a world of advanced features. These features make managing your home’s climate easier and more efficient. Let’s explore some of these impressive functionalities.
Remote Control
With WiFi connectivity, you can control your thermostat from anywhere. Use your smartphone, tablet, or computer. Adjust the temperature before you get home. Ensure a comfortable environment upon your arrival.
This convenience adds flexibility to your daily routine. Forgot to turn off the heating? No problem. Simply access the thermostat app and make the necessary changes. Remote control helps save energy and provides peace of mind.
Energy Savings Insights
Your Honeywell thermostat provides detailed energy usage reports. These insights help you understand your consumption patterns. Identify ways to reduce energy use and save money.
The thermostat analyzes data and suggests optimal settings. These settings maximize comfort and efficiency. Track your progress over time and see the impact of your adjustments. Energy savings insights empower you to make informed decisions.
Maintenance Tips
Connecting your Honeywell thermostat to WiFi ensures better control of home temperatures. First, access the thermostat’s menu. Then, select the WiFi setup option and follow the on-screen instructions to connect.
Connecting your Honeywell thermostat to WiFi ensures you can control your home’s temperature from anywhere. But, just like any other smart device, your thermostat needs regular upkeep. Let’s dive into some simple yet effective maintenance tips.Regular Updates
Keeping your Honeywell thermostat’s firmware up-to-date is crucial. These updates often include performance improvements and security patches. Check the Honeywell app periodically for notifications about new updates. Updating your thermostat regularly can prevent minor issues from becoming major problems. It also ensures your device works efficiently. Make it a habit to look for updates at least once a month.Troubleshooting Help
Even the best devices can encounter hiccups. If your Honeywell thermostat isn’t working correctly, don’t panic. Most issues can be resolved with simple troubleshooting steps. First, check your WiFi connection. Ensure your router is working and your thermostat is within range. If the connection is fine, try restarting your thermostat. If these steps don’t help, consult the Honeywell support website. They offer a wealth of information and guides. You can also contact their customer service for more personalized assistance. Regular updates and knowing how to troubleshoot common issues can keep your Honeywell thermostat running smoothly. Have you encountered any problems with your smart devices? How did you solve them? Share your experiences in the comments!Frequently Asked Questions
How Do I Reset My Honeywell Thermostat To A New Wifi?
To reset your Honeywell thermostat to a new WiFi, press “Menu”, select “WiFi Setup”, and follow on-screen instructions. Reconnect to your new network.
How Do I Reconnect My Smart Thermostat To Wifi?
Open the thermostat menu, select WiFi settings, choose your network, and enter the password. Follow the on-screen instructions.
How Do I Connect My Thermostat To My Router?
To connect your thermostat to your router, access the thermostat’s settings. Select Wi-Fi, find your network, and enter your password. Follow the on-screen instructions to complete the setup.
How To Tell If Your Honeywell Thermostat Is Wifi?
Check the model number on your Honeywell thermostat. WiFi-enabled models usually have “WiFi” or “Smart” in their name.
Conclusion
Connecting your Honeywell thermostat to WiFi is simple and quick. Follow the steps outlined in the guide. Enjoy remote control and energy savings. Ensure your thermostat stays updated for best performance. Troubleshooting tips help solve common issues. Now, you can manage your home’s comfort from anywhere.
Your smart home journey just got easier. Happy connecting!
Check Best Thermostat Pricing in Amazon
** As an Amazon Associate, I earn from qualifying purchases.