

Check Best Thermostat Pricing in Amazon
** As an Amazon Associate, I earn from qualifying purchases.
Cleaning a thermostat is simple yet essential. A clean thermostat helps ensure accurate temperature readings.
Dust and grime can affect the efficiency of your thermostat. This can lead to higher energy bills and an uncomfortable home. Regular maintenance can prevent these issues. Whether you have a digital or manual thermostat, learning how to clean it can save you money and improve comfort.
With a few basic tools and steps, you can keep your thermostat functioning well. In this guide, we will show you how to clean your thermostat effectively. Follow these steps to maintain a clean and efficient thermostat in your home.
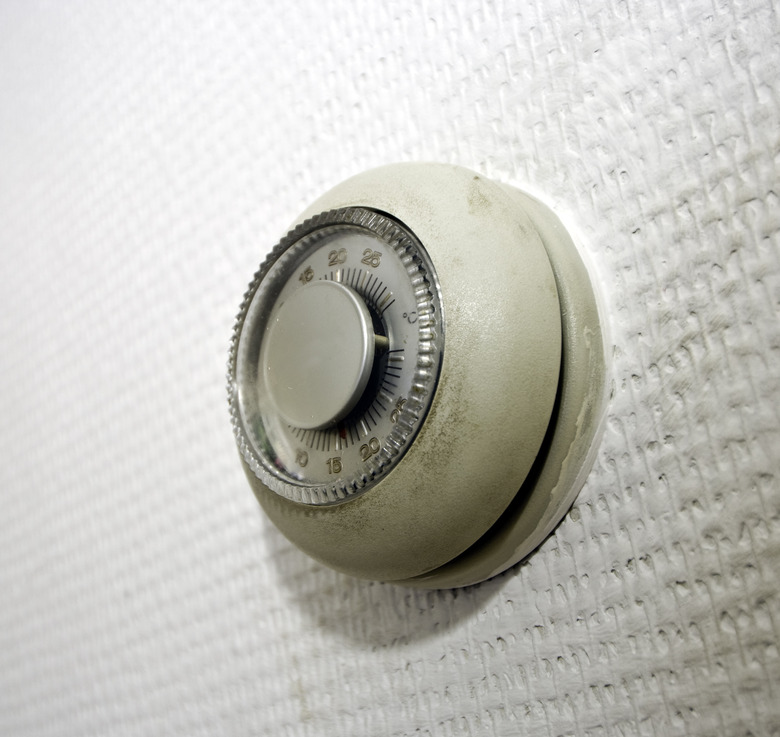
Credit: www.hunker.com
Preparation
Gather a soft cloth, mild detergent, and a small brush. Ensure the thermostat is turned off before cleaning. Gently wipe the surface and use the brush for small crevices.
Cleaning your thermostat may not be at the top of your to-do list, but it’s crucial for maintaining its efficiency. Dust and grime can accumulate and affect its performance. Let’s dive into the preparation steps to ensure you clean your thermostat effectively. ###Gather Supplies
First, gather the necessary supplies. You’ll need a soft cloth, a small brush, and a mild detergent. Make sure you have a screwdriver handy if your thermostat has a cover that needs to be removed. A can of compressed air can also be useful for hard-to-reach spots. ###Safety Measures
Before you start, ensure your safety. Turn off the power to your thermostat to avoid any electrical issues. It’s also a good idea to wash your hands to prevent transferring oils or dirt to the device. If your thermostat is high up, use a stable ladder. ###Gather Supplies
First, gather the necessary supplies. You’ll need a soft cloth, a small brush, and a mild detergent. Make sure you have a screwdriver handy if your thermostat has a cover that needs to be removed. A can of compressed air can also be useful for hard-to-reach spots. ###Safety Measures
Before you start, ensure your safety. Turn off the power to your thermostat to avoid any electrical issues. It’s also a good idea to wash your hands to prevent transferring oils or dirt to the device. If your thermostat is high up, use a stable ladder. Have you ever noticed dust build-up on your thermostat? Share your experiences in the comments below.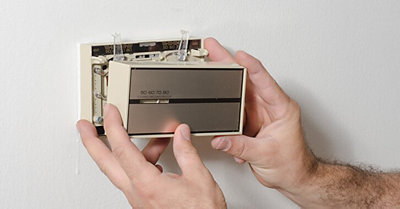
Credit: www.servicechampions.net
Power Off
Before you clean your thermostat, you need to power it off. This step is crucial for safety. It prevents any electrical mishaps. Follow these steps to ensure your thermostat is safely powered off.
Turn Off Thermostat
First, turn off your thermostat. Look for the power button or switch. It is usually on the front or side. Press or flip it to the “off” position. This stops the device from controlling your heating or cooling system.
Disconnect Power Source
Next, disconnect the power source. Locate your home’s circuit breaker. Find the breaker that controls the thermostat. Switch it to the “off” position. This cuts off all electrical power to the thermostat.
Now, your thermostat is safely powered off. You can proceed to clean it without any risk.
Remove Cover
To clean a thermostat, first remove the cover carefully. This exposes the internal components for easy access.
Removing the cover of your thermostat is a crucial step in the cleaning process. It allows you to access the internal components that may have accumulated dust and debris. Properly removing the cover ensures that you don’t damage any delicate parts inside. Here’s a clear guide to help you do it right.Locate Screws
First, find the screws that hold the thermostat cover in place. They are usually located at the top and bottom or on the sides. Depending on your thermostat model, you may need a small Phillips head screwdriver or a flathead screwdriver. Check if the screws are visible or hidden under a decorative panel. If they are hidden, gently pry off the panel to access the screws. This step ensures you don’t force the cover off, which could lead to damage.Careful Removal
Once you’ve located and unscrewed the screws, carefully remove the cover. Hold it firmly and pull it straight out. Avoid twisting or applying too much pressure, as this can damage the wiring inside. If you encounter resistance, double-check that all screws are fully removed. Sometimes, there may be clips that need to be gently disengaged. Remember, a gentle approach prevents accidental breakage. By taking these steps, you ensure a smooth and safe removal of your thermostat cover. Have you ever struggled with removing a thermostat cover? Share your experiences in the comments below!Dust Removal
Cleaning a thermostat involves gently dusting the device with a soft brush. Use a slightly damp cloth for any stubborn grime. Regular cleaning ensures accurate temperature readings.
Cleaning your thermostat is crucial for maintaining its efficiency and extending its lifespan. Dust accumulation can interfere with its performance. Removing dust is a simple yet often overlooked task that can ensure your thermostat functions optimally. Let’s dive into the essential steps for dust removal.Use A Soft Brush
A soft brush is your best friend when it comes to cleaning delicate components of a thermostat. Gently sweep the brush across the surface to remove dust without causing damage. I once used an old toothbrush, and it worked perfectly! This tool allows you to reach into crevices where dust tends to hide. Make sure to brush around the edges and any visible sensors. These areas are prone to collecting dust. Regular cleaning, even once a month, can make a huge difference in performance.Avoid Damaging Components
While cleaning, it’s crucial to be gentle. The internal components of a thermostat are delicate. Avoid using excessive force or sharp objects that can cause damage. I learned this the hard way when I accidentally knocked a wire loose. Use the brush lightly and avoid pressing down too hard. Your goal is to remove dust, not rearrange or harm the internal parts. If you notice any stubborn dirt, consider using a can of compressed air to blow it away. Have you ever thought about how often you should clean your thermostat? Keeping it dust-free can lead to more accurate temperature readings and efficient energy use. Take a few minutes every month to give it a quick brush and keep your thermostat in top shape.Clean Contacts
Cleaning the contacts of your thermostat is an essential step to ensure it functions correctly. Over time, dust and grime can build up, causing your thermostat to misread temperatures. This can lead to an inefficient heating or cooling system. By keeping the contacts clean, you ensure that your thermostat is providing accurate readings and operating smoothly.
Use Contact Cleaner
Contact cleaner is a quick and effective way to clean your thermostat contacts. It’s specifically designed to remove dirt, oil, and other contaminants without damaging the electronic components. You can find contact cleaner at most hardware stores.
Before you start, make sure to turn off the power to your thermostat. This is a crucial safety step. Spray the contact cleaner directly onto the contacts. Let it sit for a few minutes to break down any build-up.
Proper Technique
After applying the contact cleaner, it’s time to clean the contacts properly. Use a soft, lint-free cloth or a cotton swab to gently wipe the contacts. Be careful not to apply too much pressure, as this can damage the delicate components.
If the build-up is stubborn, you can use a small brush with soft bristles to scrub gently. Make sure all the residue is removed. Once you’re done, let the contacts dry completely before turning the power back on.
Have you ever noticed your thermostat acting up? Give this cleaning method a try. You might be surprised at how such a simple task can make a big difference. Do you have any tips for cleaning electronics? Share them in the comments below!
Inspect Wiring
Inspecting the wiring of your thermostat is a crucial step in ensuring it works efficiently. Over time, wires can become worn or disconnected, leading to inconsistent temperature regulation. By taking a few minutes to inspect the wiring, you can save yourself a lot of hassle down the line.
Check For Wear
First, turn off the power to your thermostat to avoid any electrical mishaps. Carefully remove the thermostat cover to expose the wiring. Look for any signs of wear such as frayed wires, discoloration, or corrosion.
If you see any damaged wires, they need to be replaced immediately. Damaged wiring can lead to inefficiencies and even pose a fire hazard. It’s better to address these issues sooner rather than later.
Secure Connections
After checking for wear, ensure all wire connections are secure. Loose connections can cause your thermostat to malfunction. Gently tug on each wire to see if it’s firmly attached.
Check Best Thermostat Pricing in Amazon
** As an Amazon Associate, I earn from qualifying purchases.
If you find any loose wires, use a screwdriver to tighten the connections. Make sure each wire is properly seated in its terminal. A secure connection ensures your thermostat operates smoothly and accurately.
Have you ever noticed your thermostat acting up? It might be due to something as simple as a loose wire. Taking the time to inspect and secure the wiring can make a big difference in how well your thermostat works. Don’t overlook this simple yet essential step!
Reassemble
After cleaning your thermostat, you need to reassemble it correctly. A proper reassembly ensures your device works efficiently. Follow these steps to make sure everything fits back into place securely.
Replace Cover
First, pick up the thermostat cover. Align it with the base. Gently push it back into position. Make sure the cover is sitting correctly. It should fit without any gaps. This helps in protecting the internal components.
Ensure Tight Fit
Next, check if the cover is tightly secured. Press around the edges. The cover should not move or wobble. A tight fit ensures no dust or debris enters. It keeps the thermostat clean and functional.
Power On
Once you’ve carefully cleaned your thermostat, it’s time to power it back on. This step is crucial because it allows you to ensure that everything is functioning correctly. You’ll want to be thorough to avoid any disruptions in your home’s heating or cooling system.
Reconnect Power
First, you’ll need to reconnect the power. Head back to your electrical panel or fuse box, and flip the switch you turned off earlier. If you have a battery-operated thermostat, simply reinstall the batteries.
Ensure everything is secure and in its place. Loose connections can cause the thermostat to malfunction, which can be frustrating.
Take a moment to double-check that the thermostat is mounted correctly on the wall. A slight tilt can affect its performance.
Test Functionality
Now, it’s time to test the functionality of your thermostat. Turn on your HVAC system and set the thermostat to a temperature higher or lower than the current room temperature.
Wait a few minutes to see if the system responds. You should hear your heating or cooling system kick in.
If the system doesn’t turn on, you might need to revisit your connections. Ensure everything is properly reconnected and try again.
Cleaning your thermostat can seem like a small task, but it’s vital for its proper operation. Have you ever ignored a seemingly minor household task, only to realize it affected your comfort significantly? Share your experience in the comments!

Credit: www.youtube.com
Frequently Asked Questions
How Do You Clean The Temperature Sensor On A Thermostat?
Turn off the thermostat. Gently remove the cover. Use a soft brush to clean the sensor. Avoid using water or cleaning agents. Reattach the cover and turn the thermostat back on.
How Do You Know When Your Thermostat Is Bad?
A bad thermostat shows erratic temperature readings, frequent cycling, or unresponsive controls. Your HVAC system may struggle to maintain the set temperature.
How Do I Clean The Inside Of My Honeywell Thermostat?
Turn off the power. Gently remove the cover. Use a soft brush or compressed air to clean. Reassemble carefully.
How Do You Clear A Thermostat?
To clear a thermostat, first turn off the power. Remove the cover and locate the reset button. Press and hold it for 5 seconds.
Conclusion
Cleaning a thermostat isn’t difficult. Follow the steps to maintain efficiency. Regular cleaning prevents dust buildup. Keep your thermostat working smoothly. A clean device saves energy and money. Simple maintenance ensures accurate readings. Preserve the lifespan of your thermostat. Routine cleaning avoids future problems.
Enjoy a comfortable home with a well-maintained thermostat. Your efforts make a difference in performance. A clean thermostat means better temperature control. Happy cleaning!
Check Best Thermostat Pricing in Amazon
** As an Amazon Associate, I earn from qualifying purchases.