
Check Best Thermostat Pricing in Amazon
** As an Amazon Associate, I earn from qualifying purchases.
Is your refrigerator not keeping your food as fresh as it should? You might be facing a thermostat issue.
Knowing how to check the thermostat on your refrigerator can save you time, money, and the hassle of spoiled groceries. In this guide, you’ll learn simple, step-by-step ways to test your fridge’s thermostat quickly and easily. By the end, you’ll feel confident in spotting problems early and keeping your fridge running smoothly.
Keep reading to take control of your fridge’s temperature and avoid unexpected breakdowns.

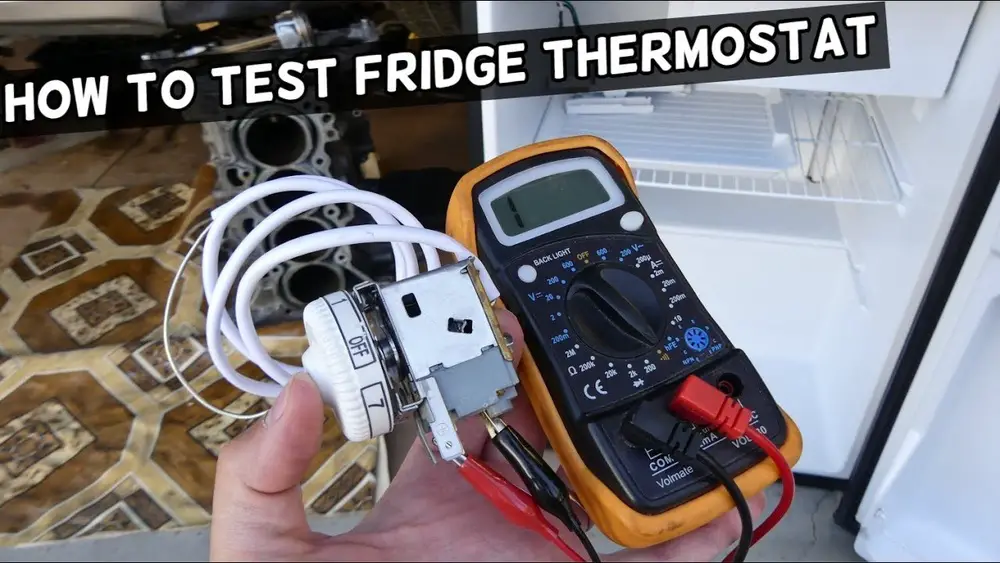
Credit: www.hnkparts.com
Signs Of A Faulty Thermostat
Knowing the signs of a faulty thermostat helps protect your food and save energy. The thermostat controls the fridge temperature. A broken thermostat causes many problems. These signs show you it might be time to check or replace it.
Inconsistent Temperature
The fridge temperature changes often without reason. One moment it feels cold, the next it feels warm. Food may freeze in some parts and spoil in others. This uneven cooling is a clear sign. It means the thermostat is not working right.
Refrigerator Not Cooling
The fridge does not stay cold enough. Even after adjusting settings, the temperature stays high. Food goes bad faster. This problem points to a thermostat that fails to tell the compressor to start cooling.
Frequent Compressor Cycling
The compressor turns on and off too often. This short cycling wastes energy and wears out the compressor. A faulty thermostat gives wrong signals, causing this constant cycling. It should switch the compressor on and off less frequently.
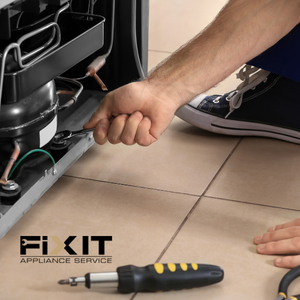
Credit: www.fixitapplianceservice.com
Tools Needed For Testing
Testing a refrigerator thermostat requires a few basic tools. These tools help check if the thermostat works correctly. You do not need many tools, but the right ones make the job easier. Below are the main tools needed for testing a refrigerator thermostat.
Multimeter
A multimeter measures electrical voltage, current, and resistance. It helps check if the thermostat has continuity. Continuity means the thermostat can complete an electrical circuit. Without continuity, the thermostat may be faulty. Using a multimeter is key to accurate testing.
Screwdriver
A screwdriver helps open the refrigerator’s control panel. You need it to reach the thermostat for testing. Most refrigerators use Phillips or flathead screws. Choose the right screwdriver size to avoid damage. It makes removing and replacing parts simple and safe.
Thermometer
A thermometer checks the refrigerator’s temperature. It shows if the thermostat keeps the fridge cold enough. Place the thermometer inside the fridge and watch the reading. If the temperature is too high or low, the thermostat might need adjustment or replacement.
Locating The Thermostat
Finding the thermostat in your refrigerator is the first step to check its settings. The thermostat controls the temperature inside. It helps keep food fresh and safe. Knowing where it is makes adjusting or testing easy. Different refrigerators have thermostats in different spots.
Inside The Refrigerator
Most refrigerators have the thermostat inside the main compartment. Look near the top or side walls. It often looks like a small dial or a slider. Sometimes it has numbers or temperature levels marked. This dial controls how cold the fridge gets. You may need to remove some shelves to see it clearly.
Behind The Control Panel
Some models place the thermostat behind the control panel. This panel is usually at the top inside edge of the fridge door. You might need a screwdriver to open it. Behind the panel, you will find wires and the thermostat dial or sensor. This spot keeps the thermostat safe from damage and moisture.
Testing The Thermostat With A Multimeter
Testing the thermostat with a multimeter helps you find out if it works correctly. The thermostat controls the fridge temperature by turning the cooling system on and off. A faulty thermostat can cause the fridge to stop cooling or freeze the food. Using a multimeter lets you check if the thermostat has electrical continuity, which means it can complete an electric circuit.
Setting The Multimeter
First, set your multimeter to the lowest ohms setting, usually marked as “200 Ω.” This setting measures resistance and helps check continuity. Make sure the multimeter is off before connecting the probes. Attach the black probe to the common (COM) port and the red probe to the port marked for resistance (Ω).
Disconnecting Power
Unplug the refrigerator from the power outlet. This step is important for safety. Never test electrical parts while the fridge is powered. After unplugging, locate the thermostat inside the fridge or behind the control panel. Remove the panel or cover carefully to access the thermostat terminals.
Checking Continuity
Touch the multimeter probes to the thermostat terminals. The order does not matter. If the thermostat is good, the multimeter will show a reading close to zero ohms. This means the circuit is complete. If the meter shows no change or infinite resistance, the thermostat is faulty. Replace it to fix cooling problems.
Adjusting The Thermostat
Adjusting the thermostat on your refrigerator is a simple step to keep your food fresh. It controls the temperature inside the fridge. Setting it right saves energy and prevents spoilage.
Check Best Thermostat Pricing in Amazon
** As an Amazon Associate, I earn from qualifying purchases.
Small changes can make a big difference. Pay attention to how the fridge reacts after each adjustment. This helps you find the perfect setting for your needs.
Turning The Dial
Locate the thermostat dial inside the fridge. It usually has numbers or a cold-to-coldest scale. Turn the dial slowly one notch at a time. Avoid large jumps to prevent freezing or warming.
Use a gentle touch. Most dials click or stop at certain points. Stop when you reach the desired level.
Monitoring Temperature Changes
After adjusting, wait at least 24 hours. The fridge needs time to reach the new temperature. Check the temperature with a fridge thermometer for accuracy.
Look for signs like frost buildup or warm spots. These indicate if the setting is too low or high. Adjust again if necessary, repeating the process.
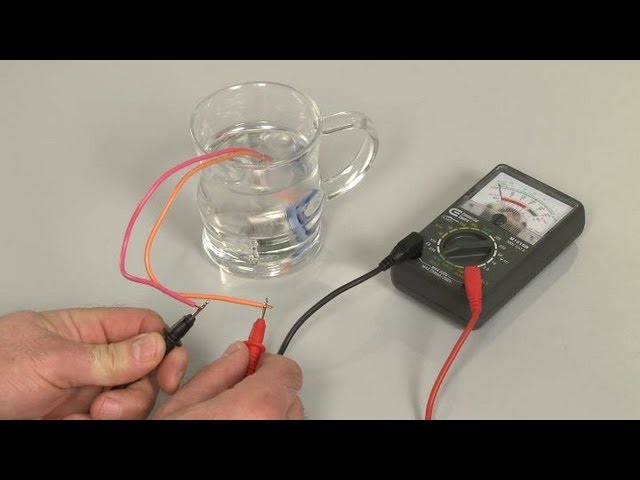
Credit: www.youtube.com
When To Replace The Thermostat
Knowing when to replace your refrigerator’s thermostat is key to keeping food fresh. A broken thermostat can cause temperature problems. It may lead to spoiled food or higher energy bills. Regular checks help spot issues early. Acting on signs of damage can save money and hassle.
Signs Of Damage
Look for these signs to know if the thermostat needs replacement. The fridge is too cold or too warm. Temperature changes often without reason. The compressor runs constantly or not at all. Strange noises come from the fridge. Ice builds up in unusual places. The fridge light does not turn off. These symptoms show the thermostat may be faulty.
Cost Considerations
Thermostat replacement costs vary. Parts usually cost between $20 and $100. Labor charges depend on service providers. Compare prices before hiring a technician. Sometimes, repairing other fridge parts may cost more. Consider replacing the whole fridge if it is old. Balancing repair costs and fridge age is important.
Safety Tips During Inspection
Checking your refrigerator’s thermostat is important for its proper function. Safety during this task is a must. Working with electrical parts can be risky without care. Follow these tips to stay safe while inspecting the thermostat.
Unplugging The Refrigerator
Always unplug the refrigerator before starting the inspection. This stops electricity from flowing. It protects you from electric shocks. Unplugging also prevents damage to the fridge parts.
Find the power cord at the back or side. Pull the plug out gently. Do not yank the cord. Wait a few minutes after unplugging before you touch anything inside.
Handling Electrical Components
Be careful when touching wires or electrical parts. Use dry hands to avoid shocks. Avoid touching metal parts directly. Use tools with insulated handles if needed.
Do not force any connections. Loose wires can cause short circuits. Check for signs of damage like cracks or burns. If unsure, call a professional for help.
Frequently Asked Questions
How Do I Test My Refrigerator Thermostat?
To test your refrigerator thermostat, turn it to the coldest setting. Listen for a click, indicating it’s working. Use a thermometer inside to check the temperature after 24 hours. If the temperature is stable and appropriate, the thermostat is functioning well.
What Are Signs Of A Faulty Refrigerator Thermostat?
Signs include inconsistent temperatures, the fridge not cooling, or running constantly. If you notice food spoiling quickly or frost buildup, the thermostat may be faulty. These issues often indicate the thermostat is not regulating temperature properly.
Can I Check The Thermostat Without Tools?
Yes, you can check by adjusting the temperature dial and listening for clicks. Observe if the compressor starts or stops accordingly. If no clicks or changes occur, the thermostat might need further testing with tools or replacement.
How Do I Adjust The Refrigerator Thermostat Correctly?
Turn the dial to a medium setting, usually marked 3 or 4. Avoid setting it too cold to prevent freezing food or too warm to avoid spoilage. Monitor the temperature inside and adjust gradually for optimal cooling.
Conclusion
Checking your refrigerator’s thermostat helps keep food fresh and safe. A simple test can show if it works right. Adjust settings if the fridge feels too warm or too cold. Regular checks save money and avoid food spoilage. Stay alert to unusual fridge behavior.
Small steps make a big difference in home care. Keep your fridge running smoothly with these easy tips.
Check Best Thermostat Pricing in Amazon
** As an Amazon Associate, I earn from qualifying purchases.