
Check Best Thermostat Pricing in Amazon
** As an Amazon Associate, I earn from qualifying purchases.
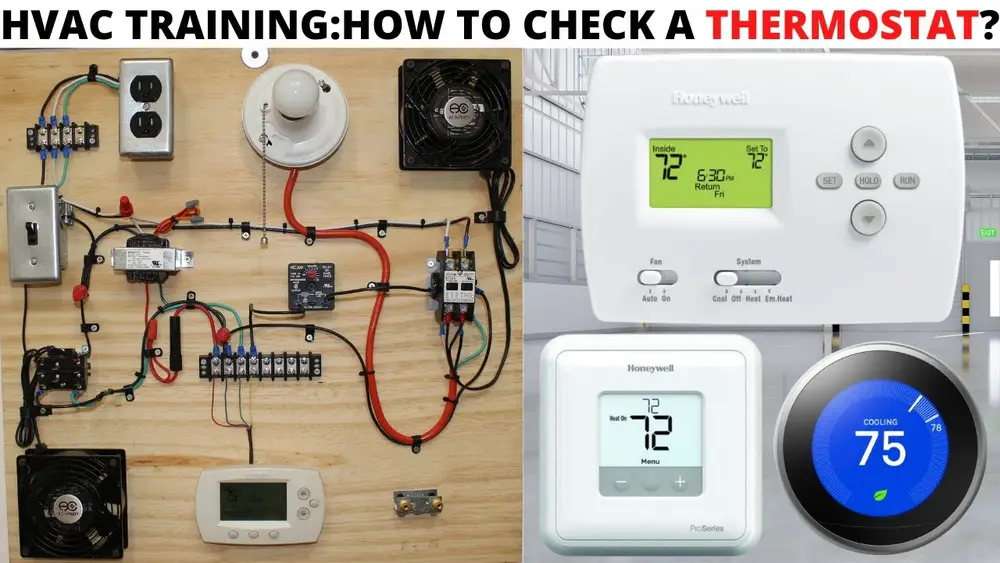
Are you sure your home thermostat is working the way it should? A faulty thermostat can make your heating or cooling system less efficient, leading to higher energy bills and uncomfortable rooms.
Checking your thermostat is easier than you might think, and doing it regularly can save you money and keep your home cozy all year round. You’ll learn simple steps to test your thermostat, spot common problems, and know when it’s time to call a professional.
Keep reading to take control of your home’s comfort and avoid costly surprises.
Tools Needed
Checking your home thermostat is simple with the right tools. These tools help you test and fix common problems. You do not need many items, just a few basics. Using these tools makes the process safe and efficient.
Thermostat Screwdriver
A small screwdriver is essential for opening the thermostat cover. Most thermostats have tiny screws. A flathead or Phillips screwdriver usually works well. It helps you reach the wiring and internal parts.
Multimeter
A multimeter measures electrical current and voltage. It shows if the thermostat sends the correct signals. This tool ensures wires and circuits work properly. It is a handy device for diagnosing issues.
Batteries
Many thermostats run on batteries. Have fresh batteries ready to replace old ones. Weak batteries can cause the thermostat to stop working. Changing batteries often fixes simple problems.
Level Tool
A small level helps check if the thermostat is mounted straight. An uneven thermostat may not read temperature correctly. This tool ensures your thermostat stays balanced on the wall.
Cleaning Brush
Dirt and dust affect thermostat performance. Use a soft brush to clean inside parts gently. This tool keeps the thermostat free from debris. It helps maintain accuracy and extends lifespan.
Prepare The Thermostat
Preparing your thermostat is the first step to check if it works correctly. This process keeps you safe and protects the device. Take your time and follow each step carefully.
Turn Off Power
Start by turning off the power to your heating and cooling system. Locate the circuit breaker or fuse box. Switch off the breaker that controls the thermostat. This stops electricity flow and prevents shocks.
Double-check that the thermostat screen goes dark. It means power is off and safe to proceed. Never remove the thermostat cover while the power is on.
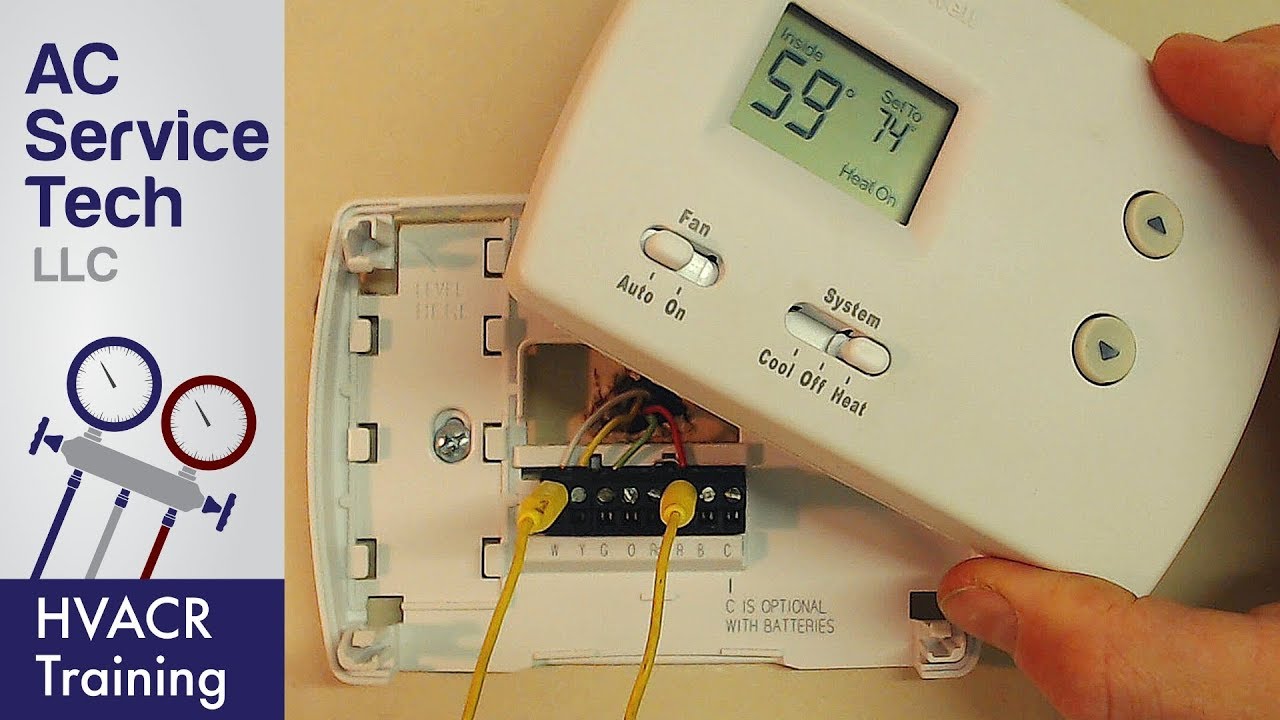
Remove Thermostat Cover
Next, gently remove the thermostat cover. Most covers snap off or lift up easily. Use your fingers or a small flat tool to pry it open. Avoid using force to prevent damage.
Once removed, you can see the wiring and internal parts. Keep the cover in a safe place to avoid losing it. This step helps you inspect the thermostat’s condition and clean if needed.
Check The Thermostat Settings
Checking your thermostat settings is the first step in making sure your heating or cooling system works well. Incorrect settings can cause discomfort and waste energy. It only takes a few minutes to review these settings and fix any problems.
Start by looking closely at the current temperature setting and the mode the thermostat is in. Adjusting these can improve your home’s comfort quickly and easily.
Verify Temperature Setting
Look at the temperature displayed on your thermostat. This shows the temperature your system tries to reach. Make sure it matches your comfort needs. For heating, the setting should be warm enough to keep you cozy. For cooling, set it cooler to stay comfortable during hot days.
Sometimes the thermostat may show a different temperature than the room actually feels. Use a separate room thermometer to compare. Adjust the thermostat if needed. This helps your system work efficiently and keeps your home comfortable.
Set To Heating Or Cooling Mode
Check the mode your thermostat is set to. It should be set to “Heating” during cold months and “Cooling” in warmer months. Setting the wrong mode means your system will not work properly. For example, if it is set to cooling in winter, your home will stay cold.
Switch the mode using the control buttons or dial on your thermostat. Some thermostats have an “Auto” mode that changes between heating and cooling automatically. Use this setting if available for easy comfort all year.
Credit: www.youtube.com
Test Temperature Accuracy
Testing your thermostat’s temperature accuracy is key to keeping your home comfortable. A thermostat that reads wrong can make your heating or cooling run too long or not enough. Checking its accuracy is simple and helps avoid wasted energy and uneven temperatures.
Use A Separate Thermometer
Start by getting a reliable thermometer. A digital or mercury thermometer works well. Place it near your thermostat but not touching it. Let it sit for about 10 minutes to read the room temperature. This step gives you a fair comparison point.
Compare Readings
Look at the temperature on your thermostat and the separate thermometer. See if the numbers match or differ. A small difference, about 1 to 2 degrees, is normal. A bigger gap means your thermostat may need recalibration or replacement.
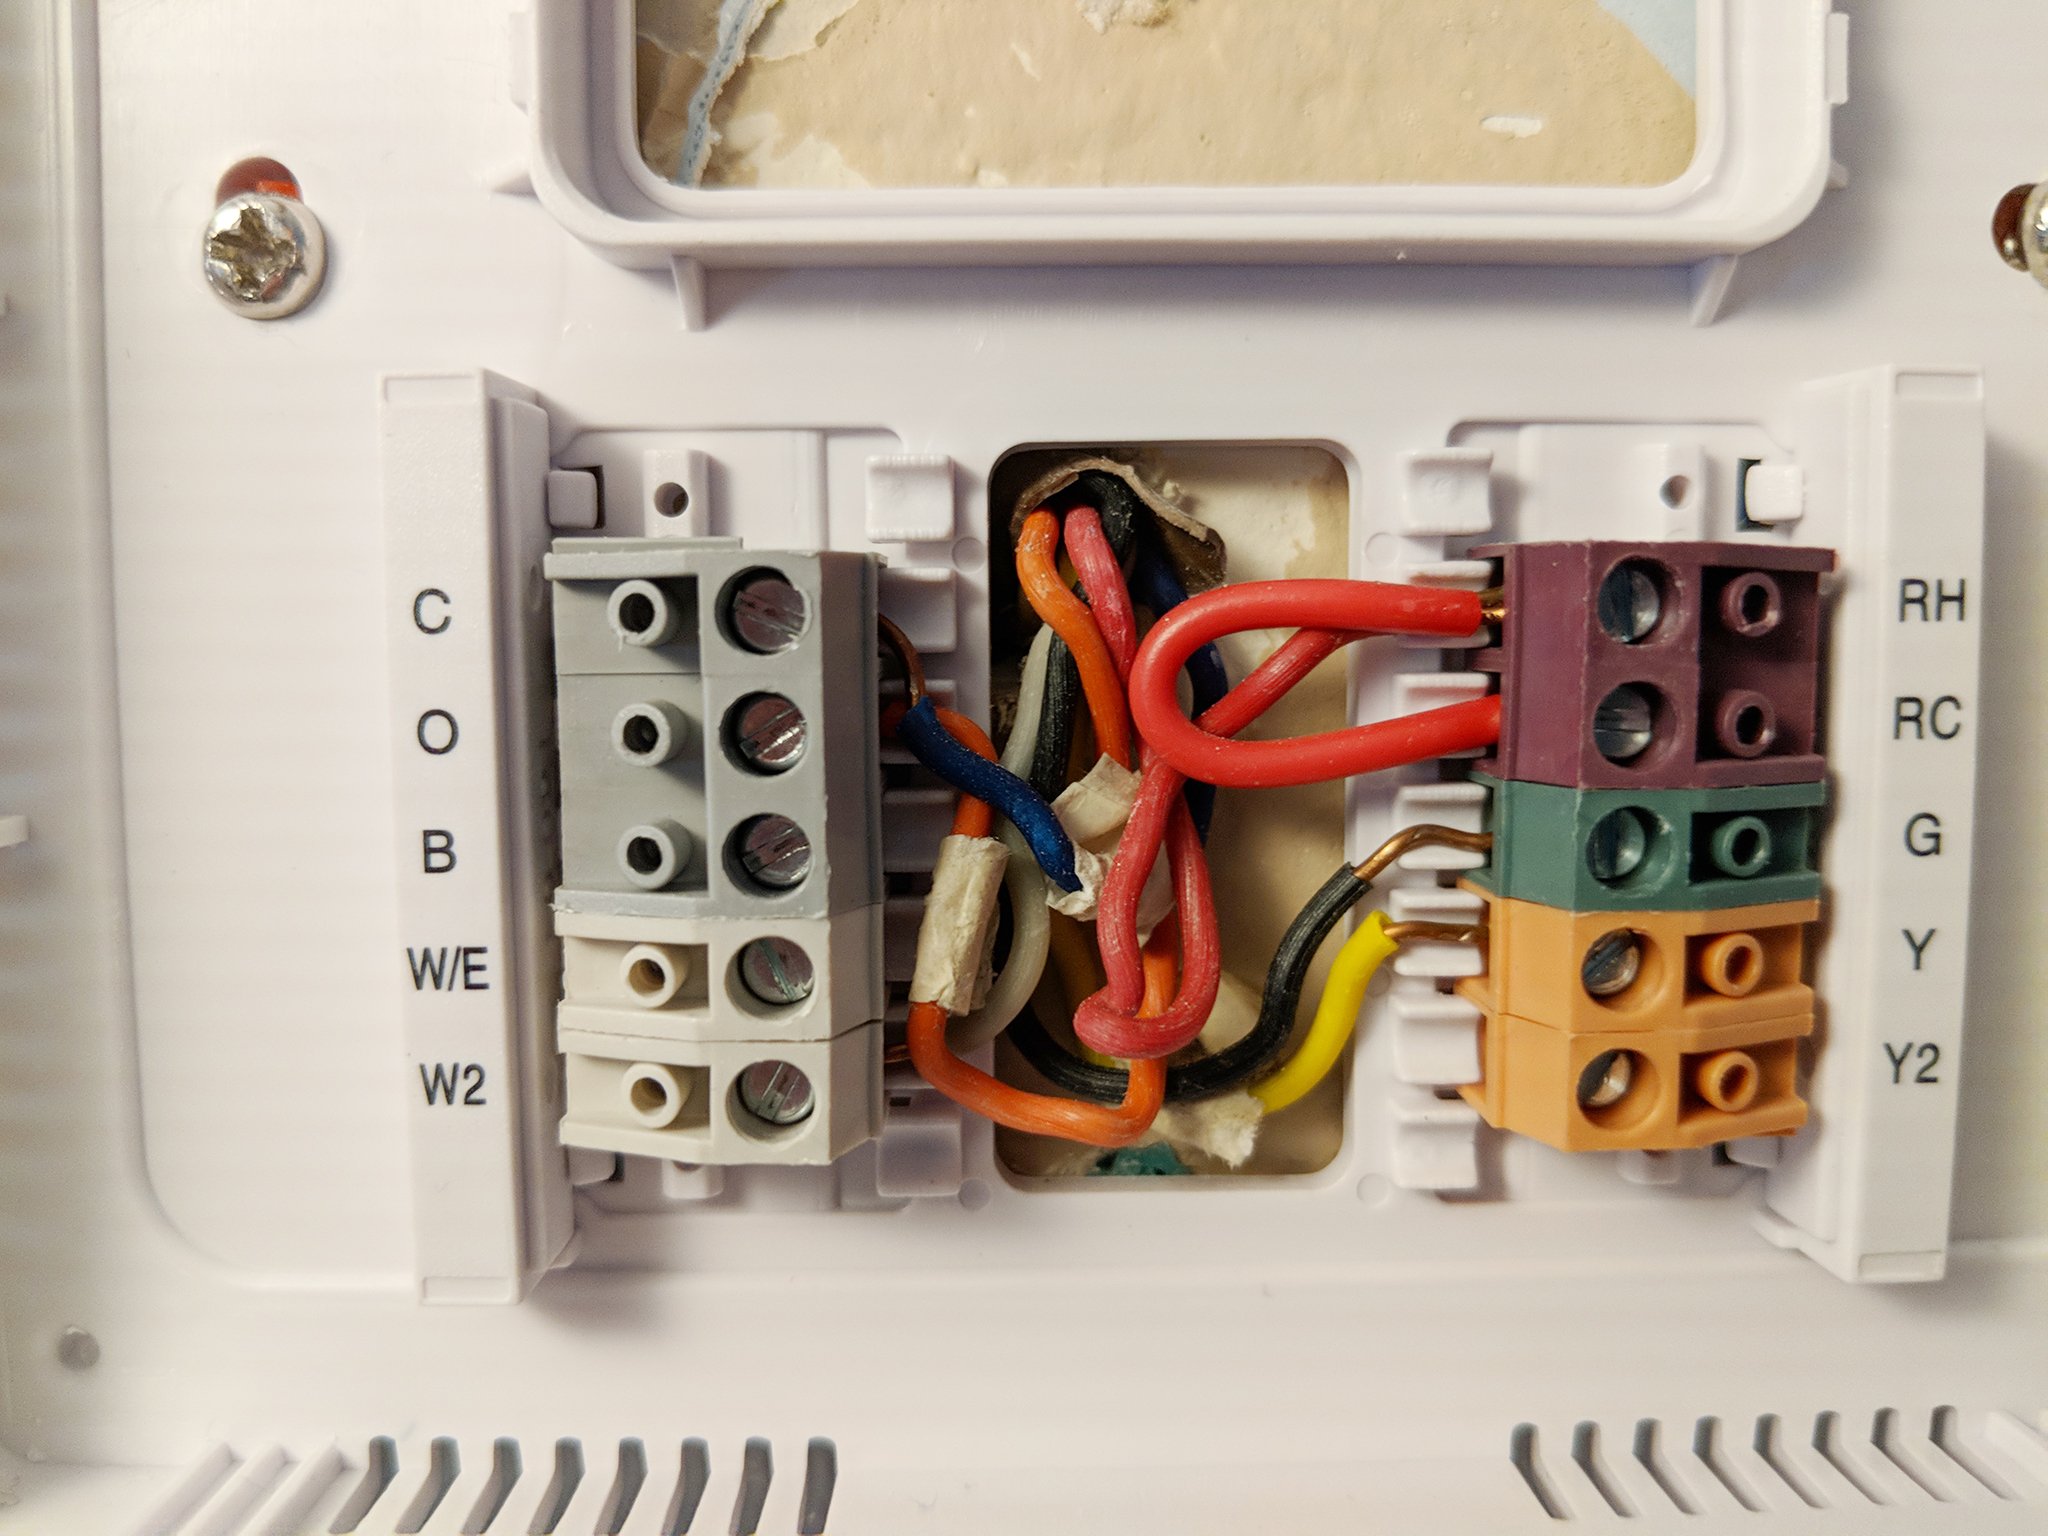
Inspect Wiring And Connections
Inspecting the wiring and connections of your home thermostat is important. It helps ensure the thermostat works well and controls your home’s temperature properly.
Loose wires or corrosion can cause problems. These issues might stop the thermostat from turning on or sending signals to your heating or cooling system.
Look For Loose Wires
Start by turning off the power to your thermostat. Remove the cover to see the wiring inside. Check if any wires are loose or disconnected. Loose wires can prevent the thermostat from working correctly. Gently push wires back into their terminals if needed. Make sure each wire is secure and tight.
Check For Corrosion
Corrosion looks like a white or greenish powder on wires and terminals. It happens over time due to moisture. Corrosion can stop the electrical connection from working. Clean any corrosion you find with a small brush or cloth. If corrosion is severe, replace the affected wires or terminals. Keep connections clean and dry to avoid future problems.
Calibrate The Thermostat
Calibrating the thermostat ensures your home stays comfortable. It helps the thermostat show the right temperature. This can save energy and lower bills. Checking calibration is easy and takes only a few steps.
Check Best Thermostat Pricing in Amazon
** As an Amazon Associate, I earn from qualifying purchases.
Adjust Temperature Calibration
Start by comparing your thermostat’s reading to a reliable thermometer. Place the thermometer near the thermostat. Wait a few minutes for a stable reading. Note any difference between the two temperatures.
Most thermostats have a calibration setting. Find this in the settings menu or inside the device. Adjust the temperature reading to match the thermometer. Make small changes, like one or two degrees. Check again to see if the reading is accurate.
Perform A Reset If Needed
If the thermostat still shows wrong temperatures, try a reset. Resetting clears errors and restores factory settings. Look for a reset button or option in the menu. Hold the button for a few seconds to reset.
After resetting, set the desired temperature again. Check the thermostat reading against the thermometer. Repeat calibration steps if needed. This simple reset often fixes stubborn issues fast.
Replace Batteries
Replacing batteries in your home thermostat is a simple task that keeps your system running smoothly. Many thermostats rely on batteries to power their display and internal functions. Dead or weak batteries can cause the thermostat to stop working or show wrong temperatures. Regular battery checks help avoid these problems and keep your home comfortable.
How To Open Your Thermostat
Start by turning off your thermostat. Find the battery cover, usually on the back or bottom of the device. Gently remove the cover. Some covers slide off, others may need a small push or a screwdriver. Be careful not to break any parts.
Which Batteries To Use
Check the type of batteries your thermostat needs. Most use AA or AAA alkaline batteries. Some models require a 9-volt battery. Use fresh batteries of the correct type to ensure proper operation. Avoid using old or rechargeable batteries unless specified.
Replacing The Batteries
Remove old batteries carefully. Insert new batteries with the positive and negative ends matching the markings inside the battery compartment. Make sure they fit snugly and do not move around. Replace the battery cover securely to protect the batteries.
Testing Your Thermostat
Turn your thermostat back on. Check if the screen lights up and shows the correct temperature. Test the heating or cooling functions to ensure they work. If the thermostat still has issues, double-check the battery installation or try new batteries.
Credit: www.androidcentral.com
When To Call A Professional
Knowing when to call a professional for your home thermostat saves time and stress. Some problems require expert skills to fix safely and correctly.
Trying to repair complex issues alone can cause more damage. A professional has the right tools and knowledge to handle these tasks.
Thermostat Not Responding
If your thermostat does not respond to any commands, it may need professional help. This issue might involve internal wiring or circuit problems.
Simple battery replacement won’t solve this problem. A technician can diagnose and fix the root cause.
Frequent System Short Cycling
When your heating or cooling system turns on and off too often, it’s called short cycling. This issue can damage your HVAC system.
A professional can inspect your thermostat settings and system to stop short cycling. Avoid ignoring this problem to prevent costly repairs.
Inconsistent Temperature Readings
Your thermostat should give accurate temperature readings. If the room feels warmer or cooler than the display shows, call an expert.
Incorrect readings may result from sensor issues or poor installation. A technician will test and adjust your thermostat properly.
Thermostat Display Is Blank Or Flickering
A blank or flickering display signals electrical or internal thermostat problems. This issue can make it hard to control your home temperature.
Professional repair or replacement is often necessary. They ensure safe handling of electrical parts and accurate fixes.
Credit: qcmechanicalhvac.com
Frequently Asked Questions
How Do I Test If My Thermostat Is Working?
To test your thermostat, set it to a temperature above room level. Listen for your HVAC system to activate. If it doesn’t, check the batteries or wiring. This quick test confirms if the thermostat is functioning properly.
Why Is My Thermostat Not Heating Or Cooling?
A thermostat may fail due to dead batteries, incorrect settings, or wiring issues. Ensure it’s set to the right mode and temperature. Also, check for power supply problems. These common fixes resolve most heating or cooling failures.
How Often Should I Check My Home Thermostat?
It’s best to check your thermostat every season. Inspect settings, battery life, and responsiveness. Regular checks ensure your system runs efficiently and prevents unexpected breakdowns. This simple routine saves energy and extends thermostat lifespan.
Can A Dirty Thermostat Affect Temperature Control?
Yes, dust and dirt can cause inaccurate readings. Clean the thermostat gently with a soft brush or cloth. Keeping it dust-free improves temperature control and system performance. Regular cleaning helps maintain comfort in your home.
Conclusion
Checking your home thermostat is simple and important. It helps keep your home comfortable. Regular checks save energy and lower bills. Make sure the settings match your needs. Watch for unusual signs like wrong temperatures or noises. Clean the thermostat gently to keep it working well.
Small steps can prevent big problems later. Stay in control of your heating and cooling. A working thermostat means a happy, cozy home. Keep an eye on it often for best results.
Check Best Thermostat Pricing in Amazon
** As an Amazon Associate, I earn from qualifying purchases.