
Check Best Thermostat Pricing in Amazon
** As an Amazon Associate, I earn from qualifying purchases.
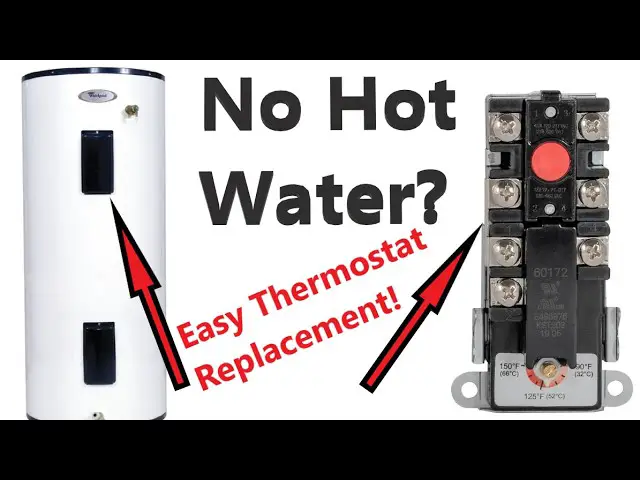
Changing a water heater thermostat might seem complex. But with the right guide, it’s manageable.
A malfunctioning thermostat can lead to cold showers or scalding water. Knowing how to change it yourself can save money and time. This guide will walk you through the process, making it simple and clear. Understanding your water heater’s thermostat is crucial for maintaining a comfortable and safe home.
Whether you’re a seasoned DIYer or a beginner, this step-by-step approach ensures you can tackle the task with confidence. Let’s dive in and learn how to change a water heater thermostat effectively, ensuring your hot water supply remains consistent and reliable.
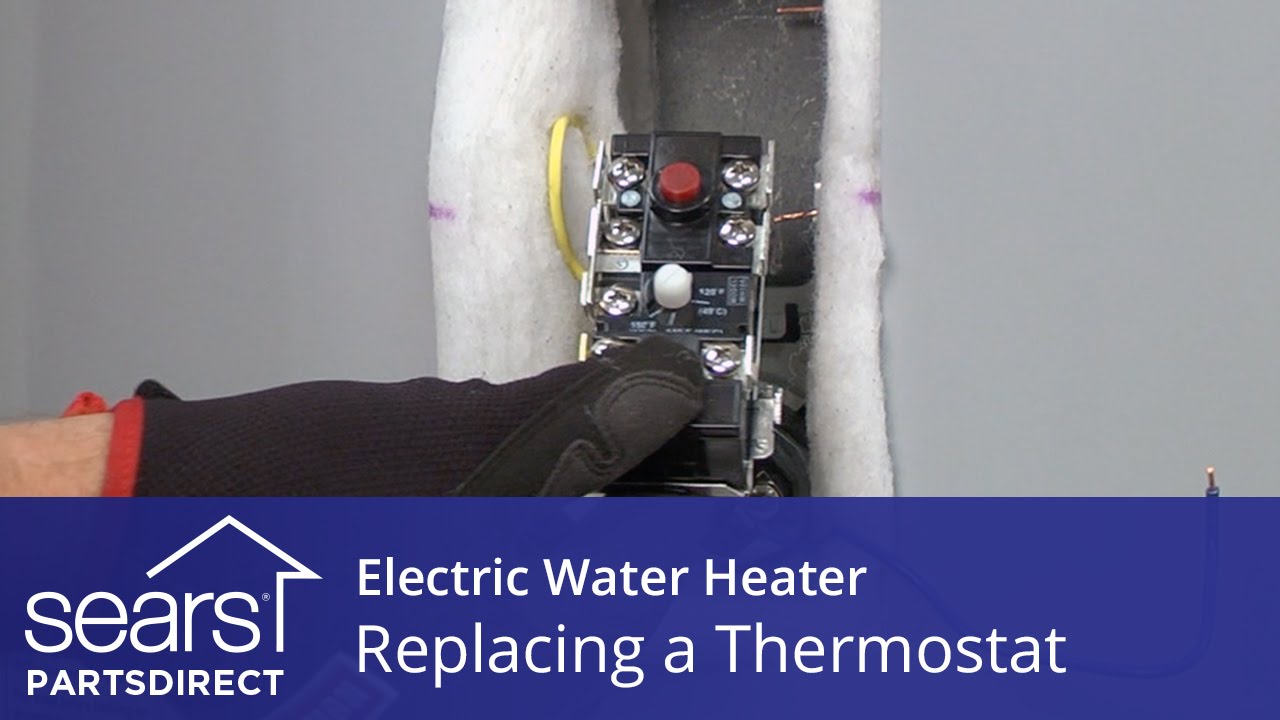
Credit: www.youtube.com
Safety Precautions
Ensure the power is off before starting. Use insulated tools to avoid electric shocks. Double-check all connections.
When it comes to changing your water heater thermostat, safety should be your top priority. A simple mistake could lead to serious injury or damage to your home. Here are some essential safety precautions you need to follow to ensure a smooth and secure process. ### Turning Off Power Before you start, it’s crucial to turn off the power to your water heater. Locate your home’s circuit breaker panel. Find the switch labeled for your water heater and flip it to the “off” position. Double-check that the power is off by using a voltage tester on the water heater’s wiring. If there’s no reading, you’re good to go. ### Wearing Protective Gear Wearing the right protective gear can prevent injuries. Put on insulated gloves to protect yourself from any residual electricity. Safety goggles are also a must to shield your eyes from dust and debris. Consider wearing long sleeves to protect your arms from sharp edges and hot surfaces. Taking these safety precautions seriously can save you from potential hazards. Have you ever had a close call that made you rethink your approach to DIY projects? Don’t let it happen again. Always prioritize safety.
Credit: www.whirlpoolwaterheaters.com
Accessing The Thermostat
Understanding how to access the thermostat is crucial for adjusting or replacing it. This process requires careful handling and some basic tools. Follow the steps below to safely access your water heater’s thermostat.
Removing The Access Panel
First, turn off the power to the water heater. This step is vital for your safety. Locate the circuit breaker and switch it off. Once the power is off, find the access panel on the water heater. It is usually on the side of the unit. Use a screwdriver to remove the screws holding the panel in place. Carefully take off the panel and set it aside.
Locating The Thermostat
With the access panel removed, you can now see inside the water heater. Look for the thermostat near the heating element. It is a small device with a temperature dial and wires connected to it. Make sure you identify the correct component before proceeding. Check the manufacturer’s manual if unsure.
Testing The Thermostat
Ensuring your water heater thermostat works correctly is essential. A faulty thermostat can lead to inconsistent water temperatures or no hot water. Testing the thermostat helps determine if it needs replacement. Follow these steps to test the thermostat using simple tools.
Using A Multimeter
A multimeter is a handy tool for testing the thermostat. First, turn off the power to the water heater from the circuit breaker. Safety first. Next, remove the thermostat cover. This exposes the electrical connections. Set the multimeter to the lowest ohms setting. This measures resistance. Place one multimeter probe on the thermostat’s common terminal. Place the other probe on the heating element terminal.
Interpreting The Results
Interpreting the multimeter readings is crucial. A reading of zero indicates the thermostat is working. If the multimeter shows a high or infinite reading, the thermostat is faulty. Replace it immediately. Repeat the test for the upper and lower thermostats. Consistent readings ensure accurate results. If both thermostats fail, consider replacing the entire unit.
Removing The Old Thermostat
Changing the thermostat on your water heater might sound intimidating, but it’s actually quite manageable. The key to success lies in carefully removing the old thermostat. This step is crucial for a smooth transition to the new one. Let’s dive into the process.
Disconnecting Wires
First, ensure the power to your water heater is completely off. Safety is paramount. Test the wires with a voltage tester to confirm there’s no electricity running.
Once you’re sure the power is off, carefully note the wire connections. Taking a picture can be a lifesaver here. It helps you remember where each wire goes.
Next, use a screwdriver to loosen the screws holding the wires. Gently pull the wires free. Be sure to keep them separate to avoid confusion later. If you’re anything like me, you might want to label them for extra clarity.
Taking Out The Thermostat
With the wires disconnected, it’s time to remove the thermostat. Look for the screws securing it in place. Using your screwdriver, remove these screws carefully.
Once the screws are out, gently pull the thermostat away from its mounting. It should come out easily. If it feels stuck, double-check for any hidden screws or clips.
Handling the old thermostat with care helps prevent any accidental damage to other components. This is especially important if your water heater is older and more delicate.
Have you ever found yourself mid-project, only to realize you missed a step? Taking your time here can prevent that headache. Carefully removing the old thermostat sets you up for a smooth installation of the new one.
Now that the old thermostat is out, you’re ready to move on to the next step: installing the new thermostat. Patience and attention to detail here will pay off in the long run.
Installing The New Thermostat
So, you’ve decided to tackle the task of replacing your water heater thermostat. Congratulations! Installing the new thermostat is a critical part of the process. It involves careful attention to detail to ensure everything functions properly and safely.
Connecting The Wires
First things first, ensure the power is still off. Safety should always be your top priority. Use a voltage tester to double-check that there’s no electrical current.
Check Best Thermostat Pricing in Amazon
** As an Amazon Associate, I earn from qualifying purchases.
Now, you’ll notice two wires: one black and one red. These wires need to be connected to the corresponding terminals on the new thermostat. The black wire goes to the terminal marked ‘L1’ and the red wire goes to the terminal marked ‘T1’.
Secure the wires tightly. Loose connections can cause your thermostat to malfunction. If you’re unsure, don’t hesitate to consult your water heater’s manual or take a quick photo before you disconnect the old wires.
Securing The Thermostat
Position the new thermostat exactly where the old one was. It should fit snugly into place. If it feels loose, you might need to adjust the mounting screws.
Use a screwdriver to tighten the screws, securing the thermostat firmly. Double-check that it’s flush against the water heater tank. A poorly secured thermostat can lead to inaccurate temperature readings.
Before you turn the power back on, take a moment to ensure everything looks correct. Are the wires connected properly? Is the thermostat securely in place? If so, you’re ready to move to the next step.
Turning the power back on and testing your new thermostat is the final part of the process. How did you find the installation? Was it easier or harder than you expected? Share your thoughts in the comments below!
Testing The New Installation
Test the new installation by turning on the water heater. Check if the water heats up properly. Ensure there are no leaks.
Once you’ve successfully installed a new thermostat in your water heater, it’s crucial to test the new installation. This ensures that everything is working correctly and safely. Let’s walk through the steps to make sure your installation is spot-on.Restoring Power
Before restoring power, double-check that all connections are secure. Turn the circuit breaker back on to restore electricity to the water heater. Be cautious and stay alert for any unusual noises or smells, which could indicate problems.Checking For Proper Function
Use a multimeter to test the thermostat settings. Set it to the correct temperature range for your home. Wait around 30 minutes and then check if the water is heating as expected. If the water is too hot or not heating at all, you may need to adjust the thermostat or troubleshoot further. Have you ever experienced a thermostat malfunction? I once dealt with a faulty installation that led to inconsistent water temperatures. Testing early saved me from potential headaches. After testing, it’s wise to monitor the water heater for the next few days. Ensure it maintains the desired temperature consistently. What steps will you take to ensure your new thermostat is functioning properly? Following these methods can save you time and stress.Maintenance Tips
Maintaining your water heater thermostat can save you from unexpected cold showers and high energy bills. Regular care ensures your system runs efficiently and lasts longer. Here are some practical tips to keep your water heater thermostat in top shape.
Regular Inspections
Make it a habit to check your water heater thermostat at least once every six months. Look for signs of wear and tear.
Inspect the wiring connections and ensure they are tight and corrosion-free. Loose connections can cause your water heater to malfunction.
During your inspection, also check for any leaks around the thermostat. A small leak can quickly turn into a big problem if left unchecked.
Signs Of Future Issues
Pay attention to any unusual sounds coming from your water heater. A rattling or popping noise might indicate sediment buildup, which can affect the thermostat’s performance.
If you notice that your water isn’t as hot as it used to be, it could be a sign that your thermostat is failing. Test the water temperature with a thermometer to be sure.
Another red flag is a sudden spike in your energy bill. This might mean your water heater is working overtime due to a faulty thermostat.
Have you ever had to change your water heater thermostat? What signs did you notice before you decided it was time for a replacement? Share your experiences and tips below to help others with their maintenance routines.

Credit: www.whirlpoolwaterheaters.com
Frequently Asked Questions
Can I Replace The Water Heater Thermostat Myself?
Yes, you can replace the water heater thermostat yourself. Ensure you follow safety precautions and consult the manual.
How Do I Know If The Thermostat Is Bad On My Water Heater?
Check if your water heater produces inconsistent temperatures or no hot water. Inspect for tripped circuit breakers. Use a multimeter to test the thermostat’s continuity. Replace if necessary.
How Much Does It Cost To Replace A Thermostat In A Hot Water Heater?
Replacing a thermostat in a hot water heater typically costs between $100 and $300, including parts and labor.
What Happens When A Water Heater Thermostat Goes Out?
A faulty water heater thermostat can cause inconsistent water temperatures. You may experience no hot water or scalding hot water. It can also lead to higher energy bills. Replacing the thermostat usually resolves the issue.
Conclusion
Changing a water heater thermostat is easier than you think. Follow the steps carefully. Always remember to turn off the power first. Safety is key. Gather your tools before starting. Take your time and be patient. Refer to your water heater’s manual.
Each model might be different. If unsure, consider professional help. Now you can save money on repairs. Enjoy your warm water without worries.
Check Best Thermostat Pricing in Amazon
** As an Amazon Associate, I earn from qualifying purchases.