
Check Best Thermostat Pricing in Amazon
** As an Amazon Associate, I earn from qualifying purchases.
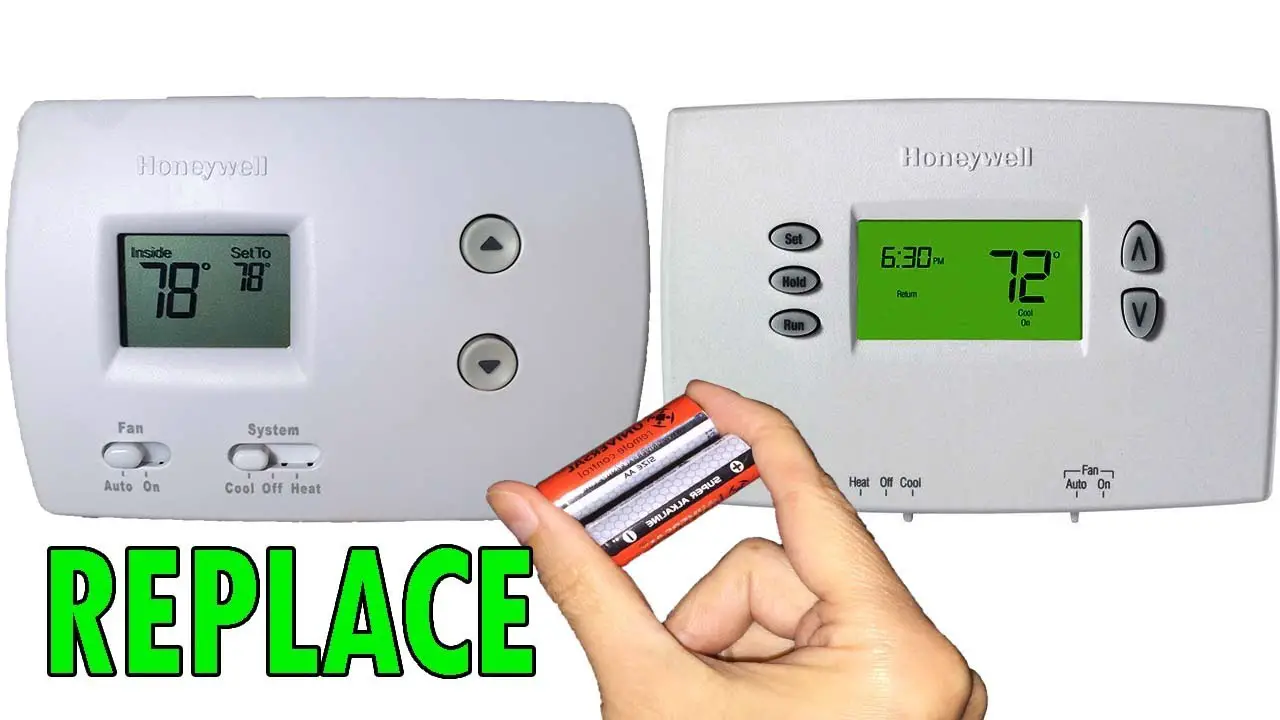
Changing the batteries in a Honeywell thermostat is simple. You can do it in just a few steps.
Thermostats keep our homes comfortable, but they need power to work right. When your Honeywell thermostat’s display dims or shows a low battery warning, it’s time to change the batteries. This process is quick and easy, even if you don’t have much experience with household repairs.
In this guide, we will show you the steps to replace the batteries in your Honeywell thermostat. Follow these instructions to ensure your thermostat works properly and keeps your home at the perfect temperature. Let’s get started!

Credit: willplumb.com
Tools And Materials Needed
Changing the batteries in a Honeywell thermostat is a simple task. But having the right tools and materials makes it even easier. Below is a list of the necessary tools and materials to get the job done smoothly.
Required Tools
These are the essential tools you need:
- Phillips Head Screwdriver: To remove the thermostat cover.
- New Batteries: Typically AA or AAA, depending on your model.
Optional Tools
These tools may help but are not essential:
- Flat Head Screwdriver: Useful for prying open a tight cover.
- Small Flashlight: To see clearly in dim light.
- Soft Cloth: To clean the battery compartment if needed.
Safety Precautions
Ensure the Honeywell thermostat is switched off before changing batteries. Avoid touching internal components to prevent damage.
Changing the batteries in your Honeywell thermostat is a straightforward task, but it’s essential to follow safety precautions to avoid any mishaps. These steps ensure you handle the components correctly and maintain your thermostat in good working order. Let’s dive into the key safety measures you should take.Turning Off The Thermostat
Before you start, turn off the thermostat to prevent any electrical issues. This simple step protects you from electric shocks. Also, it ensures the thermostat settings remain intact. You can turn off the thermostat by locating the power switch on the unit or at the circuit breaker. Once it’s off, you can safely proceed with the battery change.Handling Batteries Properly
Proper battery handling is crucial. Always use the recommended battery type for your Honeywell thermostat. Using the wrong type can damage the device or cause it to malfunction. Handle batteries with clean, dry hands. Moisture can lead to corrosion or short-circuiting. If a battery shows signs of leakage or damage, dispose of it safely and replace it immediately. Remember, never mix old and new batteries. This can lead to uneven power supply and reduce the lifespan of your thermostat. By following these safety precautions, you ensure a smooth battery replacement process. Have you ever experienced issues with battery replacement? Share your thoughts and tips in the comments!Accessing The Thermostat
Changing the batteries in your Honeywell thermostat is a simple task. First, you need to access the thermostat. This process involves a few straightforward steps.
Locating The Thermostat
Find the thermostat on your wall. It’s usually in a central location. Look in common areas like the living room or hallway. Make sure you have a clear view of the device. This ensures easy access for the next steps.
Removing The Thermostat From The Wall
Now, it’s time to remove the thermostat from the wall. Gently pull the thermostat towards you. Be careful not to use too much force. The device should detach from its mounting plate with a little effort. Keep the wires intact and avoid pulling them. This step ensures you can replace the batteries without damaging the thermostat.
Once the thermostat is off the wall, you can easily access the battery compartment. Follow the next steps in the guide to complete the battery change.
Removing The Old Batteries
Changing the batteries in your Honeywell thermostat ensures it works properly. Removing the old batteries is a key step. Let’s break it down into simple steps.
Opening The Battery Compartment
First, locate the battery compartment. It is usually on the front or back of the thermostat. Use a gentle grip to pull the cover off. Some models have a small latch. Push it to release the cover.
Taking Out The Old Batteries
Once the compartment is open, see the old batteries inside. Carefully lift them out one by one. Use your fingers or a small tool if needed. Be sure not to damage any contacts.
Dispose of the old batteries responsibly. Most places have special bins for battery recycling. This keeps the environment clean and safe.
Inserting New Batteries
Replace old batteries in your Honeywell thermostat by removing the cover, inserting new batteries, and reattaching the cover. Ensure correct battery orientation. This keeps your thermostat functioning properly.
Changing the batteries in your Honeywell thermostat is a simple yet essential task to keep your device running efficiently. You don’t need to be a tech expert to do this. Here, we’ll guide you through the process of inserting new batteries, making sure you choose the right ones and place them correctly. ###Choosing The Right Batteries
The first step is to select the correct batteries. Honeywell thermostats typically use AA or AAA batteries. Check your thermostat’s manual to confirm the type. Avoid using old or mixed batteries. Fresh, high-quality batteries ensure optimal performance. Brands like Duracell or Energizer are reliable choices. Using subpar batteries might result in frequent replacements. This can be frustrating and costly over time. So, invest a bit more in good batteries. ###Placing The New Batteries Correctly
Once you have the right batteries, it’s time to insert them. Carefully remove the old batteries from the compartment. Note the orientation of the old batteries before taking them out. Insert the new batteries in the same direction. Look for the plus (+) and minus (-) symbols inside the compartment. Align your batteries accordingly. Incorrect placement can damage your thermostat. If you’re unsure, double-check the manual or consult online resources. It’s better to be cautious than to risk your device. Have you ever placed batteries the wrong way and faced issues? Share your experiences and tips in the comments below! By following these steps, you ensure your Honeywell thermostat functions smoothly. Proper battery maintenance can save you from unexpected interruptions and help your device last longer.
Credit: www.youtube.com
Reassembling The Thermostat
After replacing the batteries in your Honeywell thermostat, the next step is reassembling the thermostat. This process ensures that your device is securely put back together and functions correctly. Follow these steps to make sure everything is in place.
Check Best Thermostat Pricing in Amazon
** As an Amazon Associate, I earn from qualifying purchases.
Securing The Battery Compartment
First, ensure the new batteries are seated correctly in the battery compartment. Double-check the polarity. The positive and negative ends should match the markings inside the compartment.
Once the batteries are secure, close the battery cover. Press it firmly until you hear a click. This sound means the cover is locked in place. If the cover does not close easily, check the alignment again.
Reattaching The Thermostat To The Wall
Next, align the thermostat with the wall plate. The connectors on the back of the thermostat should match the pins on the wall plate. Gently push the thermostat onto the plate. You should hear a click when it is securely attached.
Ensure the thermostat is flush against the wall. This ensures proper connectivity and function. Power up the thermostat to check if it is working properly. If the display lights up, you have successfully reassembled your Honeywell thermostat.
Testing The Thermostat
After changing the batteries in your Honeywell thermostat, the next step is testing. You need to ensure it works correctly. This simple check will confirm the new batteries are functioning. Follow these steps to test your thermostat properly.
Turning The Thermostat On
First, turn your thermostat on. Press the power button. If your model doesn’t have a power button, it should turn on automatically. Check if the screen lights up. A bright display is a good sign. If it doesn’t turn on, the batteries might not be installed correctly. Recheck the battery placement.
Checking The Display And Functionality
Once the thermostat is on, check the display. It should show the current temperature. If the display is blank or shows an error, there could be a problem. Restart the device by turning it off and on again.
Next, test the functionality. Adjust the temperature settings. Set the thermostat to a higher temperature than the room. The heating system should start. Then, set it to a lower temperature. The cooling system should activate. This ensures both heating and cooling functions are working.
Finally, check other settings. Test the fan mode and any programmable schedules. Make sure all functions respond correctly. If everything works, your thermostat is ready to use.
Maintenance Tips
Change the batteries in a Honeywell thermostat by first removing the thermostat from the wall. Open the battery compartment, replace the old batteries, and then reattach the thermostat.
Changing the batteries in your Honeywell thermostat is a straightforward task. However, maintaining your thermostat for optimal performance involves more than just the occasional battery swap. Here are some essential maintenance tips to keep your thermostat running smoothly.Regular Battery Checks
Performing regular battery checks on your Honeywell thermostat can save you from unexpected disruptions. A good rule of thumb is to check the batteries every six months. If you travel often, you might want to check more frequently. A quick check ensures that your thermostat is always ready to keep your home comfortable. You can set a reminder on your phone or calendar. This way, you won’t forget.Proper Storage Of Spare Batteries
Keeping spare batteries on hand is a smart move. Store them in a cool, dry place to ensure they last longer. Avoid storing them in the refrigerator. This can actually cause condensation and reduce their lifespan. Make sure they are easily accessible. When your thermostat alerts you that the batteries are low, you can quickly replace them. Did you know that using the right type of batteries can extend the life of your thermostat? Stick to high-quality, brand-name batteries for the best performance. By following these simple maintenance tips, you can ensure that your Honeywell thermostat works efficiently. What other tips do you have for maintaining household devices? Share your thoughts!
Credit: www.homeserve.com
Frequently Asked Questions
How Do I Open My Honeywell Thermostat To Change The Battery?
To open your Honeywell thermostat, gently pull the front cover off. Remove the old batteries and insert new ones.
How Do You Take The Cover Off Of A Honeywell Thermostat?
To remove the Honeywell thermostat cover, gently pull the cover off using both hands. No tools are required. Ensure the thermostat is turned off first for safety.
How Do You Remove A Thermostat Cover To Replace A Battery?
To remove a thermostat cover, gently pull or unscrew it. Locate the battery compartment, replace the old batteries, and reassemble the cover.
What Happens When A Honeywell Thermostat Battery Dies?
A dead Honeywell thermostat battery can cause the display to go blank and the system to stop working. Replace the batteries promptly to restore functionality.
Conclusion
Changing the batteries in a Honeywell thermostat is quick and easy. Follow the steps outlined above for a hassle-free experience. Regularly check your thermostat to ensure optimal performance. Fresh batteries can prevent unexpected issues. Keep your home comfortable with a well-functioning thermostat.
It’s simple maintenance you can do yourself. Save money and time by handling this small task. Enjoy the comfort of a properly working thermostat. Thank you for reading our guide. Happy troubleshooting!
Check Best Thermostat Pricing in Amazon
** As an Amazon Associate, I earn from qualifying purchases.