
Check Best Thermostat Pricing in Amazon
** As an Amazon Associate, I earn from qualifying purchases.
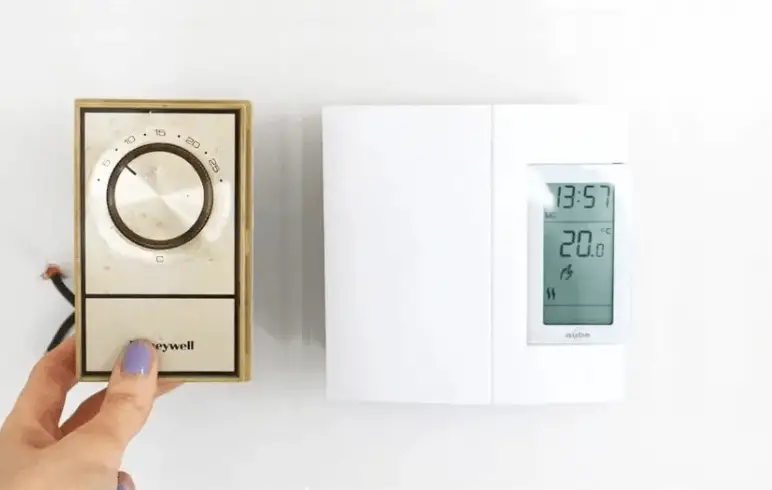
Changing an old thermostat can save energy and money. It is a simple process.
An outdated thermostat can lead to inefficiency and higher bills. Upgrading it can be a smart move for your home. Before you start, it’s important to understand the steps involved. This guide will walk you through the process, ensuring you do it safely and correctly.
Even if you’re not a tech expert, you’ll find this task manageable. With a few tools and some basic knowledge, you can install a new thermostat and enjoy better control over your home’s temperature. Read on to learn how you can make this upgrade with ease.
Gather Necessary Tools
Gather essential tools such as a screwdriver, pliers, and a voltage tester. Having these ready makes the task easier.
When you’re ready to change your old thermostat, the first step is to gather the necessary tools. Having the right tools on hand will make the process much smoother and help you avoid any frustrating moments. Let’s dive into the essential tools you’ll need for this project.Screwdrivers
Screwdrivers are a basic but crucial tool for this task. Most thermostats are secured to the wall with screws, and you’ll need a screwdriver to remove them. Make sure you have both a Phillips and a flat-head screwdriver. Thermostats can have either type of screw, and having both types ensures you’re prepared for whatever you encounter. A magnetic screwdriver can also be a lifesaver. It keeps the screws from falling and getting lost, which can be a real headache, especially if you’re working in a tight space.Wire Labels
Wire labels are small but mighty tools. They help you keep track of which wire goes where. This is important because reconnecting wires incorrectly can lead to a malfunctioning thermostat. Label each wire as you disconnect it from the old thermostat. You can use pre-made wire labels or simply write on masking tape. This step saves you from a lot of guesswork later on. I’ve been guilty of thinking I’d remember where each wire goes, only to realize too late that I was mistaken. Trust me, labeling wires is worth the few extra minutes it takes. What other tools do you think might be useful for this project?Turn Off Power
Changing an old thermostat can be straightforward. But it involves some crucial steps. One of the most important steps is turning off the power. This ensures your safety while handling electrical components. Let’s dive into the necessary steps to safely turn off the power.
Locate Circuit Breaker
First, find your home’s circuit breaker box. It’s usually in the basement, garage, or utility room. If you are unsure, ask someone for help. The breaker box holds switches that control power to different parts of your home.
Verify Power Is Off
Once you locate the circuit breaker, find the switch for the thermostat. It might be labeled as “HVAC” or “Thermostat”. Flip this switch to the off position. Next, go to your thermostat and check if the display is off. If the display is still on, you might have turned off the wrong switch. Double-check and try again.
Remove Old Thermostat
Changing an old thermostat involves disconnecting wires, removing the device, and installing a new one. Follow manufacturer instructions for a smooth process. Ensure the power is off for safety.
Removing an old thermostat might seem like a daunting task, but it can be quite simple with the right guidance. Let’s walk through the process step by step to ensure you can complete the task efficiently. First, we’ll focus on how to detach the cover plate and disconnect the wires.Detach Cover Plate
Start by turning off the power to your HVAC system. This is crucial for your safety. Once the power is off, gently pull or unscrew the cover plate from the thermostat. Some models have a snap-on cover, while others require a screwdriver. If you’re unsure, check the manufacturer’s manual. As you remove the cover, you might notice dust or grime. Take a moment to clean the area. This can make the next steps easier and provide a clear view of the wiring.Disconnect Wires
Before you start disconnecting wires, take a photo of the current wiring setup. This will serve as a handy reference when installing the new thermostat. Carefully unscrew the terminals holding the wires. There may be several colors, each serving a different function. For example, red for power, white for heat, and green for the fan. Make sure to label each wire using masking tape or sticky notes. Once all wires are detached, you can gently pull the thermostat from the wall. Keep the wires separated and safely out of the way to avoid any mix-ups. Feeling a bit overwhelmed? Remember, taking it slow and steady will help ensure you don’t miss any important steps. Have you ever had a DIY project go unexpectedly well? This could be one of those times! By following these steps, you’ll make the process of removing your old thermostat straightforward and stress-free. Ready to move on to the next stage? Let’s get started!
Credit: www.youtube.com
Prepare Wall For New Thermostat
Getting ready to install your new thermostat is an exciting step towards a more efficient home. The first thing you need to do is prepare the wall for the new device. This ensures a smooth installation and a clean look. Let’s dive into how to properly prepare your wall for your new thermostat.
Clean Wall Surface
Before installing your new thermostat, it’s important to clean the wall surface. Dust and grime can affect how well the thermostat adheres to the wall. Use a soft cloth and a bit of mild detergent to wipe down the area. If you’re anything like me, you might have discovered some hidden cobwebs during this process!
Make sure to dry the wall thoroughly. Moisture can cause adhesive issues. You don’t want your new thermostat falling off the wall because the surface was damp.
Install Wall Plate
Now that your wall is clean, it’s time to install the wall plate. The wall plate helps secure the thermostat and covers any holes or imperfections. Most new thermostats come with a wall plate, but you can purchase one separately if needed.
Align the wall plate with the screw holes from the old thermostat. This saves time and avoids drilling new holes. Use a level to make sure the wall plate is straight. Once it’s aligned, screw it into place.
Ever had that moment when you realize the wall plate is crooked after you’ve installed it? Double-checking with a level can save you from that frustration. A straight wall plate sets the stage for a perfectly installed thermostat.
Have you ever had to prepare a wall for a new device? How did it go? Share your thoughts and experiences in the comments below. Let’s learn from each other!
Install New Thermostat
Installing a new thermostat can seem like a daunting task. But with a few simple steps, you can do it yourself. This guide will help you through the process. Follow these easy steps to ensure your new thermostat works perfectly.
Connect Wires
First, turn off the power to your HVAC system. This is crucial for safety. Remove the old thermostat cover. Note the wire colors and their terminals. Take a picture for reference. Carefully disconnect the wires from the old thermostat. Now, connect the wires to the new thermostat. Match each wire to the correct terminal. Use the picture you took if needed.
Mount Thermostat
Next, mount the new thermostat to the wall. Use the screws provided in the package. Ensure the thermostat is level. Tighten the screws securely, but do not over-tighten. Once mounted, attach the cover to the thermostat. Restore power to your HVAC system. Follow the manufacturer’s instructions to set up your new thermostat. Check if it controls the heating and cooling correctly.
Credit: homerepairtutor.com
Set Up New Thermostat
Change your old thermostat easily. Start by turning off the power. Remove the old unit and connect the new one.
Setting up your new thermostat can seem daunting at first. But with a few simple steps, you’ll be enjoying a comfortable home in no time. Follow these guidelines to ensure a smooth installation process.Program Settings
First, familiarize yourself with the new thermostat’s manual. Each model has specific instructions. Locate the programming buttons on your device. Set the time and date accurately. This will help in scheduling heating and cooling cycles. Next, decide on your preferred temperature settings for different times. Many thermostats offer weekday and weekend programming. Set the temperature lower at night and when you are not home. This will save energy and reduce your utility bills.Adjust Temperature
Now, it’s time to adjust the temperature manually. Turn on the thermostat and set it to your desired temperature. Wait a few minutes for the system to respond. Check if the heating or cooling kicks in. If your home isn’t reaching the set temperature, double-check your settings. Ensure all connections are secure. Sometimes, a simple reboot can fix issues. Adjust the temperature settings as needed to find your perfect comfort level. Following these steps ensures a smooth setup. Enjoy your new thermostat and a more comfortable home. “`Test New Thermostat
Testing your new thermostat is crucial to ensure it works properly. This process involves turning on the power and checking its functionality. Follow these simple steps to test your new thermostat effectively.
Check Best Thermostat Pricing in Amazon
** As an Amazon Associate, I earn from qualifying purchases.
Turn On Power
Start by restoring power to your HVAC system. This step is essential for your thermostat to operate. Locate the circuit breaker and flip the switch to the “on” position. Ensure all connections are secure and the power is flowing. Your thermostat should light up or display information, indicating it has power.
Check Functionality
Now, check if your new thermostat works as expected. Begin by setting the temperature to a desired level. Observe whether your heating or cooling system responds to the changes. Listen for the sound of the system turning on or off. This confirms that the thermostat is communicating with your HVAC system.
Next, test different modes such as heating, cooling, and fan settings. Ensure each mode activates correctly. Adjust the temperature settings to see if the system maintains the desired temperature. This step ensures your new thermostat regulates your home environment accurately.
If you encounter any issues, consult the thermostat’s manual. It may provide troubleshooting tips. Checking the wiring connections can also help resolve any problems. Proper installation is key to a fully functional thermostat.

Credit: www.youtube.com
Troubleshoot Common Issues
When you’re changing an old thermostat, you might face a few bumps along the way. Some common issues can pop up, making the process seem more complicated than it is. Let’s troubleshoot some of these common issues so you can get your new thermostat up and running smoothly.
No Power
One of the first issues you might encounter is your thermostat not powering on. This can be frustrating, but it’s usually an easy fix.
First, check if the circuit breaker has tripped. This is a common cause of power loss in any electrical device. Simply reset the breaker and see if that restores power to your thermostat.
If the breaker isn’t the issue, ensure that the wires are correctly connected. Loose or incorrectly connected wires can prevent the thermostat from getting power. Double-check the wiring diagram in your thermostat’s manual.
Are the batteries fresh? If your thermostat uses batteries, make sure they’re new and inserted correctly. Sometimes, the simplest solutions are the most effective.
Incorrect Temperature
Another common issue is the thermostat displaying the wrong temperature. This can make your home uncomfortable and waste energy.
First, ensure your thermostat is not in direct sunlight or near any heat sources. These can cause false readings. Try relocating your thermostat to a more central location in your home.
Check if the thermostat is level. An unlevel thermostat can give inaccurate temperature readings. Use a spirit level to ensure it is correctly positioned.
Finally, inspect the calibration settings. Some thermostats allow you to manually adjust the temperature reading. Refer to your thermostat’s manual to see if this is an option.
Have you encountered any of these issues while changing your thermostat? Troubleshooting these common problems can save you time and effort. Share your experiences in the comments below. Your insights might help someone else facing the same challenges.
Frequently Asked Questions
Can I Replace My Old Thermostat Myself?
Yes, you can replace your old thermostat yourself. Ensure you follow the manufacturer’s instructions and safety guidelines. If unsure, consult a professional.
Can You Just Replace Your Thermostat?
Yes, you can replace your thermostat. Ensure compatibility with your system and follow the manufacturer’s instructions for installation.
How To Tell If An Old Thermostat Is Bad?
Check for inconsistent temperature readings, non-responsive controls, and HVAC system not turning on. Replace if issues persist.
Can You Replace A Thermostat Without An Electrician?
Yes, you can replace a thermostat yourself if you’re comfortable with basic electrical work. Always turn off power first.
Conclusion
Changing an old thermostat can be easy and rewarding. Follow the steps carefully. Ensure safety by turning off power. Choose a compatible thermostat for your system. Label wires to avoid confusion. Connect wires correctly to the new thermostat. Mount and secure the thermostat on the wall.
Restore power and test the new setup. Enjoy better control over your home’s temperature. Save energy and reduce costs with your updated thermostat. Start today and experience a more comfortable home.
Check Best Thermostat Pricing in Amazon
** As an Amazon Associate, I earn from qualifying purchases.