
Check Best Thermostat Pricing in Amazon
** As an Amazon Associate, I earn from qualifying purchases.
Have you ever found yourself shivering in your living room or sweating in your bedroom, wondering why your Emerson thermostat isn’t responding? The culprit might just be a dead battery.
If you’ve never changed the battery in your Emerson thermostat, it might seem like a daunting task. But what if I told you that with a few simple steps, you can bring your thermostat back to life and regain control over your comfort?
In this guide, you’ll discover how effortless it can be to change the battery in your Emerson thermostat. Stay with me, and you’ll soon be on your way to a cozy home environment without the hassle of expensive technician visits. Whether you’re a DIY enthusiast or a complete novice, this is one task you’ll want to tick off your to-do list today. Ready to dive in? Let’s get started!
Tools Needed
A small screwdriver and fresh AA batteries are essential for changing the battery in an Emerson thermostat. These tools help open the battery compartment and replace the old batteries quickly. Keep them handy for a smooth process.
Changing the battery in your Emerson thermostat is a straightforward task, but having the right tools can make the process smoother and more efficient. You don’t need a toolbox full of gadgets; just a few essential items will do the trick. Let’s dive into the specifics of what you’ll need to ensure your thermostat is powered up and ready to keep your home comfortable.Basic Tools
To start, you’ll need a small Phillips head screwdriver. This tool is essential for removing the screws that secure the battery compartment cover. You might already have one in your kitchen drawer or toolbox. If not, they’re easy to find at any hardware store. A flathead screwdriver can also come in handy. It’s useful for gently prying open any stubborn battery compartments. Sometimes, the cover might feel a bit stuck due to dust or humidity, and a flathead screwdriver can help ease it open without damaging the plastic.Replacement Batteries
The type of batteries you need depends on your Emerson thermostat model. Typically, AA or AAA batteries are required. Check your thermostat’s manual or the existing batteries to confirm the correct type. Having the right batteries on hand ensures a quick and hassle-free replacement. Consider using high-quality batteries for long-lasting performance. Brands like Duracell or Energizer are reliable choices. Avoid using rechargeable batteries, as they might not provide consistent power for your thermostat.Cleaning Supplies
Before you install new batteries, it’s a good idea to clean the battery compartment. Dust and debris can accumulate over time, affecting battery performance. Use a soft cloth or a cotton swab to gently clean the area. A small can of compressed air can also help remove stubborn dust particles. Cleaning the compartment not only enhances performance but also extends the lifespan of your thermostat. It’s a simple step that many overlook, but it’s worth the extra minute or two.Optional Accessories
While not essential, a magnifying glass can be useful if you have difficulty seeing small screws or battery markings. This tool is especially helpful for those with vision challenges or if the lighting in the area is dim. You might also want to keep a small bowl or tray nearby to hold screws or batteries. This prevents losing them on the floor or under furniture, saving you from unnecessary frustration. Having these tools ready makes the battery replacement process quick and stress-free. Have you ever tried changing batteries without the proper tools and found yourself frustrated? Share your experiences and tips in the comments below, and let’s help each other out!Safety Precautions
Before changing the battery in your Emerson thermostat, consider safety first. Proper precautions ensure both your safety and the device’s longevity. This section outlines crucial safety measures to follow during the process.
1.Turn Off PowerAlways turn off the power to the thermostat. This prevents electric shock. Find the circuit breaker and switch it off. Ensure the thermostat is not receiving power.
2.Use Proper ToolsGather the right tools before starting. A small screwdriver is often needed. Using the correct tools prevents damage to the thermostat. It also ensures a smoother battery replacement process.
3.Handle Batteries SafelyHandle batteries with care. Avoid touching the terminals with bare hands. This prevents corrosion and damage. Dispose of old batteries properly. Follow local guidelines for battery disposal.
4.Work in a Safe EnvironmentEnsure your work area is well-lit. A clean, clutter-free space reduces accidents. Keep children and pets away during the battery change.
5.Check for DamageInspect the thermostat for any visible damage. Cracks or loose parts may cause malfunction. If damage is found, consult a professional for repairs. Do not attempt further work if the device is compromised.
Identifying Your Thermostat Model
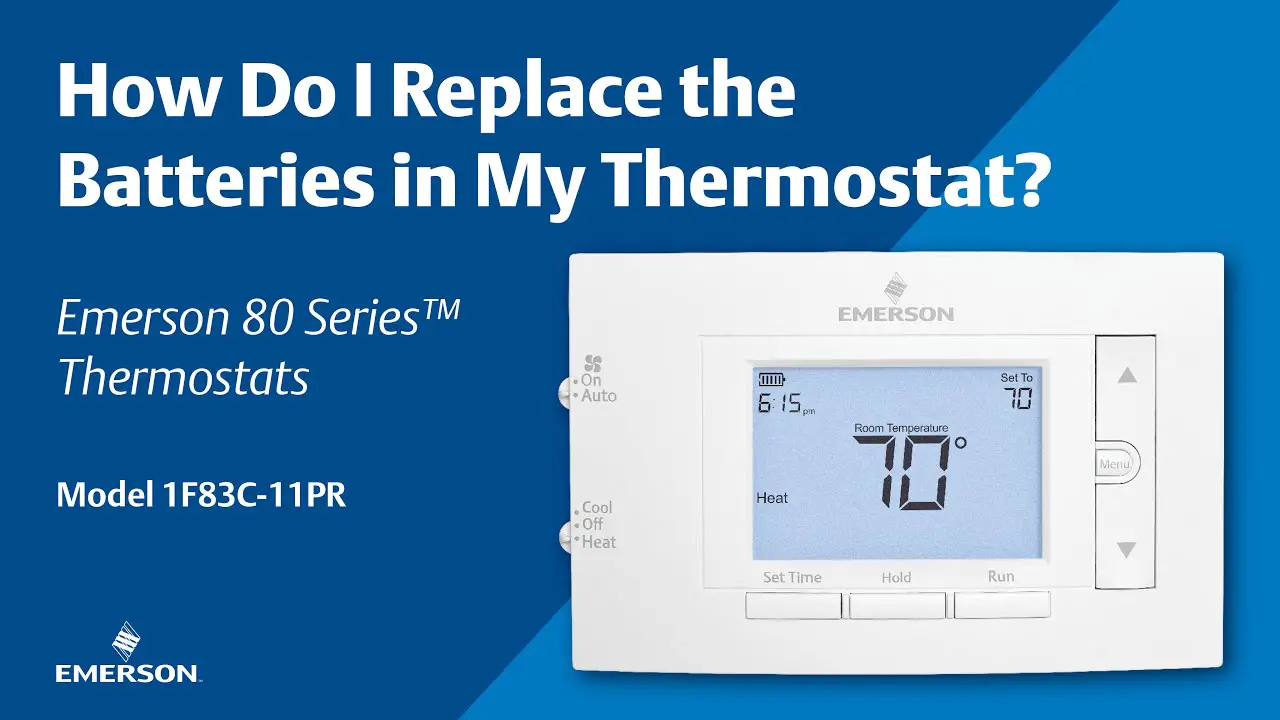
Changing the battery in your Emerson thermostat might seem simple. But first, you need to identify your thermostat model. Different models have unique battery compartments. This step ensures you use the correct method and tools.
Look at the front of your thermostat. Most Emerson thermostats display the model number here. If you can’t find it, check the user manual. The manual often has the model number listed on the cover. This number is crucial for finding the right instructions.
Check For A Model Sticker
Remove the thermostat from the wall gently. Look for a sticker on the back. This sticker usually shows the model number. Be careful when removing the thermostat. Wires might be attached, so handle it with care.
Visit Emerson’s Official Website
Visit the Emerson website for support. They offer detailed resources for identifying thermostat models. Use their search tool to input any numbers you find. This can lead you directly to your thermostat’s information.
Consult The User Manual
If you have the manual, use it. Manuals often have a section dedicated to model identification. This section can guide you through the process. It may also provide images to help you.
Contact Emerson Customer Support
If you’re still unsure, contact Emerson support. They can help identify your model over the phone. Provide any numbers or details you have. They will guide you to the right battery-changing steps.
Accessing The Battery Compartment
Locate the battery compartment at the back of the Emerson thermostat. Carefully slide open the compartment cover. Remove the old batteries and insert new ones, ensuring correct polarity.
Accessing the battery compartment in your Emerson thermostat might seem daunting at first. However, it’s simpler than you think. By following a few straightforward steps, you can ensure your thermostat is back to keeping your home at the perfect temperature in no time.Identifying The Thermostat Model
Before diving into the battery compartment, identify your thermostat model. This information is usually found on the front or back of the device. Knowing the model helps you find the right manual online if needed.Gathering Your Tools
You don’t need a toolbox full of gadgets. A small flathead screwdriver often does the trick. Keeping your tools handy speeds up the process.Turning Off The Thermostat
Safety first: turn off your thermostat before accessing the battery compartment. This prevents any accidental changes to your settings. A simple flip of the switch is all it takes.Locating The Battery Compartment
Find the battery compartment by gently removing the thermostat from its wall mount. Most Emerson models have a snap-on cover. Remove it carefully to avoid damaging any connectors.Opening The Compartment
Use your flathead screwdriver to carefully pry open the battery compartment. A gentle hand prevents scratches or cracks. Keep a firm grip to maintain control.Removing Old Batteries
Take out the old batteries and set them aside for recycling. Did you know old batteries can leak and damage your device? Regular replacement is key to long-term thermostat health. Insert fresh batteries, ensuring correct alignment with the positive and negative symbols. The right alignment ensures your thermostat functions smoothly. Double-checking never hurts.Reattaching The Thermostat
Once batteries are in place, snap the thermostat back onto the wall. Make sure it’s securely attached. A firm push is usually enough. Turn your thermostat back on and test it. Is it functioning as expected? If yes, you’ve successfully changed the batteries! If not, a quick review of the steps might help spot any missed details. Changing the batteries in your Emerson thermostat doesn’t have to be a chore. With the right approach, it becomes a quick and easy task. Have you tried changing them before? What was your experience like?Removing The Old Batteries
Changing the battery in your Emerson thermostat is a straightforward task. Removing the old batteries is the first step in this process. It’s essential to do it carefully to avoid damaging the device. This section will guide you through the process, ensuring that your thermostat functions optimally.
Opening The Thermostat Cover
Start by opening the cover of your thermostat. Use gentle pressure to pop it open. Most Emerson thermostats have a snap-on cover. Avoid using tools that might scratch or damage it.
Locating The Battery Compartment
Once the cover is off, look for the battery compartment. It’s usually easy to find. The compartment is often marked and should be visible right away.
Removing The Old Batteries Safely
Check the type of batteries used. Most Emerson thermostats use AA or AAA batteries. Make sure you know which type to replace them with. Carefully remove the old batteries from the compartment. Avoid pulling with force to prevent damaging the terminals.
Dispose Of The Old Batteries Properly
Old batteries should not be thrown in regular trash. Dispose of them at a designated recycling center. Proper disposal helps protect the environment. It ensures harmful materials don’t end up in landfills.

Credit: www.youtube.com
Inserting New Batteries
Easily replace batteries in an Emerson thermostat by removing the cover. Insert new batteries, ensuring correct polarity. Secure the cover back in place.
Changing the battery in your Emerson thermostat is a straightforward task that can save you from unexpected disruptions in temperature control. Whether you’re preparing for a season change or responding to a low battery alert, knowing how to insert new batteries is crucial. It ensures your thermostat functions efficiently, maintaining your home’s comfort levels. Let’s dive into the steps to make this task hassle-free.Gathering Your Tools
Before you start, make sure you have everything you need. Grab the right type of batteries for your Emerson thermostat. Most models use AA or AAA batteries, but it’s best to check your user manual or the existing batteries for confirmation. Having a small screwdriver handy might also help, especially if your thermostat’s battery compartment is secured with screws.Removing The Thermostat Cover
Locate your thermostat on the wall. Gently remove the cover by either pulling it forward or lifting it upward, depending on your model. If you’re unsure, a quick look at the manual can guide you. Removing the cover gives you access to the battery compartment.Taking Out Old Batteries
Once the cover is off, identify the battery compartment. Carefully take out the old batteries and set them aside for proper disposal. It’s a good idea to recycle them, as used batteries can be harmful to the environment. Notice the orientation of the batteries as you remove them; this will help you insert the new ones correctly. Now comes the essential part—placing the new batteries. Insert them into the compartment, ensuring they are aligned correctly. Look for the plus (+) and minus (-) symbols inside the battery holder and match them with the ones on the batteries. This step is crucial; inserting batteries the wrong way can prevent your thermostat from working.Securing The Thermostat Cover
After the new batteries are in place, replace the thermostat cover. Snap it back into position gently. If the cover doesn’t fit snugly, double-check that the batteries are seated correctly and that nothing is obstructing the cover. A secure cover ensures the thermostat functions optimally without any exposure to dust or other elements.Testing Your Thermostat
Turn on your thermostat and test its functions. Adjust the temperature settings to check if it’s responsive. A small test ensures everything is working perfectly. If you face issues, revisit the battery placement or consider consulting the manual for troubleshooting tips. Changing your thermostat’s batteries is a simple task, but it plays a vital role in maintaining your home’s comfort. Have you ever faced an unexpected thermostat shutdown? Share your experience below and let others learn from your insights!Reassembling The Thermostat
Changing the battery in an Emerson thermostat involves reassembling the device carefully. Start by aligning the cover and snapping it back into place. Ensure all connections are secure for optimal performance.
Check Best Thermostat Pricing in Amazon
** As an Amazon Associate, I earn from qualifying purchases.
Step 1: Align The Thermostat Cover
Once you’ve replaced the battery, start by aligning the cover with the base. Make sure the notches and grooves line up correctly. This alignment prevents any loose parts or misplacement that could affect the thermostat’s functionality.Step 2: Secure The Screws
Use a screwdriver to gently secure the screws back into place. Tighten them just enough to hold the cover firmly without overdoing it. Over-tightening could damage the plastic and compromise the thermostat’s integrity.Step 3: Test The Thermostat
After reassembly, turn on the thermostat to ensure it’s working properly. Set a temperature and listen for the click that indicates it’s responding. If it doesn’t activate, double-check the assembly to ensure everything is connected correctly.Step 4: Attach To The Wall
If you removed the thermostat from the wall, carefully attach it back. Align it with the mounting bracket and secure it tightly. A loose connection could lead to operational issues, so ensure it’s snug against the wall.Step 5: Final Check
Perform a final check by adjusting the settings. Make sure all buttons are responsive and the display shows the correct information. This step reassures you that the thermostat is functioning as intended. Reassembling the thermostat is a straightforward process, but attention to detail is key. Have you ever reassembled something only to find it didn’t work? It’s the little things that make a big difference. Taking a few extra moments to double-check can save you a lot of hassle down the road.Testing The Thermostat
Testing the thermostat after changing its battery is crucial. This step ensures your Emerson thermostat functions correctly. A functioning thermostat maintains home comfort. It saves energy too. Follow the steps below to test your thermostat effectively.
Check The Display
Look at the thermostat screen. The display should be clear and bright. If the screen is blank, the battery may not be inserted correctly. Recheck the battery placement. Ensure proper contact with the terminal.
Adjust The Temperature Settings
Set the thermostat to a different temperature. Choose a setting warmer or cooler than the current room temperature. Observe if the heating or cooling system responds. If it activates, the thermostat is working.
Listen For System Activation
Stand close to your HVAC system. Listen for any sounds indicating activation. A humming or clicking sound confirms the system is responding. A silent system may need further inspection.
Observe Room Temperature Changes
Monitor the room temperature for changes. Use a separate thermometer for accuracy. Ensure the temperature aligns with the thermostat setting. Discrepancies may indicate a problem.
Verify Consistent Operation
Allow the thermostat to run for a few hours. Check if the system maintains the set temperature. Consistent operation confirms proper functionality. Regular checks prevent future issues.
Troubleshooting Common Issues
Changing the battery in your Emerson thermostat is usually simple. Sometimes, though, issues arise. If you find your thermostat acting up after a battery change, don’t worry. Several common problems have easy solutions.
Display Not Turning On
If your display remains off, check the battery placement. Ensure the batteries are inserted correctly. Double-check the polarity. Sometimes, the issue is just reversed batteries.
Thermostat Not Responding
Your thermostat might not respond if the battery contacts are dirty. Clean the contacts using a cotton swab. Make sure they are free from dust or corrosion.
Incorrect Temperature Reading
An incorrect temperature reading might occur if the thermostat is not leveled. Use a small level to check its alignment. Also, ensure it’s not near heat sources.
Frequent Battery Drain
Frequent battery drain may be due to high energy settings. Check your thermostat settings. Adjust to a more moderate level to conserve battery life.
Resetting The Thermostat
If issues persist, consider resetting the thermostat. This can often resolve lingering problems. Refer to your user manual for specific reset instructions.
Credit: www.consumerreports.org
Maintenance Tips
Changing the battery in an Emerson thermostat ensures it runs smoothly. First, slide the thermostat off the wall plate. Replace the old batteries with new AA or AAA ones, depending on the model. Secure the thermostat back onto the wall plate.
Always dispose of old batteries responsibly.
Regular maintenance of your Emerson thermostat ensures its optimal performance and longevity. Changing the battery is a straightforward task, but it’s just one of several upkeep activities you should consider. Here are some practical maintenance tips to keep your thermostat in peak condition.Check Battery Status Regularly
Ensure the battery in your Emerson thermostat is always in good condition. A simple routine check every few months can prevent unexpected shutdowns. If your thermostat display is dim or not functioning, it might be time for a fresh battery.Use Quality Batteries
Opt for high-quality batteries for your Emerson thermostat. Cheap batteries may not last long, causing frequent interruptions. Investing in reputable brands can save you time and ensure a consistent performance.Clean The Thermostat
Dust and grime can affect your thermostat’s accuracy. Gently clean the exterior with a soft cloth. Avoid using water or cleaning solutions that might seep inside and damage the components.Secure Proper Placement
Is your thermostat placed correctly? Ensure it’s away from direct sunlight, doors, and windows. Incorrect placement might lead to inaccurate readings, affecting your home’s temperature comfort.Update Firmware
If your Emerson thermostat supports firmware updates, keep it up-to-date. Updates can fix bugs and improve performance. Check the manufacturer’s website for the latest firmware and installation instructions.Test The System
Regularly test your thermostat to ensure it communicates correctly with your HVAC system. Set your thermostat to a different temperature and listen for the system’s response. Immediate activation indicates a healthy connection.Review User Manual
Have you skimmed through the user manual? It contains valuable information specific to your model. Familiarize yourself with it to leverage all features and troubleshoot minor issues effectively.Seek Professional Help
If issues persist despite regular maintenance, consider consulting a professional. They can diagnose complex problems that may require specialized tools or knowledge. It’s better to address minor issues now than to face major repairs later. Engaging with your thermostat’s maintenance might seem trivial, but these small efforts can lead to significant savings in energy and repairs. Have you checked your thermostat recently? It might be time to give it a quick look!
Credit: www.facebook.com
Frequently Asked Questions
How Do You Replace A Battery On An Emerson Thermostat?
Remove the thermostat cover. Locate the battery compartment. Take out old batteries. Insert new AA or AAA batteries. Reattach the cover securely.
How Do I Take The Cover Off My Emerson Thermostat?
Gently pull the thermostat from the wall. Hold the base and carefully lift the cover off. Ensure power is off before starting.
Do Emerson Thermostats Need Batteries?
Yes, some Emerson thermostats need batteries to operate. Models like the Emerson 1F78 require them. Batteries ensure the thermostat functions during power outages. Check your specific model’s manual for battery requirements. Regularly replace batteries to avoid disruptions in performance.
How Do You Remove A Thermostat Cover Battery?
To remove a thermostat cover battery, gently pull the cover off. Look for any tabs or screws. Slide or press the battery compartment to access the batteries. Replace them as needed, ensuring correct polarity. Reattach the cover securely to complete the process.
Conclusion
Changing the battery in your Emerson thermostat is simple. Follow the steps outlined to avoid issues. Always keep spare batteries handy. This ensures your thermostat works efficiently. A well-maintained thermostat saves energy. It also ensures a comfortable home environment. Regular checks prevent unexpected problems.
Remember to dispose of old batteries properly. It’s good for the environment. With practice, this task becomes quicker. You will gain confidence over time. Now, enjoy a smoothly running thermostat. Your comfort depends on it. Feel free to revisit these steps as needed.
Keep your home cozy and efficient year-round.
Check Best Thermostat Pricing in Amazon
** As an Amazon Associate, I earn from qualifying purchases.