
Check Best Thermostat Pricing in Amazon
** As an Amazon Associate, I earn from qualifying purchases.
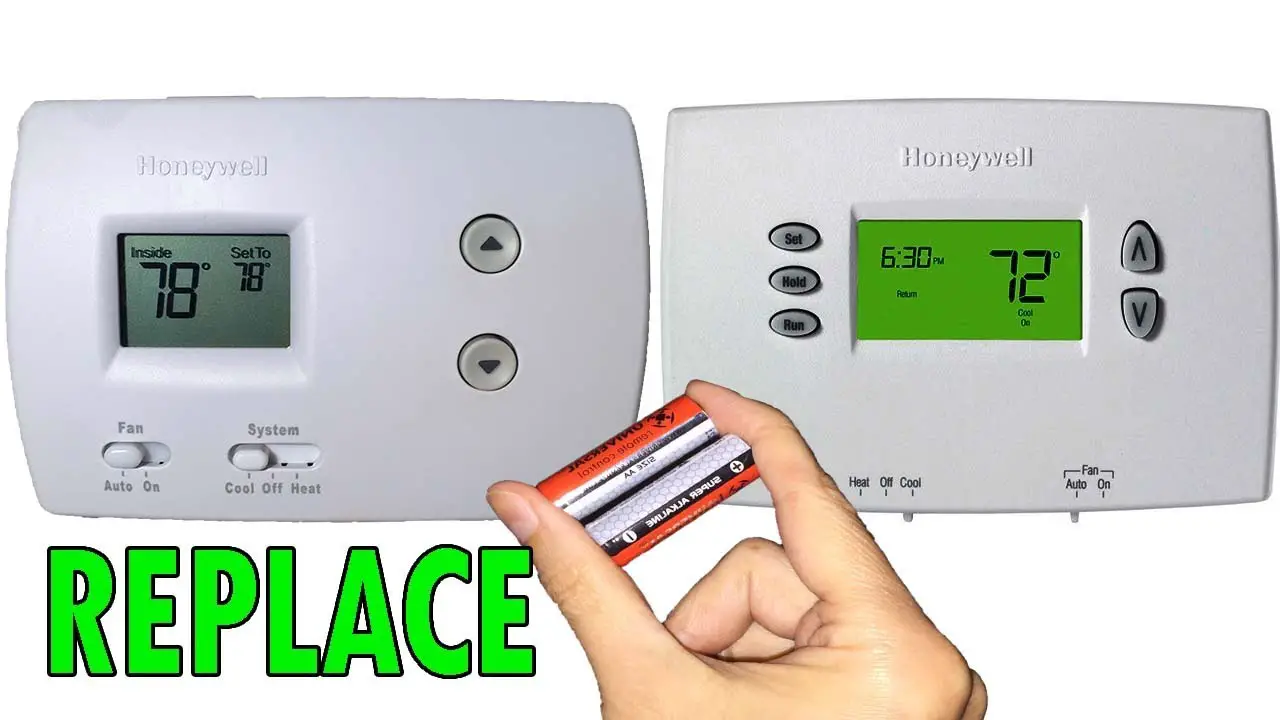
Changing the batteries in a Honeywell thermostat is a quick and easy task. First, you need to know where the batteries are located.
In this guide, we’ll walk you through the steps. A Honeywell thermostat is essential for maintaining a comfortable home temperature. But when the batteries die, the thermostat won’t work. This can lead to discomfort and even higher energy bills. Knowing how to change the batteries ensures your thermostat works efficiently.
We’ll explain each step clearly, so even beginners can follow along. This way, you’ll keep your home cozy and your energy costs down. Let’s dive into the simple steps to change the batteries in your Honeywell thermostat.
Safety Precautions
Changing the batteries in your Honeywell thermostat is a simple task. Still, it’s important to take safety precautions. This ensures both your safety and the proper functioning of the thermostat. Below are some key steps to follow.
Turning Off The Thermostat
Always turn off the thermostat before starting. This prevents any electrical issues. Locate the “Off” button on your device. Press it to ensure the thermostat is completely off.
If unsure, check the display screen. It should be blank. This confirms that the power is off. Proceed only after ensuring the device is off.
Wearing Protective Gear
Wear protective gear to safeguard yourself. Gloves are essential. They protect your hands from any sharp parts. Safety goggles are also a good idea. They protect your eyes from dust or debris.
It’s better to be safe than sorry. Wearing protective gear ensures you can change the batteries safely.
Tools Needed
Essential tools include a small screwdriver and a pair of fresh AA or AAA batteries. Keep these handy for a smooth process.
Changing the batteries in your Honeywell thermostat is a straightforward task that can save you the trouble of an unexpected power outage. However, having the right tools ready can make this process even smoother. Below, you’ll find a list of essential tools needed to get the job done efficiently.Screwdriver
A screwdriver is often necessary to open the battery compartment of your Honeywell thermostat. Most models will require either a Phillips or flat-head screwdriver. Before starting, check the screws on your thermostat to determine which type you need. It’s helpful to have a small set of screwdrivers handy so you can choose the right one easily. Make sure to keep the screws in a safe place once removed. Losing them could make it difficult to secure the battery cover back in place.Replacement Batteries
The type of replacement batteries required will depend on your Honeywell thermostat model. Common types include AA or AAA batteries. It’s wise to check your thermostat manual or the existing batteries to know the exact type and number needed. Having the correct batteries on hand will save you from a mid-task trip to the store. Consider using high-quality, long-lasting batteries to ensure your thermostat remains functional for a longer period. This can save you from frequent battery changes and the hassle that comes with it. Have you ever found yourself mid-task and realized you were missing a crucial tool? Preparing in advance can save you from such frustrations. So, gather your screwdriver and replacement batteries before beginning, and you’ll breeze through the battery change with ease.Accessing The Battery Compartment
To access the battery compartment in a Honeywell thermostat, gently pull the thermostat off the wall plate. Look for the battery slot, usually located on the back or side.
Changing the batteries in a Honeywell thermostat may seem tricky. But it is quite simple once you know the steps. The first task is accessing the battery compartment. Follow these easy steps to access it smoothly.Removing The Thermostat Cover
To start, you need to remove the thermostat cover. Carefully grip the edges of the thermostat. Pull the cover gently towards you. It should snap off without much force. Be cautious not to pull too hard. You might damage the internal components.Locating The Battery Slot
Once the cover is off, find the battery slot. It is usually near the bottom or side of the thermostat. You will see a small compartment or a slot marked for batteries. This is where the batteries are housed. Check if the slot has any clips or tabs holding it. If so, gently press them to open the compartment. “`
Credit: www.youtube.com
Removing Old Batteries
Changing the batteries in your Honeywell thermostat is easy. First, you need to remove the old batteries. This step is crucial for the proper functioning of your thermostat. Follow these simple steps to ensure you do it correctly.Start by locating the battery compartment on your Honeywell thermostat. Most models have the compartment on the back or side. Gently slide open the compartment cover. Be careful not to force it open, as this may damage the thermostat.
Once you have access to the batteries, remove them one by one. Observe their placement and note the positive and negative ends. This will help you insert the new batteries correctly later. Use a small tool, if needed, to pry them out gently.
Proper Disposal Of Batteries
Proper disposal of old batteries is important. Do not throw them in the trash. Batteries contain chemicals that can harm the environment. Instead, take them to a recycling center. Many stores also accept used batteries for recycling.
Cleaning The Battery Compartment
Before inserting new batteries, clean the battery compartment. Dust and debris can affect the connection. Use a soft cloth to wipe the compartment. Avoid using water or cleaning agents. A dry cloth is sufficient.
Check for any signs of corrosion. Corrosion can appear as a white or greenish substance. If you find any, gently scrape it off with a small tool. Ensure the area is clean and dry before placing new batteries.
Inserting New Batteries
Learn how to change the batteries in your Honeywell thermostat. Open the battery compartment, remove old batteries, and insert new ones. Ensure proper alignment for optimal performance.
Inserting New Batteries Changing the batteries in your Honeywell thermostat is a simple yet crucial task to keep your home comfortable. Whether you’re a first-time homeowner or a seasoned DIY enthusiast, ensuring your thermostat has fresh batteries can save you from unexpected temperature fluctuations. ###Correct Battery Orientation
It’s vital to insert the batteries in the correct orientation. Look for the small plus (+) and minus (-) signs inside the battery compartment. These indicators show you how to align the batteries. Make sure the positive end of the battery matches the plus sign in the compartment. The negative end should align with the minus sign. If you don’t follow this orientation, the thermostat won’t power up. This might seem like a small detail, but it’s one that makes all the difference. ###Ensuring Proper Fit
Proper fit is just as important as correct orientation. Gently slide the batteries into their slots. You should feel a slight resistance as they click into place. Avoid forcing the batteries. If they don’t fit easily, you might be using the wrong type or size. Honeywell thermostats usually require AA or AAA batteries. Double-check the user manual if you’re unsure. Using the correct batteries ensures optimal performance and a longer life for your thermostat. Have you ever struggled with a simple task like this and realized you were overthinking it? Sometimes, it’s the straightforward steps that we overlook. Make sure your batteries are snug and secure before closing the compartment. By following these steps, you ensure your Honeywell thermostat functions efficiently, providing you with the comfort you need. Have you ever changed the batteries in your thermostat? What was your experience like? Share your thoughts in the comments!
Credit: www.homeserve.com
Reassembling The Thermostat
Once you’ve replaced the batteries in your Honeywell thermostat, it’s time to put everything back together. Reassembling the thermostat correctly is crucial to ensure it functions properly. Let’s walk through the steps to secure the cover and turn the thermostat back on.
Securing The Thermostat Cover
First, align the cover with the base of the thermostat. You’ll notice small hinges or clips that need to fit into place. Take your time here to avoid damaging the cover or the base.
Press the cover gently but firmly until you hear it click into place. This sound indicates that the cover is securely attached. If you don’t hear a click, double-check the alignment and try again.
Check Best Thermostat Pricing in Amazon
** As an Amazon Associate, I earn from qualifying purchases.
It’s essential to ensure the cover is fully secured. A loose cover can lead to the thermostat not working correctly or even falling off. Have you ever had an appliance malfunction because a simple part wasn’t secured properly? It’s frustrating, right?
Turning The Thermostat Back On
With the cover securely in place, it’s time to turn your thermostat back on. Locate the power switch or button. This is usually on the side or front of the device.
Switch the power back on and watch the display. It should light up and show the current temperature and settings. If the display doesn’t turn on, double-check the batteries to ensure they’re installed correctly.
Once your thermostat is on, test it by adjusting the temperature settings. Make sure the heating or cooling system responds accordingly. Does the room temperature change as expected? If it does, congratulations! You’ve successfully changed the batteries and reassembled your Honeywell thermostat.
Have you ever tackled a DIY project that seemed daunting at first but turned out to be straightforward? Changing your thermostat batteries might just be one of those tasks. Remember, taking the time to do it right ensures your home stays comfortable year-round.
Testing The Thermostat
Changing the batteries in your Honeywell thermostat is just the first step. After completing this task, it’s crucial to test the thermostat to ensure it’s functioning properly. Skipping this step can lead to unexpected issues later on, such as incorrect temperature readings or a non-responsive unit.
Checking The Display
First, check the thermostat display. A clear, bright display indicates the batteries are installed correctly and are providing power. If the display is dim or blank, double-check the battery orientation.
My friend once replaced his thermostat batteries but didn’t check the display. He later found out that one battery was inserted the wrong way, causing a blank screen. Avoid this by ensuring the display is visible and accurate right after changing the batteries.
Verifying Functionality
Next, verify the thermostat’s functionality. Set the thermostat to a different temperature and listen for a click, indicating the system is responding. Also, check if the heating or cooling system starts shortly after.
Once, I set my thermostat to a cooler temperature and waited. The AC didn’t kick in immediately, so I knew something was off. I rechecked the batteries and discovered one was slightly loose. After securing it, the system responded promptly.
Have you ever had a similar experience? Double-checking can save you from future headaches.
Testing your thermostat ensures it’s ready to keep your home comfortable. Always take a moment to verify both the display and functionality after changing the batteries.
Maintenance Tips
Easily change the batteries in a Honeywell thermostat by removing the faceplate. Insert new AA or AAA batteries. Reattach the faceplate to complete the process.
Changing the batteries in your Honeywell thermostat is a simple task, but maintaining it properly ensures it works efficiently. Regular maintenance can save you from unexpected disruptions, especially during extreme weather. Let’s dive into some essential maintenance tips to keep your thermostat in top shape.Regular Battery Checks
Make it a habit to check the batteries at least twice a year. A good time to do this is at the start of summer and winter. These seasons typically demand more from your HVAC system. A quick check can prevent your thermostat from failing when you need it the most.Using Quality Batteries
Always use high-quality batteries for your Honeywell thermostat. Cheap or generic batteries might save you money initially but can lead to frequent replacements. This can be both inconvenient and costly in the long run. Opt for well-known brands to ensure longevity and reliability. — Maintaining your Honeywell thermostat doesn’t have to be a chore. By performing regular battery checks and using quality batteries, you can avoid many common issues. Have you ever experienced your thermostat failing at a critical moment? Share your stories in the comments below!
Credit: willplumb.com
Frequently Asked Questions
How Do I Open My Honeywell Thermostat To Change The Battery?
To open your Honeywell thermostat, gently pull the thermostat cover straight off. Replace the battery inside and reattach the cover.
How Do You Take The Cover Off Of A Honeywell Thermostat?
To remove the Honeywell thermostat cover, gently pull it straight off the wall. Ensure power is off before starting.
How Do You Open A Thermostat To Change The Battery?
To open a thermostat, locate the cover and gently pull it off. Replace the battery inside.
What Happens When Honeywell Thermostat Battery Dies?
When the Honeywell thermostat battery dies, the screen goes blank and the thermostat stops working. Replace the batteries promptly to restore functionality.
Conclusion
Changing batteries in a Honeywell thermostat is simple and essential. Follow the steps carefully to ensure proper functioning. Regular battery replacement prevents thermostat issues and maintains comfort. Always check the battery type before purchasing. Keep your thermostat running smoothly with routine checks.
A functional thermostat ensures energy efficiency and home comfort. Don’t forget to dispose of old batteries safely. With these tips, your Honeywell thermostat will work efficiently. Enjoy consistent temperatures and peace of mind.
Check Best Thermostat Pricing in Amazon
** As an Amazon Associate, I earn from qualifying purchases.