
Check Best Thermostat Pricing in Amazon
** As an Amazon Associate, I earn from qualifying purchases.
Replacing a thermostat in a car usually takes about one to two hours. The exact time depends on the vehicle’s make and model.
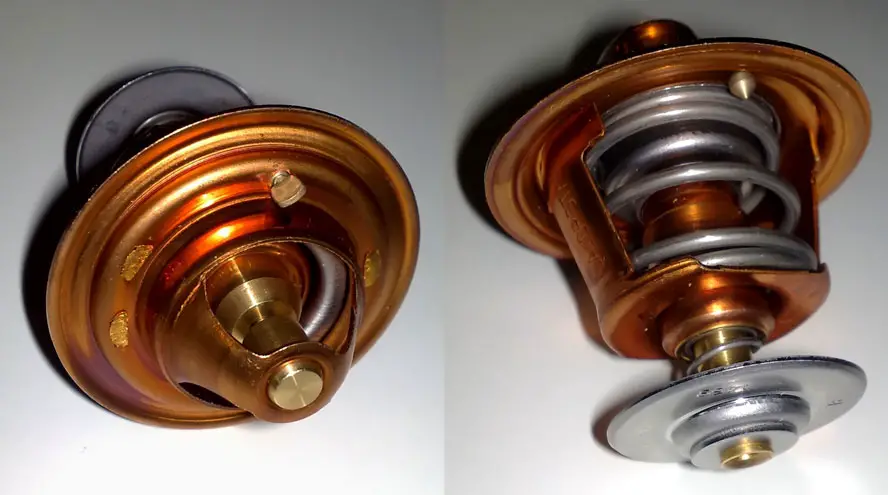
A car’s thermostat plays a crucial role in regulating the engine’s temperature. If it fails, the engine can overheat or run too cold, leading to performance issues. Replacing a faulty thermostat is essential for maintaining engine health and efficiency. The process involves draining the coolant, removing the old thermostat, and installing a new one.
While some vehicles have easier access to the thermostat, others may require more effort. Proper tools and mechanical know-how can make the task smoother. Regular maintenance checks can help identify thermostat issues early, preventing potential engine damage.

Credit: shop.advanceautoparts.com
Introduction To Car Thermostat Replacement
A car’s thermostat is a crucial component. It regulates the engine’s temperature. Replacing a thermostat is vital for your vehicle’s health. How long does it take to replace a thermostat in a car? Let’s explore that.
The Role Of A Thermostat In Your Car
The thermostat controls coolant flow. It ensures the engine stays at the right temperature. If the engine gets too hot, it can get damaged. If the engine is too cold, it won’t run efficiently. The thermostat opens and closes to maintain this balance.
Signs Of A Faulty Thermostat
A faulty thermostat can cause many issues. Here are some signs to watch for:
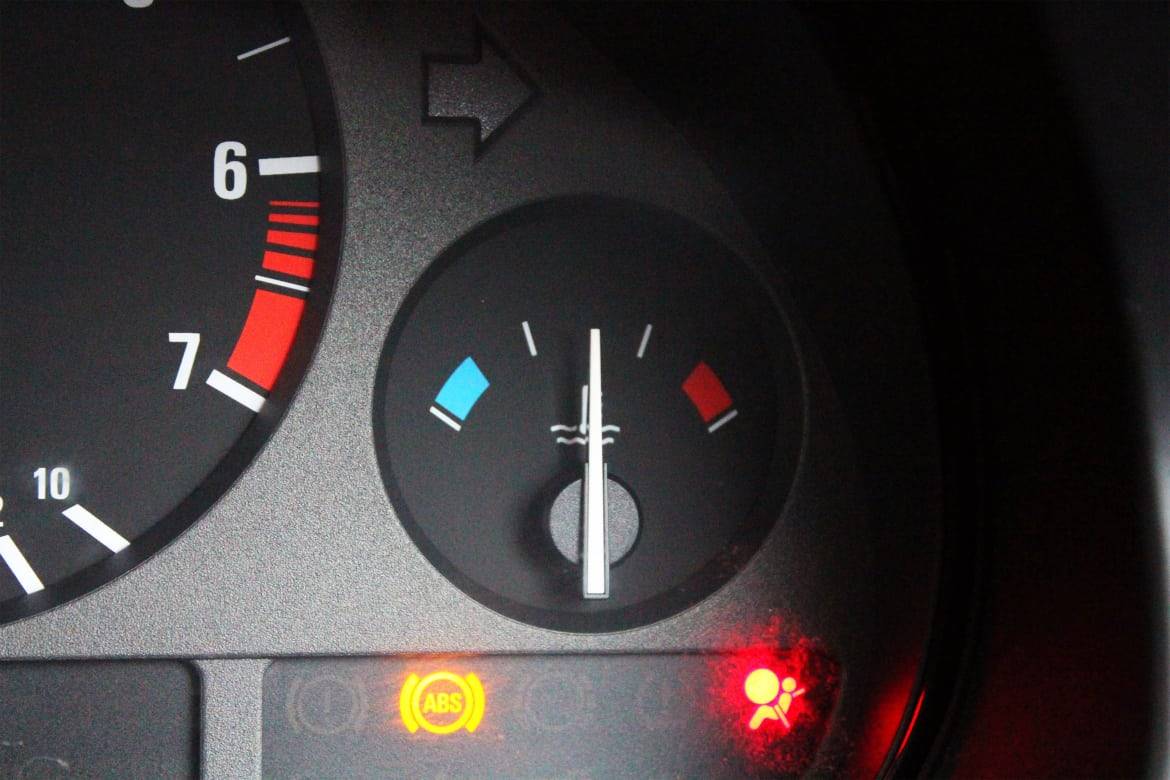
- Engine overheating: The temperature gauge shows the engine is too hot.
- Engine too cold: The heater doesn’t get warm, or the temperature gauge stays low.
- Coolant leaks: You see coolant under the car.
- Erratic temperature changes: The temperature gauge moves up and down quickly.
If you notice these signs, it’s time to check your thermostat.
Assessing The Situation
When your car’s thermostat starts acting up, it can lead to overheating or poor engine performance. Assessing the situation correctly ensures you don’t replace it unnecessarily. Knowing when to replace the thermostat and having the right tools can save you time and money.
When To Consider A Thermostat Replacement
Your car’s thermostat controls engine temperature. If it fails, the engine may overheat or run cold. Signs of a failing thermostat include:
- Engine temperature gauge is very high or very low.
- Engine overheats quickly after starting.
- Coolant leaks near the thermostat housing.
- Poor heater performance in cold weather.
If you notice any of these signs, it may be time to replace your car’s thermostat.
Tools Needed For The Job
Having the right tools makes thermostat replacement easier. Essential tools for the job include:
- Socket set and wrenches
- Screwdrivers
- Gasket scraper
- Drain pan for coolant
- New thermostat and gasket
- Coolant
These tools help ensure a smooth and efficient replacement process.
| Tool | Purpose |
|---|---|
| Socket set and wrenches | Remove and install bolts |
| Screwdrivers | Remove clamps and hoses |
| Gasket scraper | Clean old gasket material |
| Drain pan | Catch old coolant |
| New thermostat and gasket | Replace the faulty thermostat |
| Coolant | Refill the cooling system |
Understanding these tools and their uses makes the job quicker and safer. Be prepared to handle coolant safely. Always follow proper disposal guidelines.
Preparing For Replacement
Replacing a car thermostat can seem daunting. It becomes easier with the right preparation. Before diving in, ensure you have all necessary tools and parts. This section covers important steps for a smooth replacement process.
Safety Measures Before Starting
Safety should always come first. Wear safety gloves to protect your hands from sharp edges and hot surfaces. Use safety goggles to shield your eyes from debris. Ensure your car is parked on a flat surface. Engage the parking brake to prevent any movement.
Disconnect the car battery to avoid any electrical issues. Let the engine cool down completely. Working on a hot engine can cause severe burns. Keep a fire extinguisher nearby as a safety precaution.
Accessing The Thermostat Housing
First, locate the thermostat housing. It is usually found by following the upper radiator hose. The hose connects to the thermostat housing on the engine. Remove the radiator cap to release any pressure in the cooling system.
Drain the coolant from the radiator into a clean container. Use a wrench to loosen the bolts on the thermostat housing. Carefully remove the housing to expose the thermostat. Take note of the thermostat’s orientation before removing it.
Clean the housing surface to ensure a proper seal when installing the new thermostat. Check the condition of the gasket and replace it if necessary. Prepare the new thermostat for installation by comparing it with the old one.
| Step | Action |
|---|---|
| 1 | Wear safety gloves and goggles |
| 2 | Engage the parking brake |
| 3 | Disconnect the car battery |
| 4 | Let the engine cool down |
| 5 | Remove the radiator cap |
| 6 | Drain the coolant |
| 7 | Loosen the thermostat housing bolts |
| 8 | Remove the thermostat housing |
| 9 | Clean the housing surface |
| 10 | Check and replace the gasket if needed |
Step-by-step Replacement Process
Replacing a car thermostat can seem tricky. But, a step-by-step process makes it manageable. Following the right steps ensures a smooth and quick replacement. Below is the detailed process to help you out.
Removing The Old Thermostat
Before starting, make sure the engine is cool. This prevents burns.
- Locate the thermostat: It’s usually near the top of the engine, connected to the radiator by a hose.
- Drain the coolant: Place a bucket under the radiator. Open the drain valve and let the coolant flow out.
- Remove the radiator hose: Use pliers to loosen the clamp. Slide the hose off the thermostat housing.
- Unbolt the thermostat housing: Use a wrench to remove the bolts. Lift the housing off carefully.
- Take out the old thermostat: Note its position. This helps when installing the new one.
Installing The New Thermostat
Ensure you have the correct replacement thermostat for your car model.
- Place the new thermostat: Install it in the same position as the old one. Make sure the spring side faces the engine.
- Replace the gasket: A new gasket ensures a tight seal. Apply a thin layer of gasket sealant if needed.
- Reattach the thermostat housing: Bolt it back in place. Ensure the bolts are tight but not overly so.
- Reconnect the radiator hose: Slide the hose back onto the housing. Secure it with the clamp.
- Refill the coolant: Pour the drained coolant back into the radiator. Top it up if necessary.
- Check for leaks: Start the engine and let it run. Look for any coolant leaks around the thermostat housing.
Following these steps ensures a proper thermostat replacement. This can save you time and money on repairs. Always refer to your car’s manual for specific instructions.
Testing The New Thermostat
After installing a new thermostat in your car, the next step is to test it. Testing ensures the thermostat works properly and your engine stays at the right temperature. Follow these steps to test your new thermostat.
Ensuring Proper Installation
Before testing, make sure the thermostat is installed correctly. Check the following:
- Thermostat Orientation: Ensure it faces the right way.
- Gasket Position: Verify the gasket is in place.
- Tightened Bolts: Make sure all bolts are secure.
If these points are correct, you are ready to proceed with the testing.
Check Best Thermostat Pricing in Amazon
** As an Amazon Associate, I earn from qualifying purchases.
Running The Engine To Test
To test the thermostat, you need to run the engine. Follow these steps:
- Start the Engine: Turn on your car and let it idle.
- Monitor the Temperature Gauge: Watch the gauge on your dashboard.
- Feel the Radiator Hoses: Carefully touch the upper and lower hoses. They should warm up as the engine heats.
- Check for Coolant Flow: Open the radiator cap and look for fluid movement. This shows the thermostat is opening.
If the temperature gauge stays in the normal range and coolant flows, your thermostat works properly. If not, you may need to recheck the installation or replace the thermostat again.
Common Mistakes To Avoid
Replacing a car thermostat can be tricky. Many people make mistakes that can cause problems. Here are some common mistakes to avoid to ensure a smooth replacement process.
Incorrect Thermostat Orientation
Incorrect thermostat orientation is a common mistake. The thermostat must be installed in the correct position. If not, it can cause the car to overheat.
Always check the orientation before installing. Look for arrows or marks on the thermostat. These marks show the correct direction. Installing it wrong can lead to engine problems.
Overlooking Coolant Replacement
Many people overlook the coolant replacement when changing a thermostat. Old coolant can be dirty or degraded. This can cause the engine to overheat.
Always drain the old coolant. Replace it with new, recommended coolant. This ensures the engine stays cool and runs smoothly.
| Step | Description |
|---|---|
| 1 | Drain old coolant |
| 2 | Install new thermostat |
| 3 | Refill with new coolant |
- Check orientation before installation.
- Always replace old coolant.
- Follow the manufacturer’s instructions.
Cost Considerations
Replacing a thermostat in a car involves costs that vary based on multiple factors. Understanding these costs helps you make an informed decision. Below, we break down the expenses associated with both DIY and professional thermostat replacements, along with potential savings and trade-offs.
Diy Vs Professional Replacement Costs
Deciding between a DIY thermostat replacement and hiring a professional mechanic impacts your overall costs.
- DIY Costs: If you choose to replace the thermostat yourself, you primarily pay for the parts. The average cost of a car thermostat ranges from $20 to $50.
- Professional Costs: Hiring a professional mechanic includes labor charges. Labor costs can range from $100 to $300, depending on your location and vehicle model.
Therefore, a professional replacement generally costs between $120 and $350.
Potential Savings And Trade-offs
DIY replacements can save you money but come with their own set of challenges. Understanding these savings and trade-offs is essential.
| Aspect | DIY Replacement | Professional Replacement |
|---|---|---|
| Cost | $20-$50 (parts only) | $120-$350 (parts + labor) |
| Time | 2-3 hours | 1-2 hours |
| Skill Level | Moderate to High | Not Required |
| Risk of Mistakes | High | Low |
DIY Savings: You can save on labor costs. But you must have the necessary skills and tools.
Trade-offs: DIY attempts risk mistakes. Mistakes can result in higher future repair costs. Professional mechanics offer reliability and a warranty on work performed.
Credit: www.cars.com
Maintaining Your Car’s Cooling System
Keeping your car’s cooling system in top condition is crucial. It ensures your engine runs smoothly and prevents overheating. Regular maintenance is key to avoiding costly repairs and extending your vehicle’s lifespan.
Regular Check-ups For Longevity
Regular check-ups help identify issues early. Early detection can save you from expensive repairs. Here are some essential tasks for maintaining your car’s cooling system:
- Check coolant levels at least once a month.
- Inspect hoses and belts for signs of wear and tear.
- Flush the radiator every 30,000 miles or as advised in your car’s manual.
- Examine the thermostat periodically to ensure it functions properly.
Use a simple routine to check these components. It will help maintain your car’s cooling system and ensure long-term performance.
When To Schedule Professional Inspections
Some maintenance tasks require professional expertise. Knowing when to schedule these inspections is essential. Here are signs that indicate it’s time to visit a mechanic:
- Unusual engine temperatures: If your engine heats up quickly or inconsistently, it’s time to get it checked.
- Coolant leaks: Puddles under your car could indicate a leak. A professional should inspect this immediately.
- Strange noises: Grinding or squealing sounds from the engine area can signal a failing cooling system component.
- Poor heater performance: If your car’s heater isn’t working well, it might be due to a cooling system problem.
Scheduling regular professional inspections can prevent major issues. It ensures your car’s cooling system remains efficient and reliable.

Credit: www.howacarworks.com
Frequently Asked Questions
Are Car Thermostats Easy To Replace?
Yes, car thermostats are generally easy to replace. Basic tools and some mechanical knowledge are usually required. Always consult your vehicle’s manual for specific instructions.
How Long Does It Take A Mechanic To Change A Thermostat In A Car?
A mechanic typically takes 1 to 2 hours to change a car thermostat. Time varies by car make and model.
How Many Hours Does It Take To Replace A Thermostat?
Replacing a thermostat typically takes 1 to 2 hours. The exact time depends on the vehicle and technician’s experience.
What Does It Cost To Replace A Thermostat In A Car?
Replacing a car thermostat typically costs between $150 and $300. Labor and parts prices vary by vehicle model and location.
Conclusion
Replacing a thermostat in a car typically takes one to two hours. The time depends on your vehicle model and experience. Ensure you have the necessary tools and follow safety guidelines. A timely thermostat replacement can prevent engine overheating and costly repairs.
Always consult your vehicle’s manual for specific instructions.
Check Best Thermostat Pricing in Amazon
** As an Amazon Associate, I earn from qualifying purchases.