
Check Best Thermostat Pricing in Amazon
** As an Amazon Associate, I earn from qualifying purchases.
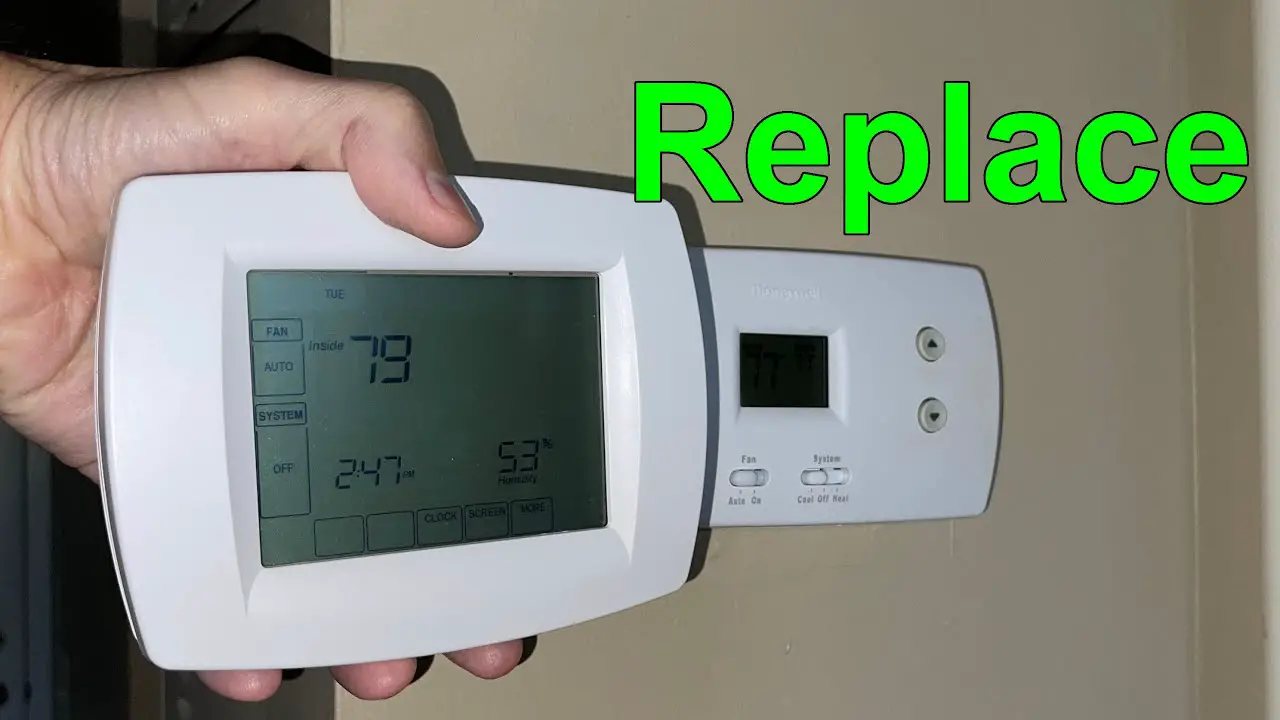
Are you dealing with a faulty Honeywell thermostat and wondering how to replace it without a hitch? You’re in the right place.
Replacing a thermostat might sound daunting, but it’s simpler than you think. Imagine finally having the perfect temperature in your home without the constant ups and downs. With just a few easy steps, you can have your new thermostat up and running, saving energy and ensuring comfort.
By the end of this guide, you’ll feel confident and empowered to handle the task like a pro. Let’s dive into the process that will transform your living space into a haven of comfort and efficiency.

Credit: willplumb.com
Tools Needed
Replacing a Honeywell thermostat requires some basic tools. These tools make the process smooth and efficient. Having them ready is important for success.
1. Screwdriver
A screwdriver is essential to remove screws. Most thermostats have screws holding them to the wall. A Phillips or flathead screwdriver works best.
2. Drill
Sometimes, new holes are needed for mounting. A drill is useful for this task. It helps create precise holes in the wall.
3. Wire Strippers
Wire strippers are crucial for working with wires. They help remove insulation without damaging the wires. This tool is vital for safe connections.
4. Level
A level ensures the thermostat is straight. It helps avoid crooked installation. A level provides a professional finish.
5. Tape Measure
Measuring the wall space is important. A tape measure helps find the right spot. It ensures the thermostat fits correctly.
6. Pencil
A pencil is handy for marking positions. Marking helps guide where to drill or screw. It prevents mistakes during installation.

Credit: www.youtube.com
Safety Precautions
Ensure safety by turning off the power at the circuit breaker before replacing a Honeywell thermostat. Carefully remove the old unit, noting the wiring setup to avoid confusion with the new installation. Use insulated tools to prevent electrical shock during the process.
Replacing a Honeywell thermostat can improve your home’s comfort. Yet, safety is crucial. Ignoring it can lead to accidents or damage. Before starting, learn the necessary safety steps. These steps protect you and your device.Turn Off The Power
Switch off the power at the circuit breaker. This prevents electrical shocks. Ensure the power to the thermostat is completely off. Test with a voltage tester. This confirms no current flows. A small oversight can cause harm.Gather The Right Tools
Have all tools ready before you begin. Use a screwdriver, drill, and voltage tester. Having tools nearby saves time. It reduces the risk of accidents.Handle Wires With Care
Wires can be fragile and dangerous. Label them before removal. This helps you reconnect them correctly later. Avoid pulling wires too hard. Damaging them can cause electrical issues.Use A Stable Ladder
If your thermostat is high, use a stable ladder. Ensure it’s on a flat surface. This prevents falls. Position the ladder close to the thermostat. This gives better control and safety.Read The Manual
Each thermostat model differs. Read the manual for specific instructions. It includes safety tips. Understanding the manual can prevent mistakes. It ensures a smooth installation process. By following these safety steps, your thermostat replacement will be safe and efficient.Removing The Old Thermostat
Removing the old thermostat is the first step in replacing a Honeywell thermostat. Start by turning off power to the system. Carefully detach the thermostat from the wall, ensuring wires are labeled for easy reconnection.
Removing an old Honeywell thermostat might seem difficult. But, with a bit of guidance, it becomes simple. Follow these steps to ensure a smooth process. Start by focusing on safety and organization. This way, you can avoid unnecessary issues.Power Off The System
First, ensure your safety. Turn off the power to your HVAC system. Go to your home’s circuit breaker. Locate the switch for your heating and cooling system. Flip the switch to the “off” position. This prevents any electrical accidents. Double-check to make sure the system is off.Detach The Cover
Next, remove the thermostat’s cover. Most covers snap off easily. Gently pull the cover away from the wall. Some covers may need a screwdriver. If so, use the right tool to avoid damage. Set the cover aside for now. Make sure it’s in a safe place.Label The Wires
Before disconnecting, label each wire. Use small pieces of tape. Write the corresponding letter or number on each piece. This keeps you organized. It ensures proper installation of the new thermostat. Take a picture of the wiring setup. This serves as an extra reference.Installing The New Honeywell Thermostat
Replacing a Honeywell thermostat can seem tricky. But installing the new one is simple. Follow these steps. Understand each step clearly. And you’ll have it working in no time.
Mount The New Base
First, remove the old base. Clean the wall area. Hold the new base against the wall. Mark the screw holes. Use a drill to make holes. Insert the wall anchors. Now, align the base with the holes. Screw it in place. Ensure it is level. A level base ensures proper functioning.
Connect The Wires
Note the wire labels. Match them with the new thermostat’s labels. Insert each wire into the correct terminal. Tighten the screws securely. Loose wires can cause issues. Double-check the connections. Make sure everything is secure.
Secure The Cover
Place the cover over the mounted base. Align it properly. Press gently until it clicks. Ensure it’s firmly attached. A secure cover protects internal components. Finally, restore power to the thermostat. Test it to confirm proper operation.
Configuring The Thermostat Settings
Replacing a Honeywell thermostat involves careful attention to detail. Start by switching off the power to ensure safety. Remove the old thermostat by loosening screws and disconnecting wires. Attach the new thermostat using the provided instructions, reconnecting wires carefully. Adjust thermostat settings to match your comfort preferences.
Configuring the thermostat settings after replacing a Honeywell thermostat is essential. It ensures optimal comfort and energy efficiency at home. Proper configuration enhances the thermostat’s functionality. It aligns with your daily routine, providing a seamless experience.Set The Date And Time
Setting the date and time is your first step. It helps in accurate scheduling. Locate the ‘Date/Time’ option on the thermostat. Press it to enter the settings menu. Use the up and down arrows to adjust the date. Press ‘Enter’ to confirm. Repeat the process for setting the time. Make sure it matches your local time.Program Temperature Settings
Programming temperature settings tailors your comfort needs. Start by choosing a program schedule. Access the ‘Program’ menu on the thermostat. Select ‘Weekday’ or ‘Weekend’ mode. Use the arrows to set temperature preferences. Choose different settings for morning, afternoon, and night. Confirm each setting by pressing ‘Enter’. Adjust as needed for changing seasons.
Credit: willplumb.com
Check Best Thermostat Pricing in Amazon
** As an Amazon Associate, I earn from qualifying purchases.
Testing The System
Replacing a Honeywell thermostat involves removing the old unit and connecting the new one. Ensure the power is off before starting. Follow the wiring diagram provided with your new thermostat to match wires correctly. Adjust settings to control temperature effectively and test the system for proper operation.
Testing your new Honeywell thermostat is a crucial step in ensuring your heating and cooling system functions smoothly. After going through the installation process, you want to make sure everything is working as expected. Taking the time to test the system can save you from unexpected surprises later. Let’s dive into the steps to ensure your system is up and running efficiently.Turn On The Power
First, turn on the power to your HVAC system. Head over to your circuit breaker and flip the switch back to the “on” position. You may hear a faint hum or click, indicating the system is receiving power. Now, go to your thermostat and check if the display is lit. A clear, bright screen means the thermostat is powered correctly. If it’s not, double-check the connections and ensure the wires are snugly fitted. Consider this: have you ever tried to power up a device, only to find out it wasn’t plugged in? It’s a simple mistake but happens more often than you think. Ensuring the power is on is a basic, yet vital step.Check Heating And Cooling
Once the power is on, test your heating and cooling settings. Switch your thermostat to the heating mode and set a temperature higher than the current room temperature. Listen for the furnace to start. Feel the air vents to ensure warm air is circulating. After confirming the heating, switch to cooling mode. Set the thermostat to a temperature lower than the room’s current temperature. The air conditioner should kick in. Cool air should flow from the vents shortly after. Imagine you’ve just installed your thermostat in the middle of winter. You want to ensure the heating works perfectly, so you’re not left in the cold. Testing now avoids discomfort later. Testing your system ensures comfort and efficiency in your home. Have you discovered any unexpected issues during testing? Addressing them early ensures peace of mind and keeps your home at the perfect temperature.Troubleshooting Common Issues
Replacing a Honeywell thermostat might seem straightforward, but what happens when things don’t go as planned? You might encounter a few hiccups along the way, and knowing how to troubleshoot these common issues can save you time and frustration. Dive into some typical problems and learn how to tackle them effectively.
Incorrect Wiring
Have you ever stared at a tangle of wires wondering if you did it right? Incorrect wiring is a common problem that can lead to a non-functional thermostat. Double-check that each wire matches the labeled terminal on the thermostat.
Use your smartphone to snap a picture of the old setup before removing it. It’s a lifesaver when you’re trying to recall where each wire goes. If you’re still unsure, consider consulting the manual or reaching out to a professional for advice.
Display Problems
A blank or flickering screen can be frustrating. You might think you’ve installed the thermostat incorrectly, but sometimes it’s a simple issue. Check to see if the display is securely mounted.
Ensure the power supply is intact. A loose wire or dead battery could be the culprit. If the problem persists, try resetting the thermostat—often a quick fix for minor display issues.
Temperature Fluctuations
Does your room feel like it’s constantly changing from a sauna to an icebox? Temperature fluctuations can be annoying and might suggest a calibration issue. Start by verifying the thermostat’s location—avoid placing it near vents or windows.
Consider adjusting the settings for a more stable temperature. Sometimes, updating the software can solve erratic temperature readings. Have you tried this before and found it useful? Share your experiences or insights with others facing the same challenge.
As you troubleshoot these issues, ask yourself: What’s the real problem here, and how can you solve it efficiently? Remember, understanding the root cause is key to finding the right solution.
Maintenance Tips
Maintaining your Honeywell thermostat ensures it runs efficiently. Regular upkeep can prevent unexpected issues. This section provides essential maintenance tips. Follow these to keep your thermostat in top condition.
Regular Cleaning
Dust can accumulate on your thermostat. This may affect its performance. Clean it regularly to ensure accurate readings. Use a soft cloth. Avoid harsh cleaners. Gently wipe the surface. Pay attention to the screen and buttons. Clean these areas thoroughly. This simple task can improve functionality.
Battery Replacement
Batteries power your thermostat. Weak batteries can disrupt operation. Replace them as needed. Check the battery indicator. It’s usually on the screen. If low, change the batteries. Use high-quality ones. This ensures longer life. Proper battery maintenance prevents sudden shutdowns.
Software Updates
Software updates enhance your thermostat’s features. They fix bugs and improve performance. Check for updates regularly. Connect your thermostat to Wi-Fi. Follow the instructions on the Honeywell app. Keep your software current. This ensures optimal operation. Updated software can also improve energy efficiency.
Frequently Asked Questions
How Do I Know If My Honeywell Thermostat Needs To Be Replaced?
Your Honeywell thermostat may need replacing if it displays incorrect temperatures, frequent malfunctions, or unresponsive controls. Check for wiring issues, outdated models, or damaged parts. Replacing it can improve efficiency and comfort in your home. Consider a new model if problems persist despite troubleshooting.
Can You Replace A Thermostat Without An Electrician?
Yes, you can replace a thermostat without an electrician. Ensure the power is off and follow the manufacturer’s instructions carefully. If unsure, consult a professional for safety. Always prioritize safety and confirm compatibility with your HVAC system. Reading the manual thoroughly can help in successful installation.
What Is The Average Life Of A Honeywell Thermostat?
A Honeywell thermostat typically lasts between 10 to 15 years. Proper maintenance can extend its lifespan. Regular cleaning and timely battery replacement ensure optimal performance. Consider upgrading if it shows signs of malfunction or inefficiency.
Can I Change My Old Thermostat To A New One?
Yes, you can change your old thermostat to a new one. Ensure compatibility with your HVAC system first. Follow the manufacturer’s instructions or hire a professional for installation. Upgrading can improve energy efficiency and provide better temperature control. Enjoy the benefits of modern features with your new thermostat.
Conclusion
Replacing a Honeywell thermostat is simpler than it seems. Follow steps carefully. Turn off power first for safety. Remove the old unit. Install the new one with proper wiring. Test it to ensure everything works. Patience and attention are key.
Don’t rush the process. Use the manual for guidance. Completing the task saves money and time. Feel proud of doing it yourself. A functional thermostat ensures comfort. Enjoy a cozy home with efficient heating and cooling.
Check Best Thermostat Pricing in Amazon
** As an Amazon Associate, I earn from qualifying purchases.