
Check Best Thermostat Pricing in Amazon
** As an Amazon Associate, I earn from qualifying purchases.
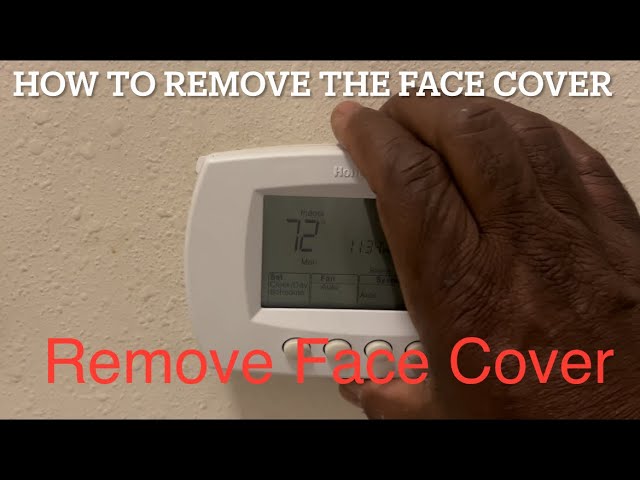
Removing a Honeywell thermostat cover is straightforward. First, switch off the power.
Then, gently pull the cover off. Honeywell thermostats are popular for their reliability and ease of use. Sometimes, you need to access the inside for maintenance or battery replacement. Removing the thermostat cover is a simple task, but doing it correctly is crucial to avoid damaging the device.
This guide will walk you through the process step-by-step, ensuring you can remove the cover safely and efficiently. Whether you’re replacing batteries or performing a check-up, this straightforward method will help you get the job done quickly. Keep reading to learn the exact steps and tips for a hassle-free experience.
Tools Needed
A small screwdriver and a putty knife are essential for removing a Honeywell thermostat cover. These tools help to gently release the cover without damaging the unit.
When you need to remove a Honeywell thermostat cover, having the right tools on hand can make the process smoother and prevent damage to the device. This section will guide you through the essential tools and safety gear required to safely and efficiently remove the cover.Essential Tools
To start, you’ll need a few basic tools that are probably already in your toolbox. A small flathead screwdriver is crucial. This tool helps you gently pry off the cover without scratching or damaging it. A Phillips head screwdriver might also come in handy if your thermostat model has screws that need to be removed. Additionally, having a pair of needle-nose pliers can be useful. These pliers help you grasp and pull out any small components or wires that might be obstructing the removal of the cover.Safety Gear
Safety should always be a priority. Before you begin, make sure you have the appropriate safety gear. Wear a pair of work gloves. They protect your hands from any sharp edges and prevent you from getting shocked if you accidentally touch any exposed wires. Safety goggles are also a good idea. They protect your eyes from dust and debris that might be disturbed during the process. Lastly, ensure the power to the thermostat is turned off at the circuit breaker. This step is crucial for your safety and prevents any electrical accidents while you’re working on the device. Removing a Honeywell thermostat cover doesn’t have to be daunting. With the right tools and safety gear, you can do it efficiently and safely. What tools do you find indispensable for your home maintenance projects? Share your experiences in the comments!Power Off
When dealing with any electrical device, safety should always come first. Removing the cover of your Honeywell thermostat is no different. Before you start, you need to ensure that you power off the device to prevent any accidents or damage. This step is crucial and straightforward. Let’s break it down.
Switch Off Thermostat
The first step is to switch off your thermostat. Locate the power button on your Honeywell thermostat. If you’re unsure, refer to the user manual for guidance. Press the button to turn it off completely. You should see the screen go blank or display an “off” message.
Always double-check that the device is indeed off. It’s easy to overlook, especially if you’re in a hurry. Take a moment to confirm the screen is blank, ensuring the thermostat is off. This simple step can save you from potential electrical shocks.
Turn Off Circuit Breaker
Next, you need to cut off the power supply to the thermostat from your home’s electrical panel. Head to your circuit breaker box. Look for the switch that controls your thermostat. It’s usually labeled, but if not, it’s often in the same section as the switches for your heating and cooling systems.
Flip the circuit breaker to the “off” position. This step is essential for your safety. With the circuit breaker off, you’re ensuring that no electrical current reaches your thermostat. This minimizes the risk of shocks and protects both you and the device.
Have you ever experienced a small shock while working with electrical devices? It’s a startling reminder of why these steps are so important. By powering off both the thermostat and the circuit breaker, you’re taking the necessary precautions to safely remove the Honeywell thermostat cover.
Remember, safety first. Now that you have powered off the thermostat and the circuit breaker, you’re ready for the next steps. With these precautions in place, you can proceed confidently, knowing you’ve minimized the risks involved.
Locate Screws
When you need to remove your Honeywell thermostat cover, locating the screws is a critical step. It might seem straightforward, but knowing where to find and how to handle these screws can save you a lot of time and frustration. Let’s dive into the details.
Identify Screw Locations
The first thing you need to do is identify where the screws are located. Typically, Honeywell thermostats have screws at the top and bottom of the cover. Some models might have them hidden under a small panel or tab. Always check your model’s manual for specific instructions.
If you don’t have the manual handy, a quick online search using your thermostat’s model number can help. I remember struggling with my own Honeywell thermostat, only to find out that the screws were cleverly concealed under a snap-on cover. Knowing where to look made all the difference.
Types Of Screws
Honeywell thermostats can use different types of screws. The most common types are Philips head and flathead screws. Ensure you have the right screwdriver for the job. Using the wrong tool can strip the screw and make removal difficult.
Some newer models may even use Torx screws. These are star-shaped and require a special Torx screwdriver. It’s a good idea to have a basic set of screwdrivers on hand to tackle any type you encounter.
Have you ever tried to remove a screw and realized you didn’t have the right tool? It can be frustrating. Avoid this by being prepared. Check the screws first and make sure you have the appropriate tools before you start.
Getting the right tools and knowing the screw locations can make the process of removing your Honeywell thermostat cover smooth and hassle-free. Have you located the screws on your thermostat yet? What type of screws did you find?
Credit: www.reddit.com
Remove Screws
To remove a Honeywell thermostat cover, start by turning off the power. Next, use a screwdriver to remove the screws. Gently pull the cover off.
When you need to remove your Honeywell thermostat cover, one of the key steps is dealing with the screws. Removing these screws may seem straightforward, but doing it correctly is crucial to avoid damaging the thermostat. Let’s dive into the details to ensure you handle this task effectively.Unscrew Carefully
First, grab a suitable screwdriver. Honeywell thermostats typically use Phillips-head screws, but double-check to be sure. Carefully insert the screwdriver into the screw head. Apply gentle pressure and turn counterclockwise. Do this slowly to avoid stripping the screws or damaging the cover. Have you ever stripped a screw? It’s a hassle, right? Taking your time here can save you from that frustration.Store Screws Safely
Once the screws are out, don’t just set them down anywhere. It’s easy to lose small parts. Use a small bowl or container to keep them in one place. Keeping screws safe is not just about avoiding loss. It also prevents them from rolling under furniture or getting into hard-to-reach places. How often have you lost a tiny screw only to find it weeks later in the most unexpected spot? Keeping them in a designated container can save you from such surprises. Remember, a little caution goes a long way. Follow these steps, and you’ll have your Honeywell thermostat cover off in no time, with all screws safely stored.Detach Cover
Removing a Honeywell thermostat cover might seem tricky. But it is simple with the right steps. This guide will show you how to detach the cover without hassle. Follow these easy steps to ensure a smooth process.
Grip Cover
First, locate the cover of the thermostat. Use both hands for a firm grip. Ensure your hands are dry to prevent slipping. Hold the cover gently but firmly.
Pull Cover Away
Next, pull the cover away from the base. Use gentle force to avoid damage. If it does not move, wiggle it slightly. This will help loosen it. Continue pulling until the cover comes off. The cover should detach smoothly if done correctly.
Credit: www.youtube.com
Check Best Thermostat Pricing in Amazon
** As an Amazon Associate, I earn from qualifying purchases.
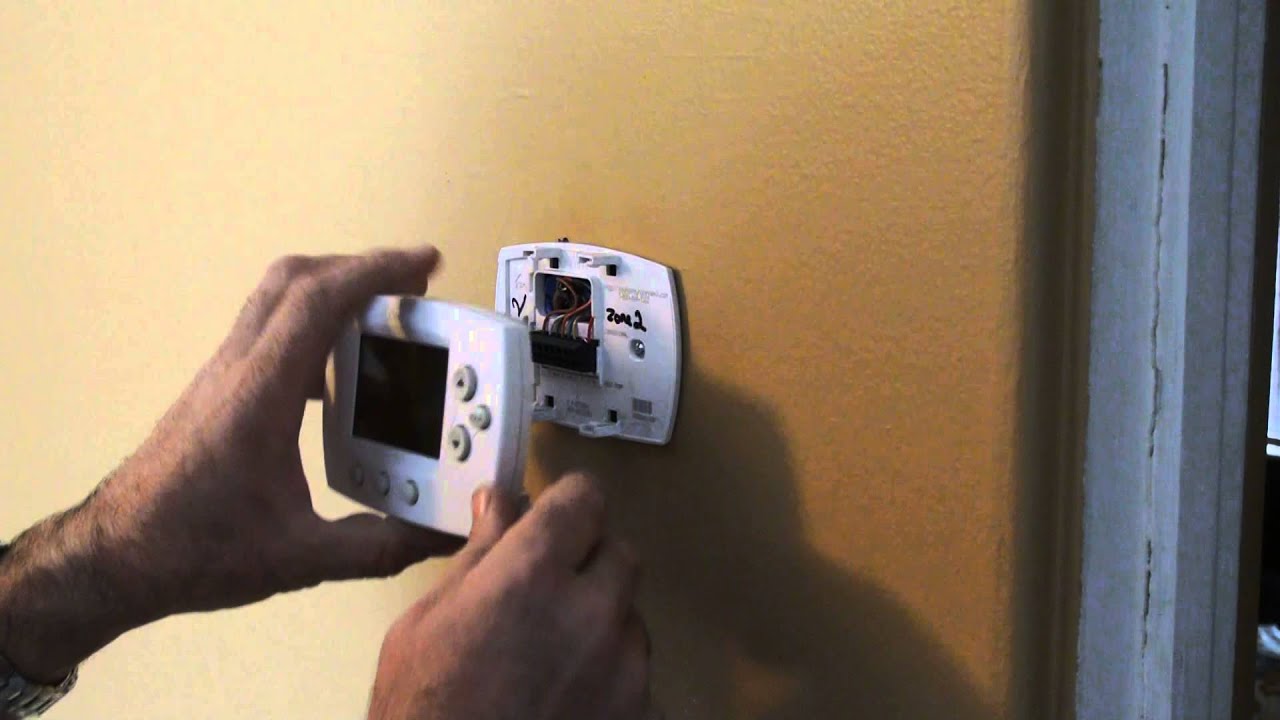
Check Components
Before you start removing the Honeywell thermostat cover, it’s crucial to check the components inside. This step ensures that you know what to expect and can safely handle the parts. Thoroughly inspecting and identifying the components will help you understand their functions and how to remove them without damage.
Inspect Inside
Once you have the cover off, take a moment to inspect inside. Look for any dust or debris that might affect the thermostat’s performance. Clean it gently if necessary. Notice how the wires are connected. This will help you reconnect them correctly later.
Identify Components
Next, identify the components inside the thermostat. You will see a circuit board, various wires, and possibly a battery compartment. Each part has a specific role in the thermostat’s operation. Take note of the wire colors and where each one connects. This will be important for reassembly.
Understanding these components will make the process smoother. You will also avoid damaging any delicate parts. Be gentle and take your time.
Reattach Cover
Reattaching the cover of your Honeywell thermostat is the final step. This step ensures your device remains protected and functions properly. Follow these simple steps to reattach the cover securely.
Position Cover
Start by positioning the cover back onto the thermostat base. Align the cover with the base, ensuring it fits snugly. Make sure all the edges match up perfectly. This will prevent any damage or loose fitting.
Secure Screws
Next, secure the screws to hold the cover in place. Use a screwdriver to tighten the screws. Be careful not to over-tighten them. Over-tightening can crack the cover. Ensure the screws are tight enough to hold the cover firmly.

Credit: willplumb.com
Power On
You’ve successfully removed your Honeywell thermostat cover, and now it’s time to power it back on. This is a crucial step to ensure your thermostat is functioning correctly. Let’s break this down into simple steps.
Turn On Circuit Breaker
Start by heading to your home’s electrical panel. This is often located in a basement, garage, or utility closet.
Locate the circuit breaker that controls your HVAC system. It’s typically labeled, but if not, it’s usually a 15 or 20 amp breaker.
Flip the breaker switch to the “on” position. You should hear a click as it engages.
Switch On Thermostat
Once the breaker is on, move to your thermostat. Ensure the faceplate is securely attached.
Press the power button on your thermostat. The display should light up, indicating that it’s receiving power.
If your thermostat doesn’t turn on, double-check the breaker and ensure the thermostat is properly connected. It’s always a good idea to consult your thermostat’s manual if you run into issues.
Have you ever found your thermostat not turning on after reattaching the cover? It might be a sign of loose wiring or an issue with the breaker. Always take a moment to double-check your steps.
These simple steps are all you need to power on your Honeywell thermostat. Now, you’re ready to enjoy a comfortable and well-regulated home environment once again.
Frequently Asked Questions
How To Take Off Honeywell Thermostat Cover?
Gently pull the thermostat cover straight off. Some models may require you to press a tab or release a clip.
How To Remove Thermostat Cover To Replace Battery?
To remove the thermostat cover, gently pull it off or unscrew it, depending on the model. Replace the battery and reattach the cover securely.
How To Take Honeywell Thermostat Off Wall To Change Battery?
To remove the Honeywell thermostat, gently pull it from the wall plate. Replace the batteries in the compartment.
How Do I Open An Old Honeywell Thermostat?
Carefully remove the thermostat cover by gently pulling it off. Unscrew the mounting plate to access internal components.
Conclusion
Removing a Honeywell thermostat cover is a simple task. Just follow the steps mentioned. Handle the cover gently to avoid damage. Always turn off the power first for safety. Refer to the manual if needed. By doing so, you ensure a smooth process.
Now, you can easily access the inside of your thermostat. This helps with cleaning or making adjustments. Good luck with your thermostat maintenance!
Check Best Thermostat Pricing in Amazon
** As an Amazon Associate, I earn from qualifying purchases.