
Check Best Thermostat Pricing in Amazon
** As an Amazon Associate, I earn from qualifying purchases.
Programming a Nest thermostat is simple. First, connect it to Wi-Fi.
Next, set your preferred temperature. Nest thermostats are popular for their smart features and energy-saving capabilities. Whether you’re tech-savvy or a beginner, programming your Nest thermostat is straightforward. You can customize schedules, control the temperature remotely, and create an efficient heating and cooling plan for your home.
By understanding the basic steps, you can ensure your home stays comfortable year-round without wasting energy. This guide will walk you through the process, making it easy to take full advantage of your Nest thermostat’s features. Let’s get started on creating a cozy and efficient home environment with your Nest thermostat.
Credit: www.youtube.com
Preparation
Getting ready to program your Nest Thermostat is crucial. Proper preparation ensures smooth and efficient programming. You need to gather some tools and check compatibility before starting.
Tools Needed
First, gather all necessary tools. You will need a screwdriver, a level, and a smartphone or tablet. The screwdriver helps remove your old thermostat. The level ensures your Nest Thermostat is installed straight. Your smartphone or tablet will help you connect to Wi-Fi.
Check Compatibility
Next, check if your current system is compatible with the Nest Thermostat. Visit the Nest compatibility checker on their website. This tool will guide you through a few simple questions. It checks your system type and wiring. If compatible, you can proceed with the installation. If not, you may need professional assistance.
Installation
Installing a Nest Thermostat can be a game-changer for managing your home’s temperature efficiently. The installation process is straightforward, and even if you’re not a tech expert, you can get it done with some basic tools and a bit of patience. Let’s dive into the steps, starting with unboxing and mounting your new Nest Thermostat.
Unboxing The Nest Thermostat
When you first receive your Nest Thermostat, the packaging is sleek and minimalistic. Inside the box, you’ll find the thermostat unit, a base plate, a screwdriver, screws, and a user manual. Make sure to check that all components are present before you start.
Take a moment to read through the user manual. Although the process is simple, it’s always good to familiarize yourself with the instructions. Lay out all the parts on a clean surface to keep everything organized.
Mounting Instructions
First, turn off the power to your HVAC system at the circuit breaker to ensure safety. Use the provided screwdriver to remove your old thermostat. Carefully disconnect the wires and label them using the stickers provided in the Nest box.
Next, attach the Nest base plate to the wall using the screws. Use a level to make sure it’s straight. Connect the wires to the corresponding terminals on the base plate. The labels you applied earlier will make this step easier.
Once the wiring is complete, snap the Nest Thermostat unit onto the base plate. Turn the power back on at the circuit breaker. The thermostat will light up, indicating it’s receiving power.
Follow the on-screen instructions to complete the setup. The Nest Thermostat will guide you through connecting to Wi-Fi and setting up your preferences. This ensures your thermostat is ready to start learning your schedule and optimizing your energy use.
Have you ever installed a smart device before? If so, what was the most challenging part for you? Share your thoughts and tips in the comments below!
Connecting To Wi-fi
Connecting your Nest Thermostat to Wi-Fi is essential for accessing all its smart features. This allows you to control the temperature remotely and receive energy-saving tips. Follow the steps below to connect your device to Wi-Fi and troubleshoot any issues.
Setting Up Wi-fi
First, turn on your Nest Thermostat. Select the “Settings” option from the menu. Navigate to “Network” and choose “Wi-Fi.” The thermostat will scan for available networks. Select your home Wi-Fi network from the list. Enter your Wi-Fi password carefully. Confirm the connection by pressing “Done.” Your Nest Thermostat should now be connected to Wi-Fi.
Troubleshooting Connection Issues
If your Nest Thermostat fails to connect, check your Wi-Fi signal strength. Ensure your router is close to the thermostat. Restart both your router and thermostat. This often resolves connection issues. Double-check your Wi-Fi password for any typos. If the problem persists, reset your Nest Thermostat’s network settings. Go to “Settings,” then “Reset,” and select “Network.” Try reconnecting to Wi-Fi after the reset.
Initial Setup
Setting up a Nest Thermostat for the first time can seem daunting, but with a little guidance, you’ll have it up and running in no time. The initial setup is crucial as it ensures your thermostat is configured to manage your home’s climate effectively. Let’s walk through the steps to get your Nest Thermostat ready for action.
Creating A Nest Account
First things first, you’ll need a Nest account. This allows you to control your thermostat remotely and access advanced features.
Download the Nest app from the App Store or Google Play Store. Open the app and select “Sign up.” Follow the prompts to create your account. Once your account is created, you can add your thermostat to the app. This process typically involves scanning a QR code on the thermostat or entering a key code provided during setup.
Check Best Thermostat Pricing in Amazon
** As an Amazon Associate, I earn from qualifying purchases.
Configuring Basic Settings
With your account ready, it’s time to configure the basic settings. Start by connecting your thermostat to Wi-Fi. This step is crucial for remote control and software updates.
On the thermostat, go to Settings > Network. Select your Wi-Fi network from the list and enter your password. Once connected, the thermostat will automatically check for updates and install them if necessary.
Next, set your location to adjust for local weather conditions. Go to Settings > Location and enter your address. This helps the thermostat optimize your heating and cooling based on your local climate.
Finally, set your preferred temperature schedule. You can do this directly on the thermostat or via the app. A simple weekday/weekend schedule is a good starting point. Adjust it as needed to fit your lifestyle.
Have you ever wondered how much energy you could save with a well-programmed thermostat? Getting the setup right is the first step towards efficiency and comfort. By following these steps, you’re well on your way to having a smart, responsive Nest Thermostat that works for you.
Programming The Thermostat
Set up your Nest Thermostat by accessing the settings menu. Follow the on-screen prompts to create a schedule. Adjust temperatures for different times of the day.
Programming your Nest Thermostat can seem daunting at first, but with a little guidance, you’ll find it easy and intuitive. Imagine waking up to a perfectly warm house in winter or returning home to a cool haven in summer. It’s all possible with a few simple steps. Let’s dive into how you can set up your Nest Thermostat to suit your lifestyle.Setting Temperature Preferences
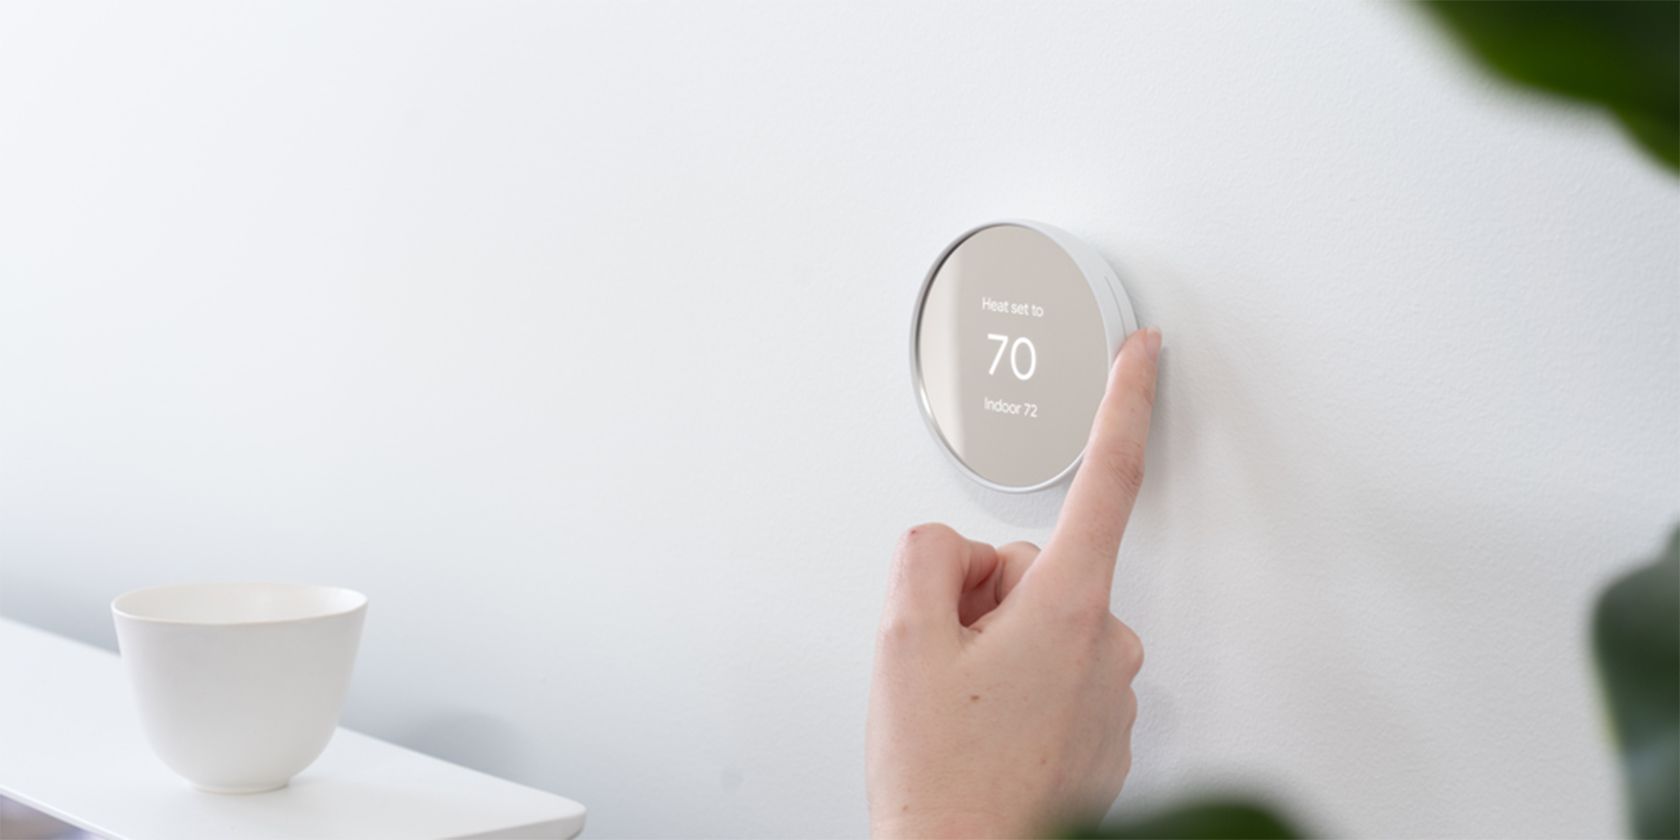
First, you need to set your temperature preferences. Think about the times you are typically home and when you are usually away. Start by pressing the thermostat’s display. Navigate to the ‘Settings’ menu and select ‘Thermostat’. Here, you can set your preferred temperatures for different times of the day. For example, if you prefer your home to be 70°F when you’re awake and 65°F when you’re sleeping, you can set those temperatures accordingly. This ensures that your home is always at a comfortable temperature when you need it to be.Creating Schedules
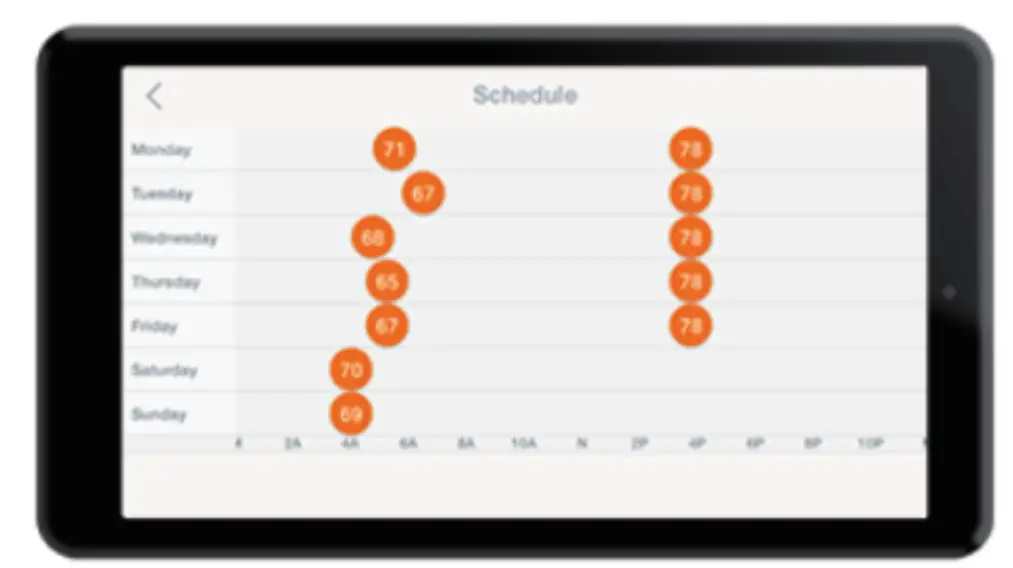
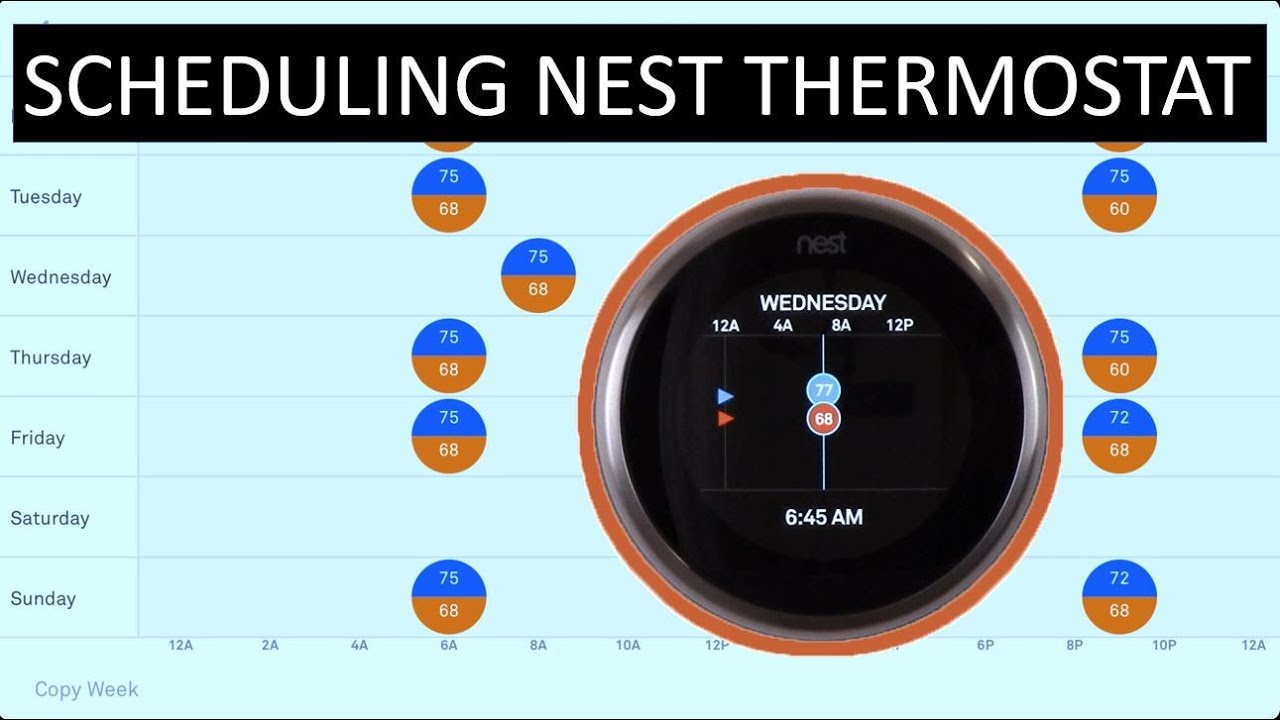
Next, you’ll want to create a schedule for your thermostat. This is where the real magic happens. Go back to the ‘Settings’ menu and select ‘Schedule’. You’ll see a week-long calendar where you can add temperature changes. Tap on the day you want to program and then choose the times and temperatures. For instance, you can set the thermostat to start warming up the house at 6 AM, just in time for your morning coffee. If you’re away at work during the day, schedule the temperature to drop at 8 AM and rise again just before you return home. By creating a schedule, you ensure that your home is not only comfortable but also energy-efficient. It’s all about finding that perfect balance between comfort and savings. Are you ready to take control of your home’s climate? Give these steps a try and enjoy the comfort of a perfectly programmed Nest Thermostat.Advanced Features
The Nest Thermostat offers many advanced features that enhance user experience. These features help you save energy, stay comfortable, and integrate with your smart home. Let’s explore some of these advanced features in detail.
Using Energy History
The Energy History feature provides insights into your energy usage. You can see how much energy you use each day. This data helps you understand your energy consumption patterns. You can make informed decisions to save energy and lower your bills. Accessing Energy History is simple through the Nest app. It shows a clear and easy-to-read graph. You can see which days you used more energy and why. Understanding your energy use helps you adjust your thermostat settings for better efficiency.
Integrating With Other Smart Devices
The Nest Thermostat can integrate with other smart devices in your home. This integration enhances your smart home experience. You can connect your Nest Thermostat with Google Home or Amazon Alexa. This allows voice control of your thermostat. Simply tell your smart speaker to change the temperature. You can also create routines that include your thermostat. For example, you can set your thermostat to adjust when you leave the house. This ensures energy is not wasted when no one is home. These integrations make managing your home environment easier and more efficient.
Maintenance And Support
Maintaining your Nest Thermostat is crucial to ensure it works efficiently. Regular maintenance and support can help you avoid problems and keep your device running smoothly. Let’s dive into some tips on maintenance and ways to get help.
Regular Maintenance Tips
Regularly dust your thermostat to prevent buildup on the sensors. Check the battery level periodically to avoid sudden power issues. Update the software to access new features and improvements. Ensure the thermostat is not exposed to direct sunlight or drafts. This can affect its temperature readings.
Getting Help
If you encounter issues, refer to the Nest support website. They offer detailed troubleshooting guides. You can also contact their customer support for personalized assistance. Use the Nest app to check for error messages and solutions. Join online forums where users share tips and fixes for common problems.

Credit: www.youtube.com
Credit: www.makeuseof.com
Frequently Asked Questions
Can You Manually Program A Nest Thermostat?
Yes, you can manually program a Nest thermostat. Use the device’s interface or the Nest app to set schedules.
How Do I Manually Adjust My Nest Thermostat?
Turn the Nest thermostat ring to adjust the temperature. Press the ring to access the menu. Select settings to make additional adjustments.
How Do You Use A Nest Thermostat For Dummies?
To use a Nest thermostat, install it on the wall, connect it to Wi-Fi, and follow setup instructions on the display. Adjust temperature using the dial or the Nest app. Schedule temperature changes or let the thermostat learn your preferences automatically.
Why Does Nest Always Say 2+ Hours?
Nest shows “2+ hours” because it estimates longer times when heating or cooling significantly. It adjusts based on real-time performance.
Conclusion
Programming a Nest Thermostat is simple and user-friendly. Follow the steps carefully. Set up the device. Adjust temperature settings. Utilize scheduling features for efficiency. Monitor energy usage through the app. Enjoy a comfortable, cost-effective home. With Nest, you save energy and reduce bills.
Take control of your home’s climate today. Make your life easier with smart technology. Happy programming!
Check Best Thermostat Pricing in Amazon
** As an Amazon Associate, I earn from qualifying purchases.