
Check Best Thermostat Pricing in Amazon
** As an Amazon Associate, I earn from qualifying purchases.
Are you ready to take control of your home’s comfort and save on energy bills? Installing a Honeywell thermostat might sound tricky, but with the right steps, you can do it yourself quickly and easily.
Imagine adjusting your heating and cooling with just a tap, all from a sleek, smart device you installed. This guide will walk you through every step, making sure you feel confident and in control. Keep reading, and you’ll have your new thermostat up and running in no time!
Choosing The Right Thermostat
Choosing the right thermostat is key for a comfortable home and energy savings. A good thermostat fits your home’s heating and cooling system. It should be easy to use and suit your daily routine. Honeywell offers many options to meet different needs. Understanding these choices helps you pick the best one.
Types Of Honeywell Thermostats
Honeywell has basic models that are simple and affordable. These let you set temperatures manually. There are programmable thermostats. They allow you to set different temperatures for different times of the day. Smart thermostats connect to Wi-Fi and can be controlled by phone. They learn your habits and adjust automatically. Choose a type that matches your lifestyle and budget.
Compatibility With Your Hvac System
Not all thermostats work with every heating or cooling system. Check if your HVAC system uses gas, electric, or heat pump. Some Honeywell thermostats work only with certain systems. Look at the wiring and voltage requirements. This ensures the thermostat will control your system properly. Reading the manual or consulting a professional helps avoid mistakes.
Preparing For Installation
Preparing for the installation of your Honeywell thermostat is a key step. It ensures a smooth and safe process. Taking time to prepare helps avoid problems later.
Before you start, gather the right tools. Also, turn off the power safely. These steps protect you and your home.
Gathering Necessary Tools
Get all tools before you begin. You will need a screwdriver, usually a Phillips head. A drill may help if new holes are needed. Have a level to keep the thermostat straight. Use a tape measure to place it correctly. Keep the thermostat’s instruction manual nearby. It guides the specific tools and parts needed.
Turning Off Power Safely
Safety is important. Switch off power at the circuit breaker. This stops electricity from reaching the thermostat wires. Test that power is off using a voltage tester. Never touch wires while the power is on. Turning off power prevents shocks and damage. Double-check before you start working on wires.
Removing The Old Thermostat
Removing the old thermostat is the first step in installing your new Honeywell thermostat. This process requires care to avoid damaging wires or your wall. Follow each step carefully to prepare for a smooth installation.
Detaching The Faceplate
Start by turning off power to your heating and cooling system. This prevents any electrical issues. Gently pull the thermostat faceplate away from the wall. Some models may have clips or screws. If screws hold the faceplate, use a screwdriver to remove them. Set the faceplate aside safely.
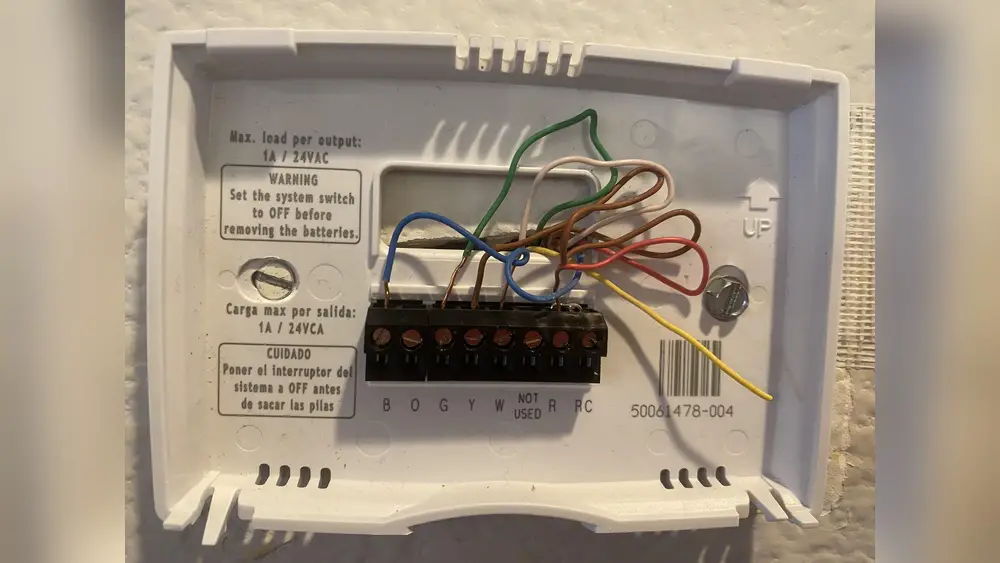
Labeling And Disconnecting Wires
Look closely at the wires connected to the thermostat. Each wire controls a different function in your system. Use small pieces of tape to label each wire with its letter or color. This step helps you connect the new thermostat correctly. After labeling, carefully unscrew the wire connectors. Gently pull the wires free from the old thermostat base. Avoid letting wires fall back into the wall.

Credit: www.reddit.com
Mounting The New Thermostat
Mounting the new Honeywell thermostat is a key step in the installation process. This step ensures your device stays secure and works properly. It also prepares the thermostat for controlling your home’s temperature effectively.
Take your time during this step. Careful mounting can prevent future issues and makes the thermostat look neat on your wall. Follow each instruction clearly to avoid mistakes.
Installing The Wall Plate
Start by attaching the wall plate to the wall. Use the screws provided in the thermostat package. Hold the plate firmly against the wall and mark the screw holes.
Drill small holes where you marked. Insert wall anchors if your wall is drywall. This gives extra support to hold the plate tightly.
Align the wall plate with the holes and screw it in place. Make sure it is level. A crooked plate can cause problems when attaching the thermostat.
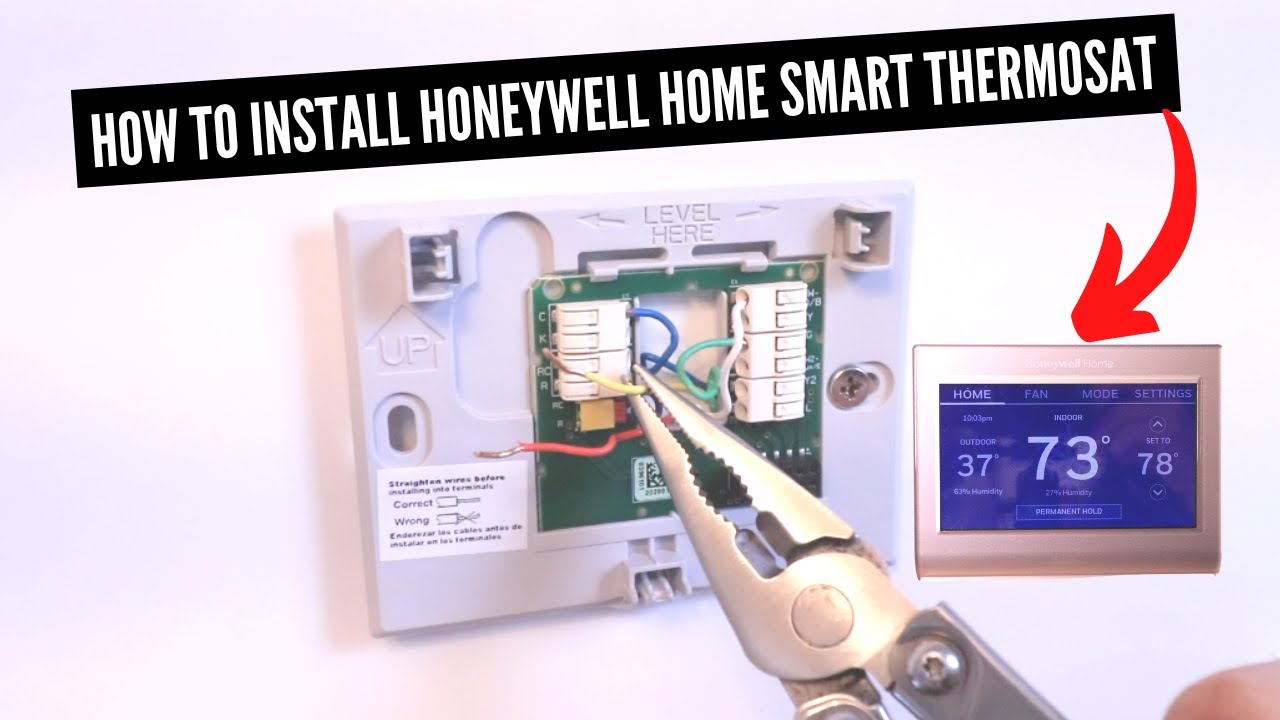
Connecting The Wires Correctly
Identify each wire by its color and label. Honeywell thermostats usually use standard colors, but check your manual to be sure. This helps avoid wrong connections.
Match each wire to the correct terminal on the thermostat base. Press down on the terminal clip and insert the wire fully. Release the clip to secure the wire.
Double-check each connection. Loose or wrong wires can stop the thermostat from working. Take your time and keep wires neat for easy future access.
Setting Up The Thermostat
Setting up your Honeywell thermostat is the next step after installation. This process prepares the device to control your home’s temperature. It involves turning the thermostat on and adjusting basic settings. You will also connect it to your Wi-Fi network if your model supports it.
Check Best Thermostat Pricing in Amazon
** As an Amazon Associate, I earn from qualifying purchases.
Following these steps will help you use your thermostat efficiently. The setup is simple and designed for easy understanding.
Powering On And Initial Configuration
Start by turning on your thermostat. Press the power button or insert batteries if needed. The screen will light up to show it is active. Next, select your language from the options on the screen. Set the date and time to keep the thermostat accurate. Choose your heating and cooling preferences. This helps the thermostat manage your home’s temperature better. Follow on-screen prompts to complete the setup. The device may ask for your zip code or home type. These details improve temperature control and energy savings.
Connecting To Wi-fi (if Applicable)
Many Honeywell thermostats connect to Wi-Fi for remote control. To start, go to the settings menu. Find the Wi-Fi option and select it. The thermostat will scan for available networks. Pick your home Wi-Fi from the list. Enter the password carefully to avoid errors. Once connected, the thermostat may update its software. This keeps it running smoothly and securely. Connecting to Wi-Fi allows you to control the thermostat from your phone. It also enables alerts and scheduling features.

Credit: www.youtube.com
Testing And Troubleshooting
Testing and troubleshooting your Honeywell thermostat after installation is vital. It ensures the system works correctly and saves you from future problems. This process helps confirm all settings and connections function as expected.
Following these steps will make your thermostat reliable and efficient. You can enjoy consistent home comfort without interruptions.
Verifying System Operation
Start by turning on your HVAC system using the thermostat. Set the temperature higher or lower than the room temperature. Check if the heating or cooling activates accordingly. Listen for the system to start running.
Observe the air vents to see if warm or cool air flows out. Confirm the fan runs as you set it. If your thermostat has a display, ensure it shows the correct mode and temperature.
Wait a few minutes to ensure the system maintains the set temperature. This test confirms the thermostat communicates properly with your heating and cooling units.
Common Installation Issues
One common issue is incorrect wiring. Double-check each wire is connected to the right terminal. Loose wires can cause the system to fail or behave erratically.
Another problem is power supply. Make sure the thermostat has power either from batteries or the HVAC system. A blank screen usually means no power.
Sometimes, the thermostat may not match your HVAC system type. Verify compatibility before installation. Incorrect settings can cause poor performance or no response.
Lastly, avoid placing the thermostat near heat sources or drafts. These spots can cause wrong temperature readings and improper system operation.
Credit: www.youtube.com
Frequently Asked Questions
How Do I Prepare For Honeywell Thermostat Installation?
Turn off power to your HVAC system first. Gather tools like a screwdriver and drill. Read the thermostat manual carefully for specific instructions.
Can I Install A Honeywell Thermostat Myself?
Yes, most Honeywell thermostats are designed for easy DIY installation. Follow the provided wiring diagram and safety precautions. If unsure, consult a professional.
What Tools Do I Need For Installation?
You typically need a screwdriver, drill, and level. A voltage tester and wire stripper may also help. Check your model’s manual for tool specifics.
How Do I Connect Wires To The Honeywell Thermostat?
Match each wire to the labeled terminal on the thermostat base. Use the installation guide for correct wiring. Ensure all connections are secure before powering on.
Conclusion
Installing a Honeywell thermostat is simple and saves energy. Follow each step carefully for the best results. Double-check your wiring before turning on the power. Take your time and ask for help if needed. Enjoy better temperature control and lower bills.
A little effort brings comfort to your home. Now, you know how to install a Honeywell thermostat easily.
Check Best Thermostat Pricing in Amazon
** As an Amazon Associate, I earn from qualifying purchases.